
Popular categories
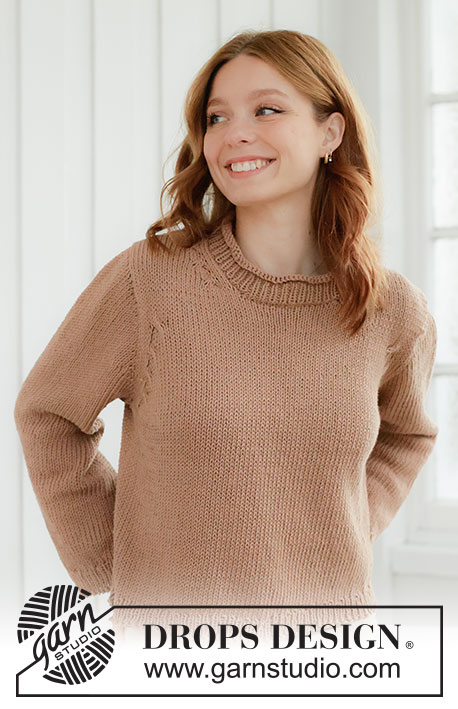
Looking for a yarn?




































Comments / Questions (18)
 Ewa wrote:
Mam pytanie dotyczące przerabiania oczek przed rozpoczęciem ściągacza. Wzór mówi że: Dalej przerabiać na drutach pończoszniczych nr 3 ściągaczem (1 oczko prawe / 1 oczko lewe), W TYM SAMYM CZASIE w pierwszym okrążeniu równomiernie dodać 8-8-8-10-10-10-12 oczek = 66-70-74-86-94-100-108 oczek. Czy tam nie powinno być ująć (zamknąć) Pozdrawiam.
10.09.2026 - 16:02DROPS Design answered:
Witaj Ewo, wszystko jest w porządku. Ściągacz jest bardziej elastycznym ściegiem i ściąga robótkę bardziej niż na przykład dżersej. Dodając oczka przed brzegiem ściągaczem unikniesz widocznej różnicy szerokości między ściągaczem, a resztą robótki. Pozdrawiamy!
14.09.2026 - 20:15
 Gaby wrote:
Omslagen in de voorste of achterste lus breien. Ik zie het echt niet meer zitten.
06.09.2026 - 20:38DROPS Design answered:
Dag Gaby,
Zou je aan kunnen geven waar dit precies staat en/of met welk deel je bezig bent? Ik kan het niet vinden in de tekst.
11.09.2026 - 17:14
 Anne wrote:
Hvordan regner jeg ut hvor mange masker mellom A1for å få bare 18 stk.
03.08.2026 - 14:35DROPS Design answered:
Hei Anne, Det skal ikke være masker mellom hver rapport av A.1, som skal strikkes 18 ganger rundt på bærestykke: Du har 162 masker og første rad i A.1 er 9 masker. 162/9 = 18. Hilsen Drops Team.
04.08.2026 - 06:25
Heidi K wrote:
Hei😊 er det mulig å strikke Halo sweater med garngruppe A?
01.08.2026 - 15:26DROPS Design answered:
Hei Heidi, Hvis du strikker med et tynnere garn, det vil være nødvendig å justere maskeantallet for å få riktig størrelse. Enten det eller øke pinnestørrelsen slik at du får riktig strikkefasthet og kan bruke mønsteret som skrevet. Da blir maskene større og vevet løsere. Hilsen Drops Team.
02.08.2026 - 06:59
 Anna wrote:
Salve, grazie per i bei modelli estivi! Solo un piccolo appunto: non so se dipende dalla mia mano, ma lavorando il modello con drops belle nella taglia M ho dovuto eliminare A6 perché avevo già raggiunto l'altezza per la separazione dalle maniche, naturalmente ho calcolato gli aumenti per arrivare al numero di maglie corretto. Buon lavoro!
20.07.2026 - 08:21DROPS Design answered:
Buongiorno Anna, il suo campione prima di lavorare corrispondeva a quello indicato? Buon lavoro!
26.07.2026 - 12:25
 Anja wrote:
Danke für Ihre Antwort, aber wir sprechen offensichtlich nicht über die selbe Anleitung (Mint Halo Sweater). Ich muß laut Anleitung für Größe XXL an keiner Stelle 53 Maschen stilllegen. Meine Frage bezogen sich auf die Rundpasse. Wieviele cm glatt rechts stricke ich zwischen Mustersatz A.1 und A.2? Ich denke, dass ich es inzwischen anhand der Skizze herausgefunden habe und es müßten in etwa 2cm sein...
09.07.2026 - 14:30DROPS Design answered:
Liebe Anja, oops Verzeihung Sie sind ja rechts, ich hatte das falsche Modell geschaut, deshalb... So in XL stricken Sie A.1 wenn die Arbeit 3 cm ab Markierung misst und A.2 wenn die Areit 6 cm ab Markierung misst, so etwas 3 cm minus die 3 Reihen A.1 nach A.1, am besten messen Sie ab Markierung, wie es vorgeschlagen ist, so haben Sie immer die richtigen Längen. Viel Spaß beim Stricken!
09.07.2026 - 16:03
Anja wrote:
Nachdem ich A1 fertig gestrickt habe, soll ich für XXL 6cm ab maschenmarkierer stricken. Bedeutet das, dass ich ab Beendigung von Muster A1 6cm glatt rechts stricke? Das wären bei mir 16 Reihen glatt rechts - das erscheint mir zu viel....?
08.07.2026 - 23:27DROPS Design answered:
Liebe Anja, meinen Sie vor den Zunahmen für den Halsausschnitt? In XXL stricken Sie A.1 und glattrechts bis die Arbeit 8 cm ab Schulter misst; dann nehmen Sie für den Halsausschnitt und legen Sie die 53 Maschen still, dann stricken Sie die 2. Schulter mit A.1 und glattrechts bis 8 cm, nehmen Sie für den Halsausschnittund dann stricken Sie beide Schulter mit den neuen Maschen dazwischen für Halsausschnitt. Misverstehe ich vielleicht Ihre Frage?
09.07.2026 - 09:28
Cornelia wrote:
Ich komme auch mit dem Diagramm nicht klar.Indem Photo ist noch ein Loch unter den 2 Löchern zu sehen.Das fehlt in dem Diagramm
24.06.2026 - 17:05DROPS Design answered:
Liebe Cornelia, das Top wird von oben nach unten gestrickt, die Diagramme liest man aber von unten nach oben, so sind es zuerst 2 Löcher (Zunahmen), dann 1 Loch (zusammen mit 1 Abnahme = ohne Zunahme). Viel Spaß beim Stricken!
25.06.2026 - 17:42
Bärbel wrote:
Ich komme mit dem Diagramm nicht zurecht. Dort wird nur von einer Null gesprochen und nicht was mit zwei Nullen passiert.
09.06.2026 - 11:16DROPS Design answered:
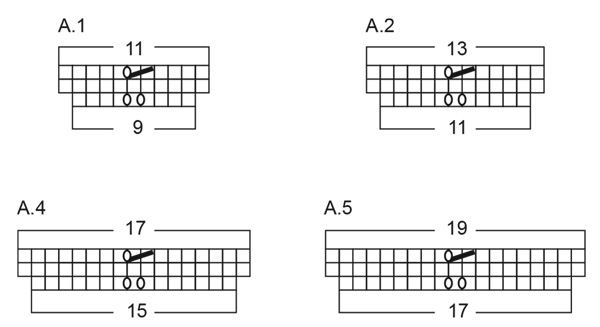
Liebe Bärbel, mit "Null" meinen Sie die Umschläge, die als 2. Symbol beschrieben ist? Dann wird man bei der 1. Reihe A.1 bis A.6 immer 2 Umschläge stricken, z.B. in A.1: 4 re, 1 Umschlag, 1 re, 1 Umschlag, 4 re (9 Maschen bis 11 Maschen zugenommen); bei der 2. Reihe wird man 2 M rechts zusammenstricken + 1 Umschlag = die Maschenanzahl bleibt gleich. Kann das Ihnen helfen oder habe ich Ihre Frage misverstanden?
09.06.2026 - 17:28
 Faiza wrote:
Jätten fint
05.05.2026 - 00:29
|
||||||||||
Mint Halo Sweater#minthalosweater |
||||||||||
 |
 |
|||||||||
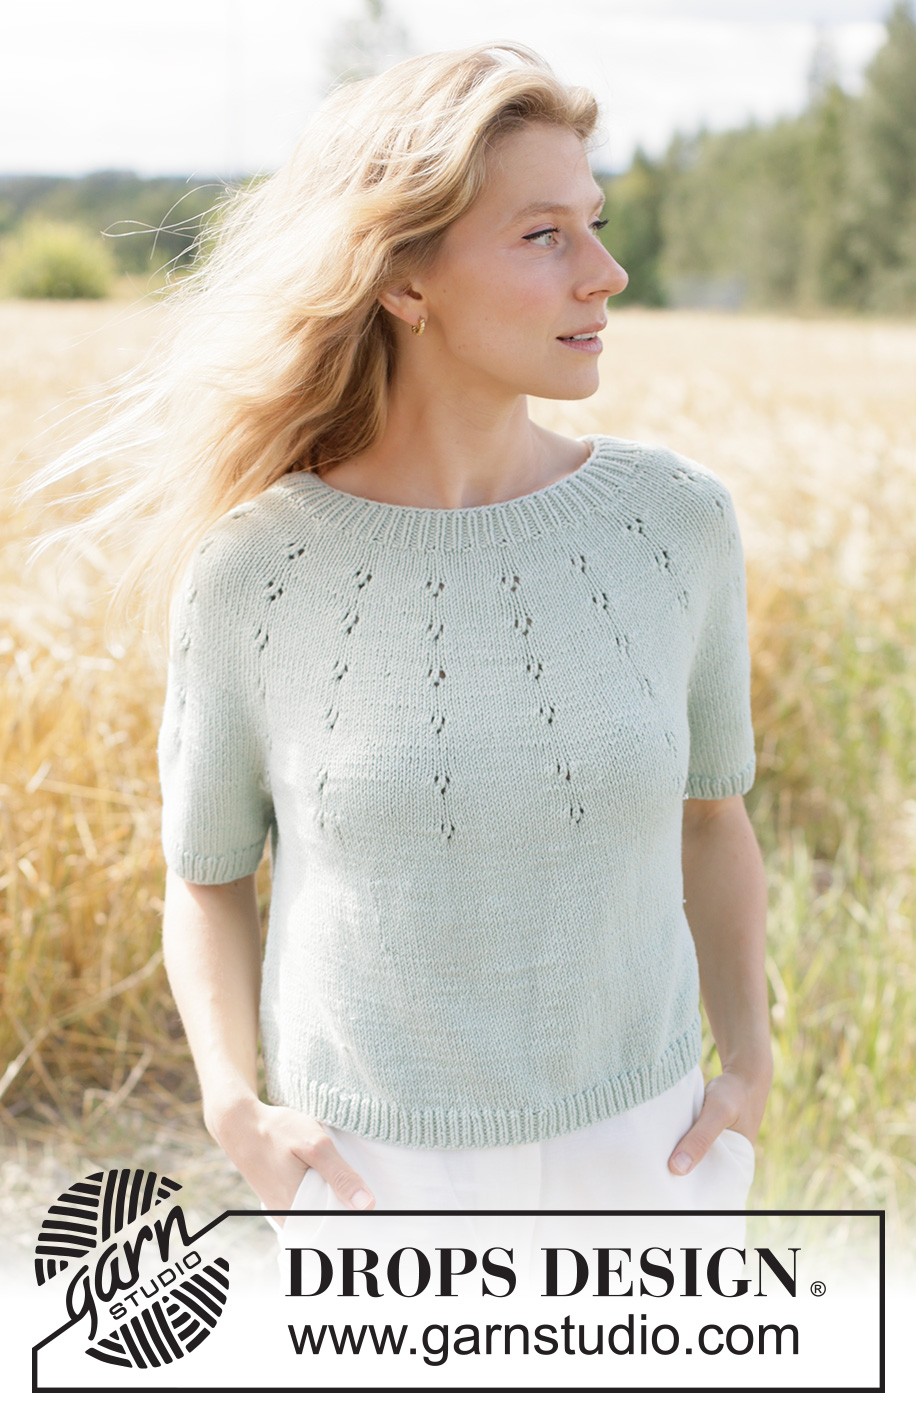
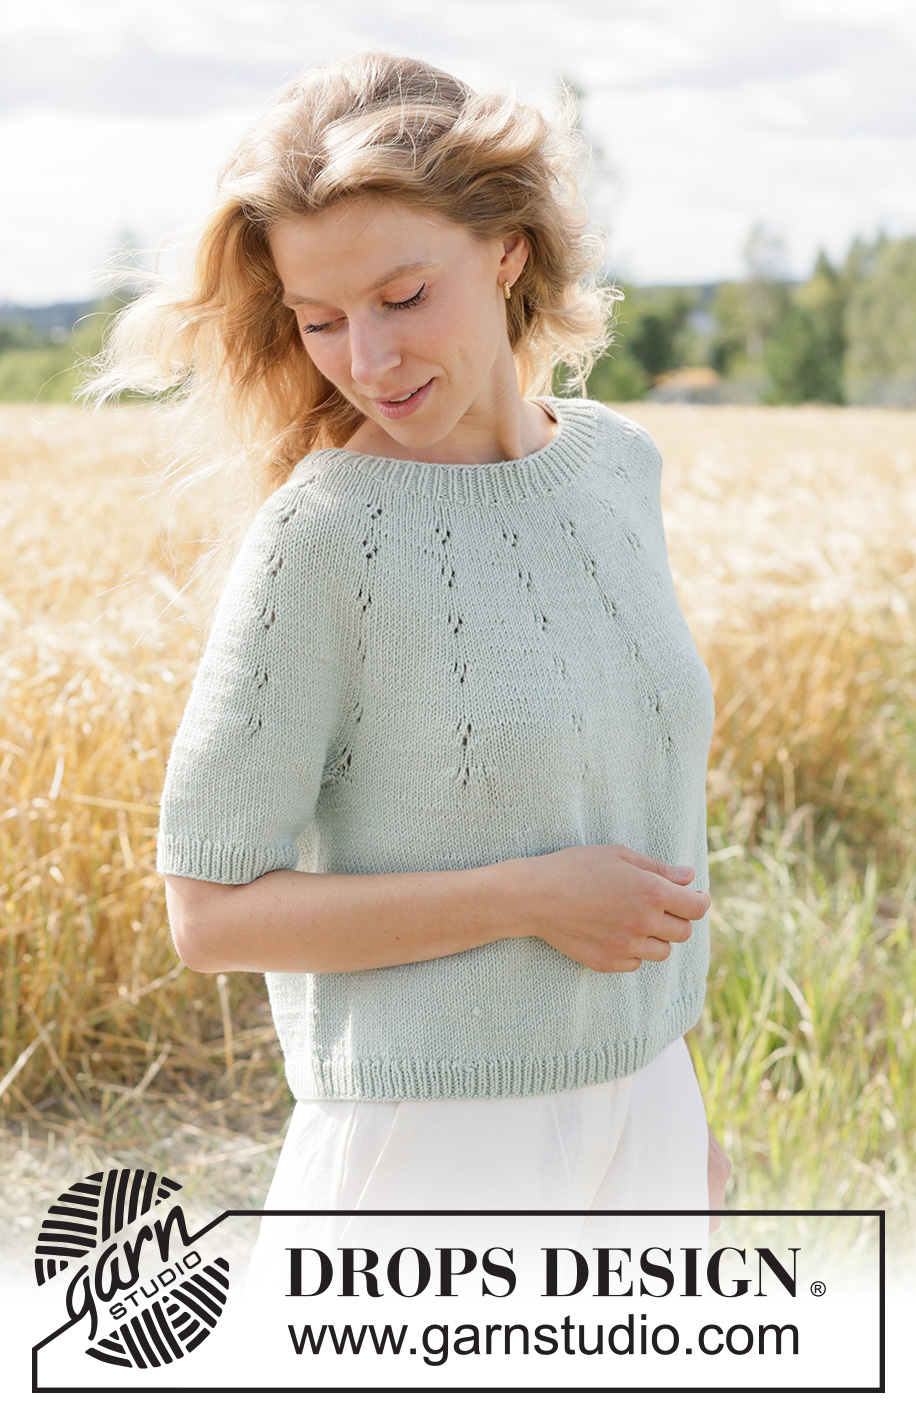
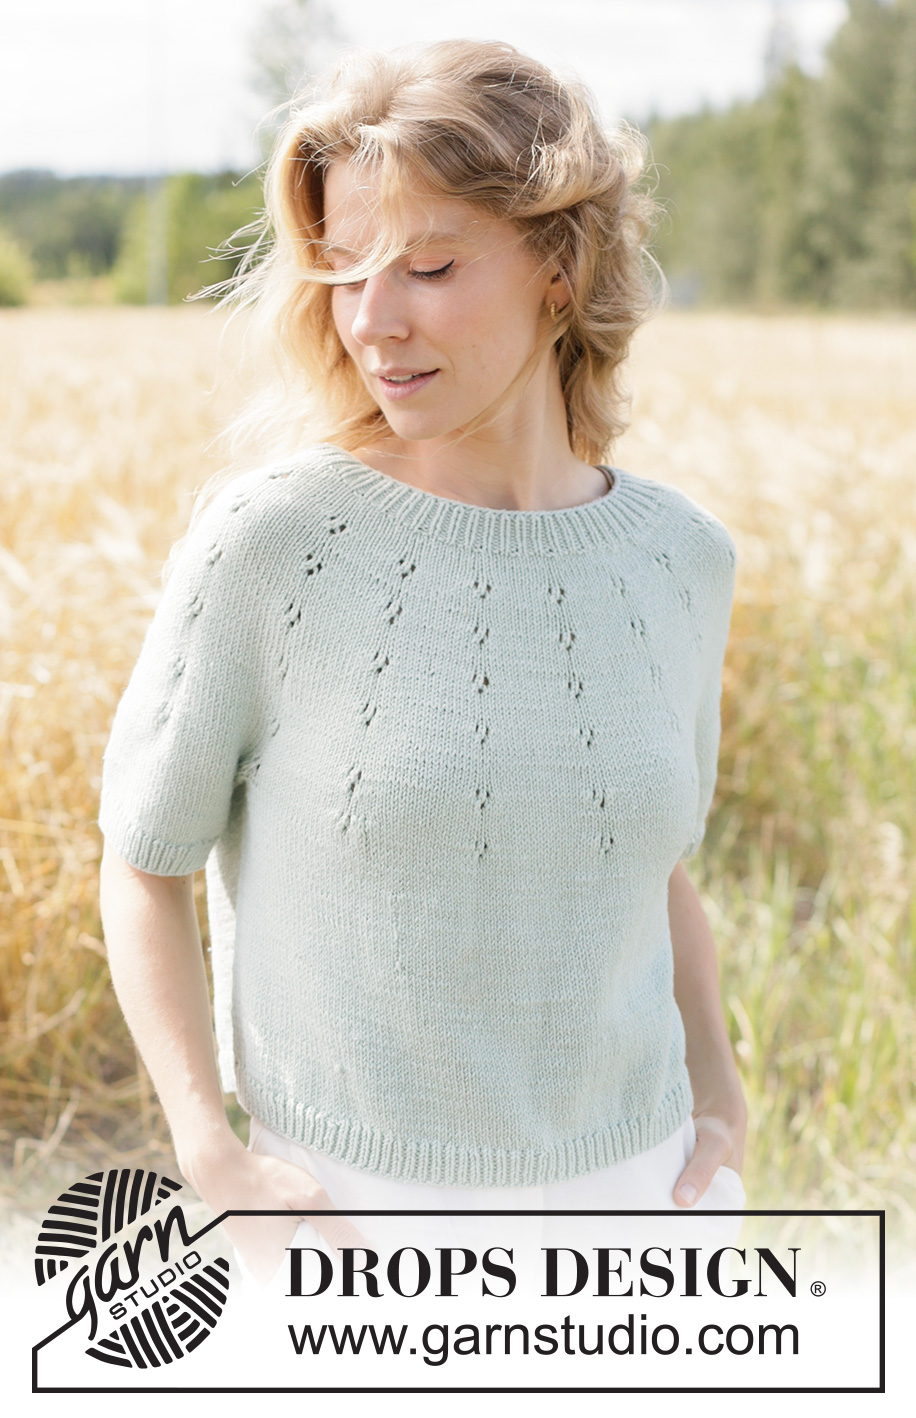
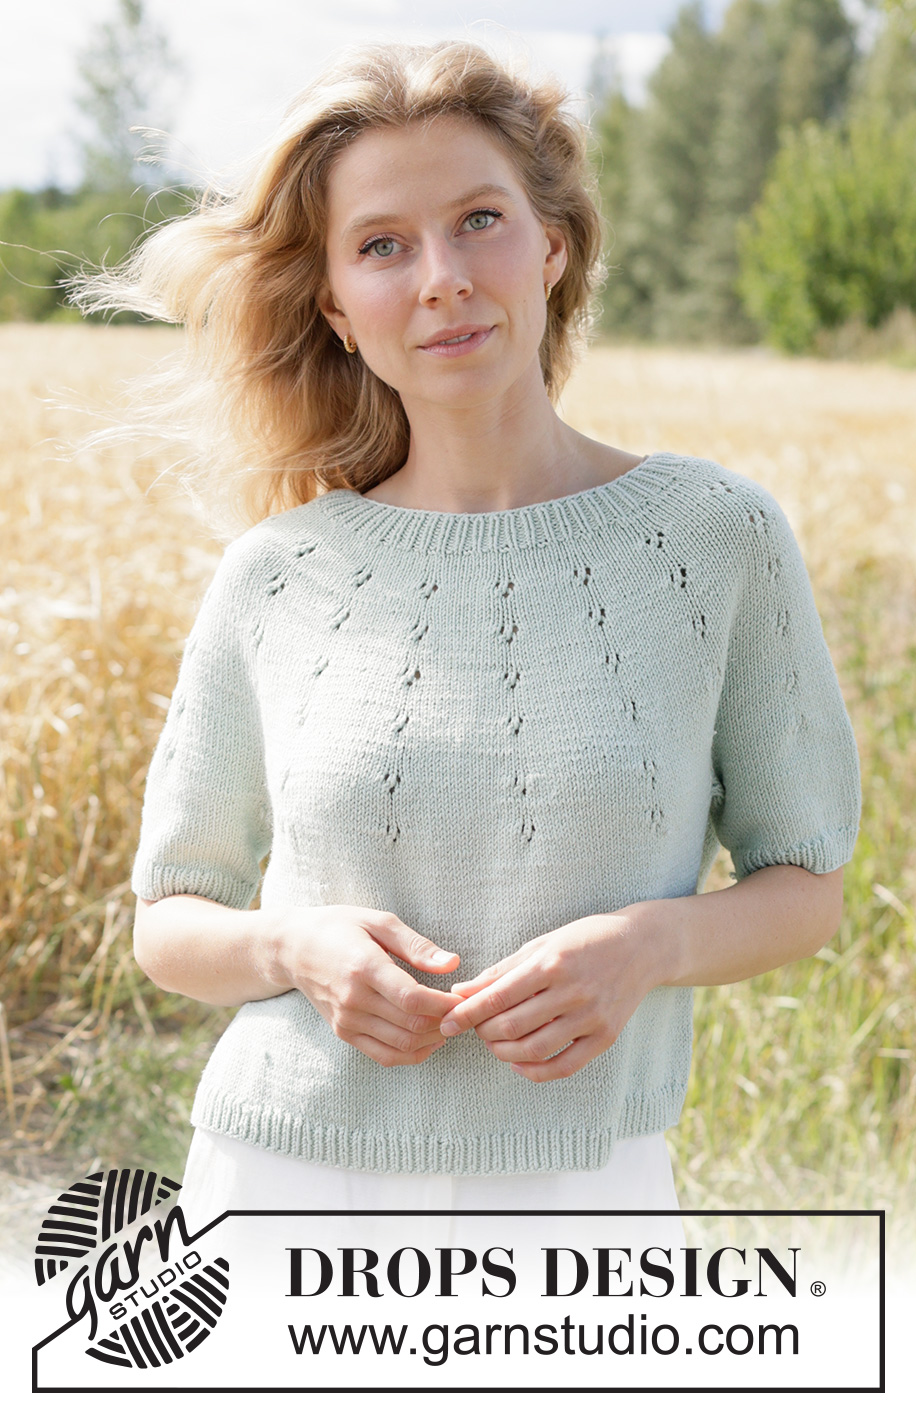
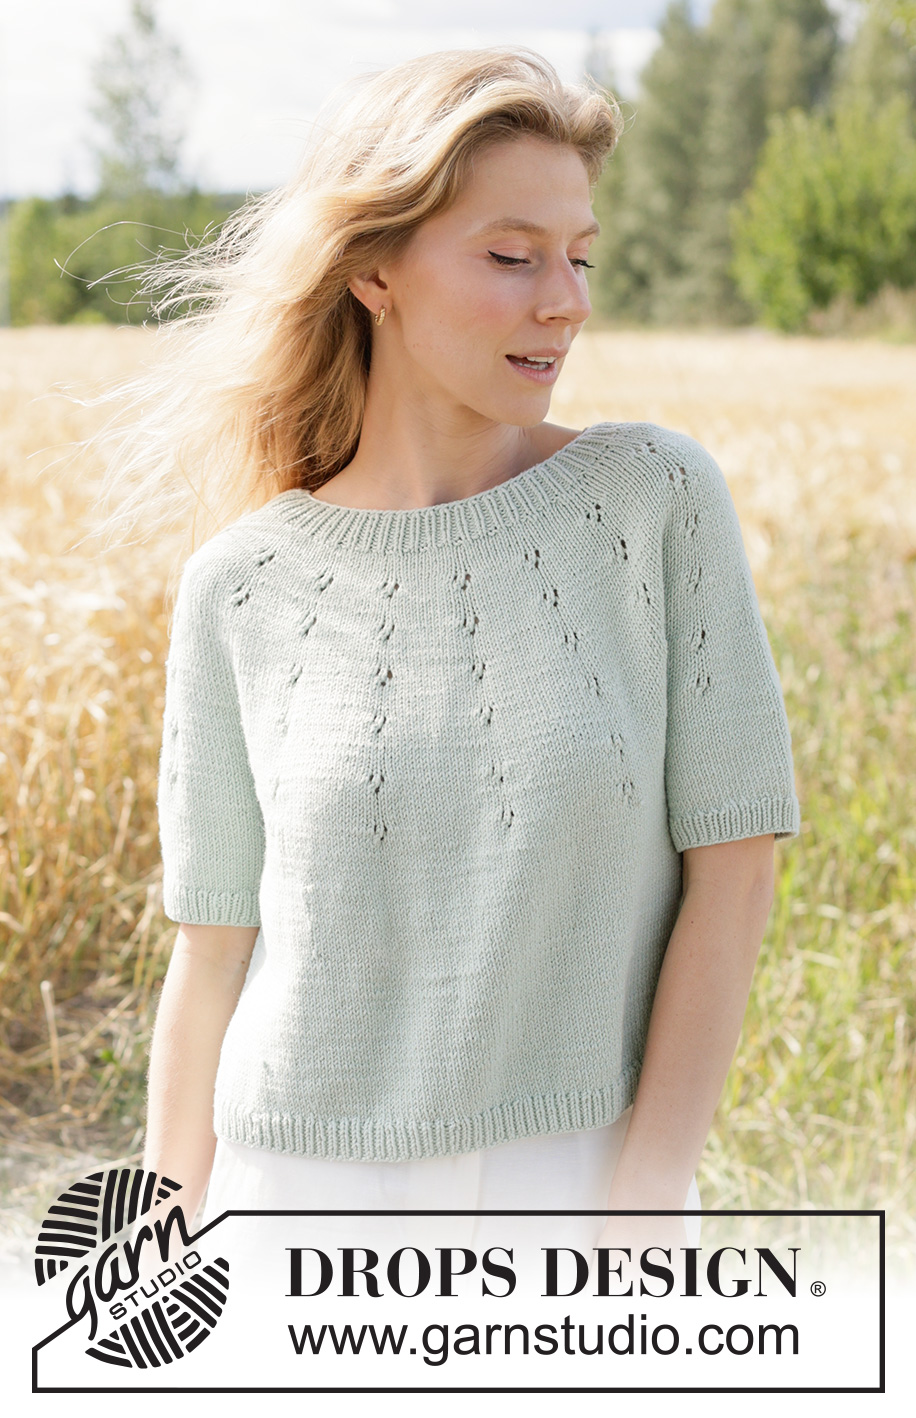
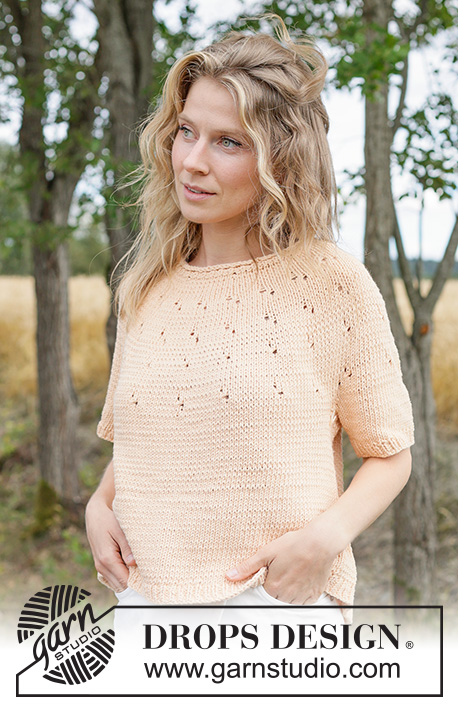
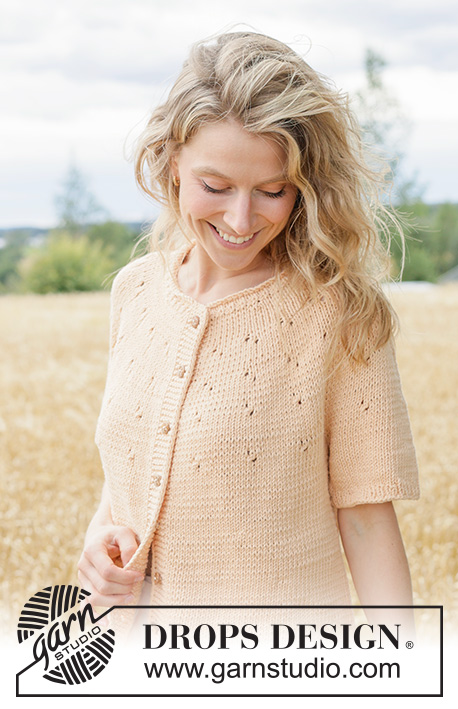
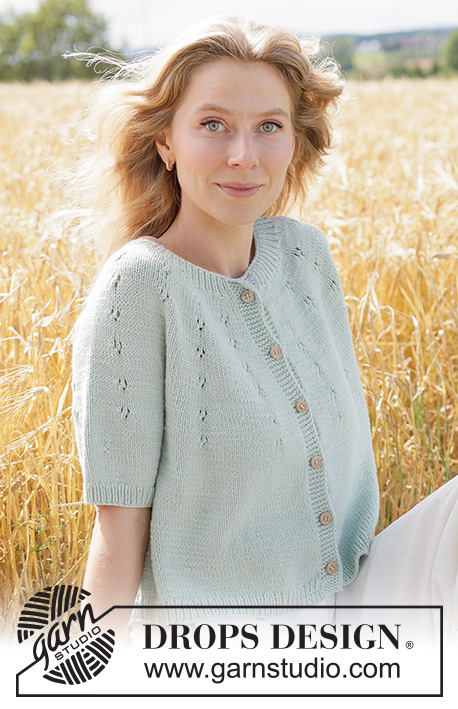
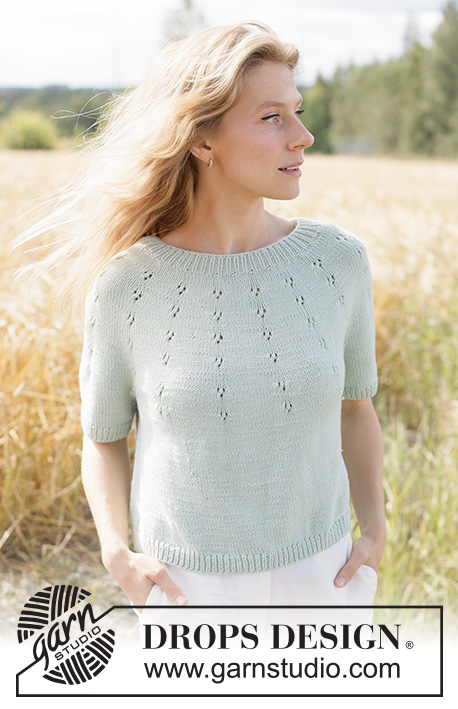
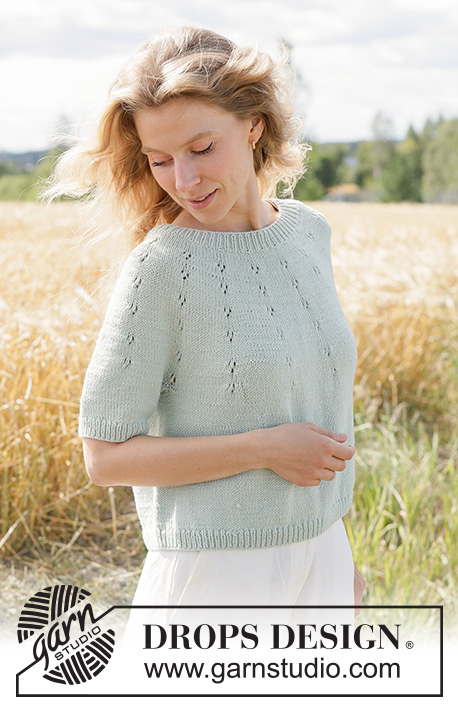
Knitted jumper in DROPS Cotton Merino or DROPS Belle. The piece is worked top down with round yoke, lace pattern on the yoke and short sleeves. Sizes XS - XXXL.
DROPS 266-33 |
||||||||||
|
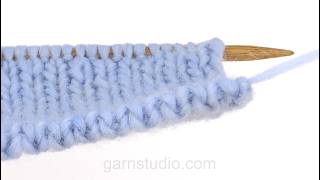
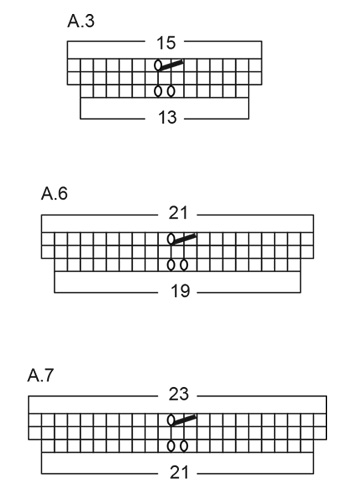
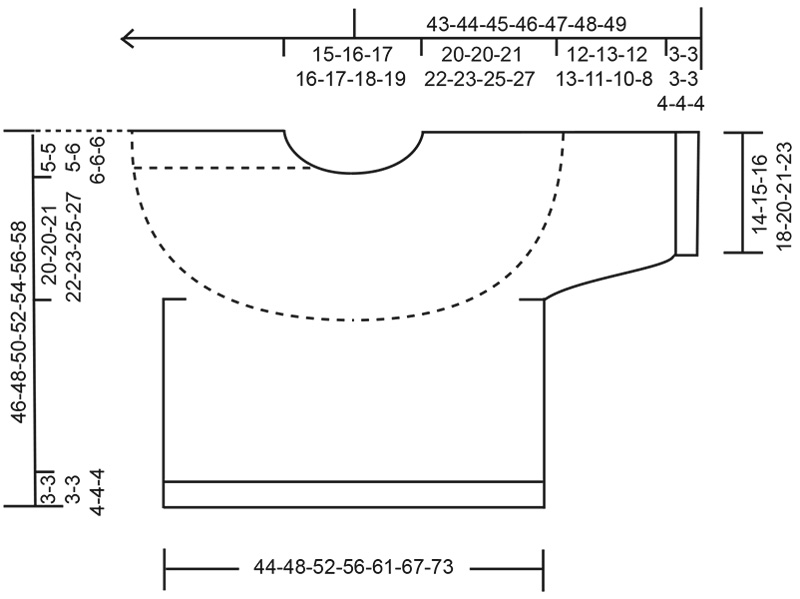
------------------------------------------------------- EXPLANATIONS FOR THE PATTERN: ------------------------------------------------------- INCREASE TIP: Increase 1 stitch by making 1 yarn over. On the next round, knit the yarn over twisted to avoid a hole. Then work the new stitch in stocking stitch. ELEVATION: To make the back of the neck slightly higher when working a round yoke, you can work an elevation at the beginning of the yoke as described here. Skip this section if you do not want an elevation. Insert 1 marker at the beginning of the round (mid-back). Read KNITTING TIP and work the next 6 rows back and forth as follows: ROW 1 (right side): Knit to 12-13-14-15-16-17-18 stitches past the marker-thread at the beginning of the round, turn. ROW 2 (wrong side): Purl 24-26-28-30-32-34-36, turn. ROW 3 (right side): Knit 36-39-42-45-48-51-54, turn. ROW 4 (wrong side): Purl 48-52-56-60-64-68-72, turn. ROW 5 (right side): Knit 60-65-70-75-80-85-90, turn. ROW 6 (wrong side): Purl 72-78-84-90-96-102-108, turn. Knit back to the marker-thread mid-back. Continue the yoke as described in the text. KNITTING TIP: When working short rows, there will be a small hole after each turn. This hole can be closed by tightening the strand or using the technique German Short Rows as follows: Slip the first stitch purl-wise, take the strand over the right needle and tighten well from the back (2 loops on the needle). These loops are worked together on the next row. PATTERN: See diagrams A.1 to A.7 (diagram A.7 only applies to sizes XXL and XXXL). SLEEVE TIP: When knitting up stitches under the sleeve, you can get a small hole in the transition between stitches on the body and sleeve. This hole can be closed by picking up the strand between 2 stitches and working this strand twisted together with the first stitch between body and sleeve. DECREASE TIP: Decrease 1 stitch on each side of the marker-thread as follows: Work until there are 3 stitches left before the marker-thread, knit 2 together, knit 2 (marker-thread sits between these 2 stitches), slip 1 stitch knit-wise, knit 1 and pass the slipped stitch over the knitted stitch (2 stitches decreased). ------------------------------------------------------- START THE PIECE HERE: ------------------------------------------------------- JUMPER – SHORT OVERVIEW OF THE PIECE: The pattern uses both long and short needles; start with the length which fits the number of stitches and change when necessary. The neck and yoke are worked in the round with circular needle, top down and from mid-back. If you would like an elevation, rows are worked back and forth before finishing the yoke in the round. When the yoke is finished, it is divided for the body and sleeves and the body continued in the round, while the sleeves wait. The sleeves are worked top down, in the round. If there is a «0» in your chosen size, skip the information and go straight to the next instruction. NECK: Cast on 104-108-112-116-120-126-130 stitches with circular needle size 3 mm and DROPS Cotton Merino or DROPS Belle – you can use the Italian cast-on method if you wish. Work rib in the round (knit 1, purl 1) for 3-3-3-3½-3½-4-4 cm. The round begins mid-back. Insert 1 marker in the middle of the round (mid-front), the piece is now measured from here. YOKE: Change to circular needle size 4 mm. Knit 1 round and increase 13-18-23-28-33-36-41 stitches evenly spaced – read INCREASE TIP = 117-126-135-144-153-162-171 stitches. You can now work an ELEVATION at the back – read explanation above. If you do not want an elevation, continue as follows. Work stocking stitch. Remember to maintain the knitting tension. When the yoke measures 2-2-2-2-3-3-3 cm from the marker, increase stitches by working PATTERN – read explanation above, as follows: A.1: Work A.1, 13-14-15-16-17-18-19 times on the round = 143-154-165-176-187-198-209 stitches. Work until A.1 is completed in height. Work stocking stitch until the yoke measures 5-5-5-5-6-6-6 cm from the marker. A.2: Work A.2, 13-14-15-16-17-18-19 times on the round = 169-182-195-208-221-234-247 stitches. Work until A.2 is completed in height. Work stocking stitch until the yoke measures 8-8-8-8-9-9-9 cm from the marker. A.3: Work A.3, 13-14-15-16-17-18-19 times on the round = 195-210-225-240-255-270-285 stitches. Work until A.3 is completed in height. Work stocking stitch until the yoke measures 11-11-11-11-12-12-12 cm from the marker. A.4: Work A.4, 13-14-15-16-17-18-19 times on the round = 221-238-255-272-289-306-323 stitches. Work until A.4 is completed in height. Work stocking stitch until the yoke measures 14-14-14-14-15-15-15 cm from the marker. A.5: Work A.5, 13-14-15-16-17-18-19 times on the round = 247-266-285-304-323-342-361 stitches. Work until A.5 is completed in height. Work stocking stitch until the yoke measures 17-17-17-17-18-18-18 cm from the marker. A.6: Work A.6, 13-14-15-16-17-18-19 times on the round = 273-294-315-336-357-378-399 stitches. Work until A.6 is completed in height. The pattern with increases is finished in sizes XS, S, M, L and XL – go to ALL SIZES. In sizes XXL and XXXL knit until the yoke measures 0-0-0-0-0-21-21 cm from the marker, then work A.7. A.7: Work A.7, 0-0-0-0-0-18-19 times on the round = 273-294-315-336-357-414-437 stitches. Work until A.7 is completed in height. Go to ALL SIZES. ALL SIZES: When the diagrams are finished, continue with stocking stitch. AT THE SAME TIME, on the first round increase 7-10-9-20-27-2-7 stitches evenly spaced = 280-304-324-356-384-416-444 stitches. Work until the yoke measures 20-20-21-22-23-25-27 cm from the marker. Now divide for the body and sleeves. DIVIDE FOR BODY AND SLEEVES: Knit 42-46-50-54-58-64-70 (= half the back piece), place the next 56-60-62-70-76-80-82 stitches on a stitch holder for the sleeves, cast on 8-8-10-10-12-12-14 stitches (mid-under the sleeve), knit 84-92-100-108-116-128-140 (= front piece), place the next 56-60-62-70-76-80-82 stitches on a stitch holder for the sleeves, cast on 8-8-10-10-12-12-14 stitches (mid-under the sleeve), knit the last 42-46-50-54-58-64-70 stitches (= half the back piece). The body and sleeves are finished separately. BODY: = 184-200-220-236-256-280-308 stitches. Continue with stocking stitch until the piece measures 38-40-42-43-44-46-48 cm from the marker mid-front. Change to circular needle size 3 mm. Work rib (knit 1, purl 1), AT THE SAME TIME increase 28-32-30-34-38-42-44 stitches evenly on the first round = 212-232-250-270-294-322-352 stitches. When the rib measures 3-3-3-3-4-4-4 cm, cast off slightly loosely with rib or with Italian cast-off. The jumper measures approx. 41-43-45-46-48-50-52 cm from the marker mid-front and 46-48-50-52-54-56-58 cm from the shoulder. SLEEVES: Place the 56-60-62-70-76-80-82 sleeve-stitches from one stitch holder onto circular needle size 4 mm and knit up 1 stitch in each of the 8-8-10-10-12-12-14 stitches cast on under the sleeve – read SLEEVE TIP = 64-68-72-80-88-92-96 stitches. Insert a marker-thread in the middle of the 8-8-10-10-12-12-14 stitches under the sleeve. The round starts by the marker-thread. Work stocking stitch in the round. AT THE SAME TIME, when the sleeve measures 2 cm from the division, decrease mid-under the sleeve – read DECREASE TIP as follows: Decrease 2 stitches every 2 cm 3-3-3-2-2-1-0 a total of 2 times = 58-62-66-76-84-90-96 stitches. Continue working until the sleeve measures 12-13-12-13-11-10-8 cm from the division. Change to double pointed needles size 3 mm. Work rib (knit 1, purl 1), AT THE SAME TIME increase 8-8-8-10-10-10-12 stitches evenly on the first round = 66-70-74-86-94-100-108 stitches. When the rib measures 3-3-3-3-4-4-4 cm, cast off slightly loosely with rib or Italian cast-off. The sleeve measures approx. 15-16-15-16-15-14-12 cm from the division. |
||||||||||
Diagram explanations |
||||||||||
|
||||||||||
 |
||||||||||
 |
||||||||||
 |
||||||||||
Have you finished this pattern?Tag your pictures with #dropspattern #minthalosweater or submit them to the #dropsfan gallery. Do you need help with this pattern?You'll find 21 tutorial videos, a Comments/Questions area and more by visiting the pattern on garnstudio.com. © 1982-2026 DROPS Design A/S. We reserve all rights. This document, including all its sub-sections, has copyrights. Read more about what you can do with our patterns at the bottom of each pattern on our site. |
||||||||||






With over 40 years in knitting and crochet design, DROPS Design offers one of the most extensive collections of free patterns on the internet - translated to 17 languages. As of today we count 333 catalogues and 12532 patterns translated into English (UK/cm). 12532
We work hard to bring you the best knitting and crochet have to offer, inspiration and advice as well as great quality yarns at incredible prices! Would you like to use our patterns for other than personal use? You can read what you are allowed to do in the Copyright text at the bottom of all our patterns. Happy crafting!
Post a comment to pattern DROPS 266-33
We would love to hear what you have to say about this pattern!
If you want to leave a question, please make sure you select the correct category in the form below, to speed up the answering process. Required fields are marked *.