
Popular categories
Looking for a yarn?


Comments / Questions (11)
![]() Marian wrote:
Marian wrote:
I'm sorry but I really don't understand the A 1 diagram - do you have written instructions for the flounce increases instead? ( I have been knitting for over 50 years and I've never seen an instruction diagram like this before)
19.02.2026 - 20:55DROPS Design answered:
Hi Marian, The diagram is read bottom up, from right to left on each round. A.1 is repeated on the round. The first row in the diagram is K1, 1 YO, K2, 1YO, K1 (repeated), 2nd row: Knit (YOs knitted through the back loop 0 twisted). 3rd row: K2, 1 YO, K4 (repeated). 4th row: Knit (YOs knitted twisted). Regards, Drops Team.
20.02.2026 - 06:56
![]() Encarna wrote:
Encarna wrote:
Después de hacer el cuello tengo 88 puntos pero en las instrucciones del patrón, cuando hace la separación, la suma es de 84 puntos. Hay que disminuir esos puntos o qué hago con ellos? Gracias por la aclaración
19.12.2025 - 07:56DROPS Design answered:
Hola Encarna, son 88 puntos. Tenemos 4 puntos en los que insertamos los marcapuntos (se insertan dentro de los puntos y no entre ellos). Por lo que tenemos: 1º punto con marcapuntos + 14 pts de la manga + 2º punto con marcapuntos + 28 pts del delantero + 3º punto con marcapuntos + 14 pts de la manga + 4º pt con marcapuntos + 28 pts de la espalda.
28.12.2025 - 19:53
![]() Marie Agnès wrote:
Marie Agnès wrote:
Bonjour, Comment faire pour que le premier rang soit élastique ? Je me retrouve toujours avec ce style de pull avec un "cou" trop petit . Merci
07.11.2025 - 14:40DROPS Design answered:
Bonjour Marie-Agnès, retrouvez ici différentes techniques de montage, pour qu'il soit plus souple et élastique, vous pouvez monter avec une aiguille d'une taille (ou plus) au -dessus, avec 2 (ou 3 fils), ou bien encore d'autres méthodes en fonction de votre choix. Bon tricot!
07.11.2025 - 17:09
![]() Jana wrote:
Jana wrote:
Diagramm A1): In der ersten Runde stets nach zwei Maschen 1 Zunahme. Nach wie vielen Maschen in der dritten Runde? Nach 4 oder nach 6 Maschen? Ich finde, das geht aus dem Diagramm nicht so klar hervor, zumindest nicht intuitiv. Es wäre besser, wenn man in dieser Runde die nächste Zunahme einmal in das Diagramm mit eingezeichnet hätte, dann wäre die Zählung eindeutiger.
19.10.2025 - 21:02DROPS Design answered:
Liebe Jana, in der 3. Runde sind stets 6 Maschen zwischen den Zunahmen. Die erste Zunahme am Anfang der Runde erfolgt jedoch nach 2 Maschen. Gutes Gelingen weiterhin!
21.10.2025 - 11:21
![]() Alex wrote:
Alex wrote:
Can you please explain a bit the diagram A1 for the flounces? I am a bit confused on how I need to increase. Do I need to make all 47 increases on one row? Or between multiple rows? Thank you!
06.09.2025 - 19:25
![]() Elise wrote:
Elise wrote:
Jeg strikker str. xl. Jeg skal øke til volanger. Jeg forstår ikke hva "Nå skal det økes til volang, det strikkes slik: Strikk A.1 totalt 52 ganger rundt på omgangen. Når A.1 er strikket ferdig er det 364 masker på pinnen." betyr. Hva menes med 52 ganger på omgangen, og når skal jeg bevege meg oppover på mønsteret?
09.05.2025 - 12:31DROPS Design answered:
Hei Elise, Det er plass til 52 rapporter av A.1 i bredden på omgangen. På omgang 1, strikker du første raden i diagrammet x 52 (nederste raden med 4 masker x 52 = 208 masker), på omgang 2 strikker du andre raden i diagrammet x 52 (6 masker x 52 = 312 masker), osv. God fornøyelse!
12.05.2025 - 06:19
![]() Camila wrote:
Camila wrote:
Hi, it's me again haha! I have finished the yoke part and I'm about to divide the body and sleeves but I think I messed up at least one increase along the way. Where should the raglan increases be? The body or the sleeves? This will help me figure out where I messed up. Thanks!!
12.04.2025 - 02:12DROPS Design answered:
Dear Camila, the raglan markers are in the transitions between the body and the sleeves. So some of the increases are in the body and some are in the sleeves. At first you will increase for both the sleeves and the body, while later on you will increase for both the sleeves and the body in some rounds and only for the body in other rounds. Remember that the raglan stitches are considered transition stitches at first but are then considered body stitches when dividing the piece. Happy knitting!
13.04.2025 - 23:12
![]() Camila wrote:
Camila wrote:
Hi! I'm a bit confused between the steps of the neck and the yoke. After getting to 4 cm on the neck, should I work the first 29 stitches and then start counting the stitches for the marker placements?
16.03.2025 - 14:57DROPS Design answered:
Dear Camila, after the 4cm first insert 5 markers in total, without working. The marker after 29 stitches is for measuring the piece and won't follow the piece as you work; make sure it stays in place and use a colour different from the others for this one. The other 4 are inserted as indicated; start counting from the beginning of the round again (not from those 29 stitches). These markers will follow the piece as you work. Happy knitting!
16.03.2025 - 22:08
![]() Franziska wrote:
Franziska wrote:
Hallo liebes Drops Team Ich verzweifle am zweiten teil der Ragelanzunahmen. Die 13 x für Grösse L in jeder 2. Runde sind gestrickt. Jetzt kommt der teil , wo man die 1. -4. Runde 6 x strickt. Man nimmt ja in der 3. Runde nur am Vorder- und Rückenteil zu (vor dem 1. und 3. Markierer und nach dem 2. und 4. Markierer) Wenn ich jetzt in der 3. Runde anfange mit Zunahme vor dem Markierer nehme ich ja in der Ärmelpartie zu… ? 🥹 ich bin ratlos. Danke für eure Hilfe und liebe Grüsse
08.03.2025 - 22:21DROPS Design answered:
Liebe Franziska, beim 2. Teil Raglanzuanhmen nehmen Sie so: 1. Runde: 8 M genauso wie zuvor. 3. Runde: nur 4 Maschen für Vorder und Rückenteil = zwischen 1. und 2. + zwischen 3. und 4. Markierung (Ärmel sind zwischen 4. und 1. und zwischen 2. und 3. Markierer, hier nehmen Sie nicht zu). Viel Spaß beim Stricken!
10.03.2025 - 08:49
![]() Anemone wrote:
Anemone wrote:
Hvor mange nøgler bliver der brugt til en str. m?
15.02.2025 - 09:52DROPS Design answered:
Hej Anemone, du skal bruge 200 g DROPS Kid-Silk = 8 nøgler til størrelse M :)
18.02.2025 - 11:08
|
|||||||
Sweet Bell#sweetbellsweater |
|||||||
 |
 |
||||||
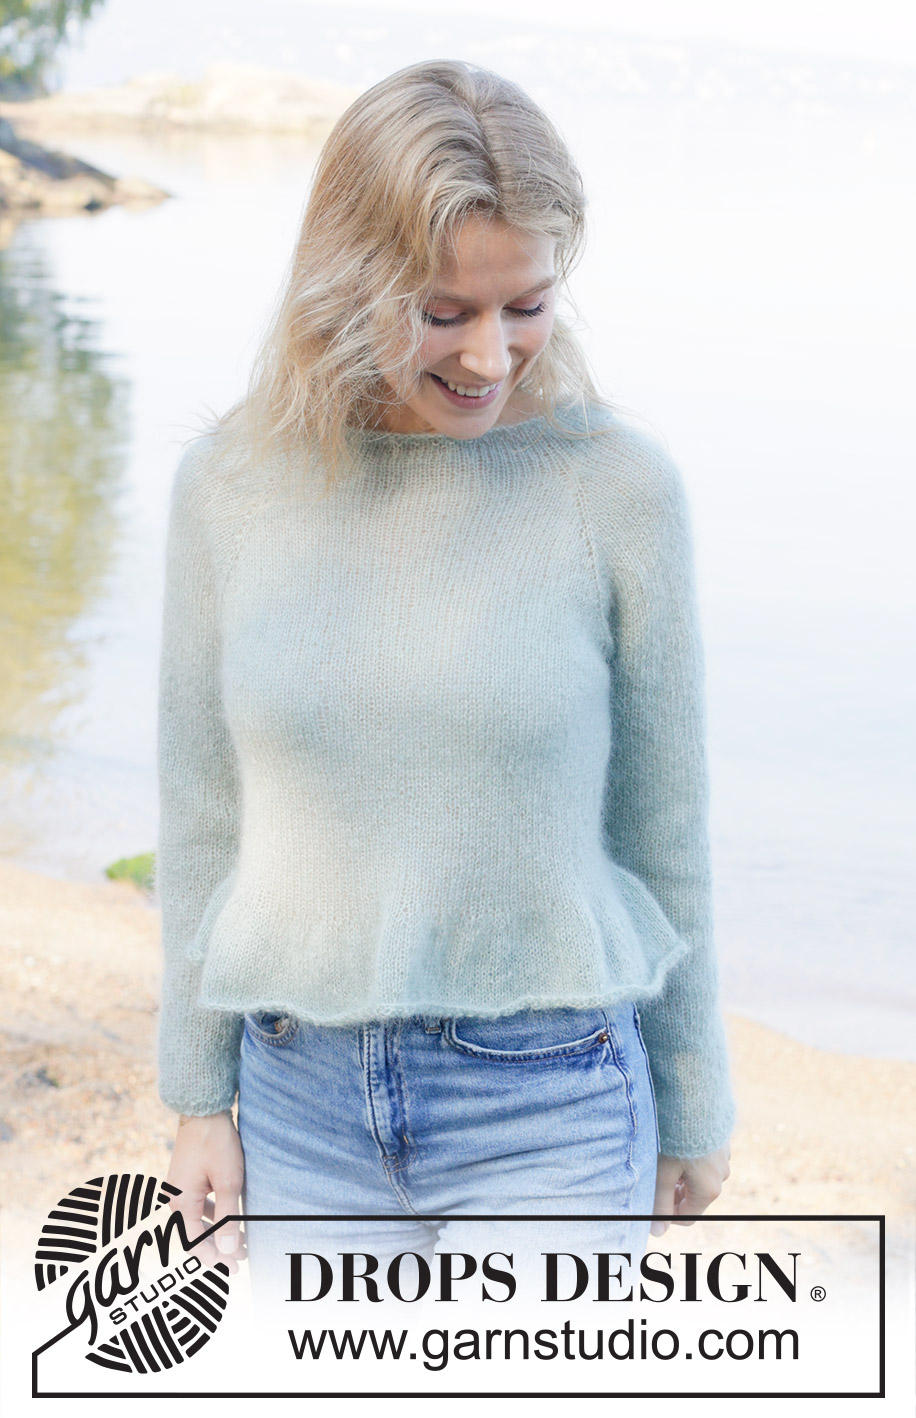
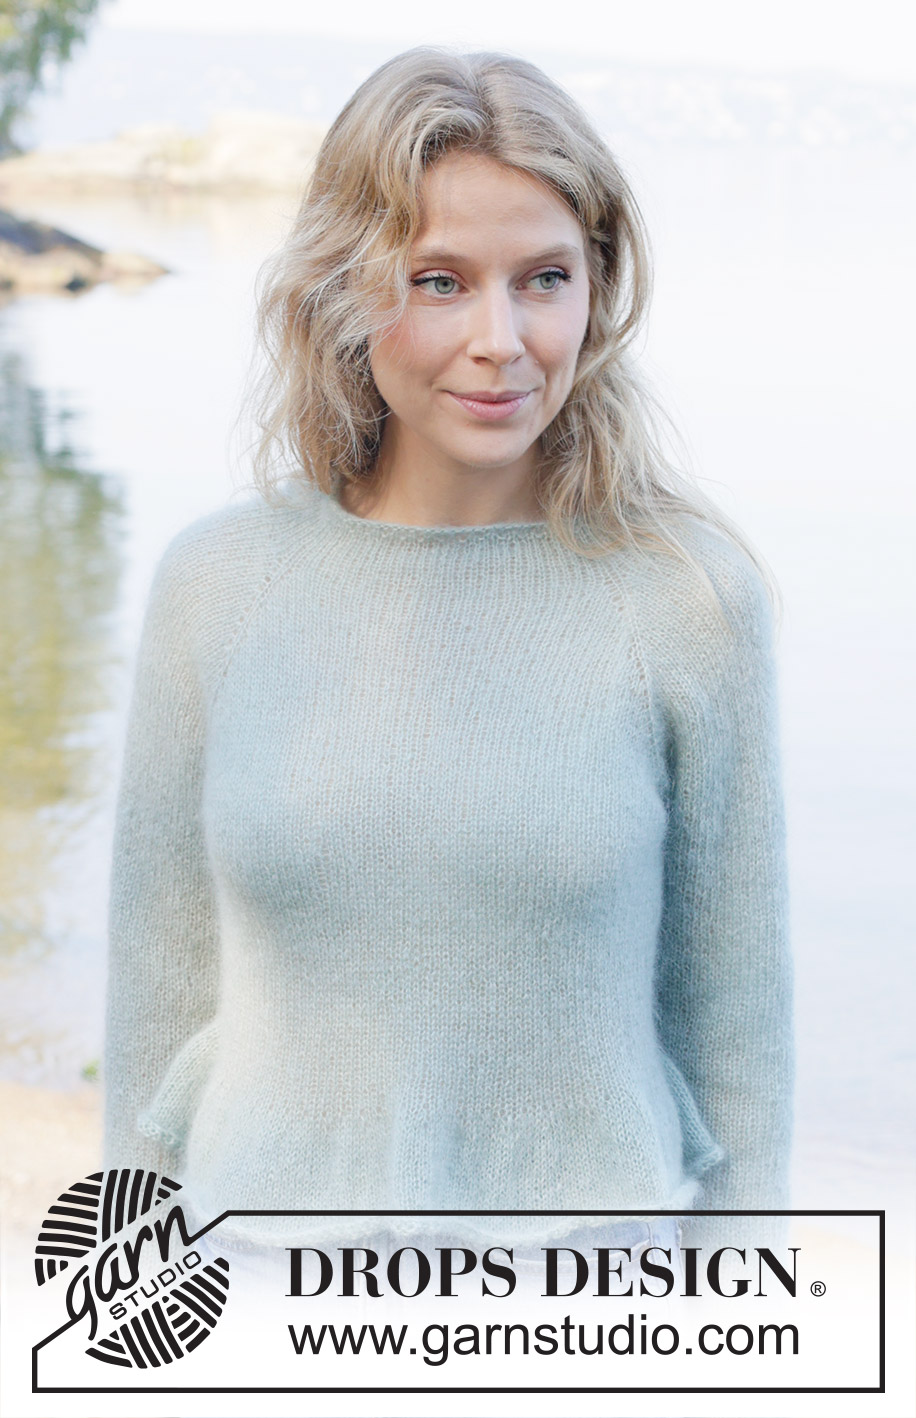
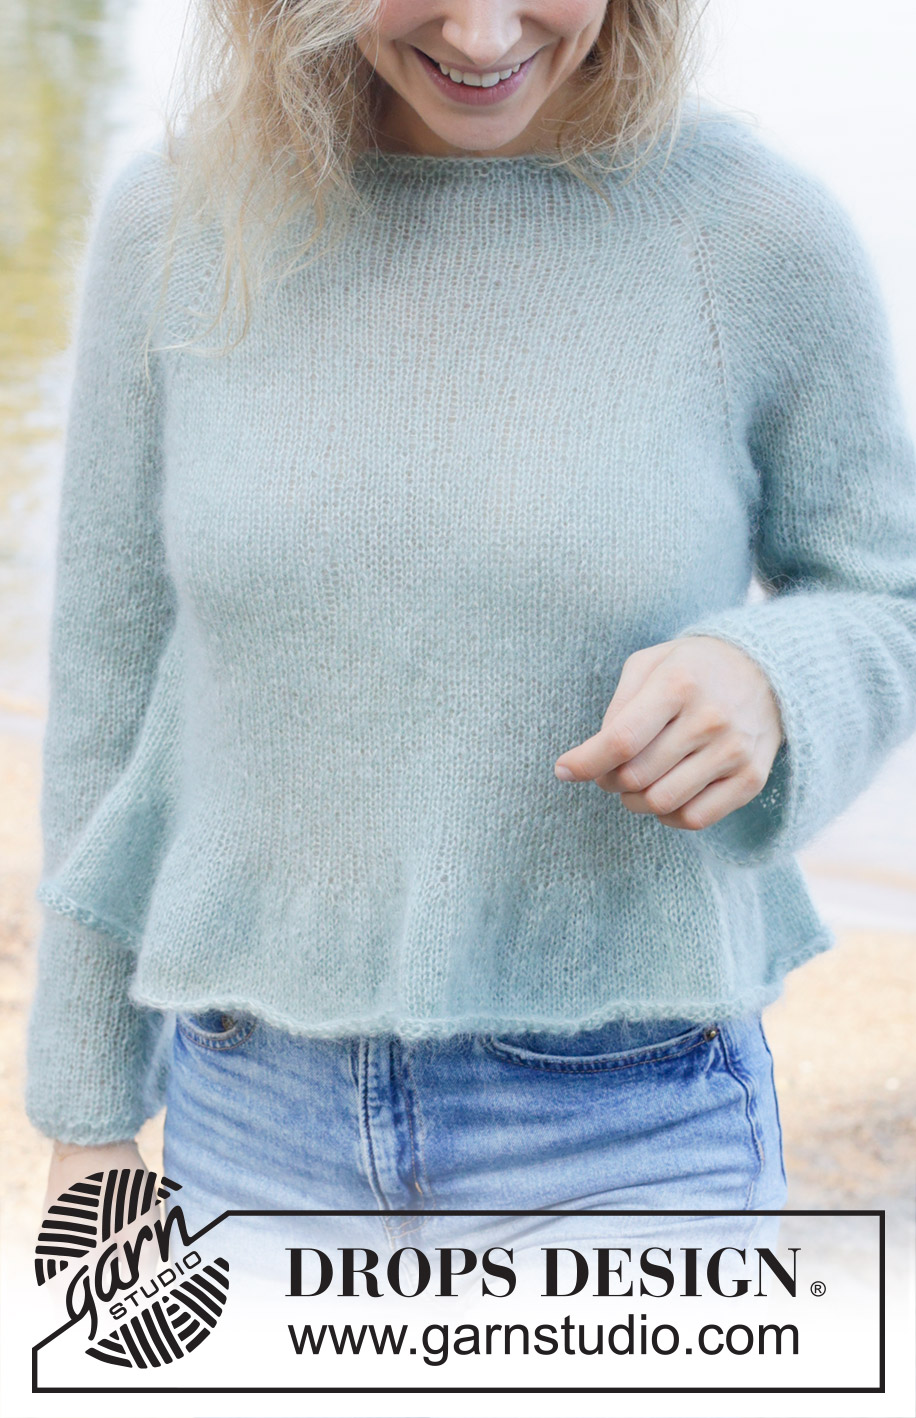
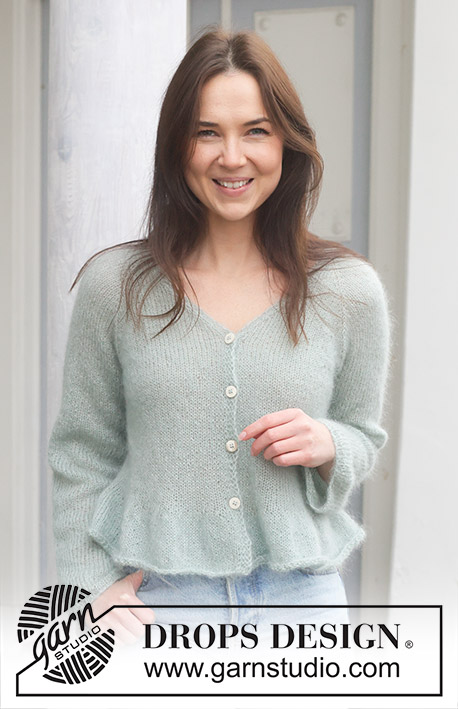
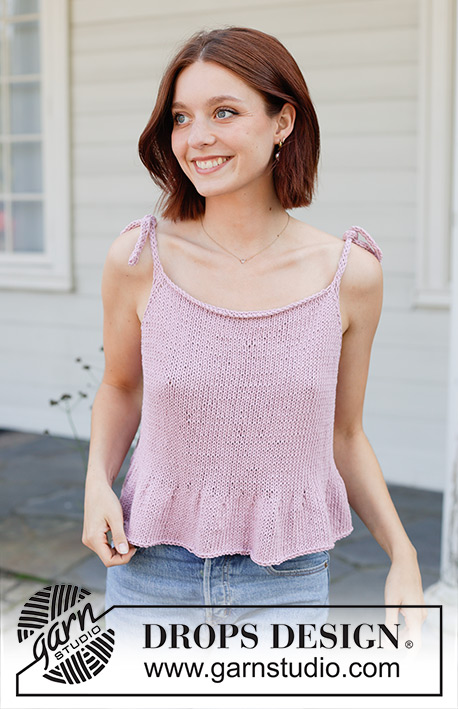
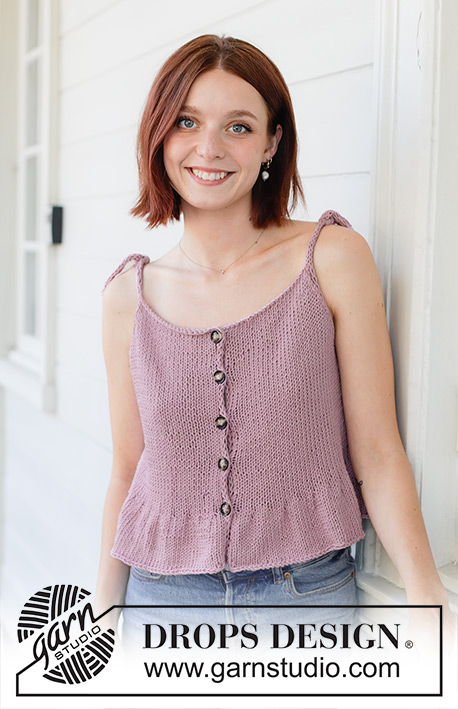
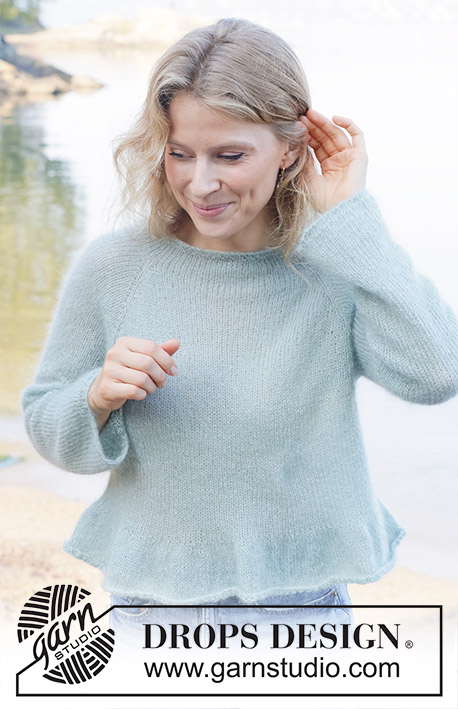
Knitted jumper in 2 strands DROPS Kid-Silk. The piece is worked top down with stocking stitch, raglan and flounces. Sizes S - XXXL.
DROPS 258-6 |
|||||||
|
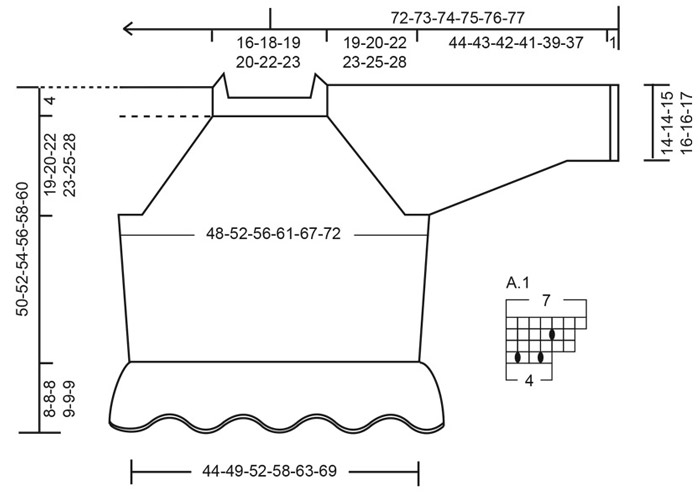
------------------------------------------------------- EXPLANATIONS FOR THE PATTERN: ------------------------------------------------------- PATTERN: See diagram A.1. DOUBLE STRAND: When changing balls, try to change strands in different places so the strand-fastenings are less visible. If there is only 1 ball left, use the strand from both the inside and outside of the ball for your double strand. RAGLAN: Increase 1 stitch by making 1 yarn over, which is worked as follows on the next round: BEFORE RAGLAN-STITCH: Slip the yarn over off the left needle and replace it the other way round (insert the left needle through the back when replacing it). Knit the front loop to avoid a hole. Then work the new stitch in stocking stitch. AFTER RAGLAN-STITCH: Knit through the back loop to avoid a hole. Then work the new stitch in stocking stitch. SLEEVE TIP: When knitting up stitches under the sleeve, you can get a small hole in the transition between stitches on the body and sleeve. This hole can be closed by picking up the strand between 2 stitches and working this strand twisted together with the first stitch between body and sleeve. DECREASE TIP: Decrease 1 stitch on each side of the marker-thread as follows: Work until there are 4 stitches left before the marker-thread, knit 2 together, knit 4 (marker-thread sits in the middle of these 4 stitches), slip 1 stitch knit-wise, knit 1 and pass the slipped stitch over the knitted stitch (2 stitches decreased). ------------------------------------------------------- START THE PIECE HERE: ------------------------------------------------------- JUMPER – SHORT OVERVIEW OF THE PIECE: The pattern uses both long and short needles; start with the length which fits the number of stitches and change when necessary. The neck and yoke are worked in the round with circular needle, top down and from the right back shoulder. When the yoke is finished, it is divided for the body and sleeves and the body continued in the round, while the sleeves wait. The sleeves are worked top down, in the round. If there is a «0» in your chosen size, skip the information and go straight to the next instruction. NECK: Cast on 88-92-96-104-108-112 stitches with circular needle size 4.5 mm and 2 strands DROPS Kid-Silk – read DOUBLE STRAND. Knit 2 rounds. Work 1 round of rib (knit 1, purl 1), then work stocking stitch until neck measures 4-4-4-5-5-5 cm. The round begins on the right back shoulder. Insert 1 marker after the first 29-30-31-33-34-35 stitches (approx. mid-front), the piece is measured from here. YOKE: Insert 4 markers, without working the stitches (insert each marker in a stitch, which is called a raglan-stitch, and is worked in stocking stitch) as follows: Insert marker-1 in the first stitch, count 14 stitches (= sleeve), Insert marker-2 in the next stitch, count 28-30-32-36-38-40 stitches (= front piece), Insert marker-3 in the next stitch, count 14 stitches (= sleeve), Insert marker-4 in the next stitch, there are 28-30-32-36-38-40 stitches left after this marker (= back piece). Work stocking stitch and increase for RAGLAN – read description above – as follows: ROUND 1: Increase on each side of all 4 raglan-stitches (= 8 increased stitches). NOTE: At the beginning of the round increase after marker-1 and at the end of the round increase before marker-1. ROUND 2. Knit, remembering to work the yarn-overs as described under raglan. Work ROUNDS 1 and 2 a total of 10-10-13-17-16-13 times (20-20-26-34-32-26 rounds worked) = 168-172-200-240-236-216 stitches. Remember to maintain the knitting tension. Now increase for raglan as follows: ROUND 1: Increase on each side of all 4 raglan-stitches (= 8 increased stitches). ROUND 2. Knit. ROUND 3: Increase only on the front and back pieces, i.e., after markers 2 and 4 and before markers 1 and 3 – do not increase on the sleeves (= 4 increased stitches). ROUND 4: Knit. Work ROUNDS 1 to 4 a total of 6-7-6-5-7-10 times (24-28-24-20-28-40 rounds worked, you have increased 6-7-6-5-7-10 times on the sleeves and 12-14-12-10-14-20 times on the front and back pieces) = 240-256-272-300-320-336 stitches. All increases for raglan are finished. You have increased a total of 22-24-25-27-30-33 times on the front and back pieces and 16-17-19-22-23-23 times on the sleeves. Continue working without further increases, until the yoke measures 19-20-22-23-25-28 cm from the marker mid-front. Now divide for the body and sleeves. DIVIDE FOR BODY AND SLEEVES: Knit 1 (this stitch belongs to the back piece), place the next 46-48-52-58-60-60 stitches on 1 thread for the sleeve, cast on 12-14-16-18-20-22 stitches (under the sleeve), knit 74-80-84-92-100-108 (= front piece), place the next 46-48-52-58-60-60 stitches on 1 thread for the sleeve, cast on 12-14-16-18-20-22 stitches (under the sleeve), knit the last 73-79-83-91-99-107 stitches. The body and sleeves are finished separately. BODY: = 172-188-200-220-240-260 stitches. Insert 1 marker-thread in the middle of the 12-14-16-18-20-22 cast-on stitches under each sleeve and allow these threads to follow your work onwards; they are used when decreasing on each side. Work to the first marker-thread. The round starts here. Work stocking stitch in the round for 5 cm. Decrease 1 stitch on each side of both marker-threads – read DECREASE TIP (= 4 stitches decreased). Decrease like this every 5 cm a total of 3 times in all sizes = 160-176-188-208-228-248 stitches. Work until the piece measures 38-40-42-43-45-47 cm from the marker mid-front. Now increase for the flounces as follows: Work A.1 40-44-47-52-57-62 times on the round. When A.1 is finished there are 280-308-329-364-399-434 stitches. Continue with stocking stitch until the piece measures 45-47-49-51-53-55 cm from the marker mid-front. Work 1 round of rib (knit 1, purl 1), increasing 0-0-1-0-1-0 stitches on the round = 280-308-330-364-400-434 stitches. Knit 2 rounds. Cast off a little loosely. The jumper measures approx. 46-48-50-52-54-56 cm from the marker mid-front and 50-52-54-56-58-60 cm from top of shoulder. SLEEVES: Place the 46-48-52-58-60-60 sleeve-stitches from one thread on circular needle size 4.5 mm, knit up 1 stitch in each of the 12-14-16-18-20-22 cast-on stitches under the sleeve - read SLEEVE TIP = 58-62-68-76-80-82 stitches. Insert 1 marker-thread in the middle of the 12-14-16-18-20-22 new stitches under the sleeve – the round starts here. Work stocking stitch in the round. When the sleeve measures 2 cm from the division, decrease 2 stitches under the sleeve – remember DECREASE TIP. Decrease like this every 12-9-6-4-3-3 cm a total of 4-5-7-10-11-11 times = 50-52-54-56-58-60 stitches. Work until the sleeve measures 44-43-42-41-39-37 cm from the division. Work 1 round of rib (knit 1, purl 1). Knit 2 rounds. Cast off a little loosely. The sleeve measures approx. 45-44-43-42-40-38 cm from the division. |
|||||||
Diagram explanations |
|||||||
|
|||||||
 |
|||||||
 |
|||||||
Have you finished this pattern?Tag your pictures with #dropspattern #sweetbellsweater or submit them to the #dropsfan gallery. Do you need help with this pattern?You'll find 26 tutorial videos, a Comments/Questions area and more by visiting the pattern on garnstudio.com. © 1982-2026 DROPS Design A/S. We reserve all rights. This document, including all its sub-sections, has copyrights. Read more about what you can do with our patterns at the bottom of each pattern on our site. |
|||||||


With over 40 years in knitting and crochet design, DROPS Design offers one of the most extensive collections of free patterns on the internet - translated to 17 languages. As of today we count 324 catalogues and 12290 patterns translated into English (UK/cm). 12290
We work hard to bring you the best knitting and crochet have to offer, inspiration and advice as well as great quality yarns at incredible prices! Would you like to use our patterns for other than personal use? You can read what you are allowed to do in the Copyright text at the bottom of all our patterns. Happy crafting!
Post a comment to pattern DROPS 258-6
We would love to hear what you have to say about this pattern!
If you want to leave a question, please make sure you select the correct category in the form below, to speed up the answering process. Required fields are marked *.