
Popular categories
Looking for a yarn?


Comments / Questions (25)
![]() Ingrid wrote:
Ingrid wrote:
Hello. Please ignore my previous email. I have just realised that your translation is very American. I read the word 'done' as needing to be done, but I now see the word done as meaning "the increase for the raglan are now finished'. Could you please let me know if this interpretation is correct. Thank you kindly.
26.04.2026 - 04:50
![]() Ingrid wrote:
Ingrid wrote:
Hello! Thank you so much for your generous free patterns. In this pattern under the heading of YOKE, the second part starts with: "work in the round in pattern...." . The sentence which states "Remember to follow the knitting 'tension'", should this not read 'remember to follow the knitting PATTERN'? Also, It would be great to remind the knitter to follow the pattern for A1 AND A2. Obviously I made a mistake. Thank you.
23.04.2026 - 14:08DROPS Design answered:
Dear Ingrid, it is really supposed to remind keeping the knitting tension, the same as you had for your gauge so that you get the finished measurements; but then that's right you have wo rok as explained under PATTERN at the beginning of the written pattern and incorporate the stitches into the pattern either A.1 or A.2. Hope it can help. Happy knitting!
23.04.2026 - 16:20
![]() Erin wrote:
Erin wrote:
Thanks so much for the response. With the A1 pattern though, how is this worked with the rows with the raglan increases? Are you stopping the pattern at the increases and then picking back up after the increases? The K2 P2 gets cut off when working to the increases, so if you end on the first purl of p2 and need to move to increases, are you picking up the second purl immediately after or restarting with the knit 2? That is what is not clear. Thanks!
12.03.2026 - 13:43DROPS Design answered:
Dear Erin, you should incorporate the new stitches into the pattern, This means read the diagram from the right towards the left when working the increases at the end of body/sleeves (before marker) and read diagram from the left towards the left to enlarge pattern at the beg of body/sleeves (after marker). Happy knitting!
12.03.2026 - 16:01
![]() Erin wrote:
Erin wrote:
Hi there, I have been trying very hard to start the yolk and understand the stitch process but am struggling. Is there a video that shows the first setup round after finishing the collar to properly understand where to place all raglan stitch markers, and how to knit with the A1 pattern while working with the raglan? Since the collar is finished I am at my BOR which makes it feel like the raglan starts immediately. I did try looking a the lessons too - this was not enough help for this pattern.
11.03.2026 - 15:26DROPS Design answered:
Hi Erin, The markers are inserted without working the stitches, so you count stitches and insert the markers between the next stitch after each count. 1 stitch before each marker and 1 stitch after each marker are the raglan stitches which are always knitted on each round onwards. You increase for raglan before and after these 2 stitches by making yarn overs. The yarn overs are then worked as described under Raglan (in Explanations at the top of the page), before being worked into pattern A.1. The 2 knitted raglan stitches are not affected by these increases. Hope this helps. Regards, Drops Team.
12.03.2026 - 06:20
![]() Henriette wrote:
Henriette wrote:
När ska man använda A1 A2 mönstret
01.03.2026 - 09:25DROPS Design answered:
Hei Henriette. Se vårt forrige svar til deg :) mvh DROPS Design
03.03.2026 - 11:10
![]() Henriette Philipson wrote:
Henriette Philipson wrote:
När vet man när man ska använda A1A2
01.03.2026 - 09:23
![]() Henriette Philipson wrote:
Henriette Philipson wrote:
När vet man när man ska använda A1A2 mönstret
01.03.2026 - 09:22DROPS Design answered:
Hei Henriette. Når du starter på oket og har byttet til større pinne str, skal du strikke etter MØNSTER. Les da forklaringen øverst i oppskriften. ( A.1 / A.2 = Mönstret stickas så här (mönstret fortsätter från oket över på fram- och bakstycke och ärmar): Sticka A.1 i 8-9-10-11-12-13 cm, sticka A.2. Sticka A.1 i 9-10-10-11-12-13 cm, sticka A.2. Sticka A.1 i 9-10-10-11-12-13 cm, sticka A.2. Sedan stickas arbetet i slätstickning). mvh DROPS Design
03.03.2026 - 11:08
![]() Anna VT wrote:
Anna VT wrote:
Hej. Stickar medium. När stickar man A2 mönster första och tredje gången? Jag ser bara där det står andra gången. Och var på ärmen? Har jag missat något? Anna VT
14.01.2026 - 20:51
![]() Patricia wrote:
Patricia wrote:
Bonjour Faut il faire la séparation su corps et des manches sur le dernier tour de A2 ou sur le premier tour de A1 ? bien cordialement.
17.11.2025 - 18:19DROPS Design answered:
Bonjour Patricia, A.2 doit avoir été tricoté 2 fois avant la division, vérifiez vos mesures, et ajustez si besoin pour diviser soit au dernier tour de A.2 soit en tricotant A.1. Bon tricot!
18.11.2025 - 08:35
![]() Patricia wrote:
Patricia wrote:
Bonjour Faut-il faire la séparation du corps et des manches sur le dernier rang de A2 ou sur le premier rang A1 ? Bien cordialement
17.11.2025 - 18:17
|
|||||||
Harbor Horizon#harborhorizonsweater |
|||||||
 |
 |
||||||
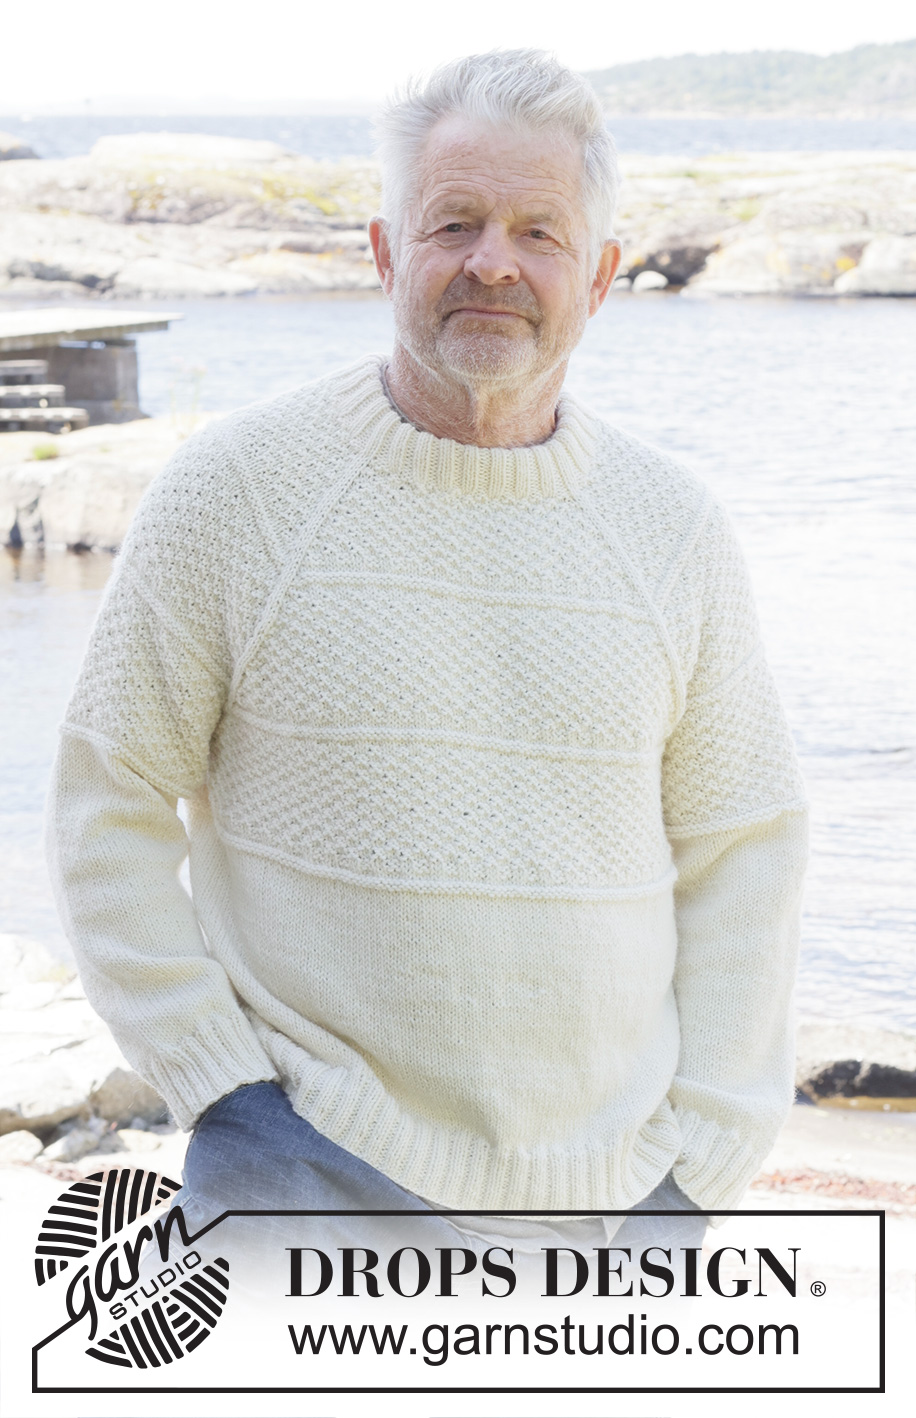
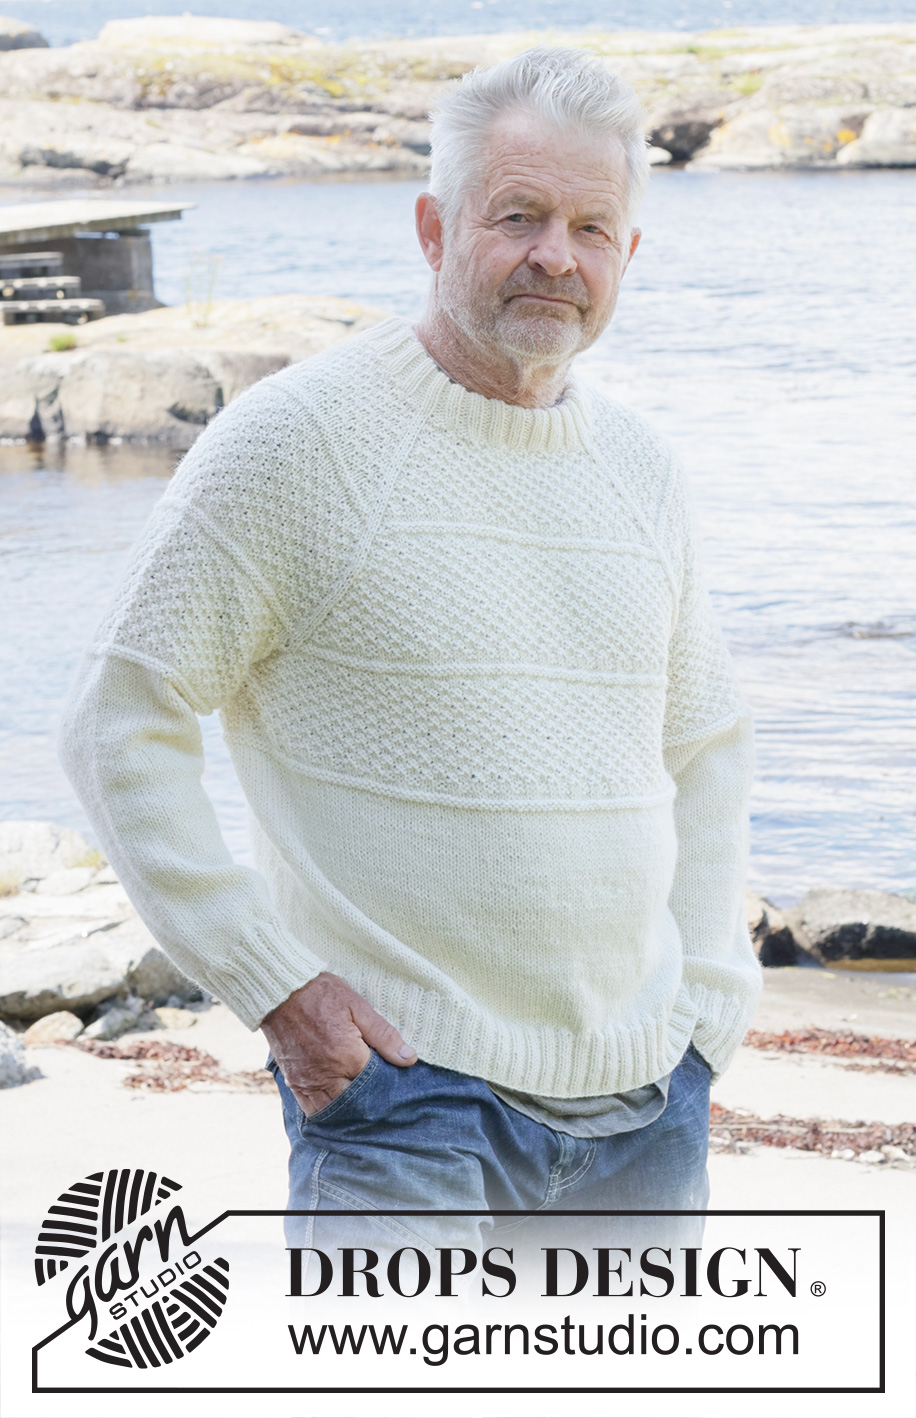
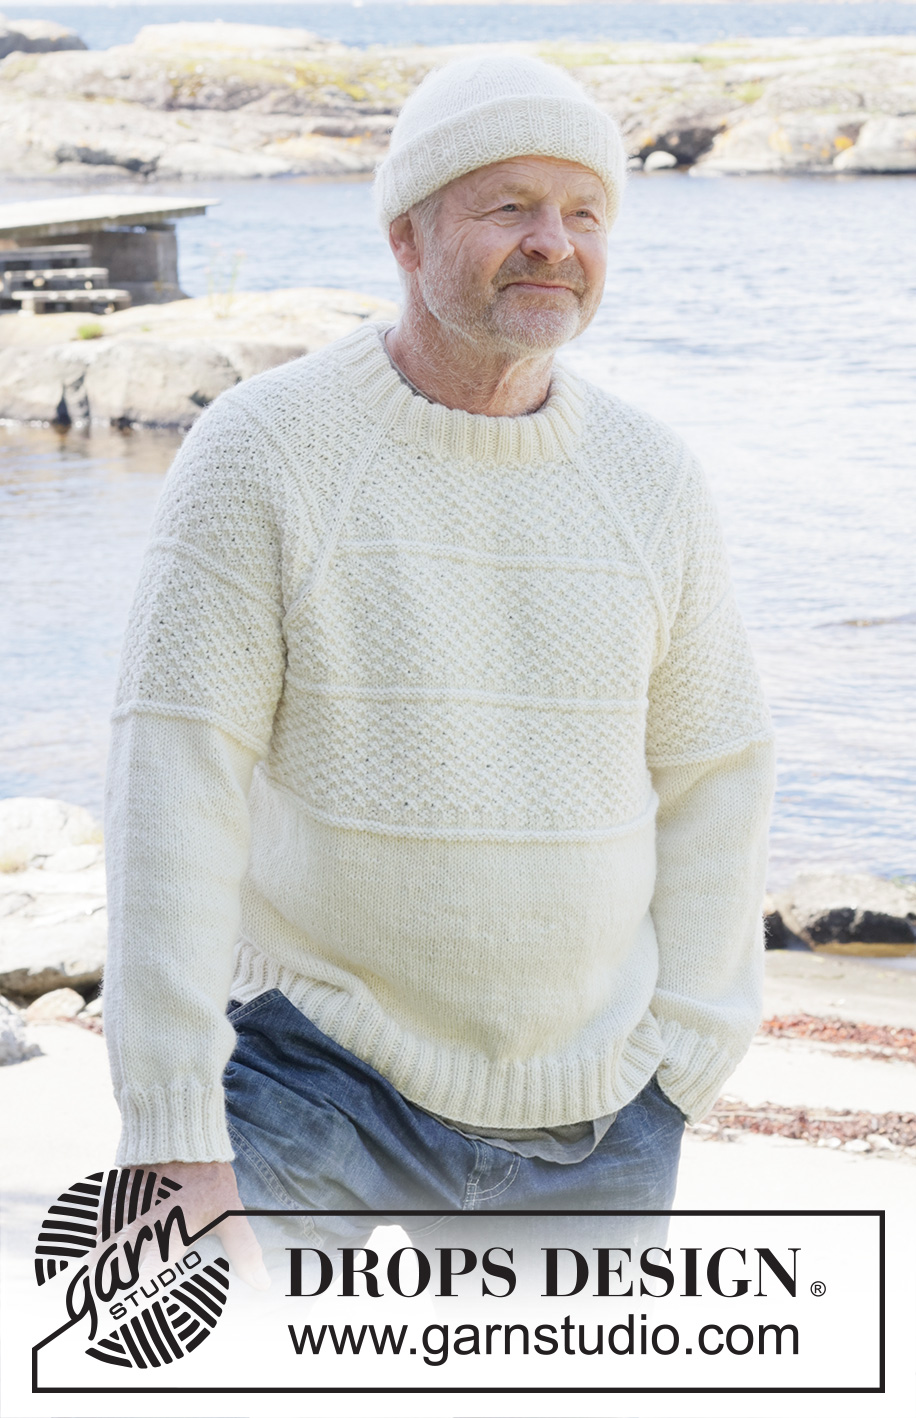
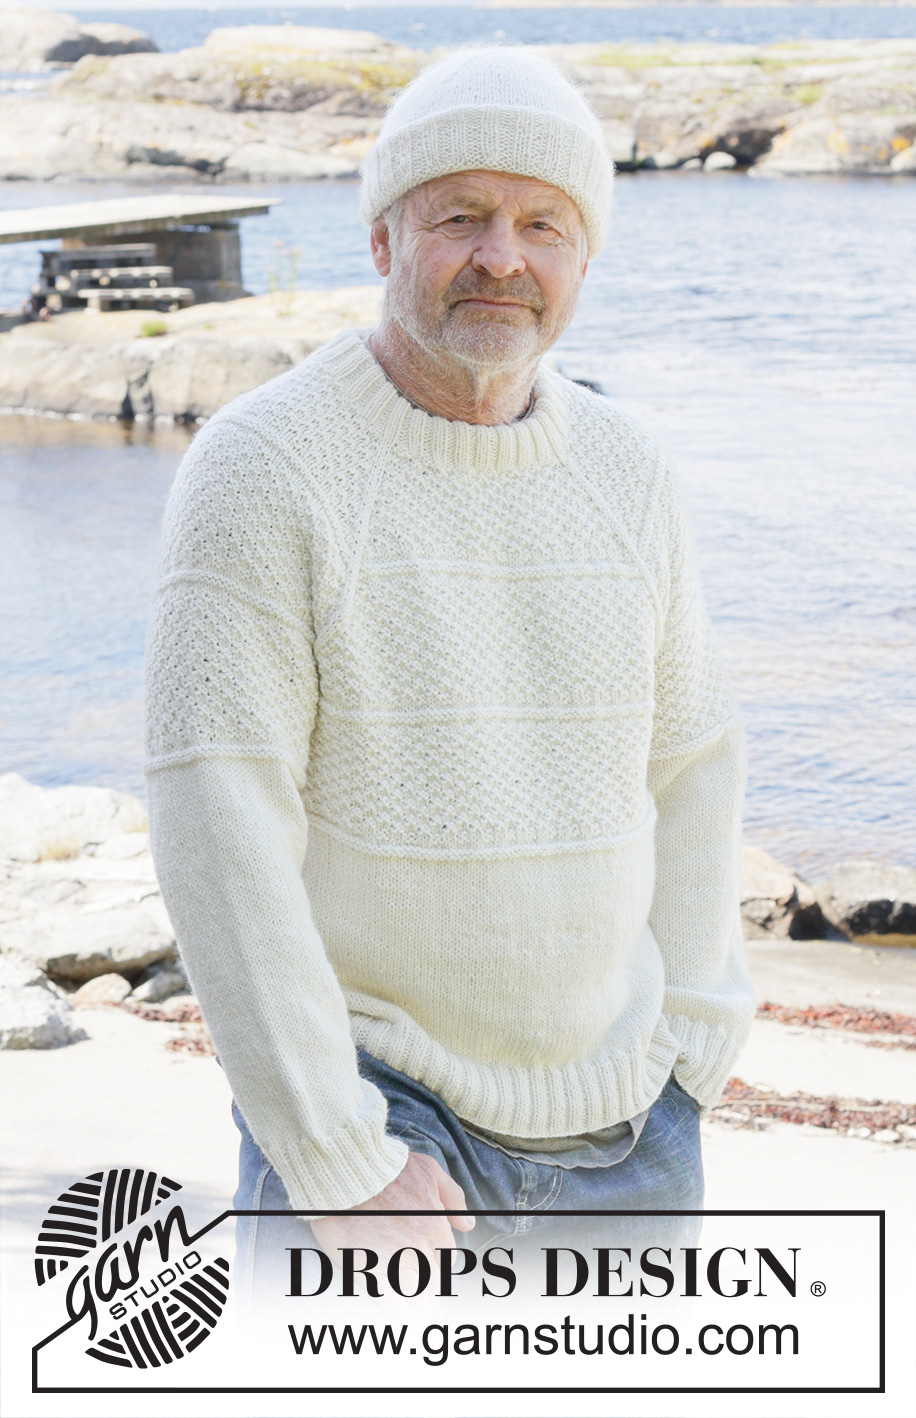
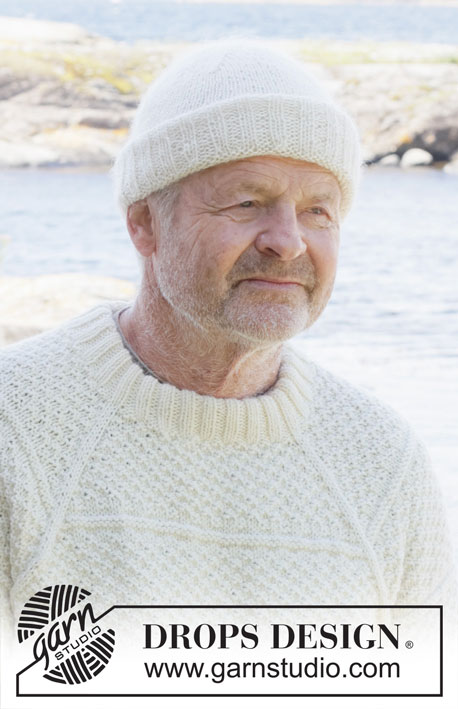
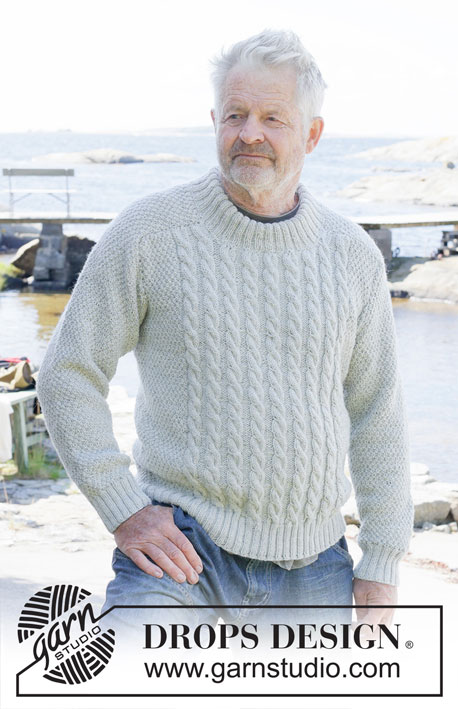
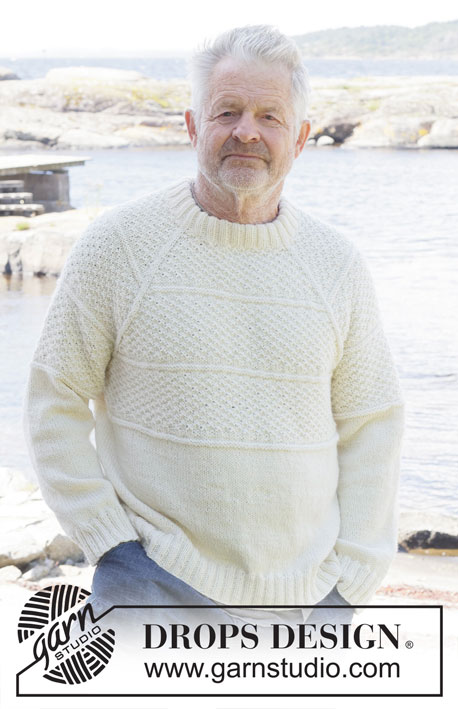
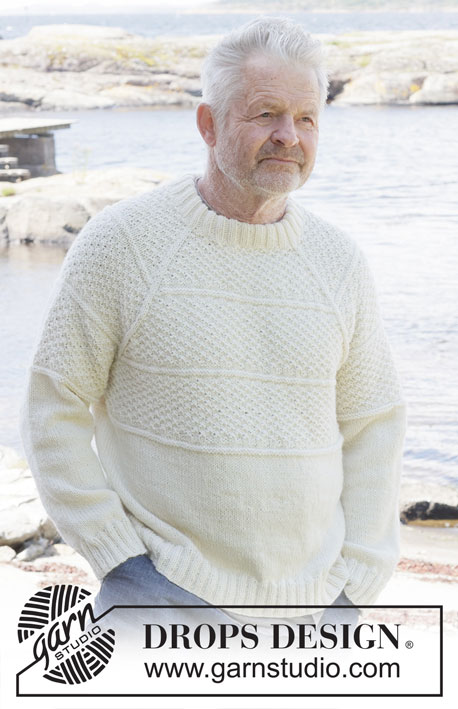
Knitted jumper for men in DROPS Lima or DROPS Fiesta. Piece is knitted top down with raglan, relief pattern and double neck edge. Size: S - XXXL
DROPS 251-2 |
|||||||
|
------------------------------------------------------- EXPLANATION FOR THE PATTERN: ------------------------------------------------------- PATTERN: See diagrams A.1 and A.2. Diagrams show all rows in pattern seen from the right side. Work pattern as follows (pattern continues from yoke over on body and sleeves): Work A.1 for 8-9-10-11-12-13 cm, work A.2 Work A.1 for 9-10-10-11-12-13 cm, work A.2 Work A.1 for 9-10-10-11-12-13 cm, work A.2 Then work piece in stocking stitch. RAGLAN: Increase 1 stitch by making 1 yarn over after/before 2 stitches in stocking stitch (marker thread is between these 2 stitches). On next round work yarn overs as explained below: BEFORE MARKER THREAD: Slip stitch off left needle and put it back on left needle but the opposite way (insert left needle in from behind when slipping it back on needle). Knit yarn overs in front loop of stitches to avoid holes. Then work the new stitches in pattern. AFTER MARKER THREAD: Knit yarn overs in back loop of stitches to avoid holes. Then work the new stitches in pattern. DECREASE TIP-1 (applies to sides of body): Decrease 1 stitch on each side of each marker thread as follows - remember to adjust decreases according to pattern: Work until 4 stitches remain before first marker thread, knit 2 / purl together, work 4 stitches (marker thread is between these 4 stitches), slip 1 stitch knitwise, knit/purl 1, pass slipped stitch over stitch worked (= 2 stitches decreased), repeat decrease at the other marker thread (= 4 stitches decreased in total). DECREASE TIP-2 (applies to mid under sleeves): Decrease 1 stitch on each side of marker thread as follows - remember to adjust decreases according to pattern: Work until 2 stitches remain before stitches with marker thread, knit/purl 2 together, marker thread is here, slip 1 stitch knitwise, knit/purl 1, pass slipped stitch over stitch worked (= 2 stitches decreased). ------------------------------------------------------- START THE PIECE HERE: ------------------------------------------------------- JUMPER - SHORT OVERVIEW OF THE PIECE: In this pattern needles of different length have been used, begin with fitting length for number of stitches and switch as needed. Work neck edge and yoke in the round on circular needle from right shoulder back, and work top down. When yoke is done, divide piece for body and sleeves. Work body down wards in the round on circular needle while putting the sleeves aside. Then work sleeves downwards in the round on needle. Fold the neck edge double against the wrong side and fasten. NECK EDGE: Cast on 112-112-120-120-128-136 stitches on circular needle size 4 mm with DROPS Lima or DROPS Fiesta. Switch to circular needle size 3 mm (cast on on a larger needle to get an elastic cast-on edge). Work rib as follows: Knit 1, * purl 2, knit 2 *, work from *-* until 3 stitches remain, purl 2 and knit 1. Continue rib in the round like this until neck edge measures 9-9-9-10-10-10 cm. The neck edge is later folded in towards wrong side and assembled to form a neck edge of approx. 4½-4½-4½-5-5-5 cm. Beginning of round is at right shoulder at the back. Insert 1 marker after the first 40-40-42-42-44-46 stitches on round (= approx. mid front), measures piece from this marker. YOKE: Insert 4 markers in the piece without working the stitches, insert markers between 2 knit stitches, and these 2 stitches are called raglan stitches and worked in stocking stitch. Insert 1st marker thread at the beginning of round, count 24 stitches (= sleeve), insert 2nd marker thread before next stitch, count 32-32-36-36-40-44 stitches (= front piece), insert 3rd marker thread before next stitch, count 24 stitches (= sleeve), insert 4th marker thread before next stitch, 32-32-36-36-40-44 stitches remain after last marker thread (= back piece). Switch to circular needle size 4 mm. Then work PATTERN in the round - read explanation above, AT THE SAME TIME increase for RAGLAN - read explanation above. Remember to work raglan stitches in stocking stitch. Work in the round in pattern and increase for raglan every other round 22-24-26-26-28-30 times in total = 288-304-328-328-352-376 stitches (= 8 stitches increased on every increase round). Remember to follow the knitting tension! Increases for sleeve are now done, but continue to increase for raglan on front piece and back piece on every other round 6-8-6-10-10-12 more times = 312-336-352-368-392-424 stitches on needle. Work without increasing until piece measures 21-23-24-26-28-30 cm from marker after neck edge - make sure that A.2 is completed for a 2nd time. Now divide yoke for body and sleeves. DIVIDING FOR BODY AND SLEEVES: Pattern continues over body and sleeves - raglan stitches are now worked into pattern. AT THE SAME TIME as next round is worked divide yoke for body and sleeves as follows: Work 1 stitch, slip the next 66-70-74-74-78-82 stitches on a thread for sleeve, cast on 10-10-14-18-18-22 new stitches on needle (= in the side mid under sleeve), work 90-98-102-110-118-130 stitches in pattern as before (= front piece), slip the next 66-70-74-74-78-82 stitches on a thread for sleeve, cast on 10-10-14-18-18-22 new stitches on needle (= in the side mid under sleeve) and work the last 89-97-101-109-117-129 stitches in pattern as before (= back piece). Finish body and sleeves separately. Now measure piece from here! BODY: = 200-216-232-256-272-304 stitches. Insert 1 marker thread in each side on body, in the middle of the 10-10-14-18-18-22 stitches cast on under each sleeve and move the marker threads when working, use the marker threads when decreasing in the sides on body. Work until the first marker thread, round begins here. Work pattern as before, AT THE SAME TIME when piece measures 11-11-11-11-12-13 cm from division, decrease 1 stitch on each side of both marker threads – read DECREASE TIP-1 (= 4 stitches decreased) = 196-212-228-252-268-300 stitches. Remember that when A.2 has been worked 3 times, continue the body in the round in stocking stitch. When piece measures 22-22-22-22-23-24 cm, decrease in the sides 1 more time = 192-208-224-248-264-296 stitches. Work until piece measures approx. 54-56-57-59-61-63 cm from marker mid front. Switch to circular needles size 3 mm, work rib (= knit 2/purl 2) while AT THE SAME TIME increasing 40-44-44-48-52-56 stitches evenly on 1st round = 232-252-268-296-316-352 stitches. When rib measures 5-5-5-6-6-6 cm, cast off with knit over knit and purl over purl. Jumper measures 59-61-63-65-67-69 cm from marker mid front and approx. 64-66-68-70-72-74 cm from the top of shoulder. SLEEVES: Slip 66-70-74-74-78-82 sleeve stitches from one thread on to circular needle size 4 mm and pick in addition up 1 stitch in each of the 10-10-14-18-18-22 stitches cast on under sleeve = 76-80-88-92-96-104 stitches. Insert 1 marker thread in the middle of the 10-10-14-18-18-22 new stitches under sleeve - round begins at the marker thread. Continue the pattern from yoke in the round on needle - AT THE SAME TIME when sleeve measures 2 cm from division, decrease mid under sleeve – read DECREASE TIP -2 and decrease as follows: Decrease 2 stitches every 3½-3-2½-2-2-1½ cm 12-13-16-17-19-22 times in total = 52-54-56-58-58-60 stitches. Work until sleeve measures 47-46-44-43-41-39 cm from division. Switch to double pointed needles size 3 mm and work rib (= knit 2/purl 2) while AT THE SAME TIME increasing 12-10-12-14-14-12 stitches evenly on 1st round = 64-64-68-72-72-72 stitches. When rib measures 5-5-5-6-6-6 cm, cast off with knit over knit and purl over purl. Sleeve measures approx. 52-51-50-49-47-45 cm from division. ASSEMBLY: Fold rib at the top of neck down on inside of garment. Fasten rib to get a double neck edge. To avoid a tight neck edge that sticks out it is important to keep the seam elastic. |
|||||||
Diagram explanations |
|||||||
|
|||||||
 |
|||||||
 |
|||||||
Have you finished this pattern?Tag your pictures with #dropspattern #harborhorizonsweater or submit them to the #dropsfan gallery. Do you need help with this pattern?You'll find 27 tutorial videos, a Comments/Questions area and more by visiting the pattern on garnstudio.com. © 1982-2026 DROPS Design A/S. We reserve all rights. This document, including all its sub-sections, has copyrights. Read more about what you can do with our patterns at the bottom of each pattern on our site. |
|||||||


With over 40 years in knitting and crochet design, DROPS Design offers one of the most extensive collections of free patterns on the internet - translated to 17 languages. As of today we count 324 catalogues and 12290 patterns translated into English (UK/cm). 12290
We work hard to bring you the best knitting and crochet have to offer, inspiration and advice as well as great quality yarns at incredible prices! Would you like to use our patterns for other than personal use? You can read what you are allowed to do in the Copyright text at the bottom of all our patterns. Happy crafting!
Post a comment to pattern DROPS 251-2
We would love to hear what you have to say about this pattern!
If you want to leave a question, please make sure you select the correct category in the form below, to speed up the answering process. Required fields are marked *.