
Popular categories
Looking for a yarn?



































Comments / Questions (71)
 Natalia wrote:
Dzień dobry. Mam problem z rzędem 11 i 12. Zakończyłam cały schemat z rzędu 11 i chcę zacząć 12, ale na lewym drucie, przed markerem zostały mi jeszcze 2 oczka. Co mam z nimi dokładnie zrobić? Przerobić oba oddzielnie na prawo i przejść do rzędu 12? Czy przerobić je jako jedno oczko razem z pierwszym oczkiem po markerze? Nie rozumiem odpowiedzi udzielonej na podobne pytanie innym użytkownikom. Bardzo proszę o pomoc, Miłego dnia
28.09.2026 - 22:03DROPS Design answered:
Witaj Natalio, przerób 2 ostatnie oczka na prawo i włóż marker z powrotem na swoje miejsce (za tymi 2 o.). Przerób całe okrążenie na prawo, czyli okr. 12. Okrążenie 13 zaczynasz od markera. Pozdrawiamy!
30.09.2026 - 08:47
 Roxane Duceppe wrote:
Je ne comprends pas pourquoi le marqueur de rang doit être placé au milieu du rang après les augmentations, que devient le marqueur qu’on place pour joindre le tricot en rond? Habituellement dans vos modèles, on commence l’empiècement à partir du marqueur du début. Merci
21.07.2026 - 22:24DROPS Design answered:
Bonjour Mme Duceppe, ce marqueur que l'on met à la fin du col sert juste de repère pour mesurer l'empiècement par la suite, ce n'est pas le marqueur du milieu du tour. Bon tricot!
11.08.2026 - 11:32
 Susu wrote:
Wo setze ich den Markierer richtig hin?
08.07.2026 - 22:46DROPS Design answered:
Liebe Susu, nach der Halsblende wird man eine Markierung in der Mitte der Runde einsetzen, setzen Sie diese Markierung in die Maschen, die Arbeit wird dann von hier gemessen, diese Markierung soll in die Arbeit sein, nicht auf die Nadel. Viel Spaß beim Stricken!
09.07.2026 - 09:24
Marieka wrote:
Ich habe jetzt die 11. Reihe gestrickt und habe am Ende einen Umschlag und die drei miteinander verstrickten Maschen (=1 Masche). Also aus dem Diagramm die beiden nach rechts verschobenen Maschen. Ist das richtig? Muss ich jetzt die 12. Reihe anfangen, also über dem Umschlag und der zusammen gestrickten Masche? Auf dem Diagramm sieht es anders aus. Aber ich habe den Rapport zu Ende gestrickt….danke für die Hilfe.
08.06.2026 - 23:03DROPS Design answered:
Liebe Marieka, die 11. Reihe beginnt mit der 2 letzten Maschen der 10. Runde, wenn diese 2 Maschen übrig sind, stricken Sie 1 Umschlag, die Abnahme (= das sind jetzt die 2 letzten Maschen der Runde), 1 Umschlag = das ist jetzt die 1. Masche der Runde, und dann stricken Sie die 2 letzten Maschen von jedem A.2 zusammen mit der 1 Masche vom nächsten Rapport. Viel Spaß beim Stricken!
09.06.2026 - 08:47
Marieka wrote:
Werden die Umschläge in den Musterschriften auch in der nächsten Reihe verschränkt gestrickt oder nur bei Zunahmen? Beim verschränkten Stricken würde ja kein Loch entstehen. Danke
04.06.2026 - 20:13DROPS Design answered:
Liebe Marieka, die Umschläge in die Diagramme sollen ganz normal gestrickt werden, damit Löcher entstehen, nur die Umschläge als Zunahmen sollen verschränkt gestrickt werden. Viel Spaß beim Stricken!
05.06.2026 - 07:16
 Mercedes wrote:
Cómo encontrar el calculador de aumentos?
07.04.2026 - 23:19DROPS Design answered:
Hola Mercedes, haz clic en el icono de la llave (herramientas) que hay en la esquina inferior derecha; ahí encontrarás el Calculador de Aumentos/Disminuciones. Saludos!
10.04.2026 - 09:43
 Edda Gramaticopolo wrote:
Sto lavorando questo modello col filato Drops Muskat e i ferri n 4, ma mi sembra che la trama sia troppo larga. Non sarebbe meglio il n 3,5? Grazie!
27.03.2026 - 17:03DROPS Design answered:
Buonasera Edda, deve lavorare con il numero di ferri che le permette di ottenere il campione indicato. Buon lavoro!
28.03.2026 - 20:52
Bettina wrote:
Warum wird beim Rumpfteil nach A4 7,5 cm glatt rechts gestrickt, am Ärmel nach A4 nur 5 cm lt. Anleitung. (Größe XXXL) Auf dem Bild sieht es aus, dass es die gleiche Anzahl Zentimeter sind.
23.12.2025 - 21:50
 Kate wrote:
On diagram 4 which line do I follow for size L
27.10.2025 - 18:05DROPS Design answered:
Hi Kate, The line closest to the diagram is for sizes S, M and L. Regards, Drops Team.
28.10.2025 - 07:07
 Denise wrote:
Bonjour, je viens de le terminer en XL , taille parfaitement. Très joli modèle, je suis ravi du résultat. Merci
01.09.2025 - 17:26
|
||||||||||||||||||||||
Sand Piper#sandpipersweater |
||||||||||||||||||||||
 |
 |
|||||||||||||||||||||
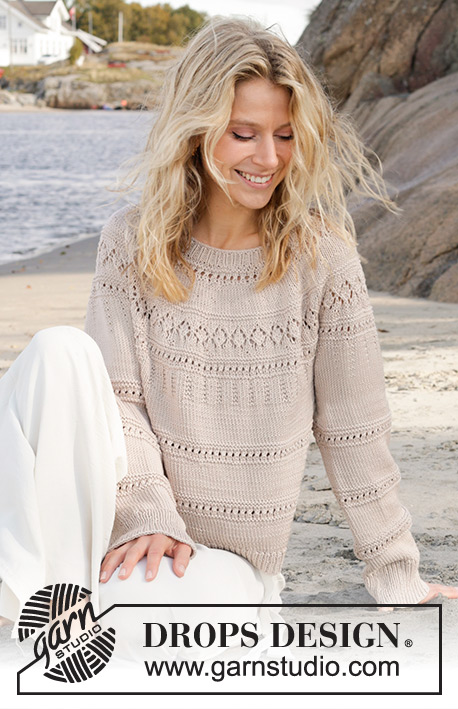
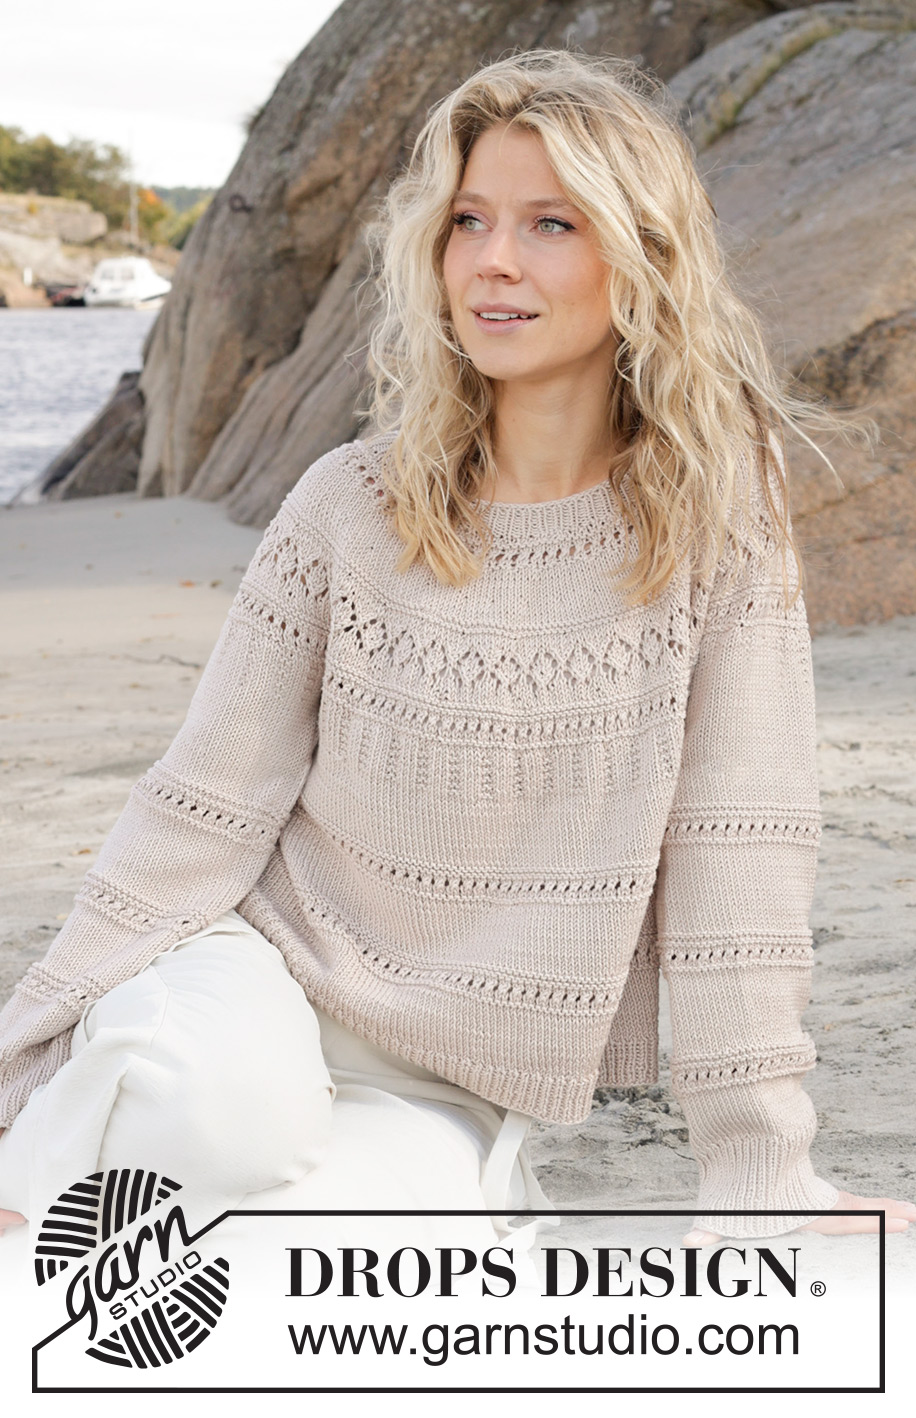
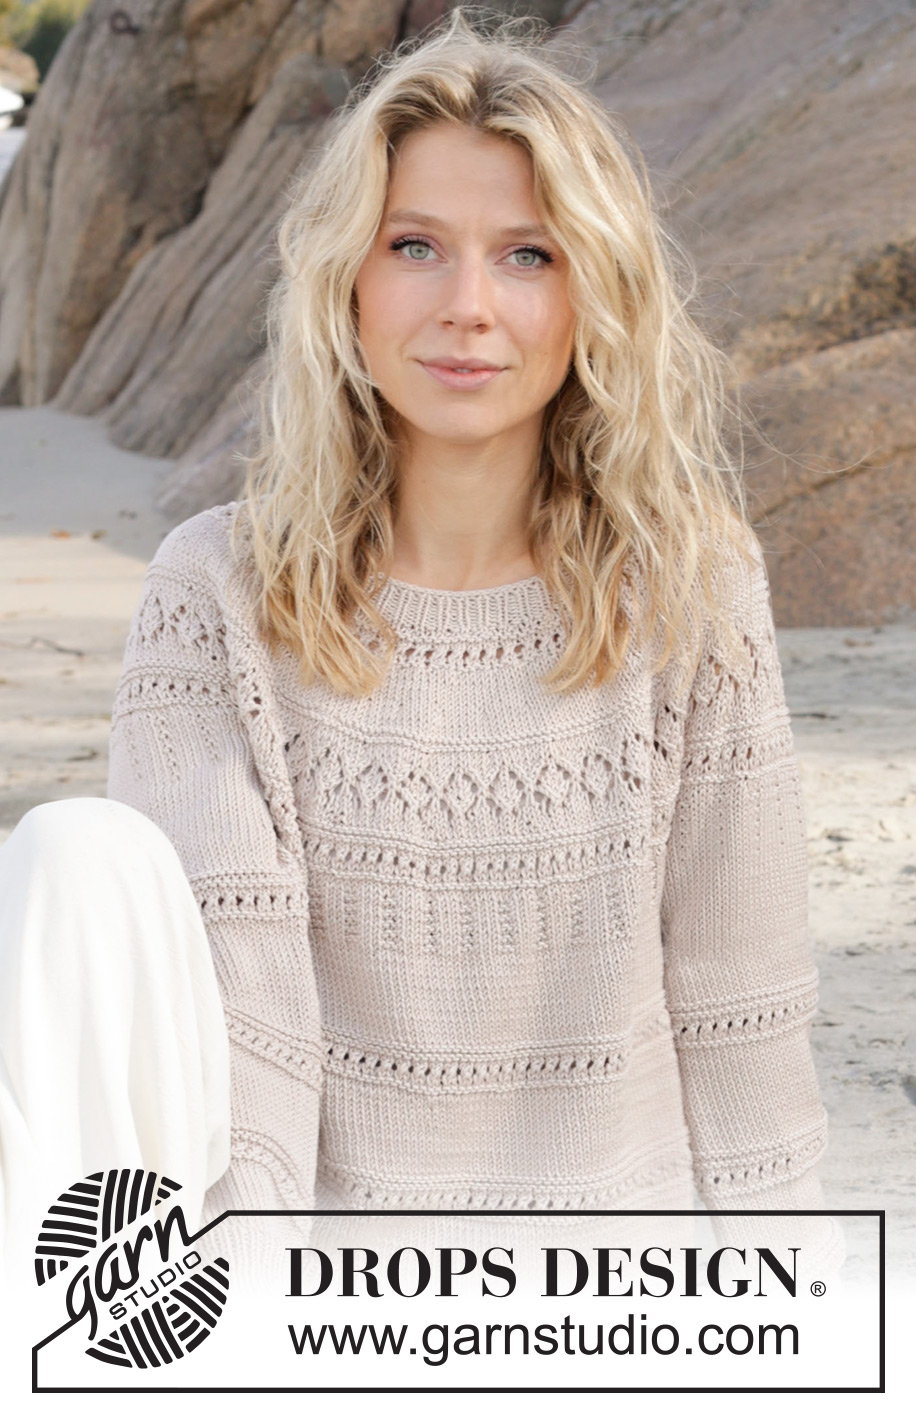
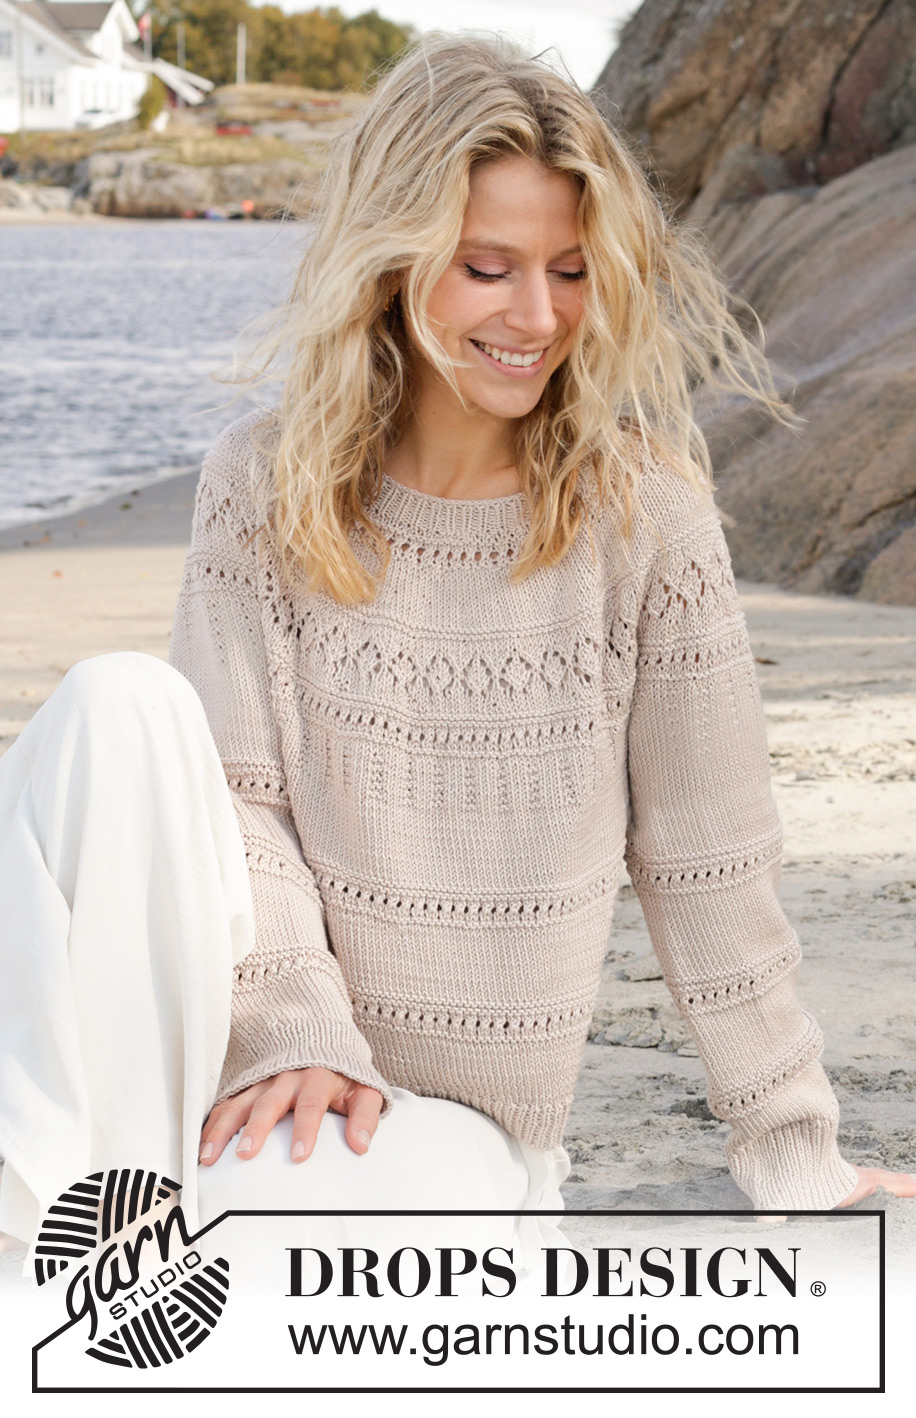
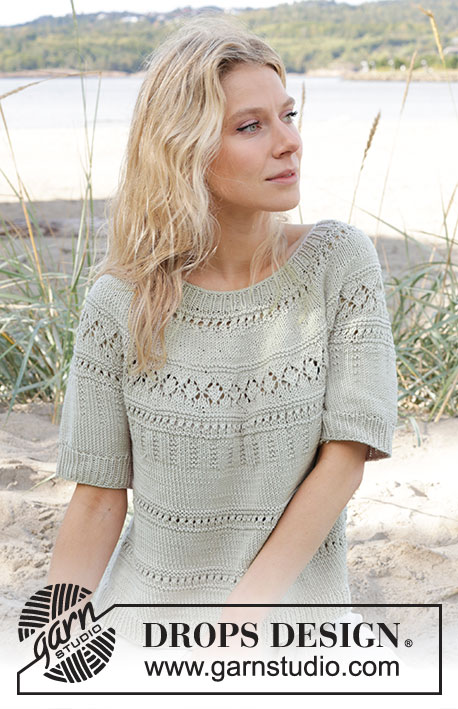
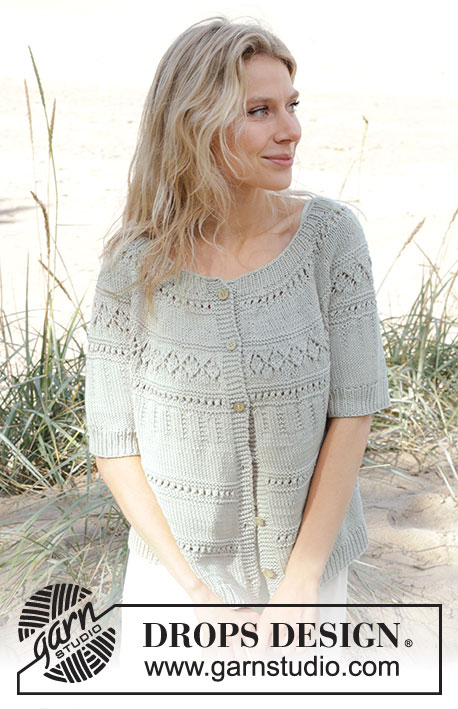
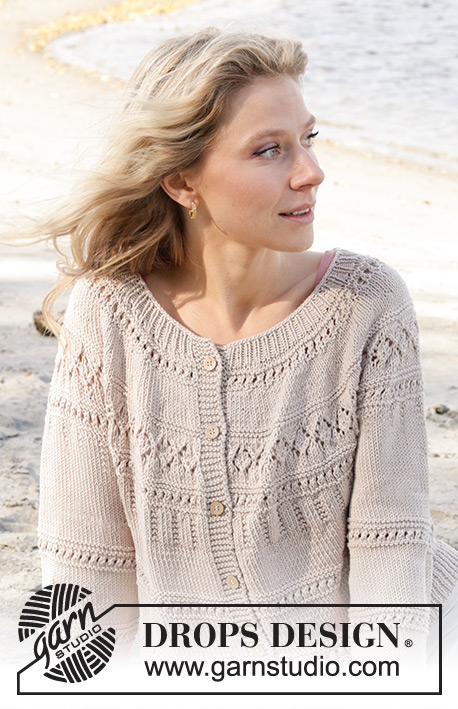
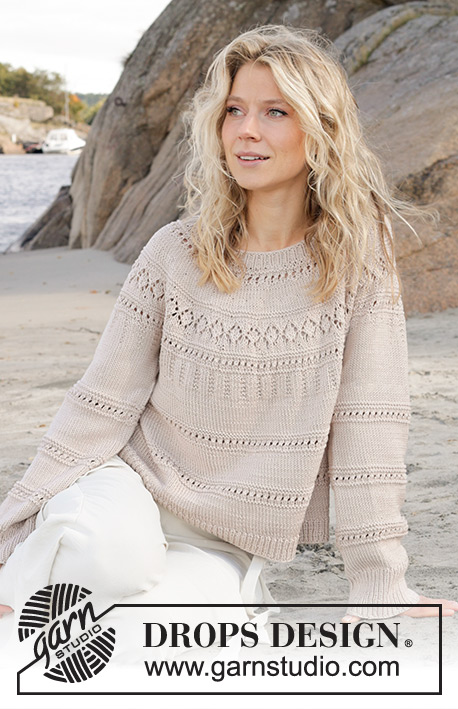
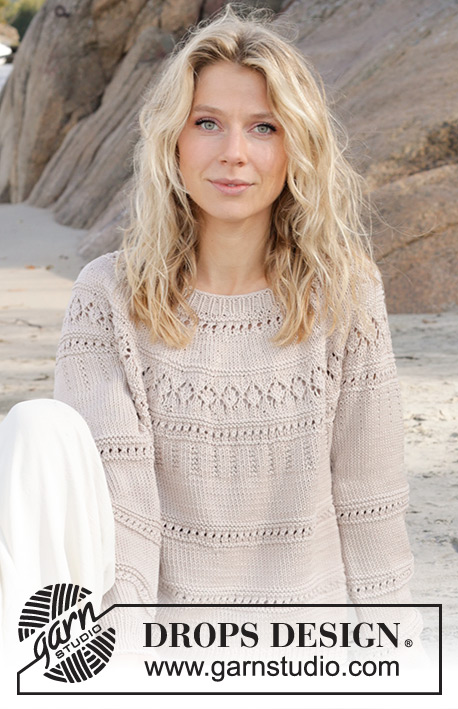
Knitted jumper in DROPS Muskat or DROPS Cotton Merino. The piece is worked top down, with round yoke and lace pattern. Sizes S - XXXL.
DROPS 239-4 |
||||||||||||||||||||||
|
------------------------------------------------------- EXPLANATIONS FOR THE PATTERN: ------------------------------------------------------- INCREASE TIP: Increase 1 stitch by making 1 yarn over, which is worked twisted on the next round to avoid a hole. PATTERN: See diagrams A.1 to A.4. DECREASE TIP (for sleeves): Decrease 1 stitch on either side of the marker-thread as follows: Work until there are 3 stitches left before the marker-thread, knit 2 together, knit 2 (marker-thread sits between these 2 stitches), slip 1 stitch as if to knit, knit 1 and pass the slipped stitch over the knitted stitch (2 stitches decreased). ------------------------------------------------------- START THE PIECE HERE: ------------------------------------------------------- JUMPER – SHORT OVERVIEW OF THE PIECE: The neck and yoke are worked in the round with circular needle, from mid back and top down. The yoke is divided for body and sleeves and the body is continued in the round. The sleeves are worked in the round with short circular needle/double pointed needles. NECK: Cast on 122-126-130-136-142-148 stitches with short circular needle size 3 mm and DROPS Muskat or DROPS Cotton Merino. Knit 1 round. Then work rib (knit 1, purl 1) for 3 cm. Knit 1 round and increase 36-38-40-44-48-52 stitches evenly spaced – read INCREASE TIP = 158-164-170-180-190-200 stitches. Insert 1 marker in the middle of the round. The yoke is measured from this marker. YOKE: Change to circular needle size 4 mm. Work A.1 around the yoke. When A.1 is finished in height, continue with stocking stitch. REMEMBER THE KNITTING TENSION! When the yoke measures 4-4-5-5-6-6 cm from the marker, increase 40-44-50-56-60-64 stitches evenly spaced = 198-208-220-236-250-264 stitches. When the yoke measures 7-7-8-8-9-10 cm from the marker, work A.2 around the yoke. NOTE: On round 11 in the diagram move the start of the round 2 stitches to the right so the pattern fits around the yoke. Then start the next round at the same place as before. On each round marked with an arrow in the diagram increase as follows: Arrow-1: Increase 42-44-50-58-62-66 stitches evenly spaced = 240-252-270-294-312-330 stitches (there is now room for 40-42-45-49-52-55 repeats of A.2 on the round). Arrow-2: Increase 38-42-48-56-58-58 stitches evenly spaced = 278-294-318-350-370-388 stitches. When A.2 is finished, work A.3 around the yoke. On the round marked with an arrow in the diagram increase as follows: Arrow-3: Increase 32-36-42-50-50-52 stitches evenly spaced = 310-330-360-400-420-440 stitches. When A.3 is finished, work A.4 around the yoke. When A.4 is finished in your size, work stocking stitch; be aware that in some sizes A.4 is not finished when you start dividing for the body and sleeves. DIVIDE FOR BODY AND SLEEVES: When the yoke measures 17-18-20-21-23-25 cm from the marker, divide for the body and sleeves; if A.4 is not finished in your size it will be finished on the body and sleeves. Work 47-51-55-61-65-69 stitches (half back piece), place the next 60-64-70-78-80-82 stitches on a thread for the sleeve, cast on 10-10-12-12-14-16 stitches (in side under sleeve), work 95-101-110-122-130-138 stitches (front piece), place the next 60-64-70-78-80-82 stitches on a thread for the sleeve, cast on 10-10-12-12-14-16 stitches (in side under sleeve), work the last 48-50-55-61-65-69 stitches (half back piece). The body and sleeves are finished separately. The piece is now measured from here. BODY: = 210-222-244-268-288-308 stitches. Finish A.4 if necessary in your size (the pattern will not fit under the sleeves – work the remaining stitches in stocking stitch; make sure the pattern continues correctly from the yoke). When A.4 is finished continue with stocking stitch. When you have worked 6-6½-7-7-7½-7½ cm stocking stitch after A.4, work A.3 around the body. When A.3 is finished, continue with stocking stitch for 6-6½-7-7-7½-7½ cm. Then work A.3 around the body again. When A.3 is finished, continue with stocking stitch. When the body measures 25-26-26-27-27-27 cm from the division, knit 1 round and increase 20-22-22-26-28-30 stitches evenly spaced = 230-244-266-294-316-338 stitches. Change to circular needle size 3 mm. Work rib (knit 1, purl 1) for 4 cm. Cast off a little loosely. The jumper measures approx. 52-54-56-58-60-62 cm from the shoulder. SLEEVES: Place the 60-64-70-78-80-82 stitches from the thread on the one side of the piece on short circular needle/double pointed needles size 4 mm and knit up 1 stitch in each of the new stitches cast on under the sleeve = 70-74-82-90-94-98 stitches. Insert a marker in the middle of the new stitches under the sleeve. Start at the marker thread. Finish A.4 if necessary in your size (the pattern will not fit under the sleeves – work the remaining stitches in stocking stitch; make sure the pattern continues correctly from the yoke). When A.4 is finished continue with stocking stitch. You will now start to decrease and work pattern. Read DECREASE and PATTERN before continuing! DECREASE: When the sleeve measures 4-4-4-4-3-3 cm from the division, decrease 2 stitches under the sleeve – read DECREASE TIP. Decrease like this every 8-8-4-3-2½-2½ cm a total of 5-5-8-11-12-13 times = 60-64-66-68-70-72 stitches. PATTERN: After working 7-8-7-6-5-5 cm stocking stitch, continue as follows: * Work A.3 around the sleeve, then work 7 cm stocking stitch *, work from *-* one more time, then work A.3 one more time. When A.3 is finished, continue with stocking stitch. When the sleeve measures 39-39-37-37-35-33 cm, knit 1 round and increase 12-12-12-12-14-14 stitches evenly spaced = 72-76-78-80-84-86 stitches. Change to double pointed needles size 3 mm. Work rib (knit 1, purl 1) for 8 cm. Cast off a little loosely. The sleeve measures approx. 47-47-45-45-43-41 cm. Work the other sleeve in the same way. |
||||||||||||||||||||||
Diagram explanations |
||||||||||||||||||||||
|
||||||||||||||||||||||
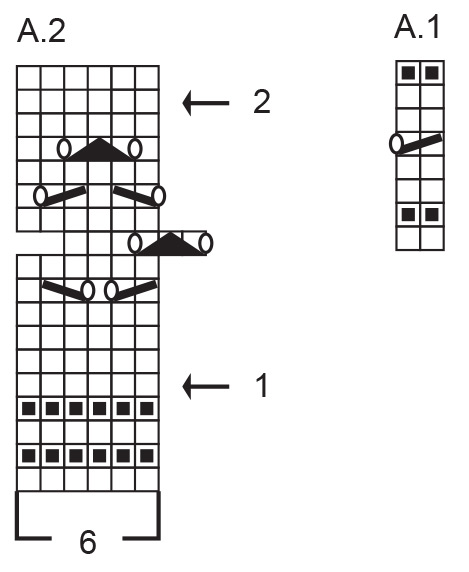 |
||||||||||||||||||||||
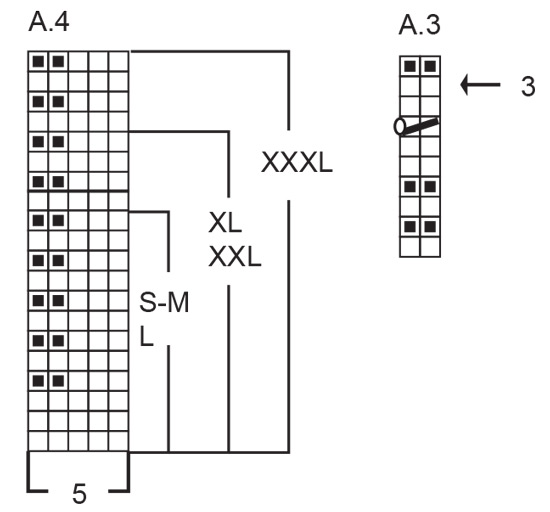 |
||||||||||||||||||||||
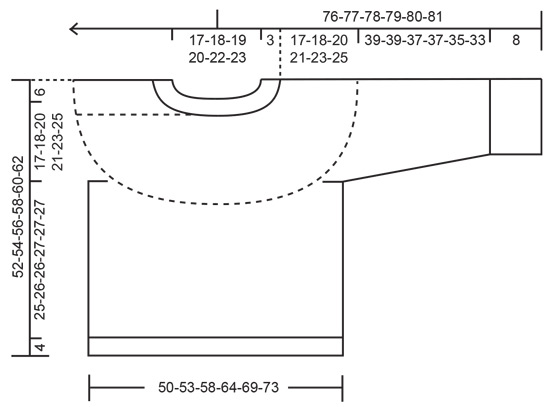 |
||||||||||||||||||||||
Have you finished this pattern?Tag your pictures with #dropspattern #sandpipersweater or submit them to the #dropsfan gallery. Do you need help with this pattern?You'll find 18 tutorial videos, a Comments/Questions area and more by visiting the pattern on garnstudio.com. © 1982-2026 DROPS Design A/S. We reserve all rights. This document, including all its sub-sections, has copyrights. Read more about what you can do with our patterns at the bottom of each pattern on our site. |
||||||||||||||||||||||






With over 40 years in knitting and crochet design, DROPS Design offers one of the most extensive collections of free patterns on the internet - translated to 17 languages. As of today we count 333 catalogues and 12525 patterns translated into English (UK/cm). 12525
We work hard to bring you the best knitting and crochet have to offer, inspiration and advice as well as great quality yarns at incredible prices! Would you like to use our patterns for other than personal use? You can read what you are allowed to do in the Copyright text at the bottom of all our patterns. Happy crafting!
Post a comment to pattern DROPS 239-4
We would love to hear what you have to say about this pattern!
If you want to leave a question, please make sure you select the correct category in the form below, to speed up the answering process. Required fields are marked *.