
Popular categories
Looking for a yarn?


Comments / Questions (31)
![]() Inge Knudsen wrote:
Inge Knudsen wrote:
Hvordan kan jeg tilpasse Drops 237-16 til en ekstra small?
09.01.2023 - 13:39DROPS Design answered:
Hej Inge, du kan vælge en anden Alaska opskrift og bruge antal masker i den størrelse som passer dig :)
10.01.2023 - 11:37
![]() Beatrice wrote:
Beatrice wrote:
Buongiorno che taglia è indossata dalla modella? grazie
28.11.2022 - 16:09DROPS Design answered:
Buonasera Beatrice, le modelle indossano la taglia M. Buon lavoro!
28.11.2022 - 22:19
![]() Loredana wrote:
Loredana wrote:
Buongiorno, mi riferivo alla parte dove vengono uniti i due davanti (davanti dx, aumenti collo e davanti sx), subito dopo c'è scritto: misurare il lavoro da qui!
20.10.2022 - 06:21DROPS Design answered:
Buonasera Loredana, quando si uniscono le parti il lavoro viene misurato dalla cima della spalla. Buon lavoro!
26.10.2022 - 22:17
![]() Loredana wrote:
Loredana wrote:
Sono perplessa perché la spiegazione (del davanti) dice di misurare dopo unione dei due pezzi più aumenti scollo.....
19.10.2022 - 12:21DROPS Design answered:
Buonasera Loredana, a quale parte del modello sta facendo riferimento? Buon lavoro!
19.10.2022 - 21:49
![]() Loredana wrote:
Loredana wrote:
Salve, la lunghezza "effettiva" degli scalfi è, nel caso della taglia L, di 21 cm?
19.10.2022 - 11:44DROPS Design answered:
Buonasera Loredana, la misura per la taglia L è 21 cm. Buon lavoro!
19.10.2022 - 21:47
![]() Loredana Daviddi wrote:
Loredana Daviddi wrote:
Buongiorno, una volta fatti aumenti per scollo davanti bisogna proseguire a maglia rasata. Il pattern dice che bisogna misurare tot cm da questo punto. Sto facendo taglia L, per il dietro ci sono 17 cm totali lungo lo scalfo, per davanti 25 cm. Vi chiedo, la misura "reale" dello scalfo è di 21cm come scritto nel disegno? Grazie
19.10.2022 - 11:30
![]() Magdalena wrote:
Magdalena wrote:
Dzień dobry, Wiem ile motków w sumie potrzebuję. Jak mogę dowiedzieć się po ile motków w każdym z potrzebnych kolorów powinnam zamówić? Pozdrawiam :)
01.10.2022 - 17:14DROPS Design answered:
Witaj Magdo, motek Alaski waży 50 g. Dla rozmiaru S potrzebowałabyś 13 motków (650/50=13) w kolorze toffee i 3 (150/50=3) w kolorze czarnym. Pozdrawiamy!
02.10.2022 - 13:47
![]() Undine wrote:
Undine wrote:
Warum können die Ärmel nicht direkt angestrickt werden? Dieses nachträgliche Einnähen ist doch so unschön und umständlich ;-(
06.09.2022 - 15:34DROPS Design answered:
Liebe Undine, so wird der Pullover geschrieben und gestrickt, aber wahrscheinlich können Sie auch die Maschen für die Ärmel auffassen und die Ärmel von oben nach unten stricken, dafür sollen Sie einfach die Anleitung anpassen. Viel Spaß beim stricken!
06.09.2022 - 16:27
![]() Llisette wrote:
Llisette wrote:
Fashion forward. Easy going. Modern. Love it.
06.09.2022 - 05:18
![]() Loredana wrote:
Loredana wrote:
Per farla senza strisce quanto filato va considerato? Grazie
04.09.2022 - 20:38DROPS Design answered:
Buonasera Loredana, per un'assistenza così personalizzata può contattare il suo rivenditore DROPS di fiducia. Buon lavoro!
04.09.2022 - 22:04
|
||||
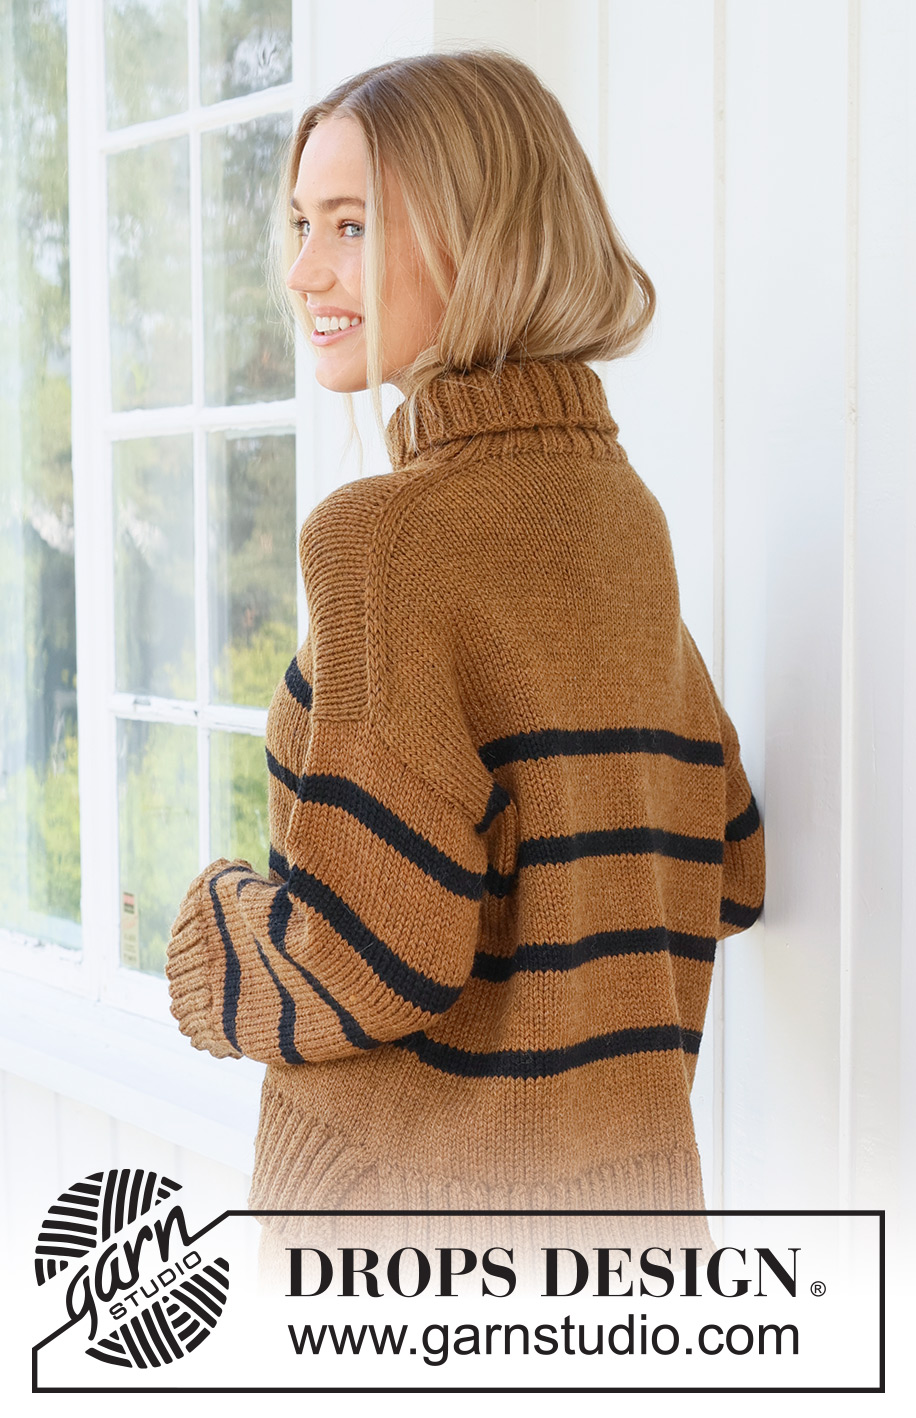
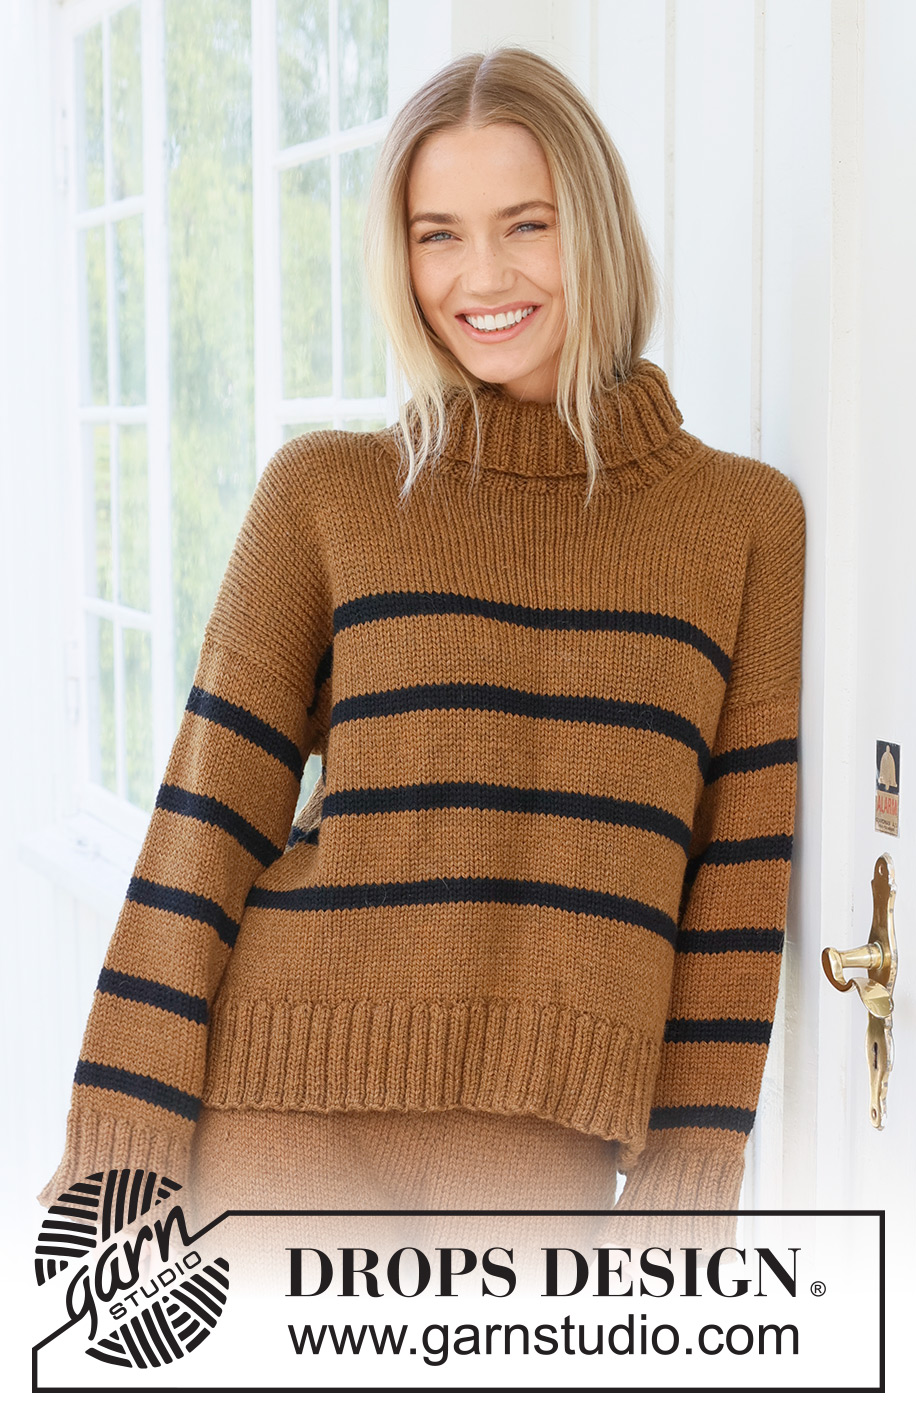
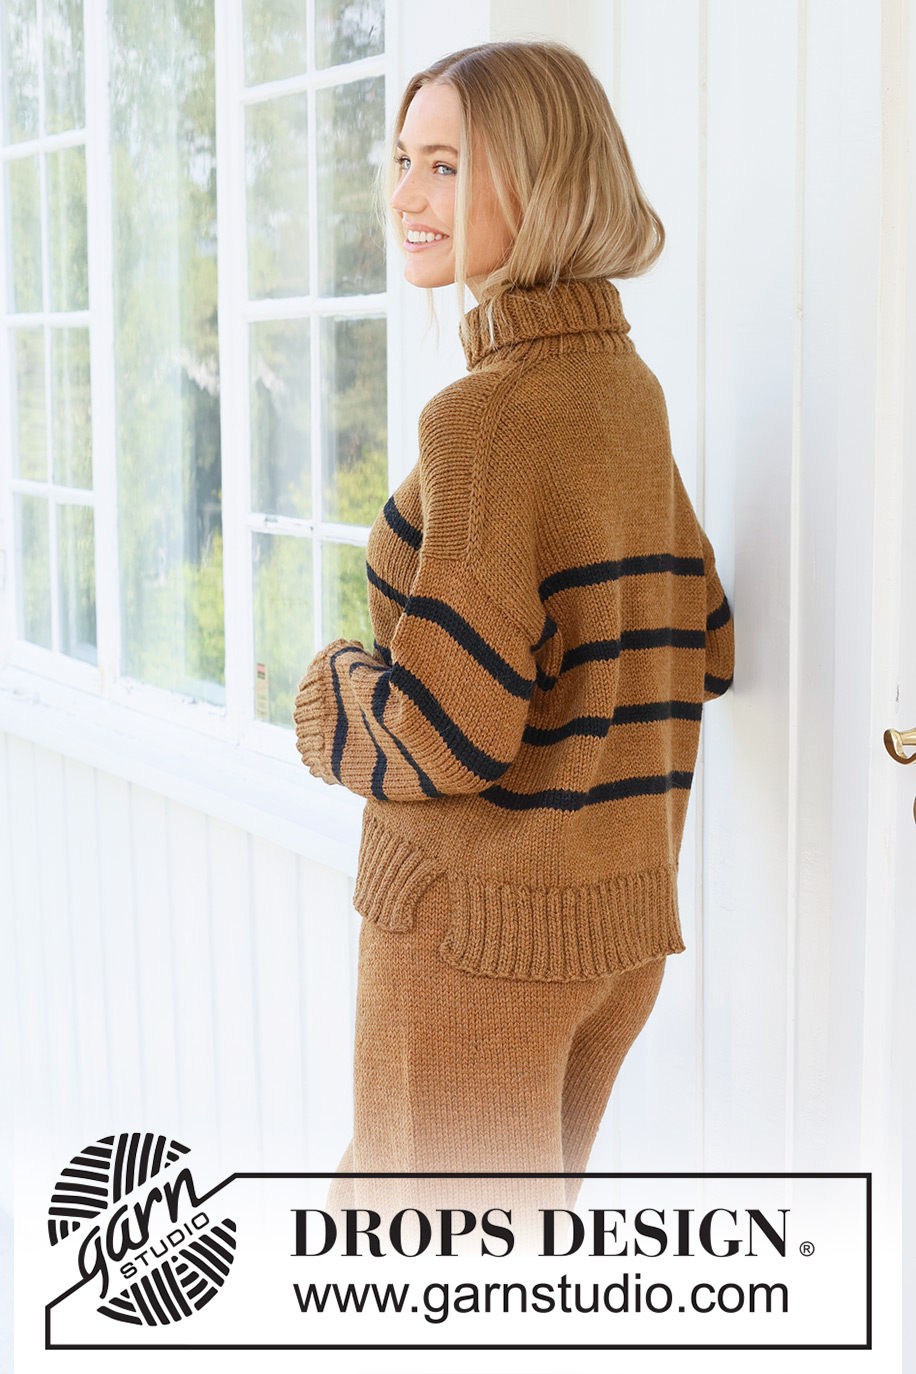
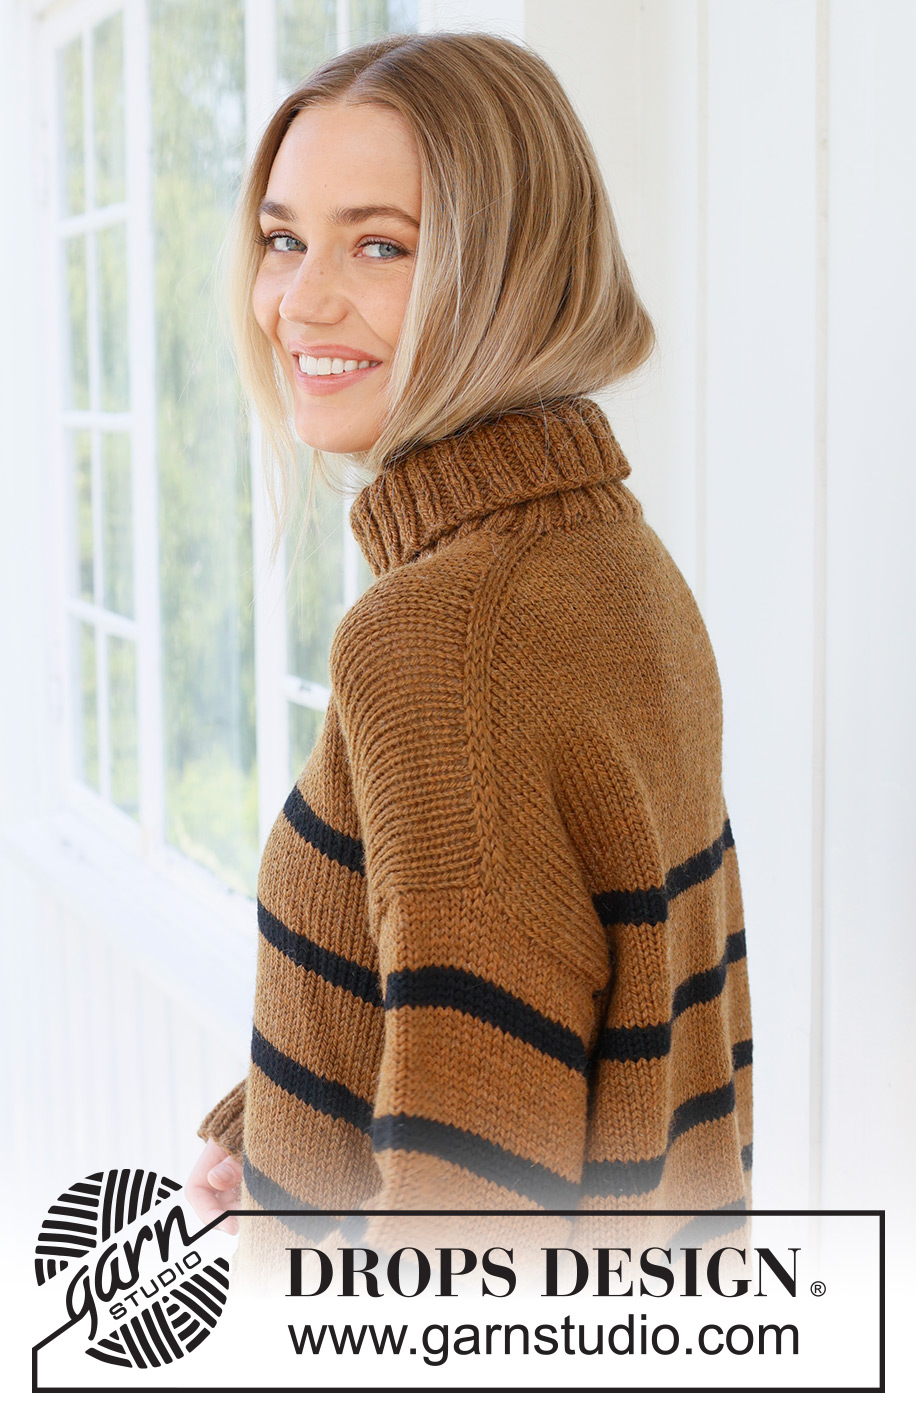
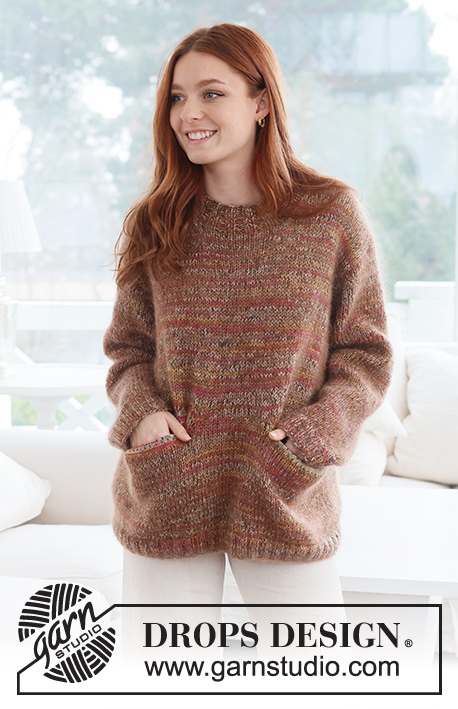
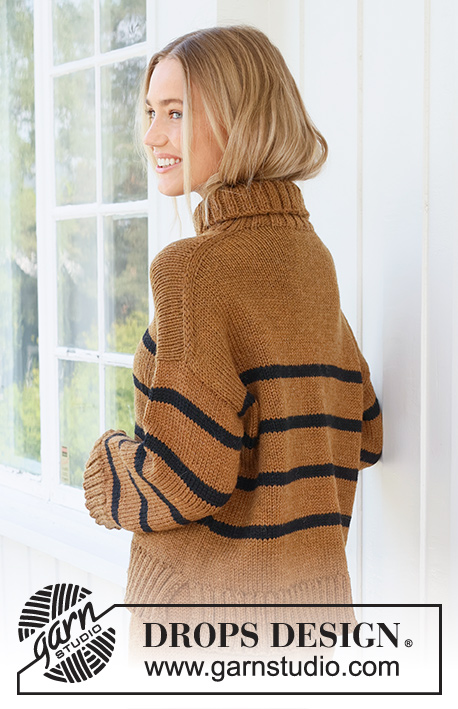
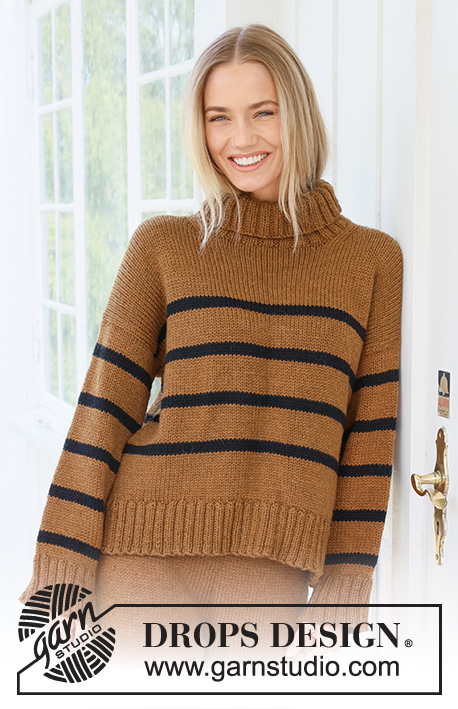
Fudge Stripes#fudgestripessweater |
||||
 |
 |
|||
Knitted jumper in DROPS Alaska. The piece is worked top down with stocking stitch, European shoulders / diagonal shoulders, stripes and high neck. Sizes S - XXXL.
DROPS 237-16 |
||||
|
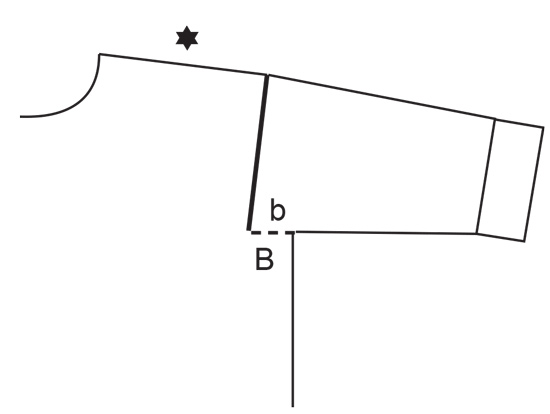
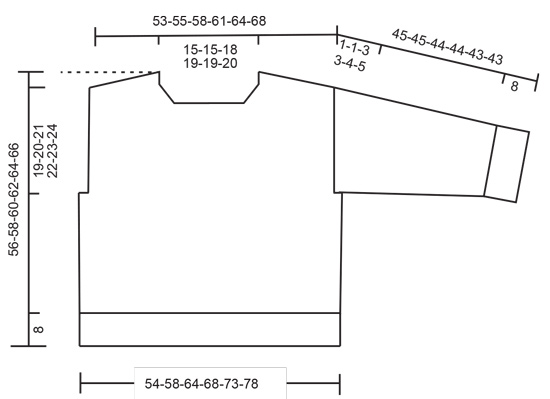
------------------------------------------------------- EXPLANATIONS FOR THE PATTERN: ------------------------------------------------------- RIDGE/GARTER STITCH (worked back and forth): Knit all rows. 1 ridge = knit 2 rows. INCREASE TIP FROM THE RIGHT SIDE: Increase towards the left AFTER MARKER: Use left needle to pick up yarn between 2 stitches from row below, pick up yarn from the front and knit in the stitch loop that is on the back of the needle. Increase towards the right BEFORE MARKER: Use left needle to pick up yarn between 2 stitches from row below, pick up yarn from the back and knit in the stitch loop that is on the front side of the needle. INCREASE TIP FROM THE WRONG SIDE: Increase towards the right AFTER MARKER: Use left needle to pick up yarn between 2 stitches from row below, pick up yarn from the back and purl in the stitch loop that is on the front side of the needle. Increase towards the left BEFORE MARKER: Use left needle to pick up yarn between 2 stitches from row below, pick up yarn from the front and purl in the stitch loop that is on the back side of the needle. STRIPES BODY: Work 4 rows/rounds with colour black, 12 rows/rounds with colour toffee. Repeat until you have worked 4 black stripes. STRIPES SLEEVES: Work 4 rows/rounds with colour black, 12 rows/rounds with colour toffee. Repeat until you have worked 5-5-5-5-4-4 black stripes. DECREASE TIP (for sleeves): Decrease 1 stitch on either side of the marker as follows: Work until there are 3 stitches left before the marker, knit 2 together, knit 2 (marker sits between these 2 stitches), slip 1 stitch as if to knit, knit 1 and pass the slipped stitch over the knitted stitch. ------------------------------------------------------- START THE PIECE HERE: ------------------------------------------------------- JUMPER – SHORT OVERVIEW OF THE PIECE: The back piece is worked back and forth with circular needle, top down until the armholes are finished. Stitches are knitted up on each shoulder and increased for the neck, then the front piece is worked back and forth with circular needle and top down until the armholes are finished. The front and back pieces are joined and the body continued in the round. Stitches are knitted up around the armholes, the sleeve-cap is worked back and forth then the rest of the sleeve is worked in the round with short circular needle/double pointed needles. The neck is worked in the round to finish. BACK PIECE: Cast on 28-28-32-34-34-36 stitches with circular needle size 5.5 mm and DROPS Alaska. Purl 1 row from the wrong side. Insert 1 marker inside 3 stitches on each side. Markers should sit inside these 3 stitches on every row onwards. Work stocking stitch back and forth. AT THE SAME TIME increase AFTER the marker at the beginning of the first row and BEFORE the marker at the end of the row – read INCREASE TIP FROM THE RIGHT SIDE. On the next row (wrong side) increase in the same way – read INCREASE TIP FROM THE WRONG SIDE. Increase from both the right and wrong side a total of 28-30-30-32-34-36 times. After the last increase there are 84-88-92-98-102-108 stitches. The piece is measured from here! Continue with stocking stitch until the piece measures 10-11-12-13-14-14 cm (measured outermost along the armhole). Now work STRIPES BODY – read description above. Continue working until the piece measures 15-16-17-18-19-19 cm. Cut the yarn, put stitches on a thread or an extra needle and work the front piece. FRONT PIECE: Start on the left shoulder (when the garment is worn). Knit up 28-30-30-32-34-36 stitches inside the outermost stitch along the shoulder on back piece (i.e. knit up 1 stitch in each row from the top of the back piece). Work stocking stitch back and forth for 4 cm. Increase stitches for the neck at the beginning of each row from the right side, increase after the 3 first stitches, remember INCREASE FROM THE RIGHT SIDE. Increase 1 stitch a total of 4 times = 32-34-34-36-38-40 stitches. Purl 1 row from the wrong side. Cut the yarn and put stitches on a thread or an extra needle and work the right shoulder. Knit up 28-30-30-32-34-36 stitches inside the outermost stitch along the right back shoulder. Work stocking stitch back and forth for 4 cm. Increase stitches for the neck, at the end of each row from the right side, increase before the last 3 stitches, remember INCREASE TIP FROM THE RIGHT SIDE. Increase 1 stitch a total of 4 times = 32-34-34-36-38-40 stitches. Purl 1 row from the wrong side after the last increase. Work the next row from the right side as follows: Knit the 32-34-34-36-38-40 stitches from the right front piece, cast on 20-20-24-26-26-28 stitches for the neck at the end of the row, knit the 32-34-34-36-38-40 stitches from the left front piece = 84-88-92-98-102-108 stitches. The piece is measured from here! Continue with stocking stitch back and forth until the piece measures 18-19-20-21-22-24 cm (measured outermost along the armhole). Work STRIPES BODY – read description above. Continue until the piece measures 23-24-25-26-27-29 cm. Now join the front and back pieces for the body: BODY: Work stocking stitch over the 84-88-92-98-102-108 stitches from the front piece, cast on 2-4-10-10-14-16 new stitches at the end of the row (= side), work the 84-88-92-98-102-108 stitches from the back piece, cast on 2-4-10-10-14-16 stitches at the end of the row = 172-184-204-216-232-248 stitches. Work stocking stitch and stripes in the round until the piece measures 48-50-52-54-56-58 cm measured from the top of the shoulder on the front piece. Now divide the front and back piece for the split in each side. Place the 86-92-102-108-116-124 stitches from the front piece on a thread or extra needle and work the back piece. BACK PIECE: Change to circular needle size 4.5 mm. Knit 1 row from the right side and increase 12-14-12-14-14-18 stitches evenly spaced = 98-106-114-122-130-142 stitches. Work as follows from the wrong side: 2 edge stitches in GARTER STITCH – read description above, * purl 2, knit 2 *, work from *-* until there are 4 stitches left, purl 2 and 2 edge stitches in garter stitch. Continue this rib for 8 cm. Cast off. FRONT PIECE: Place the stitches on circular needle size 4.5 mm and work in the same way as the back piece. LEFT SLEEVE: Using circular needle size 5.5 mm and DROPS Alaska, knit up from the right side 36-38-41-41-44-46 stitches from the bottom of the armhole and up the front piece, then 24-26-27-29-30-30 stitches from the shoulder, down the back piece to the bottom of the armhole = 60-64-68-70-74-76 stitches. Insert 1 marker in the middle of the row – the sleeve is measured from this marker. Work stocking stitch back and forth for 1-1-3-3-4-5 cm. Now join the sleeve using circular needle/double pointed needles size 5.5 mm. Insert 1 marker at the beginning of the round (mid-under sleeve). Allow the marker to follow your work onwards. Start at the marker and work stocking stitch in the round until the sleeve measures 3-3-5-5-6-7 cm, now decrease 2 stitches mid-under the sleeve – read DECREASE TIP. Decrease like this every 4-3½-3-3-2½-2½ cm a total of 8-9-10-10-11-11 times = 44-46-48-50-52-54 stitches. AT THE SAME TIME when the sleeve measures 4-4-6-6-7-8 cm, work STRIPES SLEEVES – read description above. Continue working until the sleeve measures 37-37-36-36-35-35 cm from the marker. There is 8 cm left. Try the jumper on and work to desired length. Knit 1 round and increase 8-6-8-6-8-6 stitches evenly spaced = 52-52-56-56-60-60 stitches. Change to double pointed needles size 4.5 mm. Work rib (knit 2, purl 2) for 8 cm. Cast off a little loosely. The sleeve measures approx. 45-45-44-44-43-43 cm from the marker. RIGHT SLEEVE: Work the same way as left sleeve but knit up 24-26-27-29-30-30 stitches from the bottom of the armhole up the back piece and 36-38-41-41-44-46 stitches from the shoulder down the front piece to the bottom of the armhole. Sew the bottom of the armhole together – see sketch. NECK: Start on one shoulder and knit up from the right side, inside the 1 edge stitch, 88 to 108 stitches using short circular needle size 4.5 mm. The stitch-number should be divisible by 4. Work rib in the round (knit 2, purl 2) for 14 cm. Cast off a little loosely. The neck can be folded double to the inside. |
||||
Diagram explanations |
||||
|
||||
 |
||||
 |
||||
Have you finished this pattern?Tag your pictures with #dropspattern #fudgestripessweater or submit them to the #dropsfan gallery. Do you need help with this pattern?You'll find 35 tutorial videos, a Comments/Questions area and more by visiting the pattern on garnstudio.com. © 1982-2026 DROPS Design A/S. We reserve all rights. This document, including all its sub-sections, has copyrights. Read more about what you can do with our patterns at the bottom of each pattern on our site. |
||||


With over 40 years in knitting and crochet design, DROPS Design offers one of the most extensive collections of free patterns on the internet - translated to 17 languages. As of today we count 324 catalogues and 12290 patterns translated into English (UK/cm). 12290
We work hard to bring you the best knitting and crochet have to offer, inspiration and advice as well as great quality yarns at incredible prices! Would you like to use our patterns for other than personal use? You can read what you are allowed to do in the Copyright text at the bottom of all our patterns. Happy crafting!
Post a comment to pattern DROPS 237-16
We would love to hear what you have to say about this pattern!
If you want to leave a question, please make sure you select the correct category in the form below, to speed up the answering process. Required fields are marked *.