
Popular categories
Looking for a yarn?


Comments / Questions (60)
![]() Mevr Cevaal wrote:
Mevr Cevaal wrote:
Waar ik tegen aan loop. is na het streepje van de tulp dus 1 av 1re 1av en dan komen er streepjes zodat het naar mekaar toe loopt ik heb er maar 1wat doe ik fout moet er tussen a1 en a2 dan 3steken gebreid worden.Dus na de drie rijen met de gaatjes
25.03.2026 - 18:43DROPS Design answered:
Dag Mevr Cevaal,
Helaas begrijp ik je vraag niet goed. Waar heb je er maar 1 van? De symbolen met de horizontale streepjes brei je averecht op de goede kant en recht op de verkeerde kant. De telpatronen brei je aansluitend op elkaar zoals aangegeven in de beschrijving, dus zonder steken ertussen.
05.04.2026 - 10:44
![]() Mevr Cevaal wrote:
Mevr Cevaal wrote:
Hallo ik kom niet uit het diagram zou iemand me kunnen helpen.
25.03.2026 - 13:42DROPS Design answered:
Dag Merv,
Misschien kun je aangeven waar je precies tegenaan loopt zodat we je beter kunnen helpen. Heb je de FAQ gelezen (link bovenaan het patroon) over het lezen van telpatronen.
25.03.2026 - 15:58
![]() Ins Cevaal wrote:
Ins Cevaal wrote:
Zou het ook mogelijk zijn om een geschreven patroon in plaats van een dia gram bvd insa
23.03.2026 - 12:40DROPS Design answered:
Dag Ins,
We hebben helaas alleen een telpatroon. Lees eventueel de FAQ waarin antwoorden staan over hoe je telpatronen leest.
25.03.2026 - 16:16
![]() Duplessy wrote:
Duplessy wrote:
Merci de votre réponse
18.09.2025 - 20:47
![]() Duplessy wrote:
Duplessy wrote:
Bonjour je vais commencé le diagramme je voulais savoir si il fallait commencé par un rang enver ou endroit où sa n\'a pas d\'importance merci
17.09.2025 - 17:59DROPS Design answered:
Bonjour Mme Duplessis, tricotez le 1er rang des diagrammes sur l'endroit pour que le point ajouré soit sur l'endroit. Bon tricot!
18.09.2025 - 18:13
![]() Odile wrote:
Odile wrote:
Modèle très bien expliqué. Je l'ai réalisé avec le fil du modèle pour Ne pas avoir de surprise. Il est parfaitement réussi, mais les côtes du bas su gilet, tout comme la bordure, se replient sur elle même. Que faire ? Je voudrais en faire un second en procédant différemment sur ces 2 détails désagréables, que me conseillez-vous ? Merci pour votre réponse
30.08.2025 - 17:50DROPS Design answered:
Bonjour Odile, vous pouvez humidifier le gilet (avec par ex un spray pour plante et de l'eau) et laisser le gilet sécher bien à plat, la bordure côtes ne devrait plus rebiquer. Bon tricot!
01.09.2025 - 16:27
![]() Duplessy wrote:
Duplessy wrote:
Bonjour je suis bloquée car il me demande de faire la boutonnières du devant droit mais comment je fait pour repérer le devant droit pour faire la boutonnières du bon côté Merci bonne journée
22.07.2025 - 09:57DROPS Design answered:
Bonjour Mme Duplessy, le devant droit se trouve au debut de rang (vu sur l'endroit). Pour faire la boutonnière procedez comme dans la section BOUTONNIÈRES, c'est-a-dire 'tricoter ensemble à l'endroit la 3ème et la 4ème maille à partir du bord et faire 1 jeté'. Bon tricot!
22.07.2025 - 10:56
![]() Kristin wrote:
Kristin wrote:
Er det riktig når jeg begynner på diagram A2 at selve " mønsteret" begynner på rad 7
13.07.2025 - 17:48DROPS Design answered:
Hei Kristin. Ja, det stemmer. Når du har satt ermene og bol sammen strikkes det noen cm der det felles jevnt fordelt (ulike cm og antall ganger i de ulike størrelsene). Når arbeidet måler 3-5-7-9-11-13 cm starter man på diagrammene, der de 7 første pinnene er i glattstrikk. mvh DROPS Design
01.08.2025 - 10:43
![]() Mary-Ann Edsbäcker wrote:
Mary-Ann Edsbäcker wrote:
På bak- och framstycket ska man ta in för armhålet vid 26 cm (samma för alla storlekar). Blir det inte en väl kort kofta ? Jämför med andra koftor där man tar in för ärmhålen vid ca 35 cm. Tänker jag fel?
24.05.2025 - 23:07DROPS Design answered:
Hei Mary-Ann. På denne modellen er det 23+3 cm nedenifra og opp til ermhull. Men du kan fint strikke den lengre om du ønsker det (og har nok garn). mvh DROPS Design
26.05.2025 - 13:21
![]() Jas wrote:
Jas wrote:
Ignore my comment as I misunderstood!
20.05.2025 - 22:02
|
||||||||||||||||||||||||||||
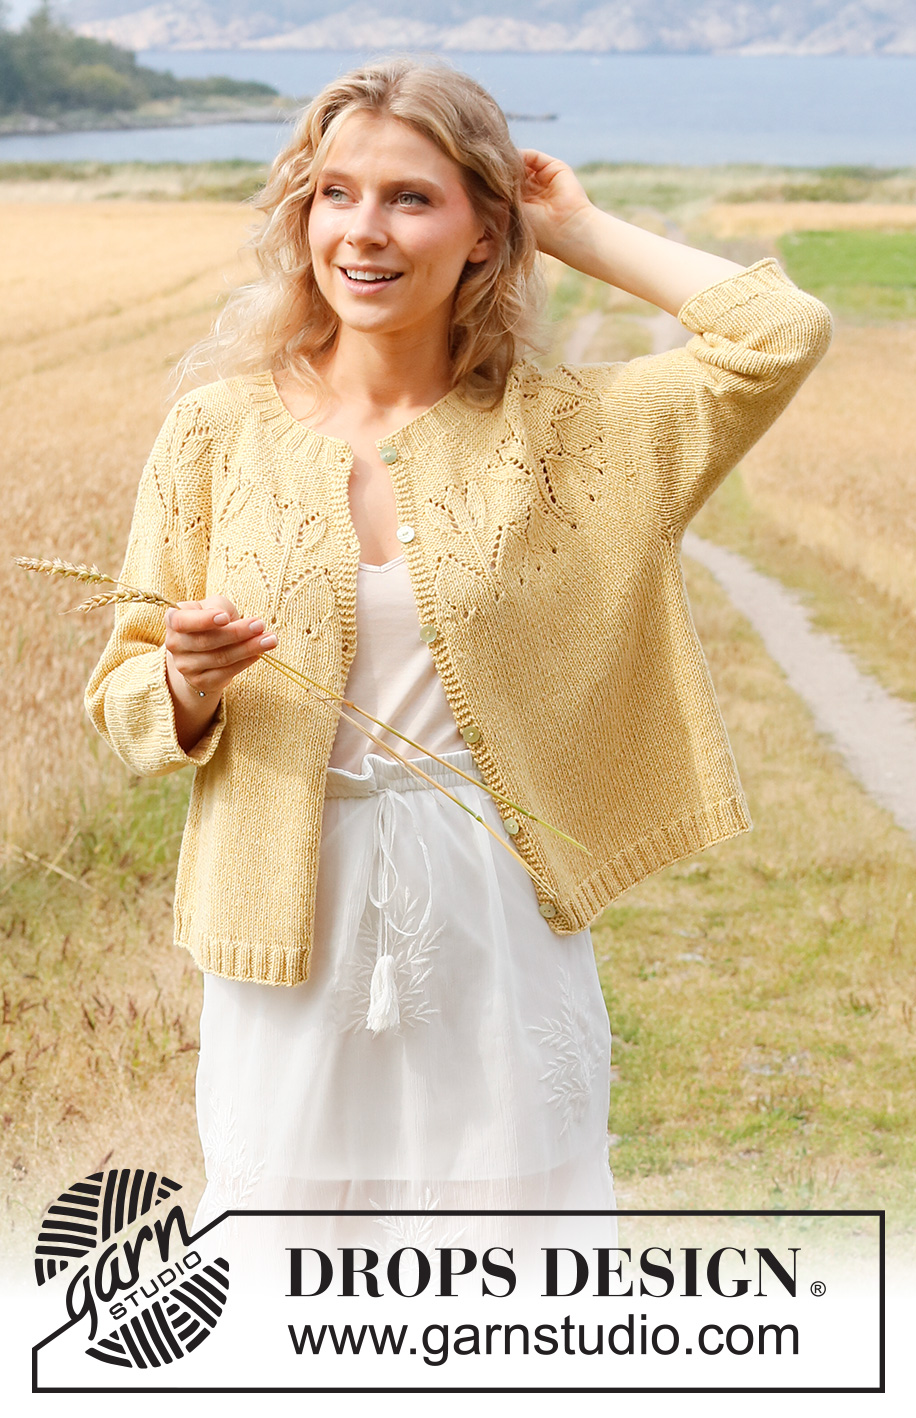
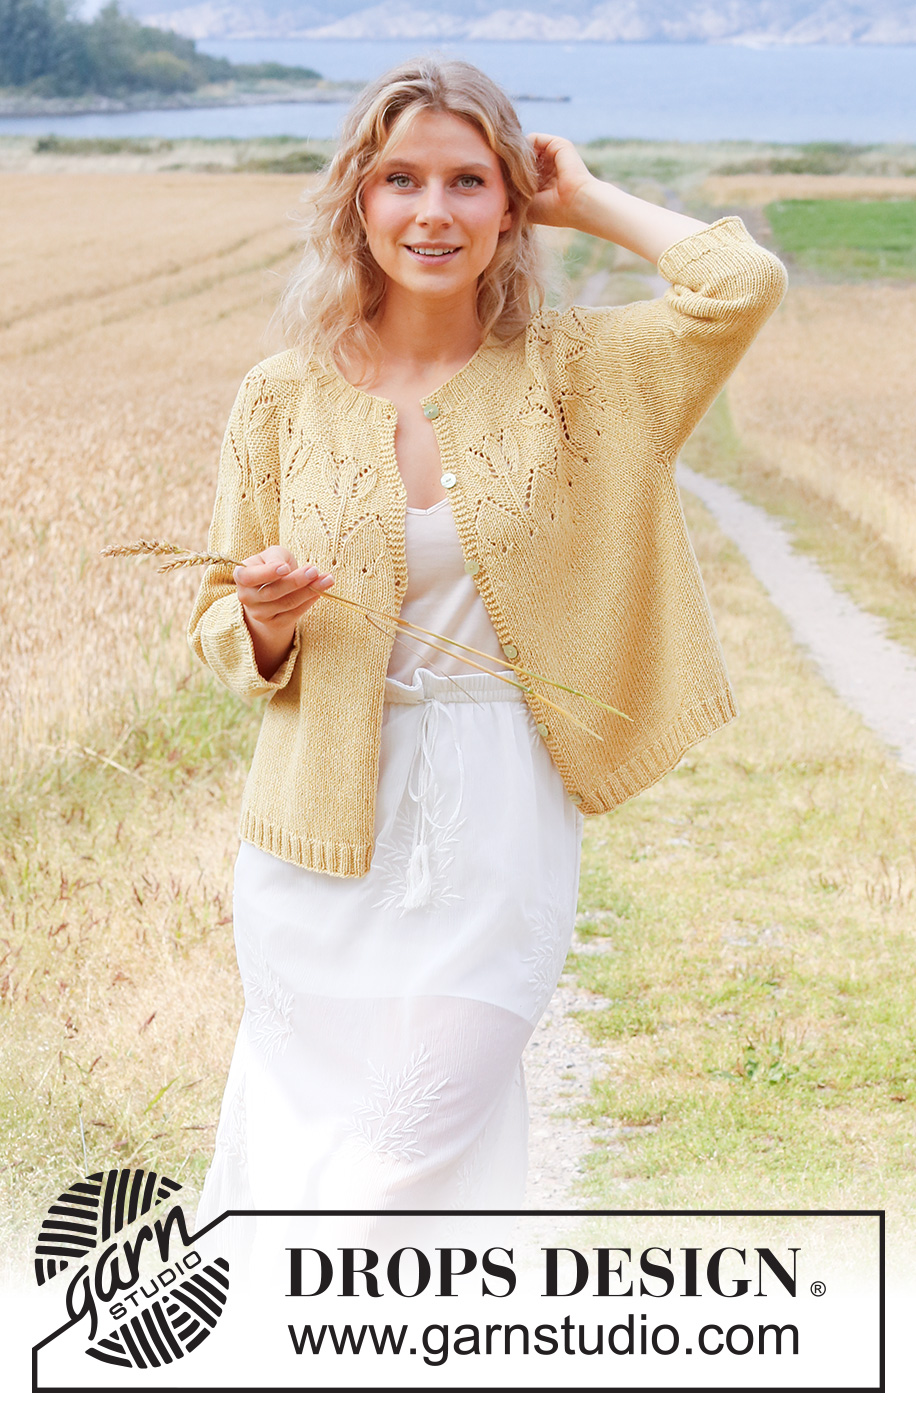
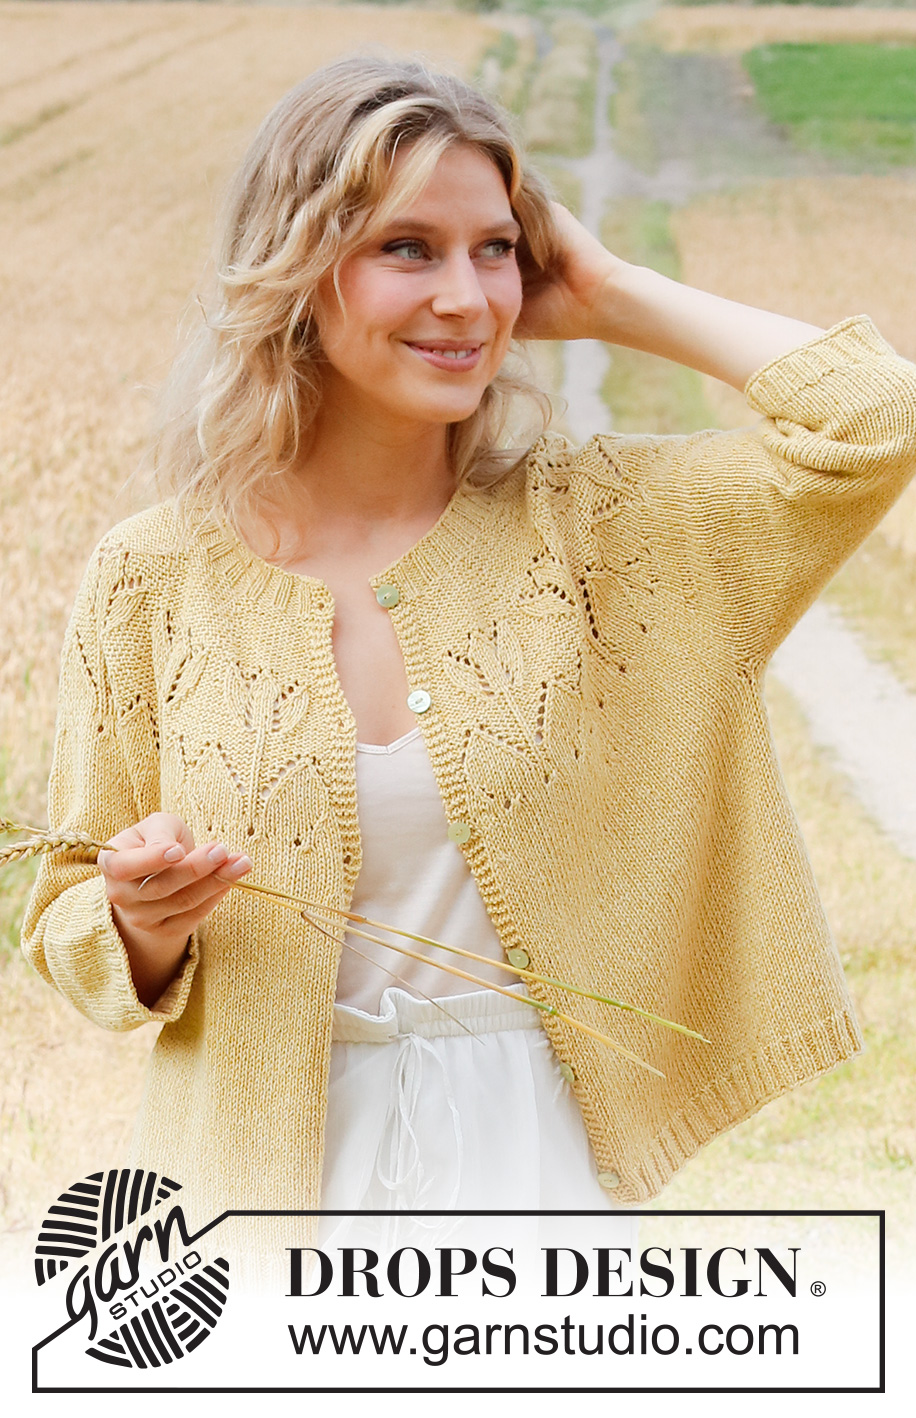
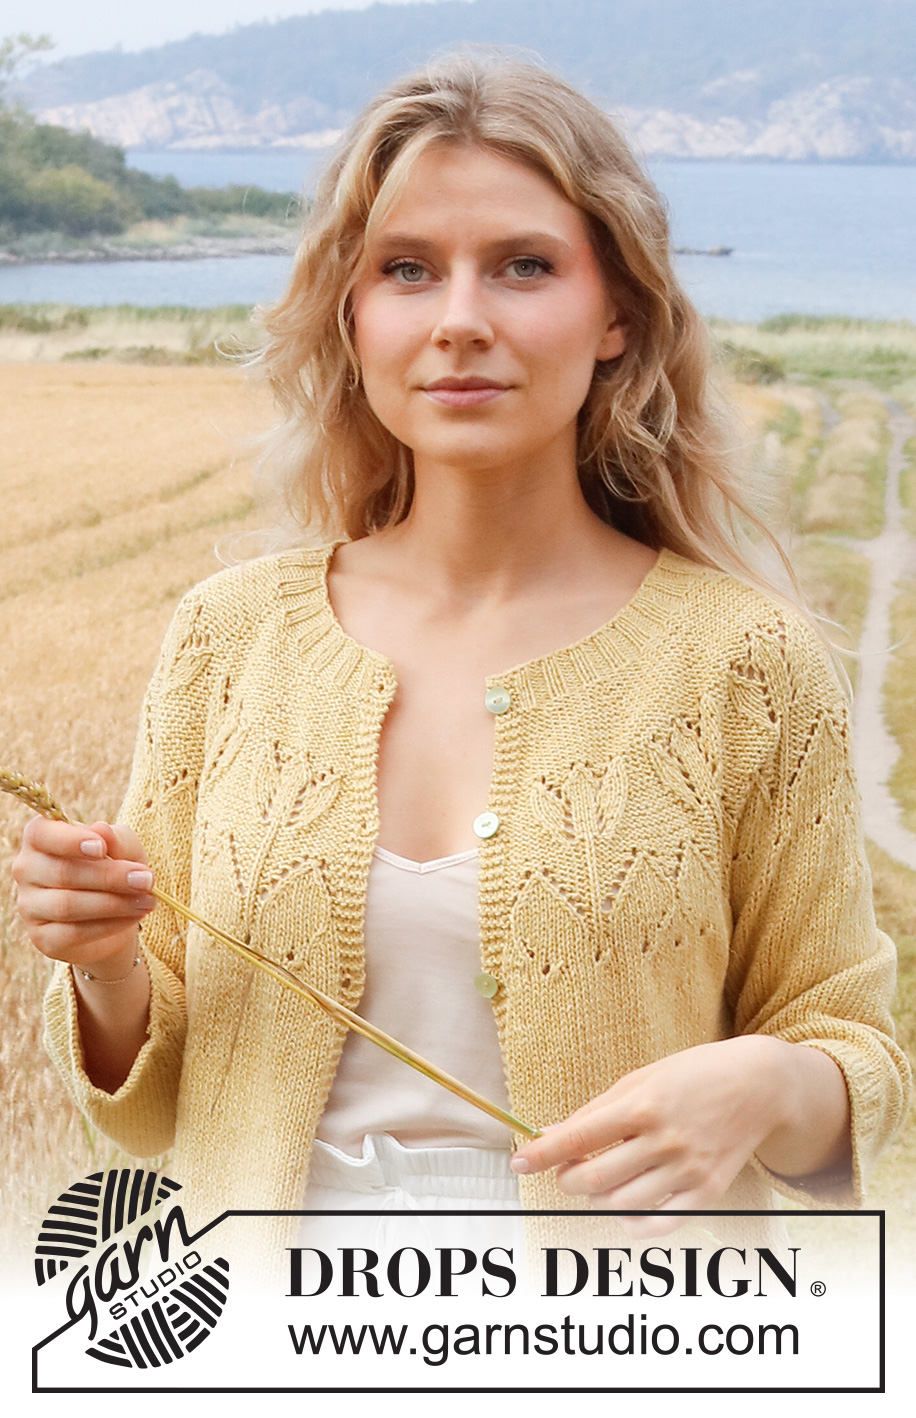
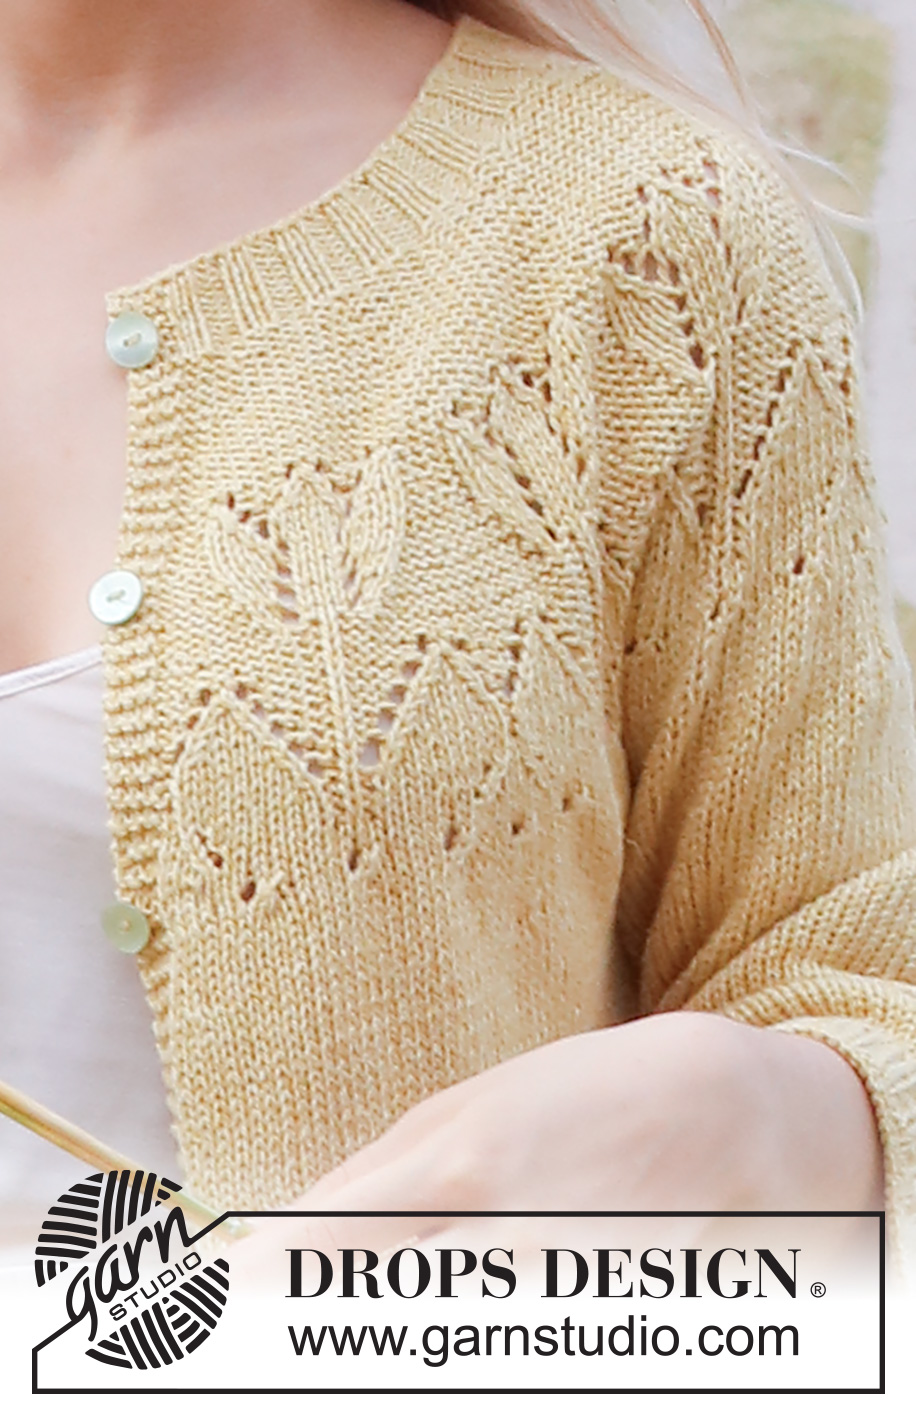
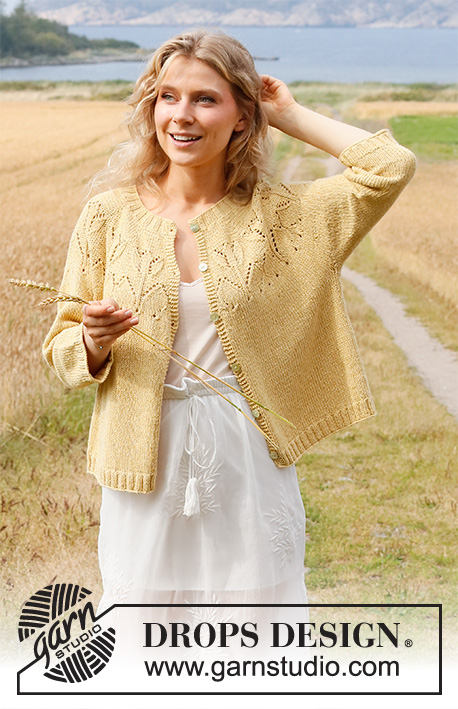
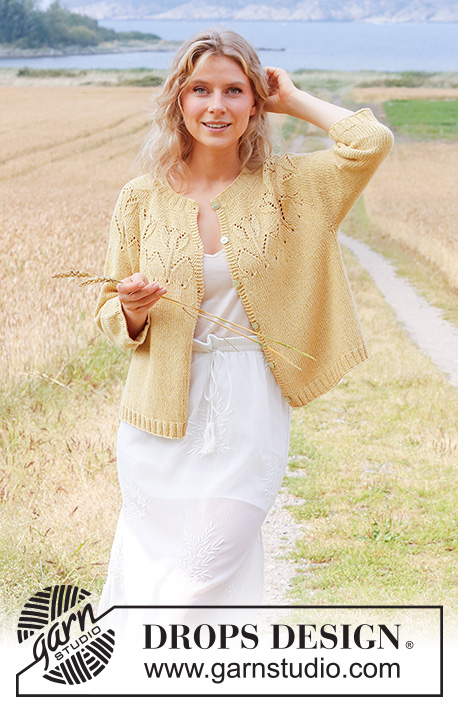
Yellow Tulip Jacket#yellowtulipjacket |
||||||||||||||||||||||||||||
 |
 |
|||||||||||||||||||||||||||
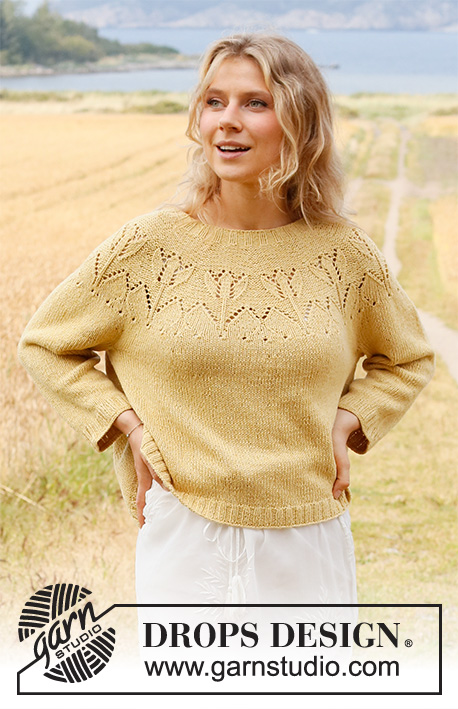
Knitted jacket in DROPS Belle or DROPS Merino Extra Fine. The piece is worked with round yoke, lace pattern and ¾-length sleeves. Sizes S - XXXL.
DROPS 222-3 |
||||||||||||||||||||||||||||
|
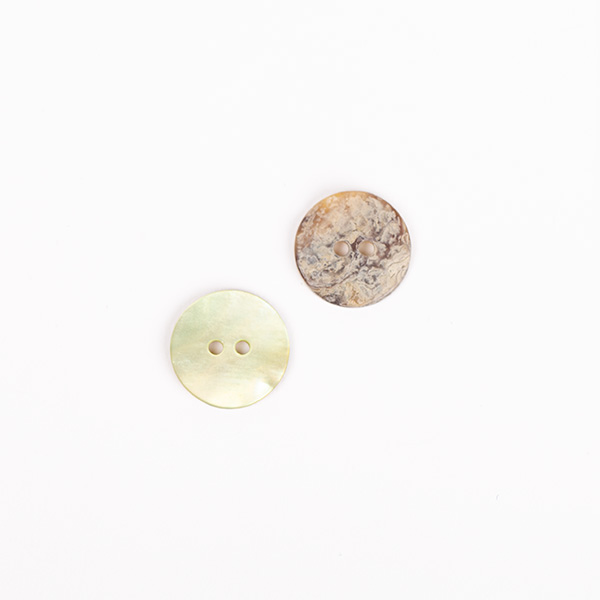
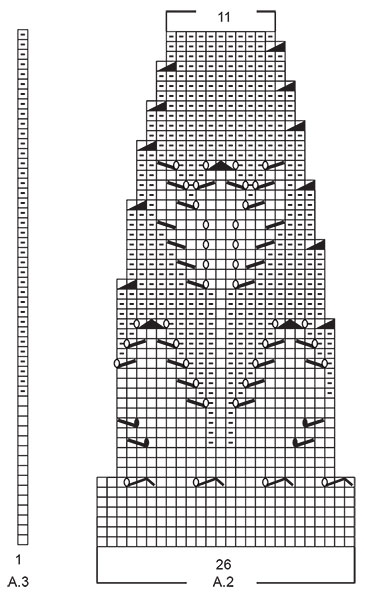
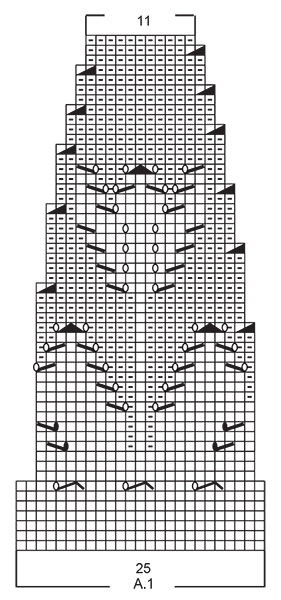
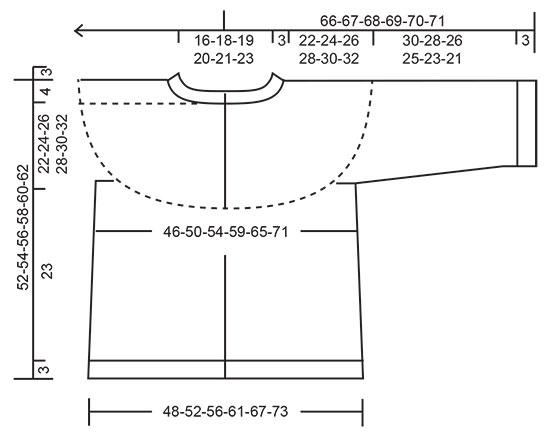
------------------------------------------------------- EXPLANATIONS FOR THE PATTERN: ------------------------------------------------------- RIDGE/GARTER STITCH (worked back and forth): Knit all rows. 1 ridge in height = Knit 2 rows. PATTERN: See diagrams A.1 to A.3. The diagrams show all rows in the pattern from the right side. DECREASE/INCREASE TIP (evenly spaced): To work out how to decrease/increase evenly, count the total number of stitches on needle (e.g. 258 stitches), minus the bands (e.g. 8 stitches) and divide by the number of decreases/increases to be made (e.g. 48) = 5.2. In this example, decrease by knitting together approx. each 4th and 5th stitch. When increasing, make 1 yarn over after approx. each 5th stitch. On the next row work the yarn overs twisted to avoid holes. DECREASE TIP-1 (for sides of body): All decreases are worked from the right side! Decrease 1 stitch on each side of the marker thread as follows: Work until there are 3 stitches left before the marker thread, knit 2 together, knit 2 (marker thread sits between these 2 stitches) slip 1 stitch as if to knit, knit 1 and pass the slipped stitch over the knitted stitch (= 2 stitches decreased and a total of 4 stitches decreased on the row). DECREASE TIP-2 (for yoke): Decrease evenly spaced in the same way as described under DECREASE/INCREASE TIP, but now decrease by purling 2 together. INCREASE TIP (for sleeves): Work until there are 2 stitches left before the marker thread, 1 yarn over, knit 4 (marker thread sits between these 4 stitches), 1 yarn over. On the next round knit the yarn overs twisted to avoid holes. Then work the new stitches in stocking stitch. BUTTONHOLES: Work buttonholes on the right band. 1 BUTTONHOLE = knit together the third and fourth stitch from the edge and make 1 yarn over. On the next row knit the yarn over = hole. Work buttonholes when the piece measures: S: 4, 12, 21, 29, 38 and 46 cm M: 5, 14, 22, 31, 39 and 48 cm L: 5, 14, 23, 32, 41 and 50 cm XL: 2, 12, 22, 32, 42 and 52 cm XXL: 3, 12, 20, 29, 37, 46 and 54 cm XXXL: 5, 14, 22, 31, 39, 48 and 56 cm ------------------------------------------------------- START THE PIECE HERE: ------------------------------------------------------- JACKET – SHORT OVERVIEW OF THE PIECE. The body is worked back and forth with circular needle, bottom up as far as the armholes. The sleeves are worked in the round with double pointed needles/short circular needle. The sleeves are placed on the same circular needle as the body and the yoke is worked back and forth to finish. BODY: Cast on 258-278-298-322-354-386 stitches with circular needle size 3 mm and Belle or Merino Extra Fine. Purl 1 row from the wrong side. Then work rib as follows: 4 band stitches in GARTER STITCH – read description above, * knit 2, purl 2 *, work from *-* until there are 6 stitches left, knit 2 and 4 band stitches in garter stitch. Continue this rib back and forth for 3 cm. Knit 1 row from the right side where you decrease 48-52-56-58-64-72 stitches evenly spaced – read DECREASE/INCREASE TIP = 210-226-242-264-290-314 stitches. Remember BUTTONHOLES on the right band – read description above. Purl 1 row back from the wrong side (the 4 band stitches on each side are knitted). Change to circular needle size 4 mm and work stocking stitch, with 4 band stitches in garter stitch on each side. REMEMBER THE KNITTING TENSION! When the piece measures 11 cm, insert 1 marker thread in each side, i.e. 55-59-63-68-74-81 stitches in from each side (= 100-108-116-128-142-152 stitches on the back piece). Allow the threads to follow your work onwards. On the next row from the right side decrease 1 stitch on each side of both marker threads – read DECREASE TIP-1. Repeat this decrease when the piece measures 20 cm = 202-218-234-256-282-306 stitches. When the piece measures 26 cm, cast off for the armholes on the next row as follows: Work the first 49-53-56-61-66-73 stitches (= front piece), cast off 8-8-10-10-12-12 stitches (=4-4-5-5-6-6 stitches on each side of the marker thread), work the next 88-96-102-114-126-136 stitches (= back piece), cast off 8-8-10-10-12-12 stitches (=4-4-5-5-6-6 stitches on each side of the marker thread), work the remaining 49-53-56-61-66-73 stitches (= front piece). Lay the piece to one side and work the sleeves. SLEEVES: Cast on 60-64-68-68-72-76 stitches with double pointed needles size 3 mm and Belle or Merino Extra Fine. Knit 1 round. Then work rib (knit 2, purl 2) in the round for 3 cm. Knit 1 round where you decrease 9-12-13-12-14-15 stitches evenly spaced = 51-52-55-56-58-61 stitches. Change to double pointed needles size 4 mm. Insert a marker thread at the beginning of the round; allow the thread to follow your work onwards. Work stocking stitch. When the piece measures 8 cm increase 2 stitches under the sleeve – read INCREASE TIP. Increase as follows in the different sizes: S: Increase every 9th round a total of 8 times. M: Increase every 5th round a total of 12 times. L: Increase alternately every 4th and 3rd round a total of 15 times. XL: Increase every 3rd round a total of 16 times. XXL: Increase alternately every 3rd and 2nd round a total of 17 times. XXXL: Increase every 2nd round a total of 18 times. When all the increases are finished there are 67-76-85-88-92-97 stitches on the round. Continue working until the sleeve measures 33-31-29-28-26-24 cm. Now cast off 8-8-10-10-12-12 stitches under the sleeve for the armhole (=4-4-5-5-6-6 stitches on each side of the marker thread) = 59-68-75-78-80-85 stitches. Lay the piece to one side and work the other sleeve in the same way. YOKE: Place the sleeves on the same circular needle as the body, where stitches were cast off for the armholes = 304-338-364-392-418-452 stitches. THE PIECE IS NOW MEASURED FROM HERE! Work stocking stitch back and forth, with 4 band stitches in garter stitch on each side. AT THE SAME TIME decrease in the different sizes as follows: Sizes S, M and L: When the piece measures 1-3-5 cm decrease 10-18-18 stitches evenly spaced = 294-320-346 stitches. Sizes XL, XXL and XXXL: When the piece measures 3-4-5 cm decrease 10-10-14 stitches evenly spaced. Repeat when the piece measures 6-7-8 cm = 372-398-424 stitches. When the piece measures 3-5-7-9-11-13 cm, work pattern as follows: 4 band stitches in garter stitch, A.1 (= 25 stitches), A.2 until there are 5 stitches left (= 10-11-12-13-14-15 repeats of 26 stitches), A.3 (= 1 stitch), 4 band stitches in garter stitch. Continue back and forth like this until the diagrams have been completed in height = 130-141-152-163-174-185 stitches. Purl 1 row from the right side (4 band stitches on each side are knitted) and decrease at the same time, 20-23-30-37-44-47 stitches evenly spaced – read DECREASE TIP-2 = 110-118-122-126-130-138 stitches. Purl 1 row back from the wrong side (band stitches knitted). Change to circular needle size 3 mm and work rib as follows: 4 band stitches in garter stitch, * knit 2, purl 2 *, work from *-* until there are 6 stitches left, knit 2 and 4 band stitches in garter stitch. Continue like this for 3 cm. Cast off with knit over knit and purl over purl. The jacket measures approx. 52-54-56-58-60-62 cm from the shoulder down. ASSEMBLY: Sew the openings under each sleeve. Sew the buttons onto the left band. |
||||||||||||||||||||||||||||
Diagram explanations |
||||||||||||||||||||||||||||
|
||||||||||||||||||||||||||||
 |
||||||||||||||||||||||||||||
 |
||||||||||||||||||||||||||||
 |
||||||||||||||||||||||||||||
Have you finished this pattern?Tag your pictures with #dropspattern #yellowtulipjacket or submit them to the #dropsfan gallery. Do you need help with this pattern?You'll find 31 tutorial videos, a Comments/Questions area and more by visiting the pattern on garnstudio.com. © 1982-2026 DROPS Design A/S. We reserve all rights. This document, including all its sub-sections, has copyrights. Read more about what you can do with our patterns at the bottom of each pattern on our site. |
||||||||||||||||||||||||||||


With over 40 years in knitting and crochet design, DROPS Design offers one of the most extensive collections of free patterns on the internet - translated to 17 languages. As of today we count 324 catalogues and 12290 patterns translated into English (UK/cm). 12290
We work hard to bring you the best knitting and crochet have to offer, inspiration and advice as well as great quality yarns at incredible prices! Would you like to use our patterns for other than personal use? You can read what you are allowed to do in the Copyright text at the bottom of all our patterns. Happy crafting!
Post a comment to pattern DROPS 222-3
We would love to hear what you have to say about this pattern!
If you want to leave a question, please make sure you select the correct category in the form below, to speed up the answering process. Required fields are marked *.