
Categorías populares
¿Buscas un hilo?


Comentarios / Preguntas (227)
![]() Vericel escribió:
Vericel escribió:
Cela n est pas tout a fais ce que je recherche
12.12.2025 - 19:44
![]() Marie escribió:
Marie escribió:
Bonjour, En suivant les explications du modèle avec aiguilles circulaires. Je viens de finir l’ épaule droite devant. Je ne comprends pas comment débuter l’épaule gauche devant ? J’ai bien mes 25 mailles et mes mailles se présentent pour faire un tour envers alors que l’on peut lire « tricoter en jersey en commençant sur l’endroit » ? Comment procéder ? Merci
04.12.2025 - 09:29DROPS Design respondió:
Bonjour Marie, lorsque vous avez rabattu les mailles de l'encolure, vous terminez chaque épaule séparément; d'abord l'épaule droite, puis quand les mailles de l'épaule droite sont rabattues, vous reprenez les 25 mailles de l'épaule gauche sur l'aiguille et tricotez en jersey en commençant par un rang sur l'endroit = à partir de l'emmanchure vers l'encolure, vous allez joindre le fil côté emmanchure. Bon tricot!
04.12.2025 - 14:21
![]() Fiona Jackson escribió:
Fiona Jackson escribió:
Do you have easy beginners knitting pattern for ladies slipover round neck using straight needles colour red size 14 please? Thank you.
01.12.2025 - 16:14DROPS Design respondió:
Dear Mrs Jackson, find all our patterns for Vest here; if you need to adapt for straight needles, this lesson will help you. There are red colours in all our yarns, you wil just have a large choice depending on the yarn chosen. Happy knitting!
01.12.2025 - 16:39
![]() Pascale escribió:
Pascale escribió:
Bonjour,Je tricote sur aiguille droite donc je viens de commencer le devant. Je ne comprends pas la diminution des emmanchures. il est noté de diminuer 6 mailles et rien à gauche. pouvez vous m'aider ? Merci
25.11.2025 - 17:17DROPS Design respondió:
Bonjour Pascale, lorsque l'on tricote en rond, on rabat les 3 premières mailles du tour (les 6 mailles entre le devant et le dos) et les 3 dernières mailles du tour = on a ainsi rabattu 6 mailles de chaque côté, entre le devant et le dos. Bon tricot!
26.11.2025 - 08:53
![]() Manuela escribió:
Manuela escribió:
Ich benutze ein dickeres Garn ( Maschenprobe 13x17). Wie viele Maschen muss ich für Größe S anschlagen bzw. von der Anleitung abweichen?
23.11.2025 - 19:06DROPS Design respondió:
Liebe Manuela, hierfinden Sie ähnliche Modellen mit 13-12 Maschen für 10 cm, das kann Ihnen sicher helfen. Viel Spaß beim Stricken!
24.11.2025 - 14:12
![]() Isabelle escribió:
Isabelle escribió:
Bonjour, Comment savoir combien de pelotes acheter selon la taille ? Je reprends le tricot après 40 ans. Merci d’avance pour votre réponse
18.11.2025 - 22:19DROPS Design respondió:
Bonjour Isabelle et bonne reprise :) Découvrez ici comment choisir votre taille. Bon tricot!
19.11.2025 - 08:31
![]() Ukulala escribió:
Ukulala escribió:
Moin, meine Frage wäre, ob die Angaben auch für Drops Alaska passen? Hat da schon jemand Erfahrung? LG
02.11.2025 - 11:08DROPS Design respondió:
Liebe Ukulala, ja, Sie können auch DROPS Alaska verwenden. Nehmen Sie am besten den Garnumrechner (den Link finden Sie unter dem Kopf der Anleitung), um zu berechnen, welche Menge Sie benötigen. Und beachten Sie bitte, dass es wichtig ist, die in der Anleitung genannte Maschenprobe einzuhalten. Viel Spaß beim Stricken!
04.11.2025 - 09:32
![]() PP escribió:
PP escribió:
Wieviel wolle benötige ich für die größe s?
30.10.2025 - 14:46DROPS Design respondió:
Hallo PP, für Größe S werden ca. 150 g DROPS AIR benötigt. Viel Spaß beim Stricken!
30.10.2025 - 19:48
![]() Daniele escribió:
Daniele escribió:
Peut on réaliser le pull avec des aiguilles normales plutôt que circulaires.? Merci de votre reponse
20.10.2025 - 18:36DROPS Design respondió:
Bonjour Daniele, c'est possible. Regardez la lecon DROPS ICI. Bon tricot!
21.10.2025 - 09:01
![]() Tove Hillestad escribió:
Tove Hillestad escribió:
Hei. Hvilke mål -overvidde /lengde - er det på vest: drops 210-28, college days str M?
15.10.2025 - 13:37DROPS Design respondió:
Hej Tove. Du finner alle mål i cm på måleskissen längst ned på sidan. Mvh DROPS Design
15.10.2025 - 14:03
|
|
College Days#collegedaysvest |
|
 |
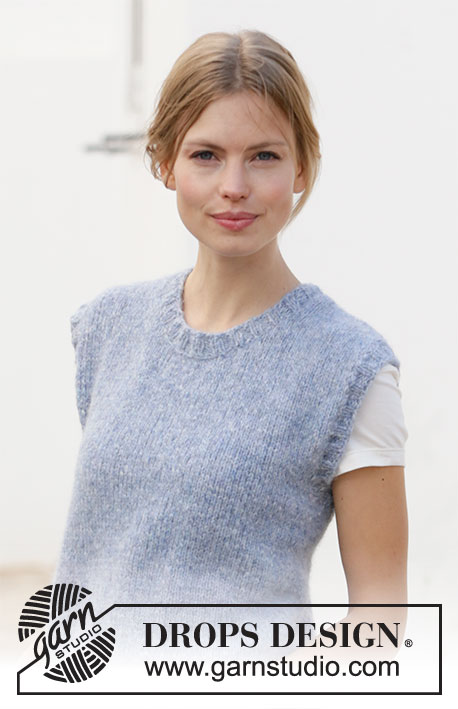 |
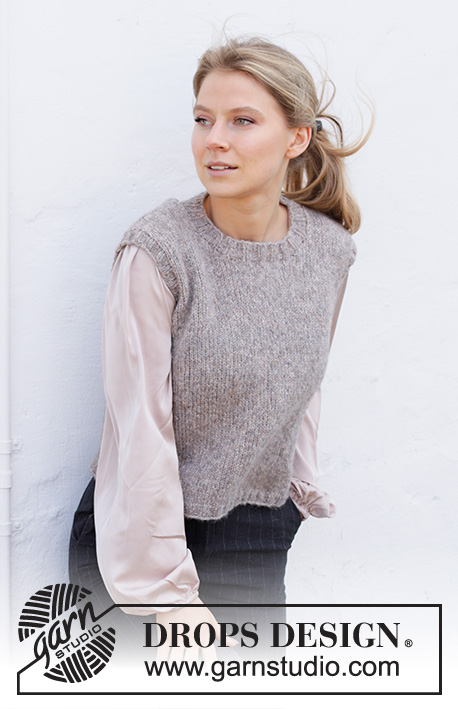
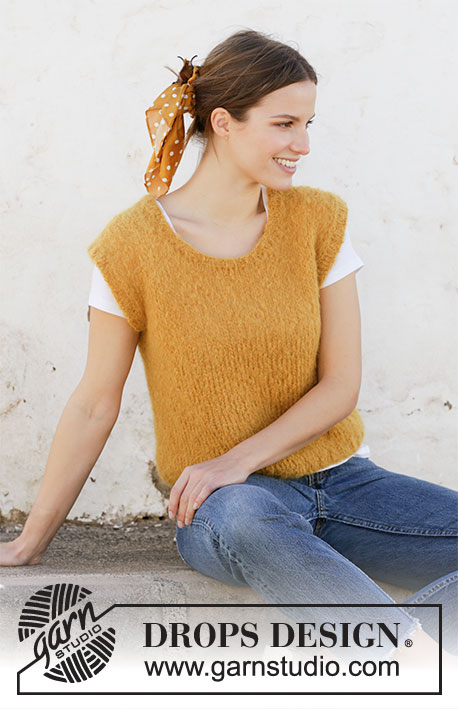
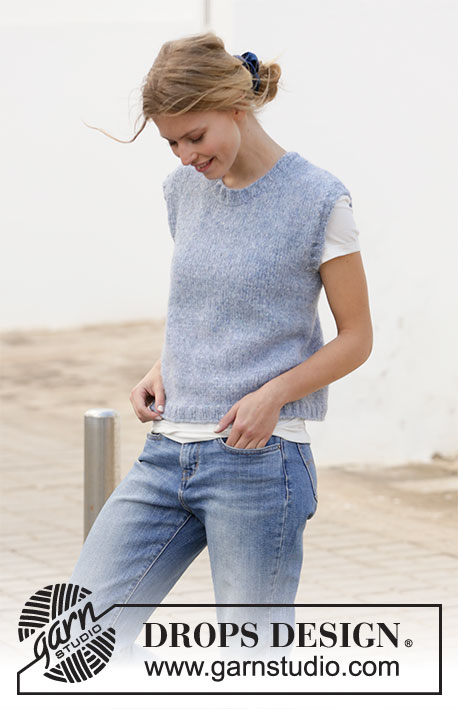
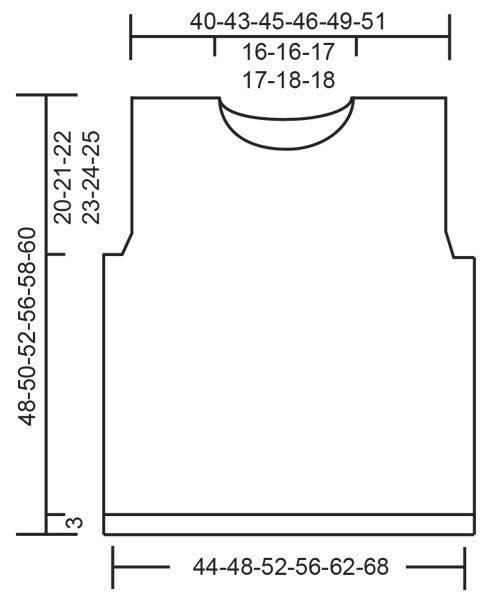
Chaleco con escote redondo en DROPS Air. Tallas S – XXXL.
DROPS 210-28 |
|
|
EXPLICACIONES PARA REALIZAR LA LABOR: ------------------------------------------------------- TIP PARA LAS DISMINUCIONES (repartidos): Para calcular cómo disminuir puntos repartidos, contar el número total de puntos en la aguja ( p.e 156 puntos) y dividir los puntos entre el número de disminuciones a trabajar (p.e 8) = 19,5. En este ejemplo disminuir trabajando aprox. cada 18º y 19º y cada 19º y 20º puntos juntos de derecho. ------------------------------------------------------- COMENZAR LA LABOR AQUÍ: ------------------------------------------------------- CHALECO - RESUMEN DE LA LABOR: La labor se trabaja en redondo con una aguja circular, de abajo arriba hasta las sisas. Finalizar el delantero y la espalda por separado de ida y vuelta. Las cenefas en el escote y las sisas se trabajan en redondo con una aguja circular hasta finalizar. CUERPO: Montar 156-172-184-200-220-240 puntos con una aguja circular de 4,5 mm y Air. Trabajar 1 vuelta de derecho, después trabajar el elástico (2 derechos, 2 reveses) 3 cm. Cambiar a una aguja circular de 5 mm. Trabajar en punto jersey, disminuir 8 puntos repartidos en la primera vuelta = 148-164-176-192-212-232 puntos – leer TIP PARA LAS DISMINUCIONES arriba. Insertar 1 marcapuntos al inicio de la vuelta y 1 marcapuntos después de los siguientes 74-82-88-96-106-116 puntos. Permitir que los marcapuntos sigan la labor; se usan para cerrar las sisas. Trabajar en punto jersey hasta que la labor mida 28-29-30-33-34-35 cm desde el borde de montaje. RECORDAR MANTENER LA TENSIÓN DEL TEJIDO! En la siguiente vuelta cerrar para las sisas, comenzar 3-3-3-4-4-4 puntos antes del primer marcapuntos; cerrar 6-6-6-8-8-8 puntos (el marcapuntos está en el centro de estos puntos), trabajar como antes hasta que queden 3-3-3-4-4-4 puntos antes del siguiente marcapuntos, cerrar los siguientes 6-6-6-8-8-8 puntos (el marcapuntos está en el centro de estos puntos) y trabajar hasta el final de la vuelta. Ahora finalizar el delantero y la espalda por separado, de ida y vuelta en la aguja. DELANTERO: = 68-76-82-88-98-108 puntos. Trabajar en punto jersey y cerrar para las sisas a cada lado al inicio de cada fila como sigue: Cerrar 2 puntos 1 vez y 1 punto 1-3-4-6-9-12 veces = 62-66-70-72-76-80 puntos. Continuar trabajando hasta que la labor mida 38-40-40-44-44-46 cm (queda aprox. 10-10-12-12-14-14 cm para alcanzar las medidas finales). En la siguiente fila por el lado derecho cerrar para el escote como sigue: Trabajar los primeros 25-27-28-29-30-32 puntos, cerrar los siguientes 12-12-14-14-16-16 puntos y trabajar los últimos 25-27-28-29-30-32 puntos. Finalizar los hombros por separado; no cortar el hilo - continuar con el hombro derecho por el lado revés. HOMBRO DERECHO DEL DELANTERO: = 25-27-28-29-30-32 puntos. Trabajar en punto jersey, comenzar por el lado revés y cerrar puntos para el escote al inicio de cada fila por el lado derecho como sigue: Cerrar 2 puntos 2 veces y 1 punto 4 veces = 17-19-20-21-22-24 puntos. Continuar trabajando hasta que la labor mida 48-50-52-56-58-60 cm desde el borde de montaje. Cerrar y cortar el hilo. HOMBRO IZQUIERDO DEL DELANTERO: = 25-27-28-29-30-32 puntos. Trabajar en punto jersey, comenzar por el lado derecho y cerrar puntos para el escote al inicio de cada fila por el lado revés como sigue: Cerrar 2 puntos 2 veces y 1 punto 4 veces = 17-19-20-21-22-24 puntos. Continuar trabajando hasta que la labor mida 48-50-52-56-58-60 cm desde el borde de montaje (ajustar con el hombro derecho). Cerrar y cortar el hilo. ESPALDA: = 68-76-82-88-98-108 puntos. Trabajar en punto jersey y rematar puntos para las sisas a cada lado al inicio de cada fila como sigue: Cerrar 2 puntos 1 vez y 1 punto 1-3-4-6-9-12 veces = 62-66-70-72-76-80 puntos. Continuar trabajando hasta que la labor mida 44-46-48-52-54-56 cm (quedan aprox. 4 cm hasta el largo final). En la siguiente fila por el lado derecho, cerrar para el escote como sigue: Trabajar los primeros 18-20-21-22-23-25 puntos, cerrar los siguientes 26-26-28-28-30-30 puntos y trabajar los últimos 18-20-21-22-23-25 puntos. Finalizar los hombros por separado; no cortar el hilo - continuar con el hombro izquierdo por el lado revés. HOMBRO IZQUIERDO EN LA ESPALDA: = 18-20-21-22-23-25 puntos. Trabajar en punto jersey, comenzando por el lado revés y rematar 1 punto al inicio de cada fila por el lado derecho = 17-19-20-21-22-24 puntos. Continuar trabajando hasta que la labor mida 48-50-52-56-58-60 cm desde el borde de montaje; ajustar al delantero. Cerrar y cortar el hilo. HOMBRO IZQUIERDO EN LA ESPALDA: = 18-20-21-22-23-25 puntos. Trabajar en punto jersey, comenzar por el lado derecho y cerrar 1 punto al inicio de la siguiente fila por el lado revés = 17-19-20-21-22-24 puntos. Continuar trabajando hasta que la labor mida 48-50-52-56-58-60 cm desde el borde de montaje; ajustar al delantero derecho. Cerrar y cortar el hilo. TERMINACIÓN: Coser las costuras de los hombros con grafting. ESCOTE: Comenzar por el lado derecho en una de las costuras de los hombros. Con una aguja circular de 4.5 mm recoger aprox. 76 - 92 puntos dentro de 1 punto alrededor de toda la línea del escote (el número tiene que ser divisible entre 4). Trabajar el elástico (2 derechos, 2 reveses) en redondo 2 cm. Cerrar con derecho sobre derecho y revés sobre revés. CENEFA ALREDEDOR DE LAS SISAS: Comenzar por el lado derecho donde se dividió la labor para la sisa. Con una aguja circular de 4.5 mm recoger aprox. 84 -124 puntos alrededor de la sisa ( el número tiene que ser divisible entre 4). Trabajar el elástico ( 2 derechos, 2 reveses) en redondo 2 cm. Cerrar con derecho sobre derecho y revés sobre revés Trabajar una cenefa alrededor de la otra sisa de la misma manera. |
|
 |
|
¿Terminaste este patrón?Entonces, etiqueta tus fotos con #dropspattern #collegedaysvest o envíalas a la galería #dropsfan. ¿Necesitas ayuda con este patrón?Encontrarás 22 videos tutoriales, un espacio para comentarios/preguntas y más visitando la página del patrón en garnstudio.com © 1982-2026 DROPS Design A/S. Todos los derechos reservados. Este documento, incluyendo todas sus sub-secciones, está protegido por los derechos de autor (copyright). Lee más acerca de lo que puedes hacer con nuestros patrones en la parte de abajo de cada patrón de nuestro sitio. |
|


Con más de 40 años en el diseño de modelos de punto y de ganchillo, DROPS Design ofrece una de las más vastas colecciones de patrones gratuitos en el internet - traducidos en 17 idiomas. Al día de hoy, contamos con 324 catálogos y 12290 patrones - de los cuales 11675 están traducidos en español.
Nosotros trabajamos con mucho esmero para brindarte lo mejor que las labores de punto y ganchillo tienen para ofrecer,inspiración y consejos, así como hilos de magnífica calidad a precios increíbles! Te gustaría usar nuestros patrones para otro fin además del uso personal? Puedes leer acerca de lo que estás permitida a hacer en el texto de Copyright en la parte de abajo de todos nuestros patrones. Felices labores!
Escribe un comentario sobre DROPS 210-28
¡Nos encantaría saber qué piensas acerca de este patrón!
Si quieres escribir una pregunta referente al patrón, por favor asegúrate de elegir la categoría correcta en el formulario debajo, para acelerar el proceso de respuesta. Los campos obligatorios están marcados con un *.