
Categorías populares
¿Buscas un hilo?





























Comentarios / Preguntas (93)
 Christina escribió:
A quel endroit faut il mettre les marqueurs, donc faire les augmentation ?
10.08.2026 - 15:47DROPS Design respondió:
Bonjour Christina, les augmentations du bas du pull se font sur les côtés, de chaque côté des 6 mailles montées sous les manches, vous allez augmenter ainsi: tricotez jusqu'à ce qu'il reste 1 m avant le marqueur, faites 1 jeté, tricotez 2m endroit (= les 2 m avec le fil marqueur entre elles) et faites 1 jeté. Répétez à l'autre marqueur. Bon tricot!
10.08.2026 - 16:31
 Elizabeth escribió:
Thank you. It makes sense - it was the way I was reading the instructions.
29.06.2026 - 01:44
Elizabeth escribió:
I have started the pattern and have finished the pattern. I understand I need to increase (12 times for size 7-8) but I do not understand what the following means:= AT THE SAME TIME inc 1 st in the middle of every repetition (= 11-11-12-12-13-13 sts inc), inc with YO, P YO on next row to make holes. Thankyou
28.06.2026 - 13:32DROPS Design respondió:
Dear Elizabeth, in the last round of the chart you had 1 purl round over all stitches. Then, in the next round, which is knitted, you will increase in the middle stitch of the 17 sts of each repeat of A.2(in the 9th stitch of the repeat). The increase is worked making 1 yarn over. So this round is worked as follows: (9 knit stitches, 1 yarn over, 8 knit stitches) over the 1st repeat of A.2; repeat from ( to ) over all other 11 repeats of A.2; you should have increased 12 stitches in total. In the next round you will purl over all stitches, including the yarn overs (don't purl them twisted) so that the yarn overs will form holes. Happy knitting!
29.06.2026 - 01:10
Elizabeth escribió:
Do you have the pattern in a version other than using the diagrams? I am unable to figure the diagrams out - which is the first row? When it says 'work A.1 over all stitches' what does that mean?
01.06.2026 - 07:36DROPS Design respondió:
Hi Elizabeth, If you click on "Lessons" at the top of the pattern, there is a video showing you how to read and work diagrams. The diagrams are read bottom up and from right to left. When it says "work A.1 across all stitches" you repeat the 8 stitches in row 1 on the round. Regards, Drops Team.
02.06.2026 - 06:43
Bertorello escribió:
Bonjour, J aimerai vous envoyer la photo du problème rencontré sur le modèle 174-14 que j ai entre le dos et devant . Je n ai plus de fantaisie. Merci. Comment faire
06.01.2026 - 11:23DROPS Design respondió:
Bonjour Mme Bertorello, il semble que vous ayez résolu ce problème, je vais voir votre question suivante. Merci.
07.01.2026 - 07:13
 Jane escribió:
Kommentar til spørgsmål nr. 87 Min fantasi rakte ikke til, at jeg skulle læse vejledningen for rapport A2 nedefra. (Måske et forbedringsforslag til opskriften?) Et par 'friske øjne' gjorde det hele overskueligt. Spørgsmål 87 er ikke længere aktuel.
17.11.2025 - 13:14
Jane escribió:
Jeg kan ikke gennemskue sammenhængen i disse to beskrivelser. 'Efter A1 strikkes A2. 7 masker over 11 rapporter. Når A2 er strikket en gang i højden er der 187 masker (100 flere end da jeg slog op)' Hvor i opskriften skal disse udtagninger foretages?
16.11.2025 - 11:29DROPS Design respondió:
Hei Jane. Når du strikker A.2 økes det masker. Se diagramikonene i diagrammet og les diagramteksten (se/les det nederste ikonet i diagramteksten). A.2 består av 10 masker når 1. rad strikkes, og når A.2 er strikket 1 gang i høyden består A.2 av 17 masker. mvh DROPS Design
17.11.2025 - 20:10
Lone escribió:
Hvornår sætter man mærketråde? hvad betyder A2(=7m)
27.08.2025 - 11:51DROPS Design respondió:
Hej Lone. Under RYG & FORSTK står det: Sæt et mærke i hver side på ryg- og forstykke hvor der blev slået nye m op under ærmet (= 3 nye m på hver side af mærket). A2 är diagrammet du finner längst ned på opskriften, och första pind i A.1 är 7 masker. Mvh DROPS Design
28.08.2025 - 14:11
 Nancy escribió:
I wanted to make this sweater for my granddaughter, but I simply do not understand the charts. Is there a written version available? Thank you
21.08.2025 - 21:24DROPS Design respondió:
Dear Nancy, this is the only version of the pattern available, with both charts and written instructions; you can read more on how to understand our knitting charts here. If you have any doubts as you read and work the pattern you can write us a comment here and we will try to answer all of your questions as clearly as possible. Happy knitting!
25.08.2025 - 01:41
Birte escribió:
Hvornår sætter man mærketråde og hvad betyder A2 (= 7 m) denne opskrift er helt væk fra mit kendskab til opskrifter/strikningen
03.08.2025 - 19:09
|
|||||||||||||||||||
Sweet Bay#sweetbaysweater |
|||||||||||||||||||
 |
 |
||||||||||||||||||
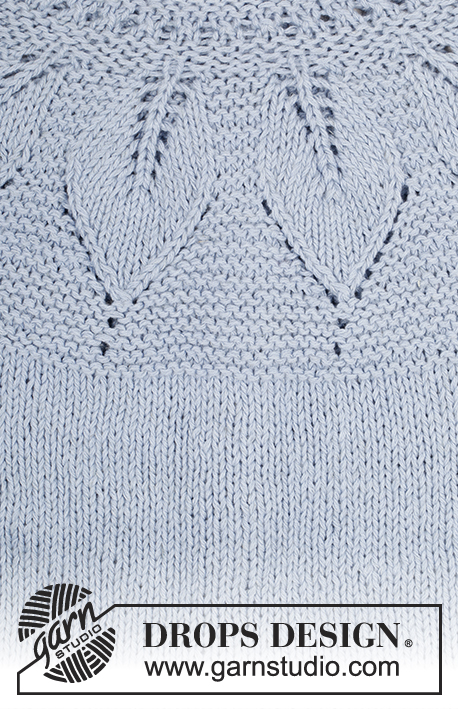
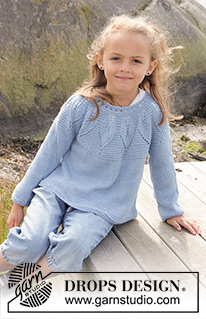
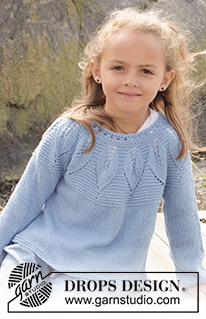
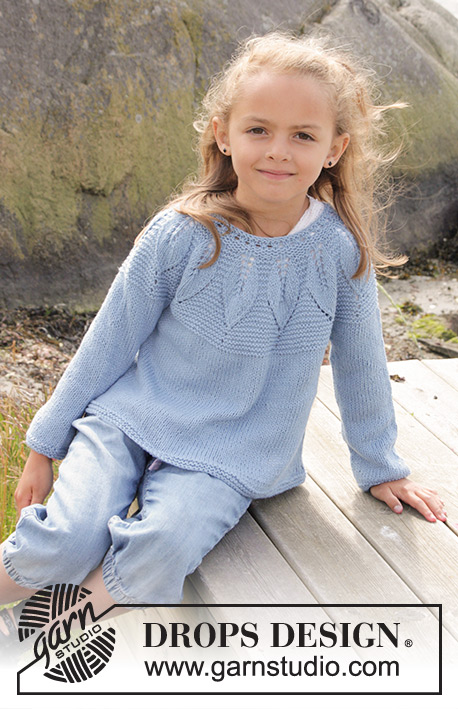
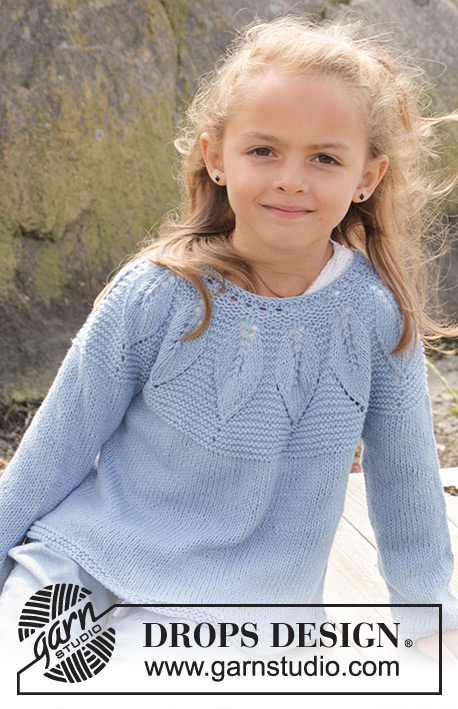
Pulóver de punto en punto musgo con patrón de hojas y pechera / canesú redondo, tejido de arriba para abajo en DROPS Belle. Talla niños 3 - 14 años
DROPS Children 27-23 |
|||||||||||||||||||
|
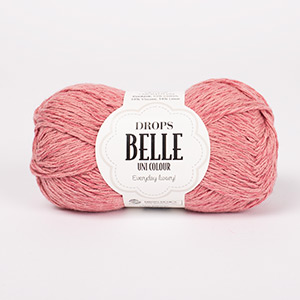
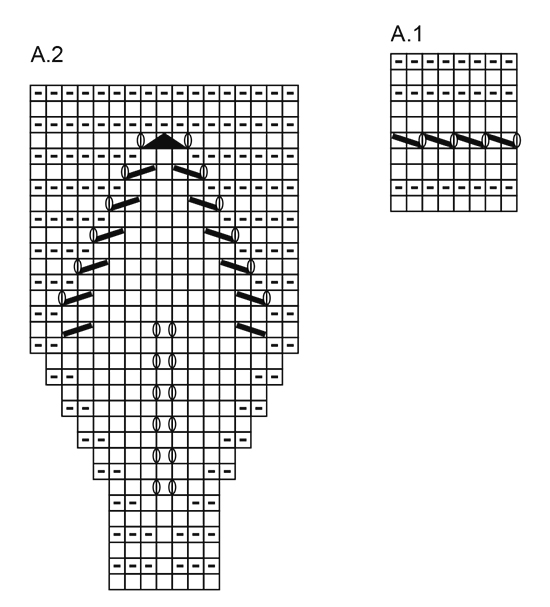
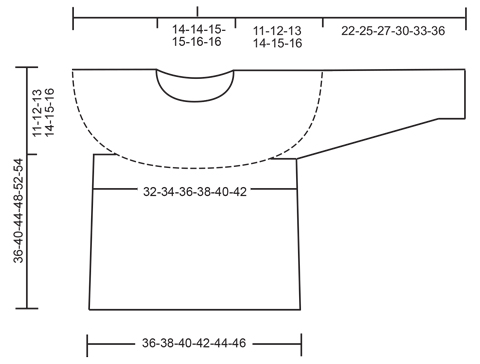
PT MUSGO (en redondo): 1 surco = 2 vtas. * 1 vta de derecho y 1 vta de revés *, repetir de *a*. PATRÓN: Ver diagramas A.1 y A.2. TIP PARA AUMENTAR: Aumentar 1 pt de cada lado de cada marcapuntos (= 4 pts aumentados). Comenzar 1 pt antes del marcapuntos y tejer de la manera siguiente: 1 HEB (lazada), 2 d (el marcapuntos está entre estos 2 pts), 1 HEB. En la hilera siguiente, tejer las HEB retorcidas de derecho para evitar agujeros. ------------------------------------------------------ PULÓVER: Tejido en redondo en ag circular, de arriba para abajo. PECHERA: Montar 77-77-84-84-91-91 pts en una ag circular corta tamaño 3.5 mm con Belle. Tejer A.1 sobre todos los pts. En las vtas con HEBs en A.1, terminar con 1 pt derecho. Cuando A.1 ha sido tejido 1 vez verticalmente, tejer A.2 (= 7 pts) sobre todos los pts (= 11-11-12-12-13-13 repeticiones de A.2). Cuando A.2 ha sido tejido 1 vez verticalmente, hay 187-187-204-204-221-221 pts en la vta y la pieza mide aprox 10 cm. Continuar con PT MUSGO – ver explicación arriba y, AL MISMO TIEMPO, aumentar 1 pt en el centro de cada repetición (= 11-11-12-12-13-13 pts aumentados), aumentar con una HEB, tejer la HEB de revés en la hilera siguiente para crear agujeros. Repetir los aumentos a cada 1-1-1½-1½-2-2 cm 0-1-1-2-1-2 veces más = 198-209-228-240-247-260 pts. Tejer 1 vta de derecho y, al mismo tiempo, ajustar el número de pts a 200-212-224-240-252-266. Continuar en pt musgo hasta que la pieza mida 11-12-13-14-15-16 cm. Después tejer de la manera siguiente: Tejer los primeros 31-33-35-37-39-40 pts (= mitad pieza de la espalda), deslizar los 38-40-42-46-48-52 pts siguientes en un gancho auxiliar (= manga), montar 6 nuevos pts bajo la manga, tejer los 62-66-70-74-78-82 pts siguientes (= pieza del frente), deslizar los 38-40-42-46-48-52 pts siguientes en un gancho auxiliar (= manga), montar 6 nuevos pts bajo la manga, tejer los 31-33-35-37-39-40 pts restantes (= mitad pieza de la espalda). CUERPO: Ahora hay 136-144-152-160-168-174 pts para el cuerpo. Insertar un marcapuntos de cada lado del cuerpo donde los nuevos pts fueron montados bajo las mangas (= 3 nuevos pts de cada lado del marcapuntos). AHORA MEDIR LA PIEZA A PARTIR DE AQUÍ! Cambiar a ag circular tamaño 4 mm. Continuar en pt jersey. Cuando la pieza mida 4 cm, aumentar 1 pt de cada lado de cada marcapuntos (= 4 pts aumentados). Repetir los aumentos a cada 5-6-7-8-9-10 cm 3 veces más – LEER TIP PARA AUMENTAR = 152-160-168-176-184-190 pts. Continuar en pt jersey hasta que la pieza mida 24-27-30-33-36-37 cm, tejer 3 surcos. Rematar. MANGA: Deslizar los pts del gancho auxiliar en las ag de doble punta tamaño 4 mm (= 38-40-42-46-48-52 pts). Levantar 1 pt en cada uno de los 6 pts montados bajo la manga = 44-46-48-52-54-58 pts. Insertar 1 marcapuntos al centro bajo la manga. Ahora medir la pieza a partir de aquí. Tejer en pt jersey. Cuando la pieza mida 3 cm, disminuir 1 pt de cada lado del marcapuntos, repetir las disminuciones a cada 7-5-5-4-4-4 cm 2-3-3-5-5-7 veces más = 38-38-40-40-42-42 pts. Continuar en pt jersey hasta que la manga mida 21-24-26-29-32-35 cm, tejer 3 surcos y rematar. |
|||||||||||||||||||
Explicaciones del diagrama |
|||||||||||||||||||
|
|||||||||||||||||||
 |
|||||||||||||||||||
 |
|||||||||||||||||||
¿Terminaste este patrón?Entonces, etiqueta tus fotos con #dropspattern #sweetbaysweater o envíalas a la galería #dropsfan. ¿Necesitas ayuda con este patrón?Encontrarás 16 videos tutoriales, un espacio para comentarios/preguntas y más visitando la página del patrón en garnstudio.com © 1982-2026 DROPS Design A/S. Todos los derechos reservados. Este documento, incluyendo todas sus sub-secciones, está protegido por los derechos de autor (copyright). Lee más acerca de lo que puedes hacer con nuestros patrones en la parte de abajo de cada patrón de nuestro sitio. |
|||||||||||||||||||






Con más de 40 años en el diseño de modelos de punto y de ganchillo, DROPS Design ofrece una de las más vastas colecciones de patrones gratuitos en el internet - traducidos en 17 idiomas. Al día de hoy, contamos con 333 catálogos y 12532 patrones - de los cuales 12026 están traducidos en español.
Nosotros trabajamos con mucho esmero para brindarte lo mejor que las labores de punto y ganchillo tienen para ofrecer,inspiración y consejos, así como hilos de magnífica calidad a precios increíbles! Te gustaría usar nuestros patrones para otro fin además del uso personal? Puedes leer acerca de lo que estás permitida a hacer en el texto de Copyright en la parte de abajo de todos nuestros patrones. Felices labores!
Escribe un comentario sobre DROPS Children 27-23
¡Nos encantaría saber qué piensas acerca de este patrón!
Si quieres escribir una pregunta referente al patrón, por favor asegúrate de elegir la categoría correcta en el formulario debajo, para acelerar el proceso de respuesta. Los campos obligatorios están marcados con un *.