
Categorías populares
¿Buscas un hilo?


Comentarios / Preguntas (18)
![]() Julia escribió:
Julia escribió:
Hallo :) warum wird der Fuß nur 4 cm lang gesteickt? In Größe 27 ist der Fuß doch 14 cm lang ? Vielen lieben Dank
16.11.2025 - 21:29DROPS Design respondió:
Liebe Julia, die 4 cm sind nur der obere Teil des Fußes, noch nicht der ganze Fuß. Sie fassen ja noch Maschen aus den Rändern auf und dadurch erhalten Sie noch mehr Fußlänge. Viel Spaß beim Stricken!
17.11.2025 - 22:38
![]() Aimee escribió:
Aimee escribió:
Why is there no pattern for the cable nit leg part showing in the picture with the pattern?
10.02.2020 - 05:29DROPS Design respondió:
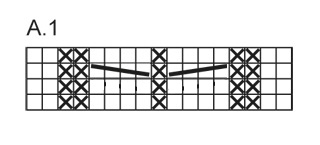
Dear Aimee, to work the cable pattern on leg part, follow the diagram A.1 you will find at the end of written pattern - you'll find how to read diagrams here. Happy knitting!
10.02.2020 - 10:20
![]() Heather Halom escribió:
Heather Halom escribió:
I have just wondered if you can tell what the width measurement across the front should be, the length is good but it looks wide across the front thanks
30.11.2017 - 22:53DROPS Design respondió:
Dear Mrs Halon, if your gauge is correct, you should get the correct measurements for each size. Garter st is quite elastic and will adjust for wider feet if necessary. Happy knitting!
01.12.2017 - 09:32
![]() Maureen escribió:
Maureen escribió:
I'm using super bulky yarn and size 5 mm needles as directed. But my gauge is way off - 17 stitches span 6.5 inches. My knitting is not loose, and the fabric is quite dense, so I'm reluctant to go to a smaller needle size. Am I missing something? Thanks for your help.
02.12.2016 - 01:07DROPS Design respondió:
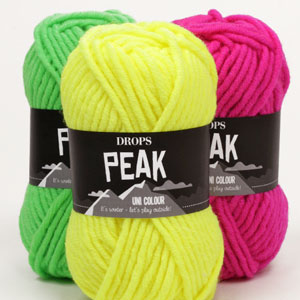
Dear Maureen, you should have 17 sts = 10 cm (= 4") in width with Drops Peak with needle size 5 mm - or adjust the needle size to get correct tension. Slippers are knitted here with a tighter tension as usual for Drops Peak to get the desired texture. Happy knitting!
02.12.2016 - 08:35Aurolina escribió:
Siempre he tenido problemas con las agujas doble punta. Es posible obtener el patron en dos agujas por favor de este modelo verde y del modelo LITTLE RED RIDING SLIPPERS? EN ESPANOL POR FAVOR.
25.01.2016 - 23:03
![]() Renee Meyer escribió:
Renee Meyer escribió:
In working with the chart. what stitched are done on the wrong side
15.01.2016 - 23:32DROPS Design respondió:
Dear Mrs Meyer, diagram show all rows both from RS and from WS, ie 1 square in diag = 1 st x 1 row. From WS, ,work K over K and P over P - see diagram text and read more here. Happy knitting!
16.01.2016 - 11:16
![]() Marcella escribió:
Marcella escribió:
Ik dacht dat je die 61 steken moest verdelen. dacht dat je die 27st op 2 verschillende naalden moest zetten
24.10.2015 - 06:44
![]() Marcella escribió:
Marcella escribió:
Denk dat er een fout in dat patroon zit dat je in het begin 42st. moet opzetten en dan iedere kant 10st. opnemen is 62st. 62:4= 15,5 Dus voor en achter 15st. en aan de zijkanten 16st. Klopt dit? Zo ja even die andere ook aanpassen
18.10.2015 - 09:17DROPS Design respondió:
Hoi Marcella. Nee, het is geen fout. Je hebt 27 st op de draad, je hebt gebreid over 14 st (16 inclusief de kantsteken, die ook weer zijn afgekant) en je neemt 10 st op aan beide zijkanten van het middelste deel: 27+14+10+10 = 61 st.
23.10.2015 - 13:26
![]() Marcella escribió:
Marcella escribió:
Ik heb nu de pijp van de slof af van mt 29/31. En dat midden gedeelte ook van de voet en heb langs de kanten ieders 10 steken opgenomen maar hoe verdeel je de steken? Dat is onduidelijk te zien in het filmpje. Zag naderhand met pauzeren dat er in dat filmpje bij de voor en achterkant 10 st.zaten en aan de zijkant 11 st. maar hoe doe je dat met 61 st.? Is een oneven aantal en waar zet je ongeveer de markeerders neer?
18.10.2015 - 09:03
![]() Mari escribió:
Mari escribió:
Ja lisäys aiempaan viestiin, toivon todella vastausta kysymykseen, kiitos! Aiemmin en sitä saanut
14.10.2015 - 03:26
|
|||||||||||||
Hopscotch |
|||||||||||||
 |
 |
||||||||||||
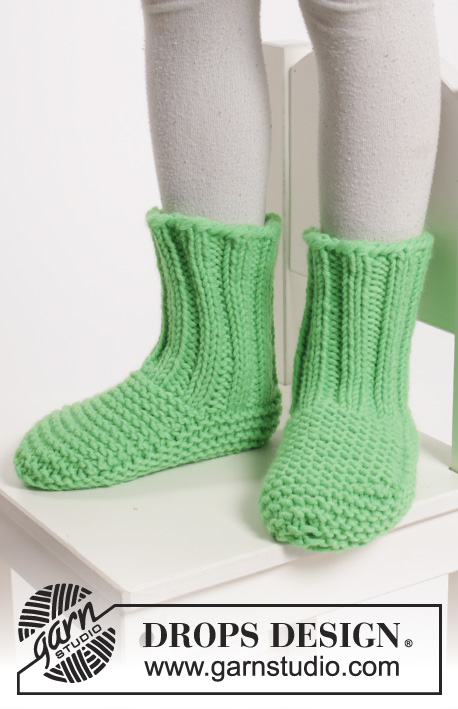
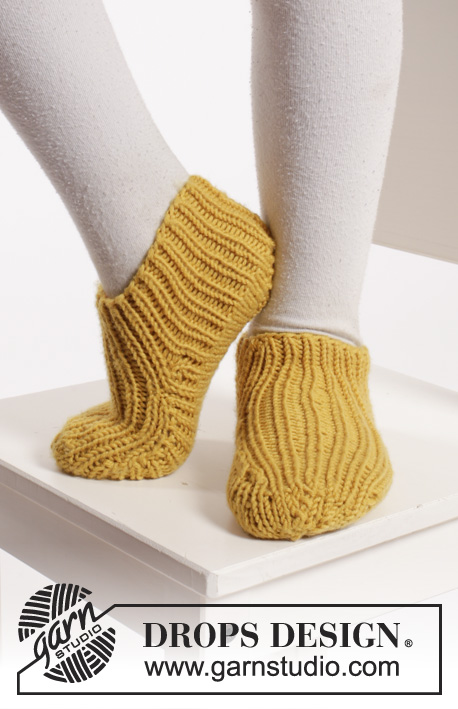
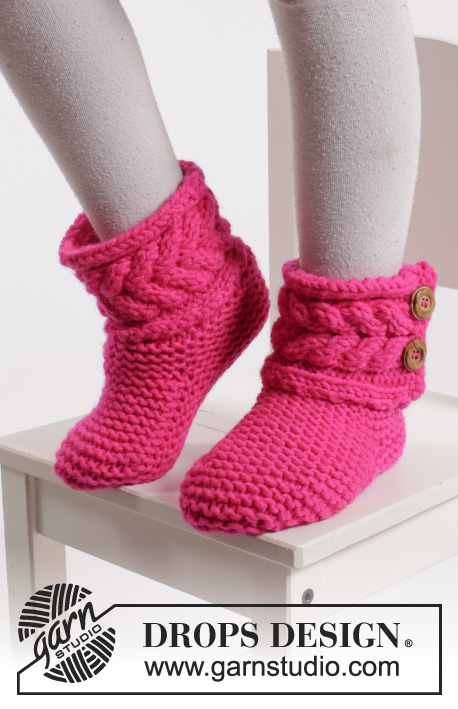
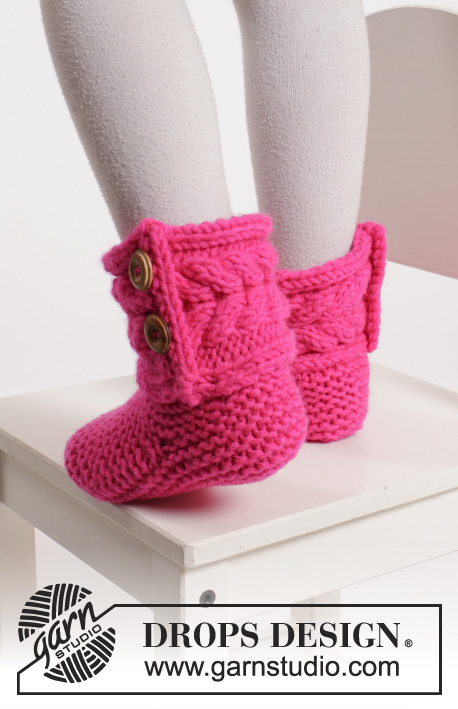
Pantuflas DROPS en punto musgo con torsadas, en Peak o Snow. Números: 20 – 34.
DROPS Extra 0-1136 |
|||||||||||||
|
PT MUSGO (en redondo en ag de doble punta): * 1 vta de derecho y 1 vta de revés *, repetir de *a*. 1 surco = 2 vtas. PT MUSGO (de ida y vuelta): Tejer todas las hileras de derecho. 1 surco = 2 hileras tejidas de derecho. PATRÓN: Ver diagrama A.1. El diagrama muestra todas las hileras en el patrón vistas por el LD. ----------------------------------------------------- PANTUFLA: PIERNA: Montar 28-31-34-37-41-44 pts en ag de doble punta tamaño 5 mm con Peak o Snow. Tejer en PT MUSGO en redondo – ver explicación arriba – hasta que la pieza mida aprox 4 cm, terminar después de 1 vta de revés. RECORDARSE DE MANTENER LA MISMA TENSIÓN DE TEJIDO DE LA MUESTRA! PIE: Ahora mantener los primeros 12-12-12-14-14-14 pts de la vta en la ag, deslizar los 16-19-22-23-27-30 pts restantes en 1 gancho auxiliar. Continuar en pt musgo de ida y vuelta sobre los 12-12-12-14-14-14 pts – AL MISMO TIEMPO, en la 1ª hilera, montar 1 nuevo pt de cada lado (pt de orillo) = 4-14-14-16-16-16 pts. Cuando la pieza del centro mida 4-4-5-6-6-7 cm, disminuir 1 pt de orillo de cada lado = 12-12-12-14-14-14 pts. Después deslizar los pts del gancho auxiliar nuevamente en la ag y levantar 7-7-9-10-10-12 pts de cada lado de la parte del centro (en el interior de 1 pt de orillo) = 42-45-52-57-61-68 pts en la ag. AHORA MEDIR LA PIEZA A PARTIR DE AQUÍ! Insertar 1 marcapuntos al centro del frente (= punta) y 1 marcapuntos al centro de la parte de atrás (= talón). Continuar en redondo en pt musgo. Cuando la pieza mida 2 cm, tejer 2 pts juntamente de derecho de cada lado de cada marcapuntos a cada 2 vtas (= 4 pts menos por vta), continuar disminuyendo hasta que la pieza mida 3-3-4-4-5-5 cm – rematar. Hacer la costura de la planta del pie en las hebras externas de los pts de orillo para evitar una costura abultada. BANDA ALREDEDOR DE LA PIERNA: Montar 13 pts en ag tamaño 5 mm con Peak o Snow. Tejer 2 surcos en PT MUSGO de ida y vuelta – ver explicación arriba – en la última hilera aumentar 4 pts distribuidos equitativamente = 17 pts. Tejer de acuerdo a A.1 (= 17 pts) hasta que la pieza mida aprox 18-20-22-24-26-28 cm, en la última hilera disminuir 2 pts sobre cada torsada en A.1 = 13 pts. Tejer 2 surcos y rematar. Colocar la orilla de montaje sobre la orilla de remate y coser 2 botones para decoración a través de la banda. Halar la banda 2 cm hacia abajo por encima del pie con los botones en el lado externo de la pantufla y coser la banda a la orilla de montaje de la pantufla, por el LR, con puntadas invisibles. Tejer otra pantufla de la misma manera, asegurarse que la banda sea cosida en el lado opuesto. |
|||||||||||||
Explicaciones del diagrama |
|||||||||||||
|
|||||||||||||
 |
|||||||||||||
¿Terminaste este patrón?Entonces, etiqueta tus fotos con #dropspattern o envíalas a la galería #dropsfan. ¿Necesitas ayuda con este patrón?Encontrarás 23 videos tutoriales, un espacio para comentarios/preguntas y más visitando la página del patrón en garnstudio.com © 1982-2026 DROPS Design A/S. Todos los derechos reservados. Este documento, incluyendo todas sus sub-secciones, está protegido por los derechos de autor (copyright). Lee más acerca de lo que puedes hacer con nuestros patrones en la parte de abajo de cada patrón de nuestro sitio. |
|||||||||||||


Con más de 40 años en el diseño de modelos de punto y de ganchillo, DROPS Design ofrece una de las más vastas colecciones de patrones gratuitos en el internet - traducidos en 17 idiomas. Al día de hoy, contamos con 325 catálogos y 12298 patrones - de los cuales 11702 están traducidos en español.
Nosotros trabajamos con mucho esmero para brindarte lo mejor que las labores de punto y ganchillo tienen para ofrecer,inspiración y consejos, así como hilos de magnífica calidad a precios increíbles! Te gustaría usar nuestros patrones para otro fin además del uso personal? Puedes leer acerca de lo que estás permitida a hacer en el texto de Copyright en la parte de abajo de todos nuestros patrones. Felices labores!
Escribe un comentario sobre DROPS Extra 0-1136
¡Nos encantaría saber qué piensas acerca de este patrón!
Si quieres escribir una pregunta referente al patrón, por favor asegúrate de elegir la categoría correcta en el formulario debajo, para acelerar el proceso de respuesta. Los campos obligatorios están marcados con un *.