
Categorías populares
¿Buscas un hilo?


Comentarios / Preguntas (113)
![]() Annie escribió:
Annie escribió:
Make all incs on right side rows, inc by P 2 sts into 1 P stitch. Does that mean increasing by two purl stitches anywhere, where there is a purl stitch across the row? Thanks
12.01.2018 - 22:11DROPS Design respondió:
Dear Annie, it basically means that you should do the increases on rows you are knitting from the right side. Also, in the rows you do the increases, they are done in every purled segment. The pattern does not specify where, so you can do them anywhere in the purled segment, however I would suggest you do them alternately at the beginning and at the end of each segment with purls. Happy Knitting!
13.01.2018 - 10:01
![]() Andrea escribió:
Andrea escribió:
So once we get to the inc on RS, just to clarify, are we then going k2 p2/3/4/5 on RS to p2 k2/3/4/5 on WS?
15.11.2017 - 06:26DROPS Design respondió:
Dear Andrea, that's correct, the increase are done in the P-sections seen from RS, so that the number of P sts from RS and K sts from wS will inc (and then decrease on the 2nd half of headband). Happy knitting!
15.11.2017 - 08:55Katharina Splettstößer escribió:
Diese Anleitung ist nicht gut übersetzt! Anleitung: "Wenn die Arb. 8 cm mißt, alle 1 li. auf 2 li aufnehmen." Hä? Eine völlig unübliche Ausdrucksweise und irreführend. Gemeint ist wohl: Re M re str, aus jeder li M 2 M herausstricken (englisch pfb) 24 M. Wenn die Arb. 14 cm mißt, 1. M re, dann *aus der 1. li M 2 M herausstricken (pfb), 1 M li, 1 M re * 29 M Vielen Dank für die vielen kostenlosen Drops Anleitungen! Katharina
07.10.2017 - 22:09DROPS Design respondió:
Liebe Frau Splettstößer, danke für Ihre Rückmeldung, Anleitung wurde überarbeitet. Viel Spaß beim stricken!
09.10.2017 - 10:29
![]() Mollie escribió:
Mollie escribió:
My daughter wants a headband like this, but wants ties at the end (maybe cord?). Do you have a pattern like that, or any idea how I could make that?? Thanks!!
02.06.2017 - 14:15DROPS Design respondió:
Dear Mollie! Thank you for your comment, this pattern is a favorite of ours to. If I would want to make this with ties, insted of sewing up at the ends, I would just turn about 0,5 -1 cm the casting on and casting off edges toward the wrong side, sew the edge down with a few stitches. Then make a tie and bull it through the casing I just seved, and tie with the two and two tie-ends held together. I hope this helps. Happy knitting!
08.06.2017 - 07:00
![]() Iris escribió:
Iris escribió:
Hallo, leider komme ich mit den Abnahmen für die 2. Hälfte des Stirnbandes nicht zurecht. Muss ich linke oder rechte Maschen für die Abnahmen zusammenstricken? LG Iris
14.10.2016 - 08:25DROPS Design respondió:
Liebe Iris, Sie müssen die linke Maschen abenehmen, und dies wird spiegelverkehrt gemacht, dh: 1. Abnahme 3 cm nach der Markierung, 2. Abnahme 6 cm nach der Markierung, 3. Abnahme 10 cm nach der Markierung und letzte Abnahme 16 cm nach der Markierung = es bleiben 19 M (2 M re, 1 M li).
14.10.2016 - 09:30
![]() Christina escribió:
Christina escribió:
Ich habe ein Stirnband mit Brushed Alpaca Silk gemacht - wunderschön und federleicht! Leichter wäre es allerdings geworden, wäre in der Beschreibung angegeben, wie die Rückreihen zu stricken sind. So musste ich es mir aus den Kommentaren raussuchen. Aber das Ergebnis ist super.
18.07.2016 - 11:13
![]() Gail Thorpe escribió:
Gail Thorpe escribió:
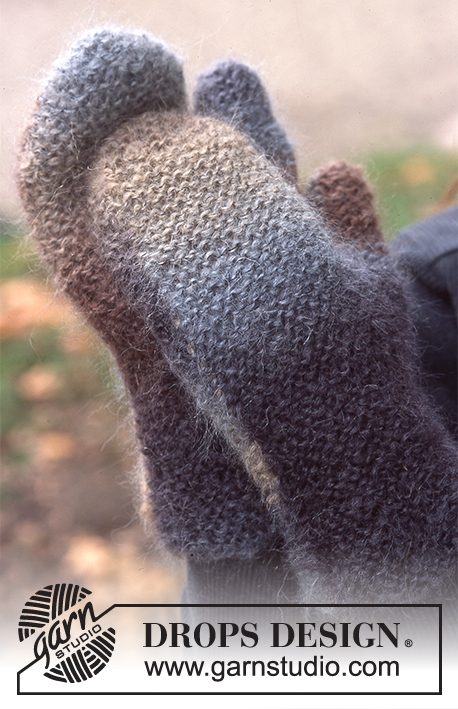
Can you tell me which Alaska brown is featured in this pattern? Thank you!
02.05.2016 - 20:07DROPS Design respondió:
Dear Mrs Thorpe, in this pattern it's used Alaska colour n° 50, dark brown. Happy knitting!
02.05.2016 - 20:11France escribió:
Bonjour est ce possible d'avoir le patron du bandeau en Français. Merci
11.02.2016 - 05:53DROPS Design respondió:
Bonjour France, vous pouvez obtenir les explications en français de tous nos modèles en cliquant sur la flèche sous la photo, sélectionnez "français" - voir ici Bon tricot!
11.02.2016 - 10:49
![]() Christine Fabiani escribió:
Christine Fabiani escribió:
Hi! Thanks so much for this pattern. It will be perfect for Knots of Love's brain surgery patients. Knots of Love donates over 1,000 pieces EVERY WEEK to chemo patients and blankets to fragile new lives in incubators. Much love and many blessings, Christine M. Fabiani
17.01.2016 - 17:05Amanda escribió:
"bind off an sew"
21.12.2015 - 17:40
|
|
Saturn Rings |
|
|
|
|
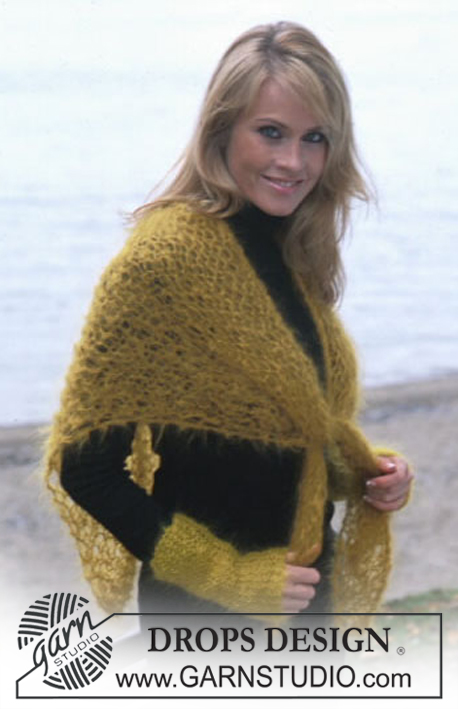
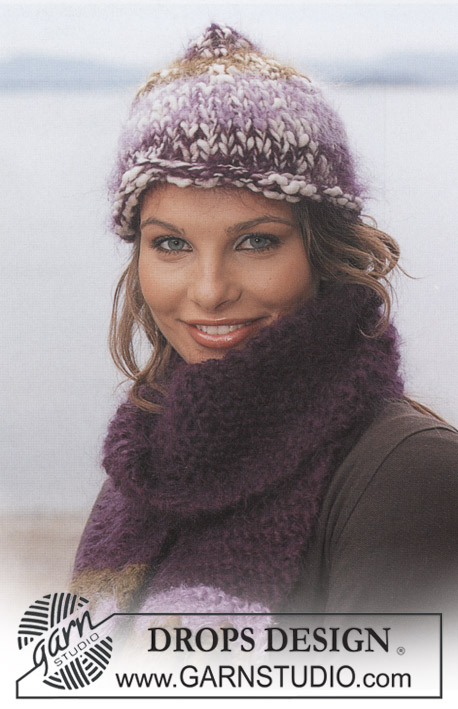
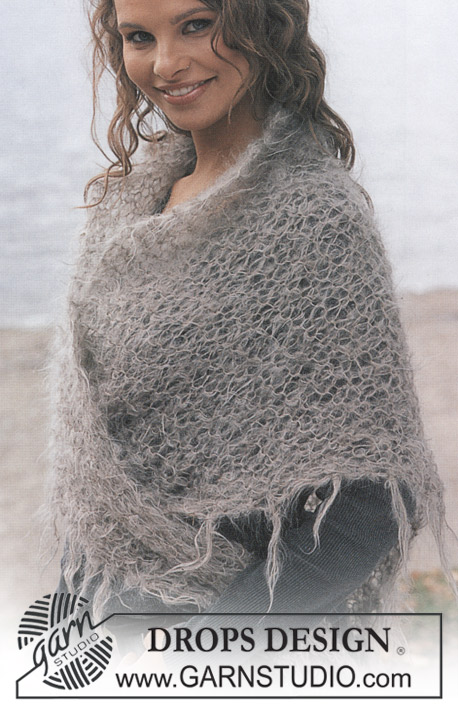
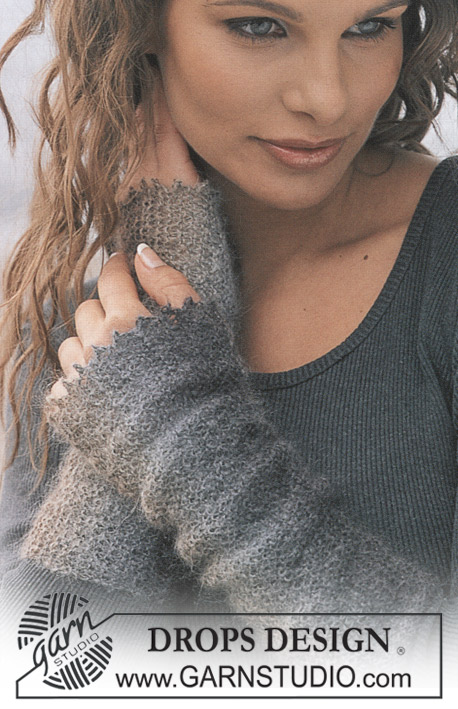
Banda para la cabeza DROPS en “Alaska” y Chal en “Vienna”
DROPS 86-10 |
|
|
Muestra: 18 pts x 23 vtas en puntada jersey = 10 x 10 cm Banda para la cabeza: Empezar por el centro posterior. Mon 19 pts. Tejer resorte como sigue: Vuelta 1 (lado derecho): 1d (pt de orillo tejido en pt musgo), *2d, 1r*, repetir un total de 5 veces – terminar la vta con 2d y 1d (pt de orillo tejido en pt musgo). Vuelta 2 (lado revés): 1d (pt de orillo tejido en pt musgo), *2r, 1d*, repetir un total de 5 veces – terminar la vta con 2r y 1d (pt de orillo tejido en pt musgo). Hacer todos los aum en las vtas del lado derecho. Cuando la pieza mida 8 cm aum todos los 1r a 2r = 24 pts. Cuando la pieza mida 14 cm aum todos los 2r a 3r = 29 pts. Cuando la pieza mida 18 cm aum todos los 3r a 4r = 34 pts. Cuando la pieza mida 21 cm aum todos los 4r a 5r = 39 pts. Cuando la pieza mida 24 cm colocar un marcapuntos (MP) = este es el centro de la banda para la cabeza. A cont corresponde dar forma a la inversa – medir desde el MP. Hacer todas las dism en las vtas del lado derecho. Cuando la pieza mida 3 cm dism todos los 5r a 4r = 34 pts. Cuando la pieza mida 6 cm dism todos los 4r a 3r = 29 pts. Cuando la pieza mida 10 cm dism todos los 3r a 2r = 24 pts. Cuando la pieza mida 16 cm dism todos los 2r a 1r = 19 pts. Cuando la pieza mida 48 cm unir a la orilla de montaje (no rem primero). CHAL: Medidas: Largo: 100 cm Ancho: 205 cm Materiales: DROPS Vienna de Garnstudio 200 g No. 43, café claro Agujas DROPS 15 mm – o tamaño necesario para obtener la muestra correcta. Muestra: 5 pts x 9 vtas en pt musgo = 10 x 10 cm (esto se teje flojo). Chal: Mon 4 pts y tejer pt musgo, aum 1 pt en uno de los lados en vtas alternas. El aum se hace tejiendo 2 pts dentro de 1 pt. Cont aum hasta tener 50 pts, la pieza mide aprox 102 cm. Ahora dism en el mismo lado que los aumentos – dism en vtas alternas tejiendo juntos del derecho los 2 pts más externos. Cont dism hasta que queden 4 pts, la pieza mide aprox 205 cm. Rem pts. Fleco: Colocar mechones de flecos a lo largo de los dos lados aprox 4-5 cm entre uno y otro – empezar en la punta de la orilla inferior. Cortar 6 hebras de 35 cm de largo, doblar a la mitad, pasar la punta doblada a través del pt más externo y pasar los extremos a través del bucle. |
|
¿Terminaste este patrón?Entonces, etiqueta tus fotos con #dropspattern o envíalas a la galería #dropsfan. ¿Necesitas ayuda con este patrón?Encontrarás 16 videos tutoriales, un espacio para comentarios/preguntas y más visitando la página del patrón en garnstudio.com © 1982-2026 DROPS Design A/S. Todos los derechos reservados. Este documento, incluyendo todas sus sub-secciones, está protegido por los derechos de autor (copyright). Lee más acerca de lo que puedes hacer con nuestros patrones en la parte de abajo de cada patrón de nuestro sitio. |


Con más de 40 años en el diseño de modelos de punto y de ganchillo, DROPS Design ofrece una de las más vastas colecciones de patrones gratuitos en el internet - traducidos en 17 idiomas. Al día de hoy, contamos con 324 catálogos y 12290 patrones - de los cuales 11685 están traducidos en español.
Nosotros trabajamos con mucho esmero para brindarte lo mejor que las labores de punto y ganchillo tienen para ofrecer,inspiración y consejos, así como hilos de magnífica calidad a precios increíbles! Te gustaría usar nuestros patrones para otro fin además del uso personal? Puedes leer acerca de lo que estás permitida a hacer en el texto de Copyright en la parte de abajo de todos nuestros patrones. Felices labores!
Escribe un comentario sobre DROPS 86-10
¡Nos encantaría saber qué piensas acerca de este patrón!
Si quieres escribir una pregunta referente al patrón, por favor asegúrate de elegir la categoría correcta en el formulario debajo, para acelerar el proceso de respuesta. Los campos obligatorios están marcados con un *.