
Popular categories
Looking for a yarn?


Comments / Questions (7)
![]() Sigrid wrote:
Sigrid wrote:
Vil det ikke bli ulikt antall masker mellom kast og masker i sidene? På hullraden vil man ha 2 masker før kastet på den ene siden og avslutte med kast og 1 maske rett på den andre siden. Det samme vil det bli på knapphullene. På knapphullene kan det strikkes kast og strikke 3 og 4 maske sammen på motsatt side for å få knapphullene like på begge sider. Hvordan kan jeg få hullraden lik?(likt antall masker i sidene?)
17.01.2024 - 17:02DROPS Design answered:
Hei Sigrid. Nei, du starter med 1 rett, så strikker og gjentar du * 2 rett sammen + kast * til det gjestår 1 maske. Altså du starter og slutter med 1 rett (kun det som står mellom * som skal gjentas). Knapphull = Strikk tredje og fjerde maske FRA kanten rett sammen, deretter lag 1 kast, gjenta i begge sider av arbeidet (NB - fra kanten). mvh DROPS Design
18.01.2024 - 09:50
![]() Marie wrote:
Marie wrote:
På billedet ser det ud til at der er en kant ved indtagningerne nederst på forstykket. Den kommer så vidt jeg kan se ikke frem, når man følger opskriften?
23.08.2019 - 20:48DROPS Design answered:
Hei Marie. Kantene strikkes i riller, som hele bodyen strikkes i. Den kanten du henviser til, ser litt anderledes ut, men det er fordi det blir felt 1 maske innenfor 3 masker i riller i hver side til skrittet. God Fornøyelse!
09.09.2019 - 11:37
![]() Sofie wrote:
Sofie wrote:
Arbejdet ruller fuldstændig sammen, kan man løse dette?
30.07.2019 - 12:28DROPS Design answered:
Hei Sofie. Du kan prøve å dampe plagget lett, og se om det hjelper. Lykke til
31.07.2019 - 14:28
![]() Carolin wrote:
Carolin wrote:
Hallo, ich habe eine Frage zu dem Rückenteil. Wenn ich die 20 Reihen Zunahmen gemacht habe, dann habe ich 54 Maschen. Ich verstehe leider nicht, wie ich dann mit 22 Zunahmen auf 76 Maschen komme. Vielen Dank für die Antwort!
13.08.2018 - 15:14DROPS Design answered:
Liebe Carolin, wenn Sie 54 M haben, schlagen Sie 11 M am Ende der nächsten Hinreihe = 54+11= 65 M, wenden und der nächste Rückreihe stricken und 11 M am Ende dieser Reihe anschlagen = 65+11= 76 M - deutsche Anleitung wird angepasst. Viel Spaß beim stricken!
13.08.2018 - 15:49
![]() Housmans wrote:
Housmans wrote:
Goedenavond, ik snap niet helemaal hoe ik de minderingen moet doen. Kunt u dit wat beter uitleggen? Wanneer moet ik minderen, moet ik minderen tussen de 3 zij-ribbelsteken? Of alleen aan de zijkant? Wat betekend "in totaal...in de 4e en 2e naald" hoeveel naalden moet ik doen tot er genoeg geminderd is etc. Alvast bedankt voor uw reeds genomen moeite. Mvg
03.08.2018 - 20:52DROPS Design answered:
Dag Housmans, Je mindert naast de 3 steken in ribbelsteek, zodat deze 3 steken in tact blijven. Aan het begin van de naald brei je eerst 3 steken in ribbelsteek, dan 2 steken samen. Aan het eind van de naald brei je tot er 5 steken over zijn, haal dan 1 steek recht af, brei 1 steek recht en haal de afgehaalde steek over de gebreide steek, brei tot slot de 3 steken in ribbelsteek. Deze minderingen doe je eerst elke 4e naald (5) 4-5-4-6 (6-5) keer. Daarna doe je deze minderingen elke 2e naald (2) 6-7-11-10 (12-16) keer. Dus je mindert eerst een aantal keren (afhankelijk van je maat) op de 4e naald aan beide kanten. Daarna minder je een aantal keren op iedere 2e naald.
06.08.2018 - 10:02
![]() Vlasta Bambasová wrote:
Vlasta Bambasová wrote:
Jsem nadšená z těchto stránek a předpisů na pletení,háčkování.Všechno pěkně dopodrobna popsané.Děkuji
24.07.2018 - 18:40Mary Smith wrote:
I knitted this in. Cotton and it has stretched being garter stitch. Any ideas how to resolve this?
01.05.2018 - 18:41
|
||||
Little Miss Ribbons#littlemissribbonshat |
||||
 |
 |
|||
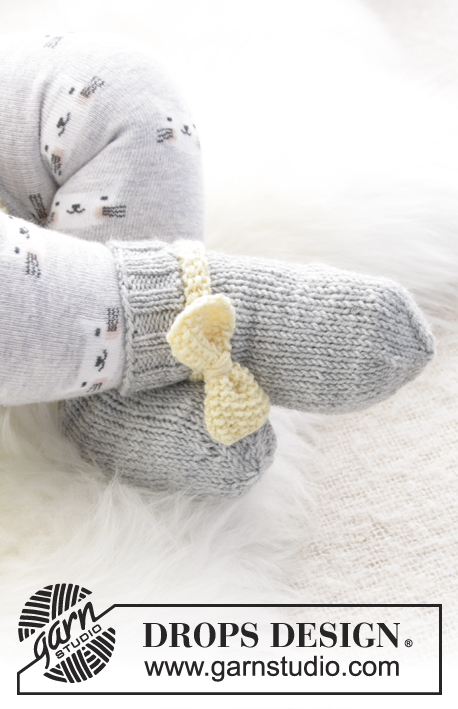
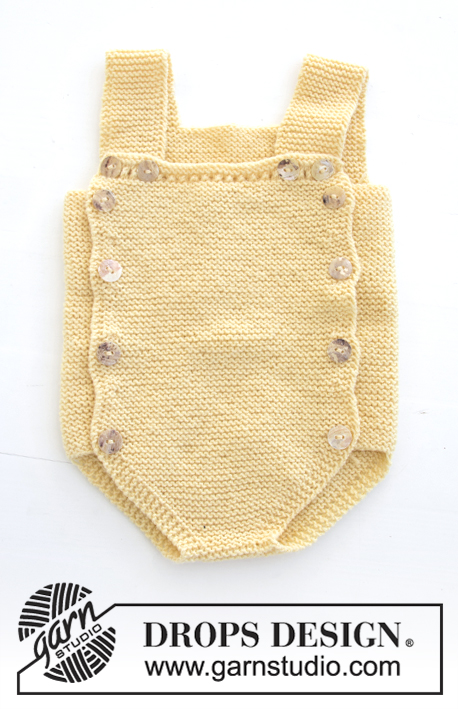
Knitted baby body in garter stitch. Knitted in one piece. Sizes premature - 4 years. The piece is worked in DROPS BabyMerino.
DROPS Baby 31-10 |
||||
|
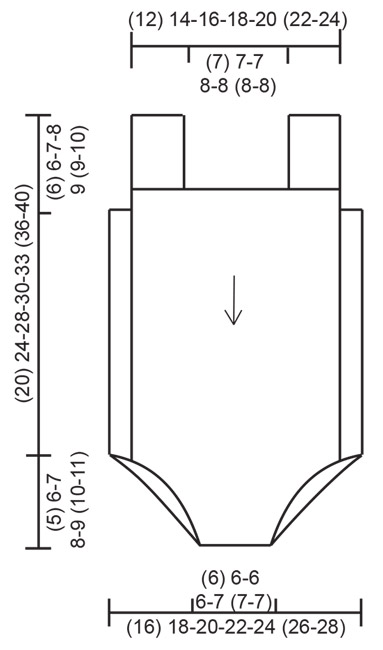
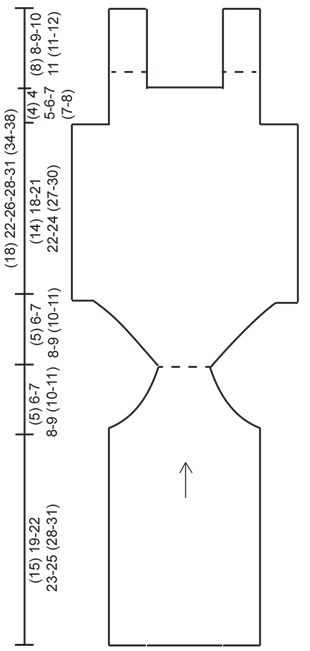
INFORMATION FOR THE PATTERN: RIDGE/GARTER STITCH (worked back and forth): 1 ridge = Knit 2 rows. INCREASE TIP: All increases are made from the right side. Increase inside the 3 stitches in garter stitch in each side of the piece. Increase 1 stitch by making 1 yarn over, on next row knit the yarn over twisted to avoid a hole. DECREASE TIP: All decreases are made from the right side. Decrease as follows before the 3 stitches in garter stitch: Slip 1 stitch as if to knit, knit 1, pass the slipped stitch over (= 1 stitch decreased). Decrease as follows after the 3 stitches garter stitch: Knit 2 together (= 1 stitch decreased). BUTTONHOLES: Work buttonholes on the front piece. 1 BUTTONHOLE = Knit together the 3rd and 4th stitch from the edge and make 1 yarn over, repeat in both sides of the piece. On the next row, knit the yarn overs (= holes). Work buttonholes when the piece measures a total of approx.: <0: 3, 9 and 15 cm. 0/1 MONTH: 3, 8, 13 and 18 cm. 1/3 MONTHS: 3, 9, 15 and 21 cm. 6/9 MONTHS: 4, 10, 16 and 22 cm. 12/18 MONTHS: 4, 9, 14, 19 and 24 cm. 2 YEARS: 3, 9, 15, 21 and 27 cm. 3/4 YEARS: 4, 9, 14, 19, 24 and 30 cm. ---------------------------------------------------------- BODY: The piece is worked back and forth. First work the front piece from the top down to the gusset, then work the back piece on from there, bottom up; the straps are worked at the end. The body is worked in one piece. FRONT PIECE: Cast on (28) 34-38-44-48 (52-58) stitches with needle size 3 mm and BabyMerino. Knit 3 rows, purl 1 row from the wrong side, then work a row of holes as follows: Knit 1 stitch, * knit 2 together, 1 yarn over *, work from *-* until there is 1 stitch left, knit 1. Purl 1 row from the wrong side over all stitches; purl the yarn overs to leave holes (the straps will be buttoned on here). Then continue working in GARTER STITCH – see description above, to finished length. REMEMBER THE KNITTING TENSION! When the piece measures (3) 3-3-4-4 (3-4) cm work buttonholes in each side of the piece – read BUTTONHOLES! When the piece measures (15) 19-22-23-25 (28-31) cm decrease for the gusset as follows – read DECREASE TIP: Decrease 1 stitch inside the 3 stitches in garter stitch in each side of the piece (= 2 stitches decreased) every 4th row a total of (5) 4-5-4-6 (6-5) times, then every 2nd row a total of (2) 6-7-11-10 (12-16) times = (14) 14-14-14-16 (16-16) stitches. The piece now measures approx. (20) 25-29-31-34 (38-42) cm. Insert 1 marker in the piece. The front piece is finished. THE PIECE IS NOW MEASURED FROM HERE! BACK PIECE: Now increase as follows – read INCREASE TIP: Increase 1 stitch inside the 3 stitches in garter stitch in each side of the piece (= 2 stitches increased) every 2nd row a total of (12) 15-17-20-21 (23-26) times = (38) 44-48-54-58 (62-68) stitches. The piece measures approx. (5) 6-7-8-9 (10-11) cm from the marker. Then cast on 11 new stitches in each side of the piece at the end of the next 2 rows = (60) 66-70-76-80 (84-90) stitches. When the piece measures (19) 24-28-30-33 (37-41) cm cast off 16 stitches for the armholes at the beginning of the next 2 rows (i.e. in each side of the piece) = (28) 34-38-44-48 (52-58) stitches. When the piece measures (4) 4-5-6-7 (7-8) cm from where you cast off stitches for the armholes, (= (23) 28-33-36-40 (44-49) cm from the marker), knit the first (6) 9-11-12-14 (16-19) stitches (= 1 strap), then place them on a thread, cast off the next (16) 16-16-20-20 (20-20) stitches for neck, knit the last (6) 9-11-12-14 (16-19) stitches (= 1 strap). Continue working garter stitch over these (6) 9-11-12-14 (16-19) stitches until the piece measures (31) 36-42-46-51 (55-61) cm from the marker (the strap measures approx. (8) 8-9-10-11 (11-12) cm). Cast off. Work the other strap in the same way. ASSEMBLY: Sew 2 buttons onto each of the straps, the buttons are buttoned through the row of holes at the top of the front piece. Sew the buttons on the middle of the 6 outermost stitches on each side of the back piece (= bands). ---------------------------------------------------------- For hat see DROPS number 31-11. For socks see DROPS number 31-12. ---------------------------------------------------------- |
||||
Diagram explanations |
||||
|
||||
 |
||||
 |
||||
Have you finished this pattern?Tag your pictures with #dropspattern #littlemissribbonshat or submit them to the #dropsfan gallery. Do you need help with this pattern?You'll find 15 tutorial videos, a Comments/Questions area and more by visiting the pattern on garnstudio.com. © 1982-2026 DROPS Design A/S. We reserve all rights. This document, including all its sub-sections, has copyrights. Read more about what you can do with our patterns at the bottom of each pattern on our site. |
||||


With over 40 years in knitting and crochet design, DROPS Design offers one of the most extensive collections of free patterns on the internet - translated to 17 languages. As of today we count 325 catalogues and 12298 patterns translated into English (UK/cm).
We work hard to bring you the best knitting and crochet have to offer, inspiration and advice as well as great quality yarns at incredible prices! Would you like to use our patterns for other than personal use? You can read what you are allowed to do in the Copyright text at the bottom of all our patterns. Happy crafting!
Post a comment to pattern DROPS Baby 31-10
We would love to hear what you have to say about this pattern!
If you want to leave a question, please make sure you select the correct category in the form below, to speed up the answering process. Required fields are marked *.