
Popular categories
Looking for a yarn?


Comments / Questions (7)
![]() Elisabeth wrote:
Elisabeth wrote:
Hallo, mir ist nicht klar wie der Schnitt funktioniert, was wie zusammen kommt.
02.04.2025 - 20:19DROPS Design answered:
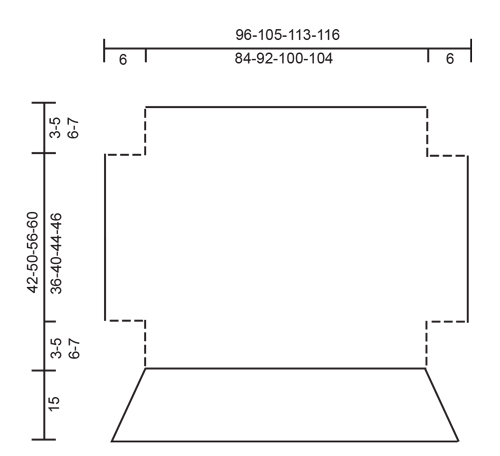
Liebe Elisabeth, schauen Sie mal die Maßskizze: man beginnt mit den 84-104 cm breit unten, dann wird man die Maschen für die Ärmel beidseitig anschlagen, nach 36-46 cm diese Maschen abketten und noch 3-7 cm stricken. Die Ärmel wird man zusammen nähen: an jeder Seite näht man zusammen die 3-7 ersten mit den 3-7 letzen cm und dann die neuen Maschen mit den abgeketteten Maschen (Loch für den Ärmel). Am ende wird man Maschen um beide Ende: die angeschlagenen Maschen + die abgeketteten Maschen für den Rand im Rippenmuster (um herum die ganze Öffnung der Jacke). Viel Spaß beim Stricken!
03.04.2025 - 08:40
![]() Cheryl wrote:
Cheryl wrote:
Hi. How to knit stockinette stitch. Kind regards Cheryl
21.06.2024 - 01:49DROPS Design answered:
Hi Cheryl, Stockinette or stocking stitch is knitted from the right side and purled from the wrong side. Happy crafting!
21.06.2024 - 06:48
![]() Julie Hepburn wrote:
Julie Hepburn wrote:
Good Morning, I don't understand the diagram for this pattern, even though I am an experienced knitter. I can't work out what size to use and I can't see whether I am knitting top down or across the piece, Help! Thank You, Julie Hepburn
21.05.2022 - 10:53DROPS Design answered:
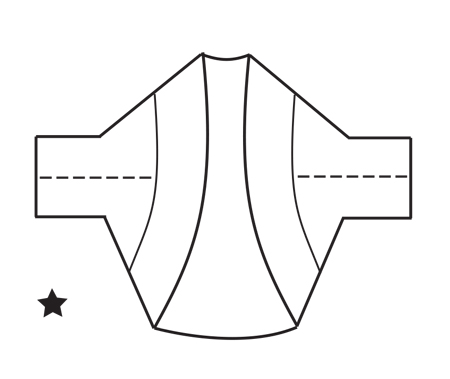
Dear Julie, first you work the center part and then the edge. You work top down, casting on extra stitches on each side for the sleeves. To finish, you sew under the sleeve and the side seams and you work an edge. To choose the right size, choose your usual size since this jacket is quite wide (as long as you have the correct gauge and obtain the measurements indicated under the pattern instructions). Happy knitting!
22.05.2022 - 22:41
![]() Marianne wrote:
Marianne wrote:
Ang. Sammensygning : forstår jeg det sådan at den glatte side skal vende ud og sammensygning foretages fra denne side ? Mvh. Marianne
24.07.2019 - 18:15DROPS Design answered:
Hej Marianne, ja det stemmer, du finder en video for hvordan du gør så det bliver pænt, til venstre i opskriften (under billedet). God fornøjelse!
02.08.2019 - 11:49
![]() Giulia wrote:
Giulia wrote:
Buongiorno! Vorrei sapere quanti centimetri si deve cucire per formare le maniche. Grazie!
01.12.2018 - 12:03DROPS Design answered:
Buongiorno Giulia. Deve cucire le linee tratteggiate dello schema con le misure: quindi 6 cm per il sotto manica (che corrispondono alle 10 maglie avviate per le maniche) e i lati nella parte in basso del davanti / dietro per 3-5-6-7 cm (a seconda della taglia). Buon lavoro!
01.12.2018 - 17:22
![]() Saskia Duives-Cahuzak wrote:
Saskia Duives-Cahuzak wrote:
Klopt de onderste tekening wel? er wordt toch een rand gebreid aan zowel de bovenkant als de onderkant?
27.07.2018 - 19:21
![]() Camilla wrote:
Camilla wrote:
Hej Jag vill gärna sticka den här boleron men i bomull/merinoull-garn. Går det att använda Cotton-merino som inte tillhör grupp C?
16.05.2018 - 09:16DROPS Design answered:
Hei Camilla. Så lenge strikkefastheten overholdes er det ikke noe i veien for å bruke et annet garn, også fra en annen garngruppe. Det går feks an å strikke med fler tråder om man vil bruke et mye tynnere garn enn anngitt i oppskriften. Nå skal det sies at Alpaca Boucle har en veldig annerledes tekstur enn Cotton Merino, så bare vær obs på at plagget da også kommer til å bli veldig annerledes. Vær også obs på at det går med mer garn av Cotton Merino enn Alpaca Boucle. God fornøyelse.
16.05.2018 - 13:16
|
||||
Nebula |
||||
 |
 |
|||
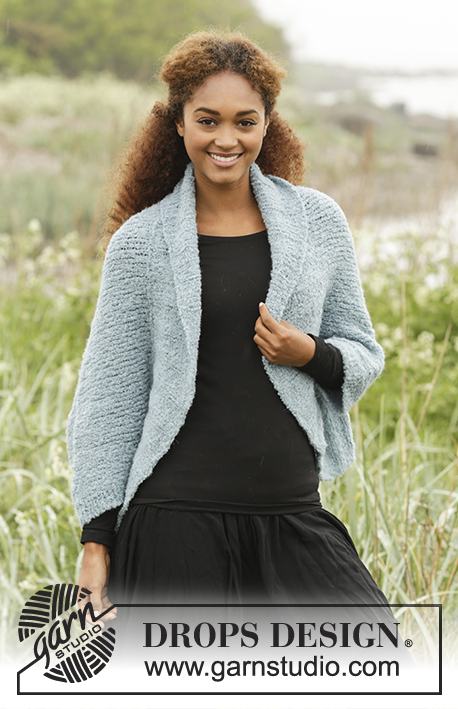
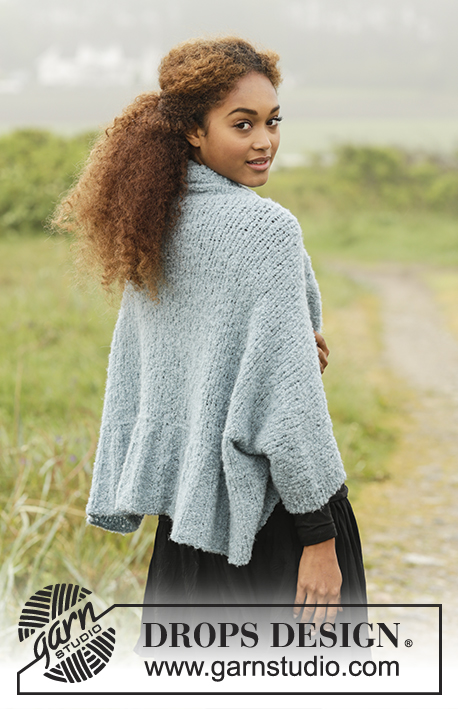
Knitted shoulder piece in DROPS Alpaca Bouclé with wide edge in rib. Size: S - XXXL.
DROPS Extra 0-1351 |
||||
|
GARTER ST (back and forth): K all rows. 1 ridge = 2 rows K. INCREASE TIP-1 (applies to edge in rib): To calculate how often inc should be done, use the total no of sts on row (e.g. 264 sts) and divide by no of inc to be done (e.g. 60) = 4.4. I.e. in this example inc after alternately approx. every 4th and 5th st (inc 1 st by making 1 YO, on next row K YO twisted to avoid holes). INCREASE TIP-2: Inc 1 st in transition between P/K. Inc 1 st by making 1 YO, on next round P YO twisted. ---------------------------------------------------------- SHOULDER PIECE: Worked back and forth on circular needle. Place the 2 circular needles tog and cast on 134-148-160-166 sts over both circular needles with Alpaca Bouclé (this is done to avoid a tight cast-on edge). Pull out circular needle size 4 mm and continue on circular needle size 5.5 mm as follows: Work 1 ridge in GARTER ST - see explanation above. Then work in stocking st with 1 edge st in garter st in each side. REMEMBER THE KNITTING TENSION When piece measures 3-5-6-7 cm, cast on 10 new sts at the end of the next two rows for sleeves = 154-168-180-186 sts. Continue in stocking st with 5 edge st in garter st in each side. When piece measures 39-45-50-53 cm, cast off 10 sts at the beg of the next two rows = 134-148-160-166 sts. Continue in stocking st with 1 edge st in garter st in each side until piece measures 41-49-55-59 cm. Work 1 ridge and LOOSELY cast off (it is important for the shape of the garment to avoid a tight cast-off edge). ASSEMBLY: Place cast-on edge against cast-off edge with WS against WS, sew side and underarm seams in one inside 1 edge st - see dotted line on chart. EDGE IN RIB: Pick up from RS 264-292-316-328 sts along cast-on/cast-off edge on shoulder piece (i.e. pick up 1 st in every st) on circular needle size 4 mm with Alpaca Bouclé. K 1 round while inc 60-68-68-68 sts evenly - READ INCREASE TIP-1 = 324-360-384-396 sts. Then work rib in the round = K 3/P 3. When rib measures 4 cm, inc every other 3 P sts to 4 P sts = (see from RS) - READ INCREASE TIP-2 = 351-390-416-429 sts. When rib measures 8 cm, inc the remaining 3 P sts to 4 P sts = 378-420-448-462 sts. When rib measures 15 cm, LOOSELY cast off with K over K and P over P - NOTE: Make 1 YO after approx. every 7th st while casting off (cast off YOs as sts) to make the cast-off edge more elastic (cast off YOs as sts). |
||||
Diagram explanations |
||||
|
||||
 |
||||
 |
||||
Have you finished this pattern?Tag your pictures with #dropspattern or submit them to the #dropsfan gallery. Do you need help with this pattern?You'll find 23 tutorial videos, a Comments/Questions area and more by visiting the pattern on garnstudio.com. © 1982-2026 DROPS Design A/S. We reserve all rights. This document, including all its sub-sections, has copyrights. Read more about what you can do with our patterns at the bottom of each pattern on our site. |
||||


With over 40 years in knitting and crochet design, DROPS Design offers one of the most extensive collections of free patterns on the internet - translated to 17 languages. As of today we count 324 catalogues and 12290 patterns translated into English (UK/cm).
We work hard to bring you the best knitting and crochet have to offer, inspiration and advice as well as great quality yarns at incredible prices! Would you like to use our patterns for other than personal use? You can read what you are allowed to do in the Copyright text at the bottom of all our patterns. Happy crafting!
Post a comment to pattern DROPS Extra 0-1351
We would love to hear what you have to say about this pattern!
If you want to leave a question, please make sure you select the correct category in the form below, to speed up the answering process. Required fields are marked *.