
Popular categories
Looking for a yarn?


Comments / Questions (19)
Sumaira wrote:
After eyelet holesfrom WS pattern says"then increase 1st in every 4rows and dec 1. St in left side of piece every other row..I am not understanding this.every 4rows mean both right and wrong side...?
14.02.2017 - 14:04DROPS Design answered:
Dear Sumaira, you inc 1 st every 4th row = every other row worked from RS, and dec 1 st every other row = every row from RS. Happy knitting!
14.02.2017 - 15:02Jinky wrote:
Thanks for this beautiful pattern, love making it, was wondering if you have an adult size for this one?
09.12.2015 - 01:51DROPS Design answered:
Dear Jinky, what about this one - just add a picot edge as in the baby pattern. Happy knitting!
09.12.2015 - 09:54Ranveig wrote:
Thank you so much for your video on how to assemble the hat. I will use this pattern many times.
24.09.2015 - 19:09
![]() Selam wrote:
Selam wrote:
How do I adujust the tension and size?is there some instructions please???
05.08.2015 - 09:57DROPS Design answered:
Hej Selam, for at få færre m på 10 cm prøver du med en tykkere pind. for at få flere m på 10 cm prøver du med en tyndere pind. God fornøjelse!
07.08.2015 - 08:14
![]() Selam wrote:
Selam wrote:
Hi, how can I knit this hat for a child 6-9 years of Age?please help
05.08.2015 - 09:12DROPS Design answered:
Dear Selam, this hat is for a head circumference to 50/52 cm, you can then adjust with your tension and the size of the child. Happy knitting!
05.08.2015 - 09:49
![]() Anna wrote:
Anna wrote:
Bij dit patroon is de picotrand niet correct weergegeven. De Noorse versie is dan ook iets anders (en wel consistent met de rest van debeschrijving). In de nederlandse versie zou moeten staan: Naald 1 alles recht moeten zijn. naald 2 alles recht tot 4 steken over zijn, dan het picot gedeelte voor 2 steken meer. naald 3 minderingen van het picot gedeelte en vervolgens alles recht naald 4 alles recht. Misschien is dit ook bij vertalingen naar andere talen misgegaan.
24.04.2015 - 16:09DROPS Design answered:
Hoi Anna. Ja, je hebt gelijk dat de Nederlandse beschrijving verkeerd was. Nld 3 en 4 moesten 2 en 3 zijn. Het is aangepast. Bedankt voor het melden.
27.04.2015 - 14:43
![]() Nadine wrote:
Nadine wrote:
Er staat bij de stekenverhouding 10x10 is 21 St. En 42 nl maar karisma (en garenalternatief Marino extra fine ) geven op de omslag aan 21stk en 28 Ndl. Wat is de JUISTE stekenverhouding? Alvast dank
17.12.2014 - 13:00DROPS Design answered:
Hoi Nadine. Wat er staat op de wikkel is de standaard. Je moet de stekenverhouding aanhouden wat op het patroon staat. De stekenverhouding kan verschillen per patroon afhankelijk van structuur, motief, vorm enzovoort.
17.12.2014 - 14:56
![]() Dijana wrote:
Dijana wrote:
Picokant på de 4 yderst masker samtidig med der tages 1 m ud (indenfor picokanten) Når der så står 4 m picokant, 1 r, slå om, ret til der er 3 m tilbage.. Skal jeg så strikke 4 r (picokanten) og 1 r, slå om. Eller er det at starte med 1 r, slå om også ret vider.
20.11.2014 - 18:37DROPS Design answered:
Hei Dijana. Du strikker picotkant over 4 m i höjre side af arbejdet (set fra retten). Dvs, du strikker PICOTKANT over de 4 m i höyre side, merke, 1 r, 1 kast og strik til 3 m tilbage: 2 r sm og 1 r. Vend og strik vrang som beskrevet.
21.11.2014 - 16:08
![]() Christina wrote:
Christina wrote:
Hej. For at få den viste picotkant, skal denne I så ikke linke til den video som hedder Picot kant -Strikket? Jeg er stadig ny-strikker og læner mig derfor meget op af videoerne :) og mange af mine medstrikkere gør sikkert det samme. Jeg blev i hvertfald forvirret, da min hue ikke lignede den på billedet :) /Christina
17.09.2014 - 23:32
|
|
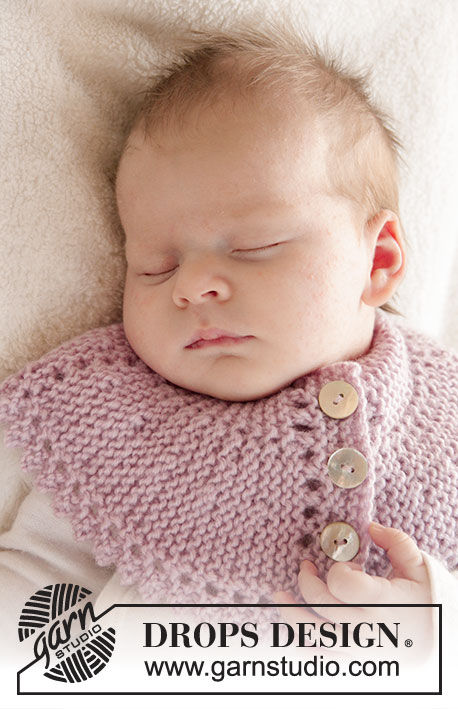
Lullaby#lullabybonnet |
|
|
|
|
Knitted baby hat in garter st with picot edge in DROPS Karisma. Size 0 - 4 years.
DROPS Baby 25-3 |
|
|
GARTER ST (back and forth on needle): K all rows. 1 ridge = 2 rows K. PICOT EDGE (back and forth on needle): ROW 1 (= RS): K all sts. ROW 2 (= WS): K until 4 sts remain, work these sts as follows: K 2 tog, 1 YO, K 2 sts in each of the last 2 sts = 2 new sts on row. ROW 3 (= RS): Slip 1st st as if to K, K 1, psso, K 1 and slip the last st on right needle over the foremost st, 2 sts dec - then K the remaining sts. ROW 4 (= WS): K all sts. Repeat rows 1 to 4. ---------------------------------------------------------- HAT: Cast on 27-31-35-37 (41-43) sts on needles size 4 mm with Karisma. Insert 1 marker inside the outermost 4 sts in right side of piece (seen from RS), move the marker upwards when working. Work in GARTER ST - see explanation above, AT THE SAME TIME work PICOT EDGE over the outermost 4 sts before marker - see explanation above. AT THE SAME TIME inc 1 st in right side of piece (inside picot edge) and dec 1 st in left side of piece as follows: ROW 1 (= RS): 4 sts picot edge, K 1, 1 YO (= 1 inc), work until 3 sts remain, K 2 tog and K 1. ROW 2 (= WS): K until marker (K YO twisted to avoid holes) and finish with 4 sts picot edge. Repeat these 2 rows until piece measures 5-5½-6-6½ (7-8) cm. Then dec 1 st in the right side of piece and inc 1 st in the left side of piece as follows: ROW 1 (= RS): 4 sts picot edge, K 1, slip 1 st as if to K, K 1, psso, work until 1 st remains, make 1 YO and K 1. ROW 2 (= WS): K until marker (K YO twisted) and finish with 4 sts picot edge. Repeat these 2 rows until 1 row remains from WS before piece measures 10-11-12-13 (14-16) cm. Now work a row with eyelet holes from WS as follows: * K 2 tog, 1 YO *, repeat from *-* until 1 st remains before marker, K 1 and finish with 4 sts picot edge (K YOs on row with eyelet holes, not K twisted on next row). Then inc 1 st in right side of piece every 4 rows and dec 1 st in left side of piece every other row until piece measures 14½-15½-16½-17½ (18-19) cm from cast-on edge. Then dec 1 st in right side of piece every 4 rows and inc 1 st in left side of piece every other row until piece measures 19-20-21-22 (22-22) cm from cast-on edge. On next row from WS work eyelet holes as follows: * K 2 tog, 1 YO *, repeat from *-* until 1 st remains before marker, K 1 and finish with 4 sts picot edge (K YOs on row with eyelet holes, not K twisted on next row). Then inc 1 st in right side of piece every other row and dec 1 st in left side of piece every other row until piece measures 24-25½-27-28½ (29-30) cm. Now dec 1 st in the right side on every other row and inc 1 st in the left side on every other row until finished measurements = 29-31-33-35 (36-38) cm. Cast off. ASSEMBLY: Back of hat = one side of piece has 2 whole tips and 2 half tips. The 2nd of the 3 whole tips in the opposite side of the piece (= blunt tip) goes down to the forehead at the front. Sew the hat edge to edge with neat little stitches as follows: Sew tog on back of head by sewing first half tip tog with first half of first whole tip. Continue to sew second half of first whole tip tog with first half of second whole tip. Then sew the other half of the second whole tip tog with the last half tip. Finish by sewing the hat tog mid back. TIES: Cut 2 lengths of yarn of 150 cm. Twine them tog until they resist, thread the tie through one tip at the front of hat (from WS through a hole in row with eyelet holes) place the string double and let it twine again. Make a knot at the end. Make another tie in the other end of hat. |
|
Have you finished this pattern?Tag your pictures with #dropspattern #lullabybonnet or submit them to the #dropsfan gallery. Do you need help with this pattern?You'll find 15 tutorial videos, a Comments/Questions area and more by visiting the pattern on garnstudio.com. © 1982-2026 DROPS Design A/S. We reserve all rights. This document, including all its sub-sections, has copyrights. Read more about what you can do with our patterns at the bottom of each pattern on our site. |


With over 40 years in knitting and crochet design, DROPS Design offers one of the most extensive collections of free patterns on the internet - translated to 17 languages. As of today we count 324 catalogues and 12290 patterns translated into English (UK/cm).
We work hard to bring you the best knitting and crochet have to offer, inspiration and advice as well as great quality yarns at incredible prices! Would you like to use our patterns for other than personal use? You can read what you are allowed to do in the Copyright text at the bottom of all our patterns. Happy crafting!
Post a comment to pattern DROPS Baby 25-3
We would love to hear what you have to say about this pattern!
If you want to leave a question, please make sure you select the correct category in the form below, to speed up the answering process. Required fields are marked *.