
Popular categories
Looking for a yarn?


Comments / Questions (97)
Vanda wrote:
Hallo, in der deutschen Version bei der Aermel steht "beginnen Sie also mit 3 M re." geschrieben, aber das passt nicht. In der englischen Version dagegen schreibt es "start at marker with P 3", dass wuerde auf Deutsch "beginnen Sie also mit 3 M li." heissen. Vielleicht korrigieren Sie die deutsche Anleitung, weil es sehr viele Fragen diesbezueglich in der Kommentare waren. Danke.
20.07.2015 - 10:30DROPS Design answered:
Ja, Sie haben Recht, das wird nun korrigiert. Vielen Dank für den Hinweis!
20.09.2015 - 15:11
![]() Tiny Van Hassel wrote:
Tiny Van Hassel wrote:
Hoe kan ik dit patroon aanpassen aan xxxl ?
13.02.2015 - 20:39DROPS Design answered:
Hoi Tiny. Je kan met hulp van de stekenverhouding (aantal st per 10 cm) het aantal st dat je meer moet hebben berekenen. Maar kijk goed uit bij het maken van de raglan, het is hier heel belangrijk dat de minderingen en afmetingen goed uitkomen. Succes
16.02.2015 - 15:48
![]() Yvonne Verleg wrote:
Yvonne Verleg wrote:
Ik ben begonnen met de herentrui pag 1, nr:85-2 , Alaska. Volgens het patroon moet deze trui met een rondbreinaald gebreid worden, maar ik kan daar niet goed mee uit de voeten. Ik brei graag, het is een hobby van me, maar dan wel gewoon met 2 naalden. Heeft U deze trui met raglan en patroon 6 re -6 li, ook voor mij zodat ik hem met 2 naalden kan breien? Daar zou ik heel blij mee zijn. Alvast bij voorbaat dank.
20.01.2015 - 16:52DROPS Design answered:
Beste Yvonne. Ik heb niet dit patroon voor heen en weer breien. U zou het patroon eventueel kunnen aanpassen voor heen en weer breien, maar ik denk dat het lastig zal worden met dit patroon ivm het design en de raglan. Ik kan u helaas niet helpen met individuele aanpassingen.
21.01.2015 - 15:50
![]() Giada wrote:
Giada wrote:
Scusate ancora per le mie mille domande, ma le diminuzioni sul rovescio del lavoro del raglan quando si fanno?
14.01.2015 - 21:39DROPS Design answered:
Buongiorno Giada. Mentre si lavora la sprone in tondo, quando il lavoro misura (a seconda della taglia) 49-59-61-64 cm, bisogna mettere in attesa le m per lo scollo sul davanti. A questo punto si lavora avanti e indietro sui ferri e quando le diminuzioni per il raglan diventano ad ogni ferro (diminuire ad ogni ferro 3-0-10-5 volte), sarà necessario diminuire sul rovescio del lavoro. Se sta lavorando la taglia M, non sono però previste diminuzioni per il raglan ad ogni ferro, quindi le diminuzioni sono solo sul diritto del lavoro. Buon lavoro!
15.01.2015 - 10:15
![]() Lis Folke wrote:
Lis Folke wrote:
Når jeg skal strikke denne opskrift med en anden garntybe Karisma hvad gør jeg så?? Kan jeg bruge samme pinde 5 og gå en størrelse op, eller har I et forslag?? på forhånd tak
05.01.2015 - 14:46DROPS Design answered:
Hej Lis. Strik altid en pröve först for at opnaa den rette strikkefasthed angivet i mönstret. Er garnet meget tykkere/tyndere, ville jeg nok beregne mönstret paany saa det passer til fastheden paa det nye garn. At gaa en störrelse op er nemt, men det kan give forkerte maal.
05.01.2015 - 15:04
![]() Giada wrote:
Giada wrote:
Buonasera, non capisco gli aumenti per le maniche. Ho il segnapunti con 3 rovesci da una parte e 3 dall'altra, quindi arrivo a 13 cm (lavoro la misura M) aumento 1 m a entrambi i lati delle 6 m rov che contengono il segnapunti (lavorare a rov le prime 6 m aumentate, lavorare a dir le 6 m successive). Io capisco che mi viene una costa con 12 maglie a rovescio (6 rov già esistenti+6 aumenti a rov) e una nuova costa di 6 diritti (tutti aumenti). È giusto?
27.12.2014 - 22:35DROPS Design answered:
Buongiorno Giada. Deve lavorare le prime 6 m aumentate da ciascun lato, a rov. Quindi avrà : 6 m rov (sono le m aumentate), 6 m rov (le m con il segno al centro), 6 m rov (le m aumentate). Deve poi lavorare le successive 6 m aumentate a dir; quindi alla fine degli aumenti avrà: 6 m rov (prime 6 m aumentate), 6 m dir (seconde 6 m aumentate) 6 m rov ( le m con il segno), 6 m dir e 6 m rov. In questo modo prosegue la lavorazione a coste 6 m dir, 6 m rov. Buon lavoro!
28.12.2014 - 12:24
![]() Jasmine wrote:
Jasmine wrote:
I have read and reread the instruction for the sleeves. and for the life of me i don't get it. if you could tell me stitch by stitch i would get it a lot easier. example inc p3 k around in pattern. or p3 inc. i'm not getting at all how this ribbing works with the increases. help please
18.12.2014 - 00:32DROPS Design answered:
Dear Jasmine, you will keep P6 mid under sleeve and will inc either side of these P6 to continue ribbing around the sleeve, ie P first 6 inc each side (you will then get P18 mid under sleeve), then K next 6 inc each side(you will get P6,K6,P6(mid under arm),K6,P6 when all next K6 inc are done) and so on. Happy knitting!
18.12.2014 - 09:03
![]() Sylvie Rheaume wrote:
Sylvie Rheaume wrote:
Bonjour, Dans la section empiècement vous nous dite ; En même temps, a (dans mon cas) 59 cm de hauteur total, mettre en attente, 20 m centrales sur un arrêt de maille pour l'encolure. C'est 59 cm de hauteur de la manche ou du corp dois-je prendre?
13.12.2014 - 16:44DROPS Design answered:
Bonjour Mme Rheaume, on mesure ici la hauteur totale depuis le bas du pull (rang de montage) au milieu devant - le pull mesure 66 cm de hauteur totale du bas jusqu'à l'épaule quand il est terminé (en taille S/M). Bon tricot!
13.12.2014 - 18:37
![]() Giada wrote:
Giada wrote:
Ciao, sto lavorando il corpo della taglia M di questo maglione. Quanto arrivo a questo punto "Quando il lavoro misura 10-15-15-15 cm e 20-30-30-30 cm aumentare 1 m a ogni lato di ogni segnapunti – lavorare a rov gli aumenti = 168-192-216-240 m" non capisco questo passaggio, dice due volte quando si arriva a 15 cm e 30 cm fare gli aumenti. Mi potete dare una mano? Grazie :-)
09.12.2014 - 12:35DROPS Design answered:
Buongiorno Giada. Quando il lavoro misura 15 cm, aumenta 1 m a ogni lato di ogni segnapunti; ripete poi questi aumenti quando il lavoro misura 30 cm. Completati gli aumenti, sui ferri avrà 192 m. Buon lavoro!
09.12.2014 - 12:57Anita wrote:
I've read the pattern and the questions raised about the increase in the sleeves and I still do not understand. If you increase either side of the middle p6 you then have p8. do you then increase like that until you have p12 and then with each further increase, make the middle stitches k stitches?
26.11.2014 - 22:06DROPS Design answered:
Dear Anita, you inc either side of the mid P6 under sleeve in rib, to get K6/P6 all around the sleeve when all inc are done, you will then have after the first 6 inc you will have under the sleeve P6 (6 inc sts), P6 (mid under sleeve), P6 (6 inc sts), then K the next 6 inc to get: P6, K6 (new 6 inc sts), P6 (mid under sleeve), K6 (new 6 inc sts), P6. Happy knitting!
27.11.2014 - 09:22
|
|
Of The Sea |
|
 |
 |
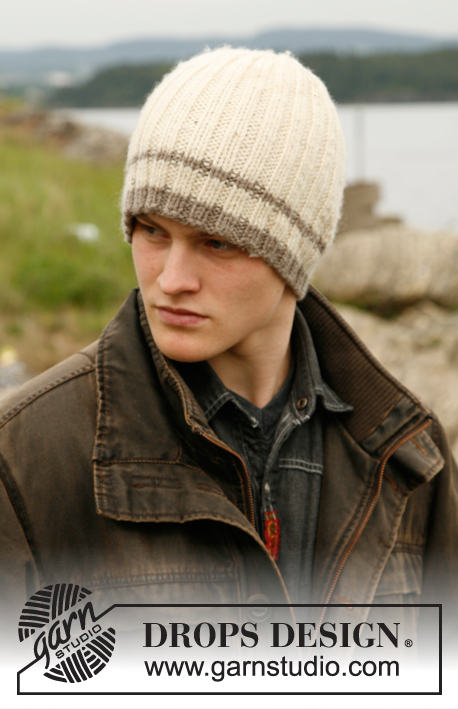
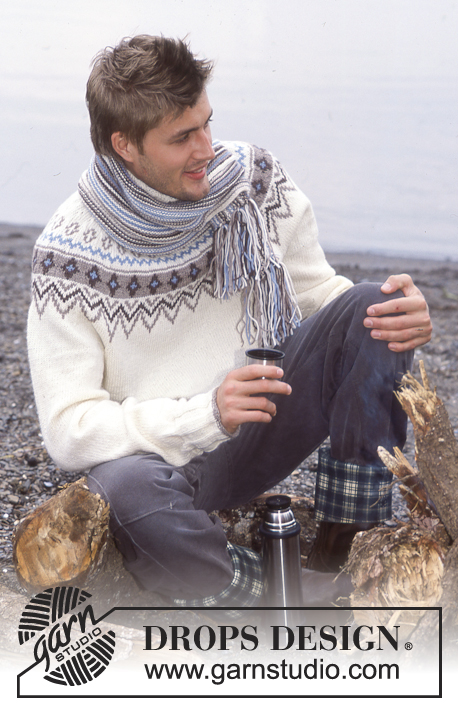
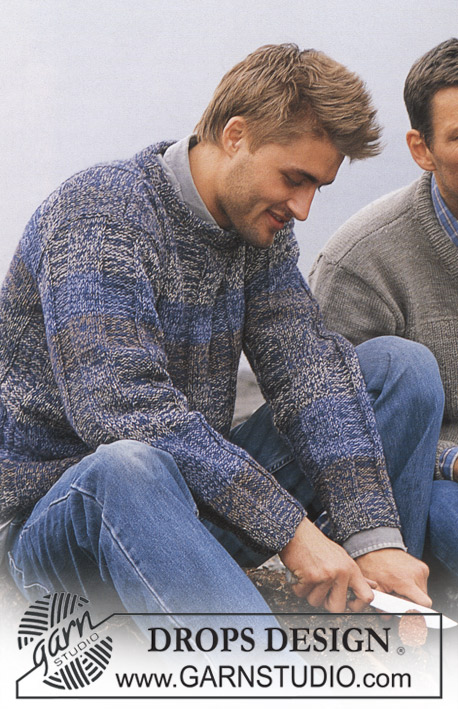
Men's knitted sweater with raglan and rib in DROPS Alaska, and scarf with English rib in DROPS Snow. Size: 12 years - XXL
DROPS 85-2 |
|
|
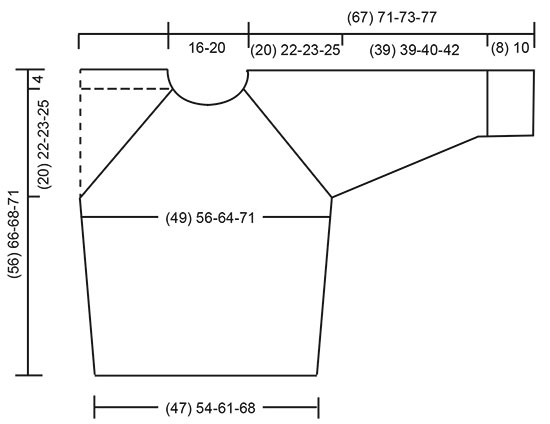
SWEATER Decreasing tips (for raglan): Dec as follows from right side: Start 4 sts before the marker: K 2 tog, K 4 (the marker is in the center of these 4 sts), slip 1 as if to knit, K 1, psso. Dec as follows from wrong side: Start 4 sts before the marker: P 2 tog, twisting sts, P 4 (the marker is in the center of these 4 sts), P 2 tog. (If it is too difficult to twist the sts, sl them, return to left needle 1 by 1, twisting each, and then P 2 tog). BODY Cast on 160-184-208-232 sts on circular needles; join and place a marker at the join. Knit 2 rows stockinette st, then establish rib as follows: P 1, *K 6, P 6*, repeat from *-* over 72-84-96-108 sts, K 6, P 1, place a marker (= side), P 1, *K 6, P 6*, repeat from *-* over 72-84-96-108 sts, K 6, P 1. Continue the rib as established. When the piece measures 10-15-15-15 cm and 20-30-30-30 cm inc 1 st at each side of each marker – P the increased sts – = 168-192-216-240 sts. When the piece measures 32-40-41-42 cm bind off 12 sts at each side for armhole (= K 3, P 6, K 3) = 72-84-96-108 sts remain on Front and Back. Lay piece aside and knit the sleeves. Sleeve: Cast on 48-48-60-60 sts on double-pointed needles; join and place a marker at the join. Knit 2 rows stockinette st, then knit rib (P 3, K 3) over all sts. When the piece measures 8-10-10-10 cm, change to * K 6, P 6 * rib as on Body – start at marker with P 3 so that the marker is centered in a P 6. When the piece measures 10-13-13-11 cm inc 1 st on both sides of the P 6 containing the marker every 3-3-3-3.5 cm a total of 12 times (knit the increased sts in the rib as you go along, i.e P first 6 inc sts, K next 6 sts) = 72-72-84-84 sts. When the piece measures 47-49-50-52 cm bind off 6 sts each side of marker = 60-60-72-72 sts remain. Lay piece aside and knit a second sleeve. Yoke: Put the sleeves in on the same circular needles as Body where you bound off for armholes = 264-288-336-360 sts. Put a marker in each transition between front, back and sleeves = 4 markers. Knit 0-1-1-1 row before raglan shaping begins. Raglan shaping: Dec 1 st at each side of all markers (= 8 decs) – see Decreasing tips above. Dec every other row 21-24-20-25 times and every row 3-0-10-5 times. At the same time when the piece measures 49-59-61-64 cm put the 8-20-20-32 sts at center front on a st holder for the neck and knit back and forth. Bind off at each neck edge every other row: 2 sts 1 time and 1 st 2 times. After all raglan and neck shaping is complete 56-68-68-80 sts remain and the piece measures approx. 56-66-68-71 cm to shoulder. Neckband: Pick up approx. 16 sts for smallest size, 28 to 40 sts for other sizes at front neck (incl. sts on st holder) = 72 sts for smallest size, 96 to 120 sts for other sizes; join and place a marker at the join. P 1 row, K 1 row and P 1 row, then K 1 row, decreasing evenly distributed to 72-84-90-96 sts. Then knit rib (K 3, P 3) until the collar measures 10-10-12-12 cm. Bind off in rib. Fold the rib in half to wrong side and stitch in place. Assembly: Sew opening under the sleeve. SCARF: English rib: Row 1 (wrong side): K 1 (edge st knit in garter st), *K 1, yo, sl 1 as if to purl*, repeat *-* to last 2 sts, K 2. Row 2 (right side): K 1 (edge st knit in garter st), *yo, sl 1 as if to purl, K tog the next st and yo from previous row*, repeat *-* to last 2 sts, yo, sl 1 as if to purl, K 1 (edge st knit in garter st). Row 3 (wrong side): K 1 (edge st), *K tog the next st and yo from previous row, yo, sl 1 as if to purl*, repeat *-* to last 2 sts + yo from previous row, K tog the next st and yo, K 1. Repeat rows 2 and 3 over all sts. Scarf: Loosely cast on 13 sts and knit English rib – see instructions above. Bind off when the piece measures approx 150 cm. |
|
 |
|
Have you finished this pattern?Tag your pictures with #dropspattern or submit them to the #dropsfan gallery. Do you need help with this pattern?You'll find 32 tutorial videos, a Comments/Questions area and more by visiting the pattern on garnstudio.com. © 1982-2026 DROPS Design A/S. We reserve all rights. This document, including all its sub-sections, has copyrights. Read more about what you can do with our patterns at the bottom of each pattern on our site. |
|


With over 40 years in knitting and crochet design, DROPS Design offers one of the most extensive collections of free patterns on the internet - translated to 17 languages. As of today we count 325 catalogues and 12298 patterns translated into English (UK/cm).
We work hard to bring you the best knitting and crochet have to offer, inspiration and advice as well as great quality yarns at incredible prices! Would you like to use our patterns for other than personal use? You can read what you are allowed to do in the Copyright text at the bottom of all our patterns. Happy crafting!
Post a comment to pattern DROPS 85-2
We would love to hear what you have to say about this pattern!
If you want to leave a question, please make sure you select the correct category in the form below, to speed up the answering process. Required fields are marked *.