
Popular categories
Looking for a yarn?


Comments / Questions (45)
![]() Anne wrote:
Anne wrote:
Pourquoi les augmentations avant de tricoter les côtes au bas de l’ouvrage ?
08.12.2025 - 18:57DROPS Design answered:
Bonjour Anne, pour la même largeur/circonférence, il faut plus de mailles avec les aiguilles 3 pour les côtes que pour le jersey avec les aiguilles 4; on va donc augmenter à intervalles réguliers avant de tricoter les côtes pour éviter qu'elles ne resserrent le bas du pull - il en va de même en bas des manches. Bon tricot!
09.12.2025 - 08:40
![]() Claudia wrote:
Claudia wrote:
Liebes Drops-Team, ist es richtig, dass ich nach der Halsblende 16 Maschen abnehme und in der nächsten Reihe 24 zunehme? Warum kann ich dann nicht nur 8 Maschen zunehmen?
09.10.2025 - 18:36DROPS Design answered:
Liebe Claudia, ja, das ist korrekt so. Auf diese Weise ergibt sich eine etwas bessere Festigkeit der Halsblende und auch eine leicht andere Formgebung, als wenn Sie direkt nur 8 Maschen zunehmen. Viel Spaß beim Weiterstricken!
21.10.2025 - 21:56
![]() Corinne Sibal wrote:
Corinne Sibal wrote:
Désolée si c'est une question bête, mais c'est mon premier jacquard. J'ai tricoté les 12 cm de côtes pour le col en XXXL= 152 mailles, puis 1 tour en diminuant de 20 mailles = 132 mailles. On me dit ensuite de tricoter la flèche 1 en augmentant de 40 mailles. Je ne comprends pas pourquoi diminuer de 20 mailles pour immédiatement augmenter de 40 mailles au rang d'après; pourquoi ne pas diminuer du tout et augmenter juste de 20 mailles pour obtenir les 172 mailles ????? Merci !
24.12.2024 - 15:46DROPS Design answered:
Bonjour Mme Sibal, on procède ainsi pour que le col soit plus joliment défini; Bon tricot!
02.01.2025 - 11:04
![]() Brigitte Schmees wrote:
Brigitte Schmees wrote:
Hallo, ich habe die 21 cm für die Teilung schon vor der 7. Zunahme erreicht. Kann ich jetzt schon teilen und das Muster in den Ärmeln und Rumpfteil getrennt weiter stricken? Und wie ist das mit den restlichen Zunahmen? Vielen Dank schon mal für Ihre Antwort. Schöne Feiertage
23.12.2024 - 08:31DROPS Design answered:
Liebe Frau Schmees, wenn die Teilung vor den 2 letzten Zunahmen entsteht passt die Maschenanzahl dann nicht, und die Arbeit wird zu eng sein, am besten nehmen Sie dann regelmäßig öfter in der Höhe als die Pfeile, damit die Höhe sowie die Zunahmen stimmen. Viel Spaß beim Stricken!
02.01.2025 - 10:25
![]() Catherine wrote:
Catherine wrote:
Guten Tag, ab der 3. Zunahme entspricht die Strickschrift nicht mehr (2M Farbe 77, 1M Farbe 21). Muss ich nun die Fortsetzung den Zunahmen anpassen, dh 4M (anstatt 3) Farbe 21 und weiter 1M 77 ... usw ? Danke im voraus
21.11.2024 - 11:56DROPS Design answered:
Liebe Catherine, nach 3. Pfeil haben Sie 180-200-212-228-236-252 Maschen, Diagram stricken Sie über 4 Maschen insgesamt 45-50-53-57-59-63 Mal in der Runde. So passt das Muster in der Runde. Viel Spaß beim Stricken!
21.11.2024 - 15:53
![]() Inge wrote:
Inge wrote:
Ik heb het werk verdeeld voor lijf en mouwen Als ik nu het lijf ga breien wat doe ik dan met mijn 8 steken onder de mouw.
19.11.2024 - 12:30DROPS Design answered:
Dag Inge,
Je breit nu verder in licht eiken over de steken van het lijf en ook over de nieuw opgezette steken onder de mouwen.
21.11.2024 - 20:10
![]() Rian wrote:
Rian wrote:
Hoe zet ik desteken in de zijkant van de mouw op bij het lijf?
11.11.2024 - 19:21DROPS Design answered:
Dag Rian,
In deze video wordt dat uitgelegd. In de video wordt niet in de rondte gebreid, maar je kunt wel zien hoe de steken opgezet worden. Je breit de steken van het lijf, dan zet je steken op voor onder de mouw en dan brei je verder met het andere deel van het lijf.
05.12.2024 - 20:09
![]() Ana wrote:
Ana wrote:
Hi, why do we have to decrease for the neck and then directly after increase back?
12.10.2024 - 22:33DROPS Design answered:
Dear Ana, we work decreases followed with increases not because of the necessary number of stitches but because of the necessary shaping. You start off with extra stitches so that the rib in the double neck won't be too tight. Then you decrease to adjust for the necessary number of stitches for the yoke and the colour pattern, while shaping the neck. Then, you will increase for the yoke shaping as indicated by the arrows. Happy knitting!
13.10.2024 - 23:37
![]() Rosaria wrote:
Rosaria wrote:
I bottoni dove vanno messi? Grazie
08.10.2024 - 00:17DROPS Design answered:
Buonasera Rosaria, abbiamo corretto il testo, non sono necessari i bottoni. Buon lavoro!
08.10.2024 - 22:21
![]() Gabriella wrote:
Gabriella wrote:
Står att man ska ha rundsticka 80 cm men vart i mönstret används lång rundsticka?
29.09.2024 - 21:22DROPS Design answered:
Hej Gabriella. Du byter till lång rundsticka när du inte längre får plats med alla maskor på den korta rundstickan. Mvh DROPS Design
30.09.2024 - 14:54
|
||||||||||||||||
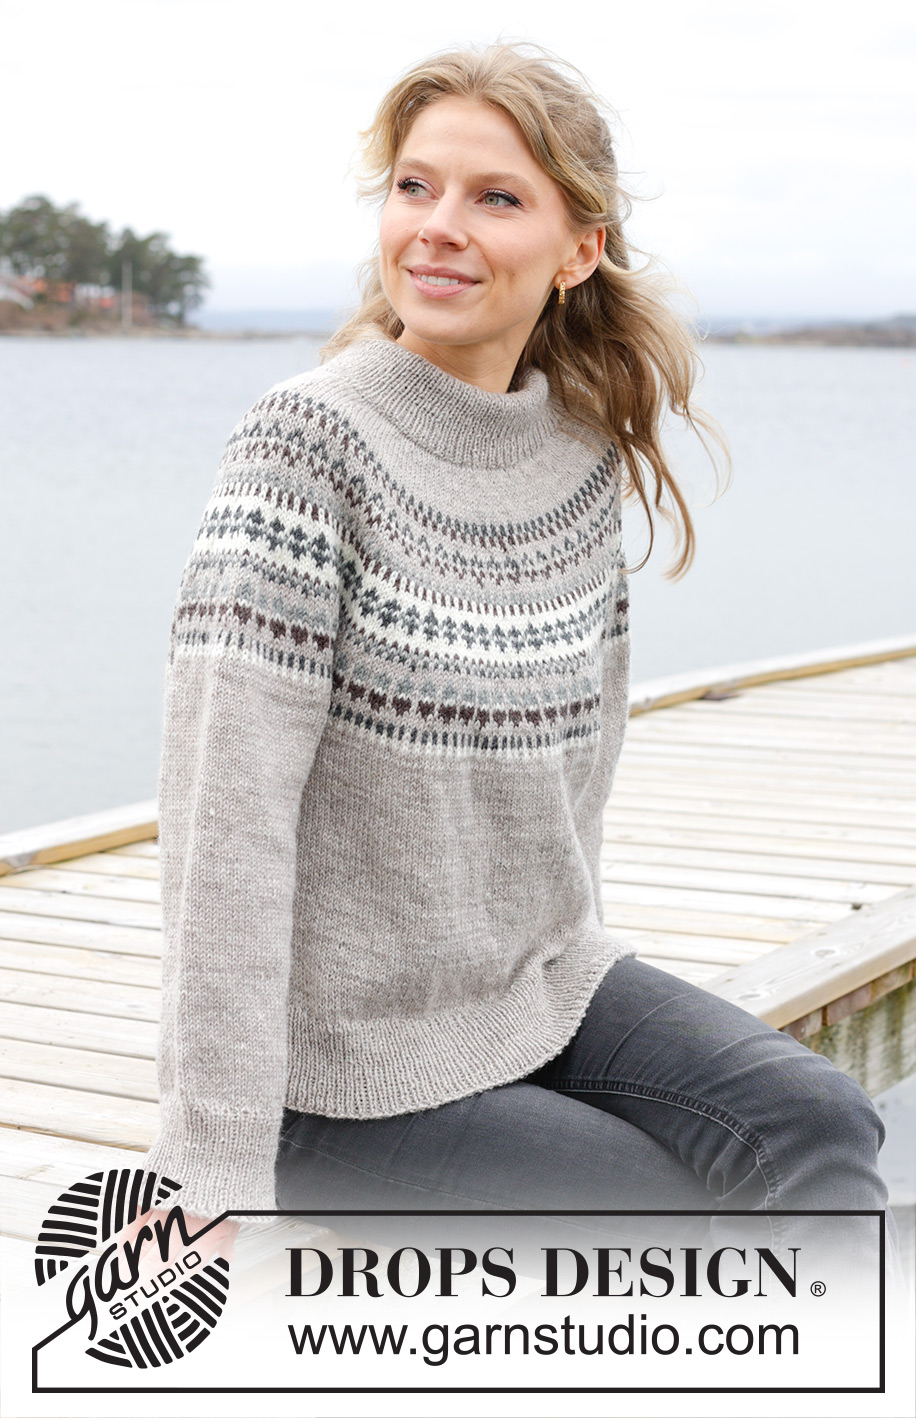
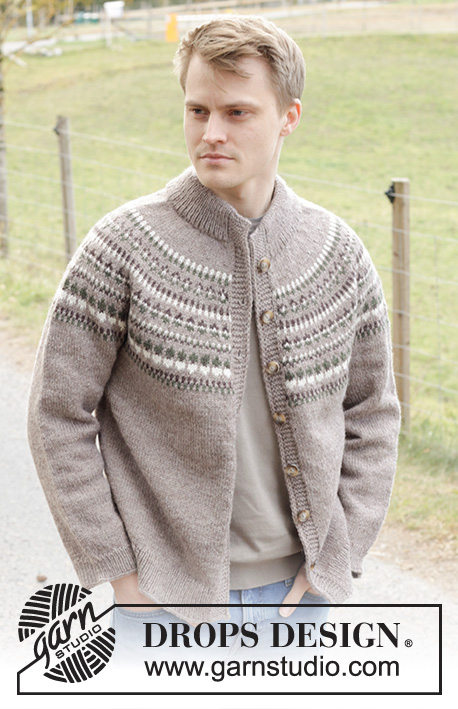
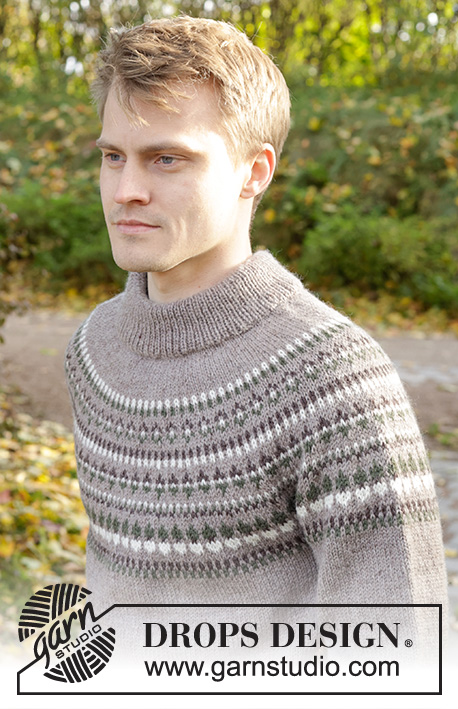
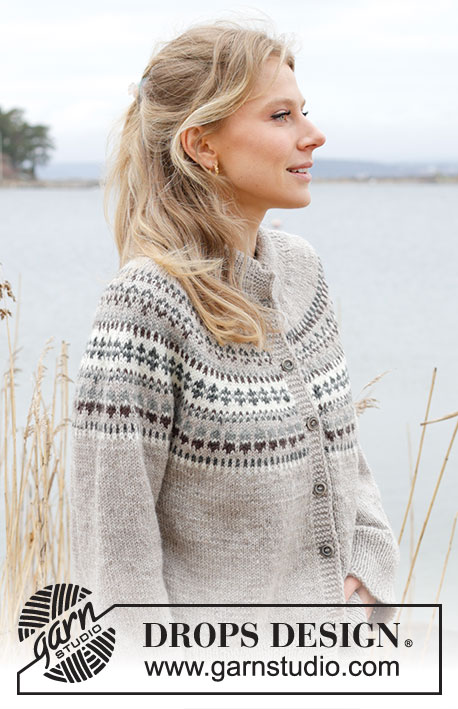
Boreal Circle#borealcirclesweater |
||||||||||||||||
 |
 |
|||||||||||||||
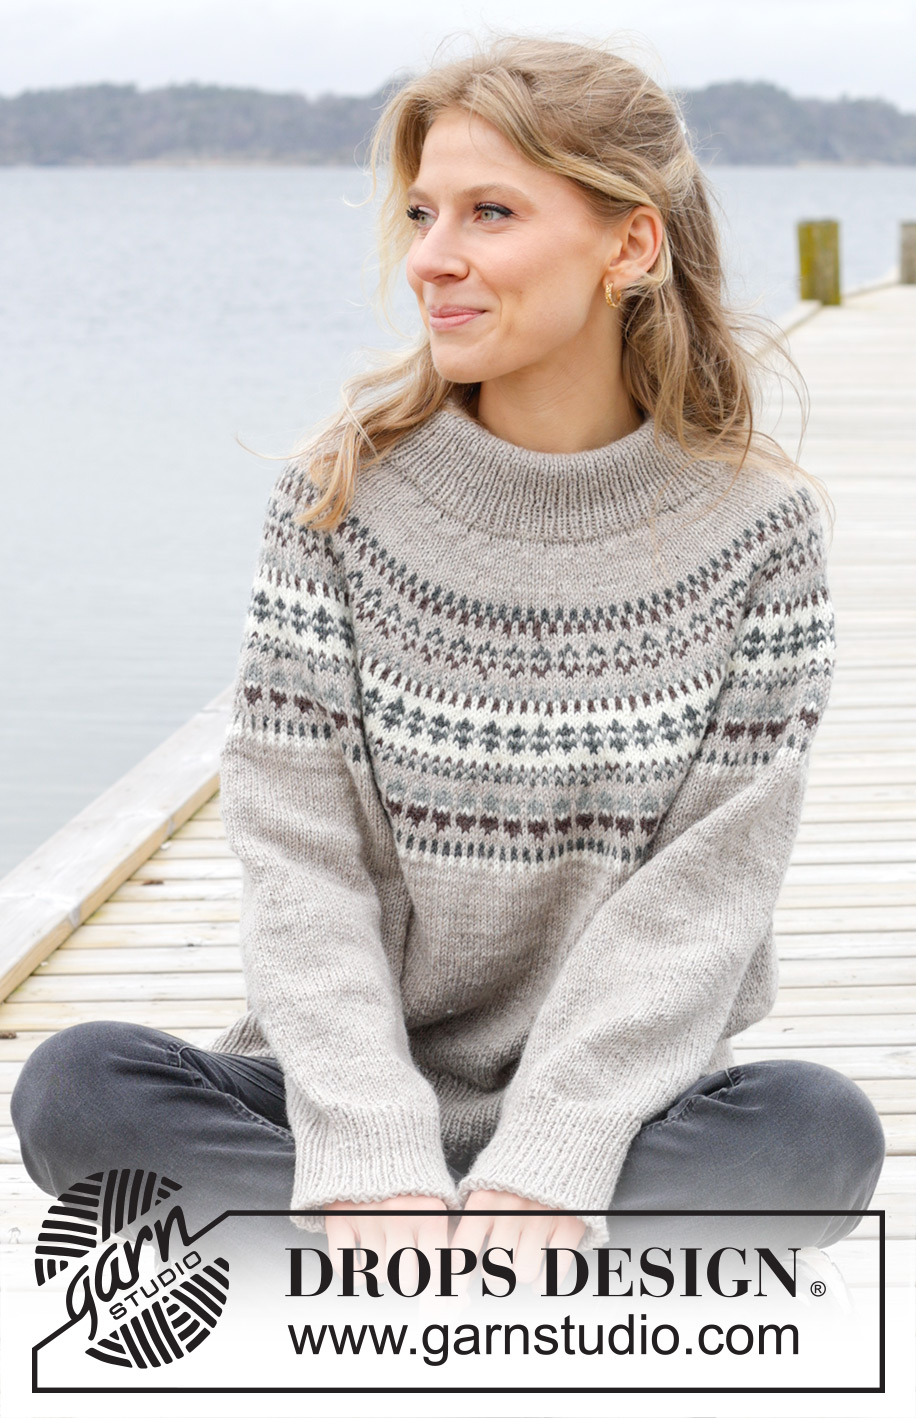
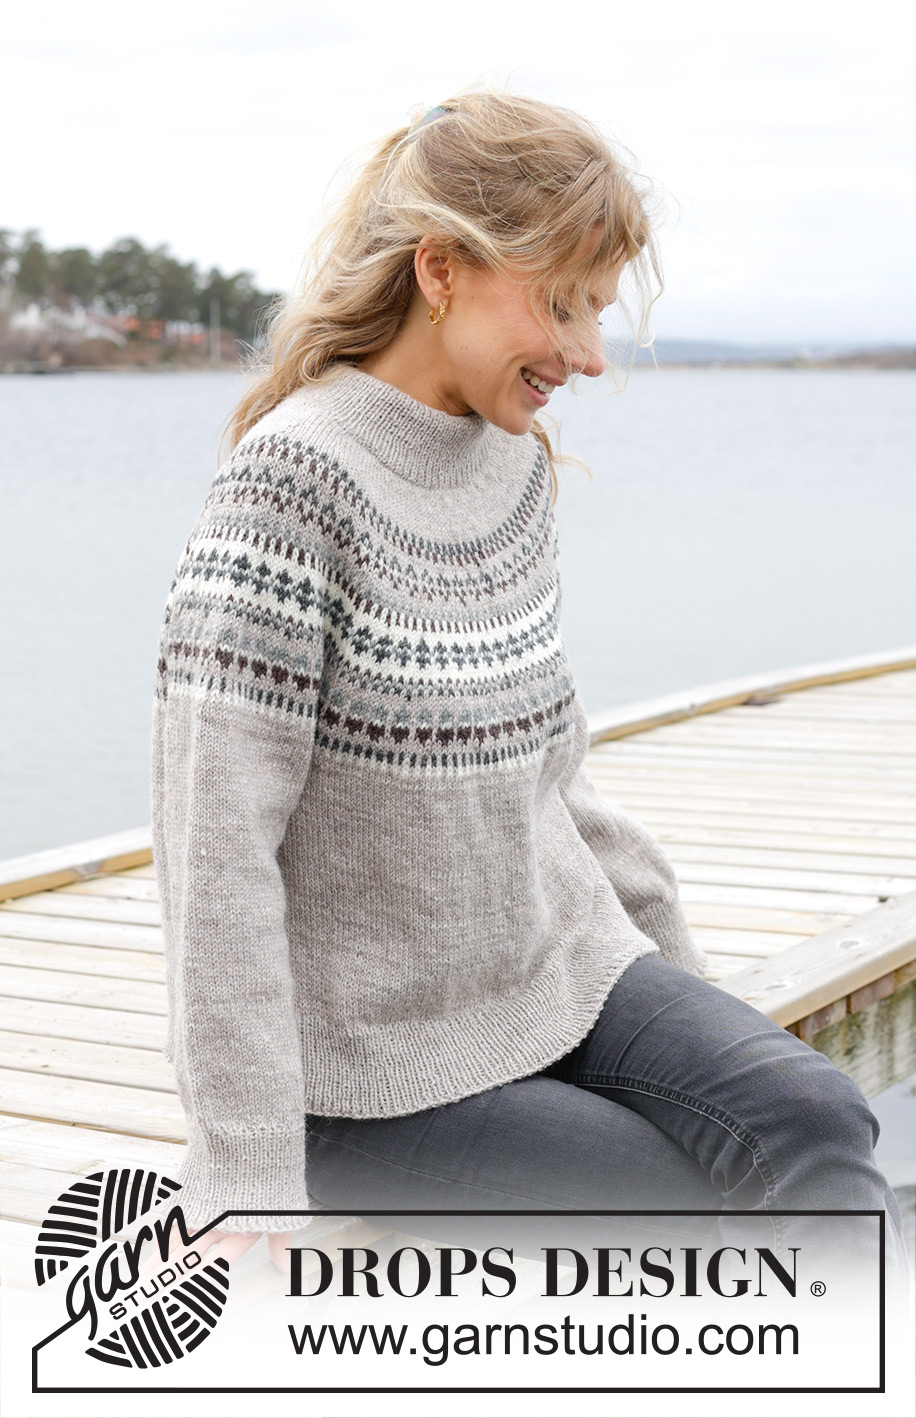
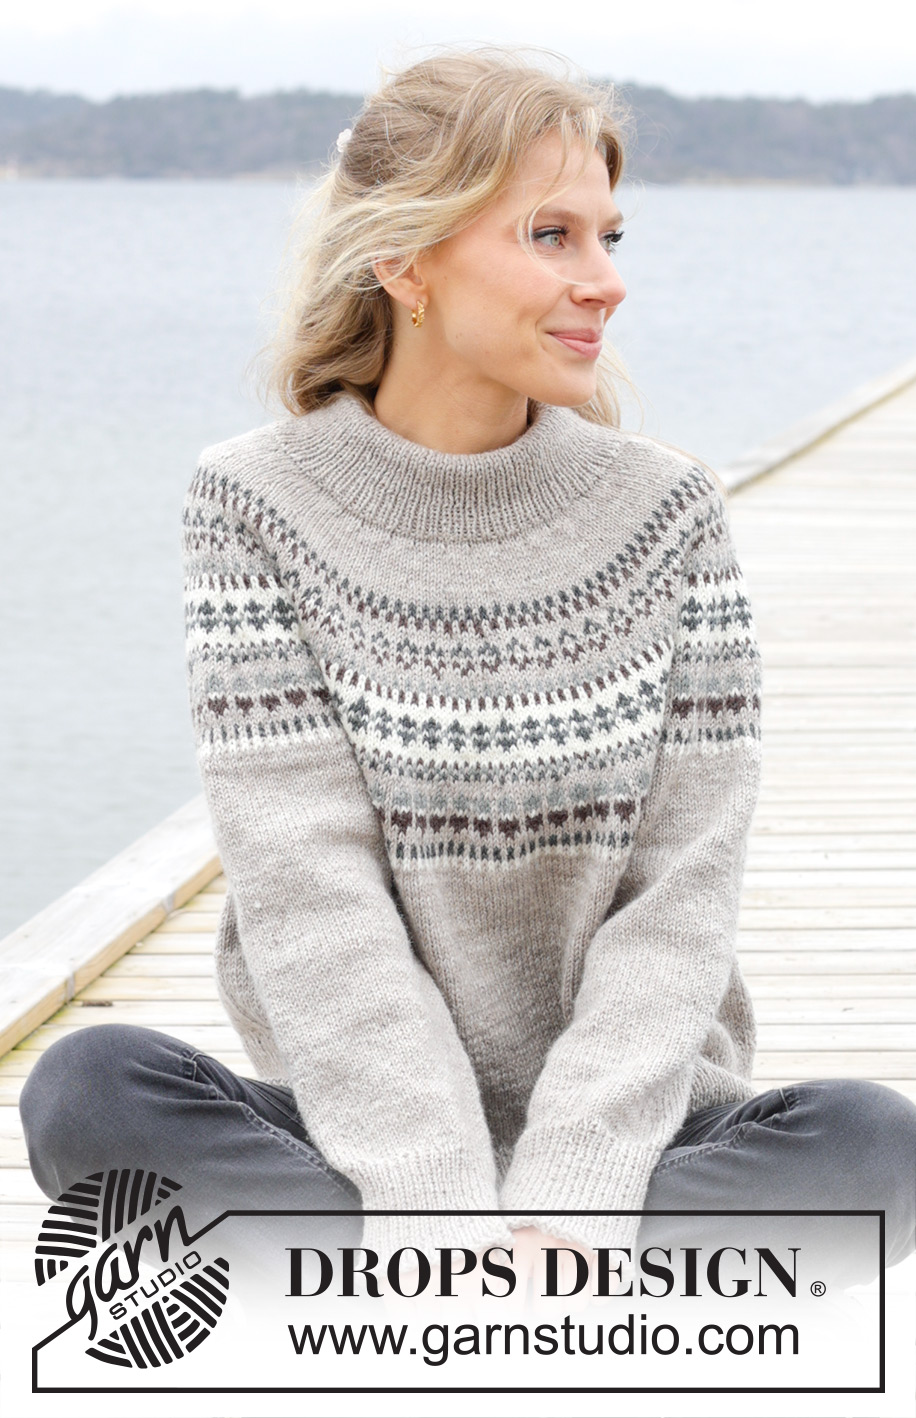
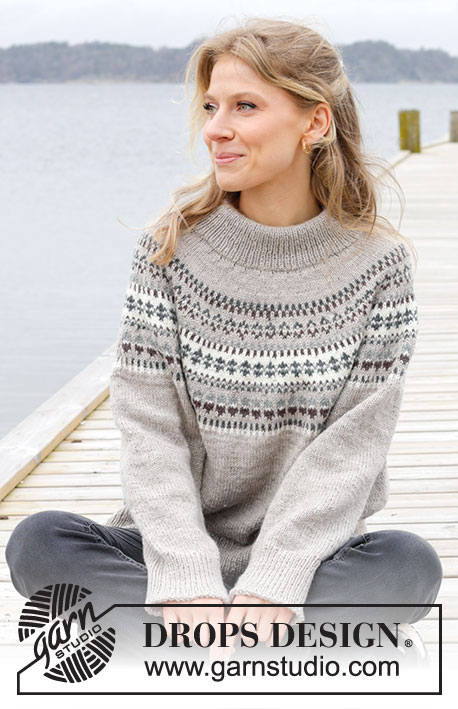
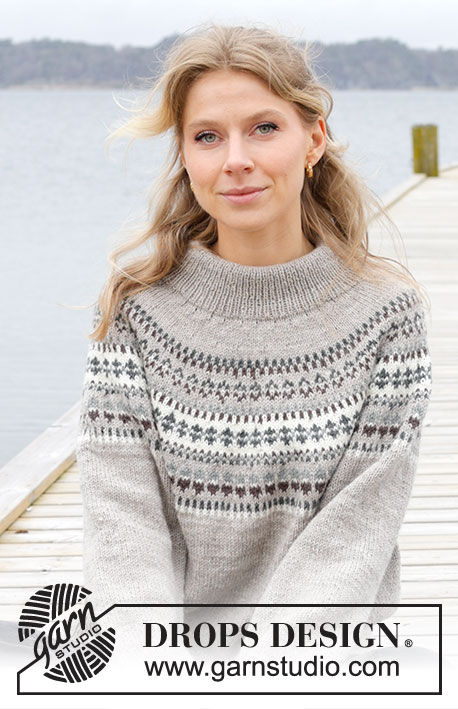
Knitted jumper in DROPS Karisma. The piece is worked top down with round yoke and Nordic pattern. Sizes S - XXXL.
DROPS 245-4 |
||||||||||||||||
|
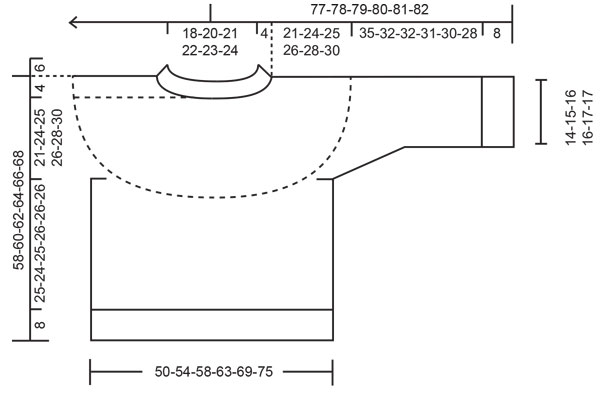
------------------------------------------------------- EXPLANATIONS FOR THE PATTERN: ------------------------------------------------------- PATTERN: See diagram A.1. Choose diagram for your size. The pattern is worked in stocking stitch. INCREASE/DECREASE TIP (evenly spaced): To work out how to increase/decrease evenly, count the total number of stitches on needle (e.g., 124 stitches) and divide by the number of increases/decreases to be made (e.g., 16) = 7.75. In this example, increase by making 1 yarn over after alternately each 7th and 8th stitch (approx.). On the next row work the yarn overs twisted to avoid holes. When decreasing, knit together approx. each 7th and 8th stitch. DECREASE TIP (for sleeves): Decrease 1 stitch on each side of the marker-thread as follows: Work until there are 3 stitches left before the marker-thread, knit 2 together, knit 2 (marker-thread sits between these 2 stitches), slip 1 stitch knit-wise, knit 1 and pass the slipped stitch over the knitted stitch. ------------------------------------------------------- START THE PIECE HERE: ------------------------------------------------------- JUMPER – SHORT OVERVIEW OF THE PIECE: The neck and yoke are worked in the round with circular needle, top down. The yoke is divided for body and sleeves and the body is continued in the round with circular needle. The sleeves are worked in the round with short circular needle/double pointed needles. DOUBLE NECK: Cast on 124-132-138-144-148-152 stitches with DROPS Karisma colour light oak, using short circular needles size 3 and 4 mm held together. Remove the needle size 4 mm keeping stitches on the needle size 3 mm (this gives you an elastic cast-on edge). Knit 1 round. Work rib in the round (knit 1, purl 1) for 12 cm. Work 1 round where you decrease 16-16-18-20-20-20 stitches evenly spaced – read INCREASE/DECREASE TIP = 108-116-120-124-128-132 stitches. The neck will later be folded double. YOKE: Change to short circular needle size 4 mm. Work A.1 over all stitches. REMEMBER THE KNITTING TENSION! On each row with an arrow in the diagram increase as follows: ARROW 1: Increase 24-28-28-32-36-40 stitches evenly spaced = 132-144-148-156-164-172 stitches. ARROW 2: Increase 24-28-32-36-36-40 stitches evenly spaced = 156-172-180-192-200-212 stitches. ARROW 3: Increase 24-28-32-36-36-40 stitches evenly spaced = 180-200-212-228-236-252 stitches. ARROW 4: Increase 24-28-32-36-36-40 stitches evenly spaced = 204-228-244-264-272-292 stitches. ARROW 5: Increase 28-28-32-36-40-40 stitches evenly spaced = 232-256-276-300-312-332 stitches. ARROW 6: Increase 28-28-32-36-40-40 stitches evenly spaced = 260-284-308-336-352-372 stitches. ARROW 7: Increase 28-32-32-36-40-44 stitches evenly spaced = 288-316-340-372-392-416 stitches. ARROW 8: Increase 32-32-32-36-40-44 stitches evenly spaced = 320-348-372-408-432-460 stitches. Continue with stocking stitch and colour light oak. When the yoke measures 21-24-25-26-28-30 cm from the neck, divide for the body and sleeves as explained below. DIVIDE PIECE FOR BODY AND SLEEVES AS FOLLOWS: Knit 49-54-57-62-67-73 (half back piece), place the next 62-66-72-80-82-84 stitches on a thread for the sleeve, cast on 6-6-8-8-10-12 stitches (in side under sleeve), knit 98-108-114-124-134-146 (front piece), place the next 62-66-72-80-82-84 stitches on a thread for the sleeve, cast on 6-6-8-8-10-12 stitches (in side under sleeve), knit the last 49-54-57-62-67-73 stitches (half back piece). The body and sleeves are finished separately. THE PIECE IS NOW MEASURED FROM HERE! BODY: = 208-228-244-264-288-316 stitches. Continue with stocking stitch and colour light oak for a further 25-24-25-26-26-26 cm. Knit 1 round and increase 70-78-78-86-96-100 stitches evenly spaced = 278-306-322-350-384-416 stitches. Change to circular needle size 3 mm. Work rib (knit 1, purl 1) for 8 cm. Cast off a little loosely. The jumper measures approx. 58-60-62-64-66-68 cm from the shoulder. SLEEVES: Place the 62-66-72-80-82-84 stitches from the thread on the one side of the piece on short circular needle/double pointed needles size 4 mm and knit up 1 stitch in each of the new stitches cast on under the sleeve = 68-72-80-88-92-96 stitches. Insert a marker-thread in the middle of the 6-6-8-8-10-12 stitches under the sleeve. Start at the marker-thread and work stocking stitch in the round with colour light oak. When the sleeve measures 3 cm, decrease 2 stitches mid-under sleeve – read DECREASE TIP. Decrease like this every 9-8-4-2½-2-2 cm a total of 4-4-7-10-11-12 times = 60-64-66-68-70-72 stitches. Continue working until the sleeve measures 35-32-32-31-30-28 cm from the division (or to desired length. There is approx. 8 cm left). Knit 1 round and increase 20-20-20-22-22-22 stitches evenly spaced = 80-84-86-90-92-94 stitches. Change to double pointed needles size 3 mm and work rib (knit 1, purl 1) for 8 cm. Loosely cast off with knit. The sleeve measures approx. 43-40-40-39-38-36 cm. Work the other sleeve in the same way. ASSEMBLY: Fold the neck double to the inside and sew down. To avoid the neck being tight and rolling outwards, it is important that the seam is elastic. |
||||||||||||||||
Diagram explanations |
||||||||||||||||
|
||||||||||||||||
 |
||||||||||||||||
 |
||||||||||||||||
Have you finished this pattern?Tag your pictures with #dropspattern #borealcirclesweater or submit them to the #dropsfan gallery. Do you need help with this pattern?You'll find 29 tutorial videos, a Comments/Questions area and more by visiting the pattern on garnstudio.com. © 1982-2026 DROPS Design A/S. We reserve all rights. This document, including all its sub-sections, has copyrights. Read more about what you can do with our patterns at the bottom of each pattern on our site. |
||||||||||||||||


With over 40 years in knitting and crochet design, DROPS Design offers one of the most extensive collections of free patterns on the internet - translated to 17 languages. As of today we count 324 catalogues and 12290 patterns translated into English (UK/cm).
We work hard to bring you the best knitting and crochet have to offer, inspiration and advice as well as great quality yarns at incredible prices! Would you like to use our patterns for other than personal use? You can read what you are allowed to do in the Copyright text at the bottom of all our patterns. Happy crafting!
Post a comment to pattern DROPS 245-4
We would love to hear what you have to say about this pattern!
If you want to leave a question, please make sure you select the correct category in the form below, to speed up the answering process. Required fields are marked *.