
Popular categories
Looking for a yarn?


Comments / Questions (25)
![]() Laurence Canepa wrote:
Laurence Canepa wrote:
Après les cotes pourquoi diminuer de 12 mailles alors que le modèle a l’air de forme droite? Merci
14.08.2022 - 15:54DROPS Design answered:
Bonjour Mme Canepa, il faut plus de mailles pour la même largeur pour tricoter en côtes avec les aiguilles 8 que pour tricoter en jersey/point fantaisie avec les aiguilles 9, raison pour laquelle on va diminuer après les côtes, pour conserver la bonne largeur. Bon tricot!
15.08.2022 - 08:28
![]() Martine ALZINGRE wrote:
Martine ALZINGRE wrote:
Bonjour pour tricoter aiguilles droites dois je diviser les mailles par 2 pour ce modèle ou pas Je vous remercie
02.05.2022 - 05:08DROPS Design answered:
Bonjour Mme Alzingre, ce modèle se tricote en allers et retours sur aiguille circulaire pour avoir suffisamment de place pour y loger toutes les mailles, seul le col se tricote en rond. Vous pouvez ainsi suivre les indications telles quelles pour le dos et le devant, faire la couture de l'une des épaules, relever les mailles du col (+ 1 m lis de chaque côté) et faites ensuite la couture du col + de la 2ème épaule. Bon tricot!
02.05.2022 - 10:30
![]() Marianne Göransson wrote:
Marianne Göransson wrote:
Hej, jag har stickat många mönster o köpt era garner genom åren....men nu känner jag att jag måste säga ifrån. Varför har ni alltid som i detta mönster 5 bilder nästan exakt lika förutom att man vänder på huvudet..... hade önskat få se hur plaggen ser ut bakifrån o från sidan. tänker att det måste vara mer än jag som hade velat se dem så. Hoppas på ändring
21.02.2022 - 12:09
![]() Mia Svane wrote:
Mia Svane wrote:
Hej, fantastisk hjemmeside 😊 Jeg vil rigtig gerne strikke Louise slipover med uden knap i siden, altså strikket sammen. Kan dette lade sig gøre på en “nem” måde? Jeg er nybegynder, så ikke rutineret nok til bare selv at udtænke det. Mvh Mia
13.02.2022 - 16:48DROPS Design answered:
Hej Mia, Hvis du hellere vil strikke vesten rundt på rundpind, så får du hverken slids eller knap i siden. Men da slår du bare dobbelt antal masker op og strikker rundt ifølge rygstykket til du kommer op til ærmegabet, da er du nødt til at dele på arbejdet og strikke ryg og forstykke færdig hver for sig. Se størrelsen på de mål som passer dig i måleskitsen nederst i opskriften. God fornøjelse!
15.02.2022 - 14:27
![]() Veronique Cadet wrote:
Veronique Cadet wrote:
Er staat een foutje in 82 steken opzetten - 10 minderen om verder te gaan = 72 en er staat 74 waardoor de rest niet klopt
13.12.2021 - 14:27
|
|
Louise Slipover#louiseslipover |
|
 |
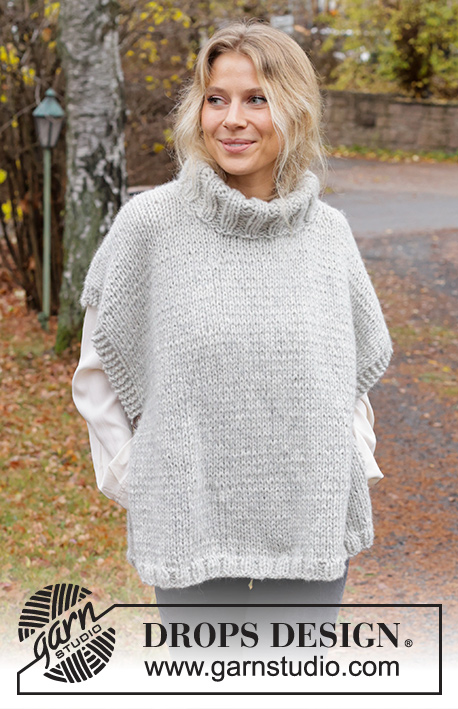 |
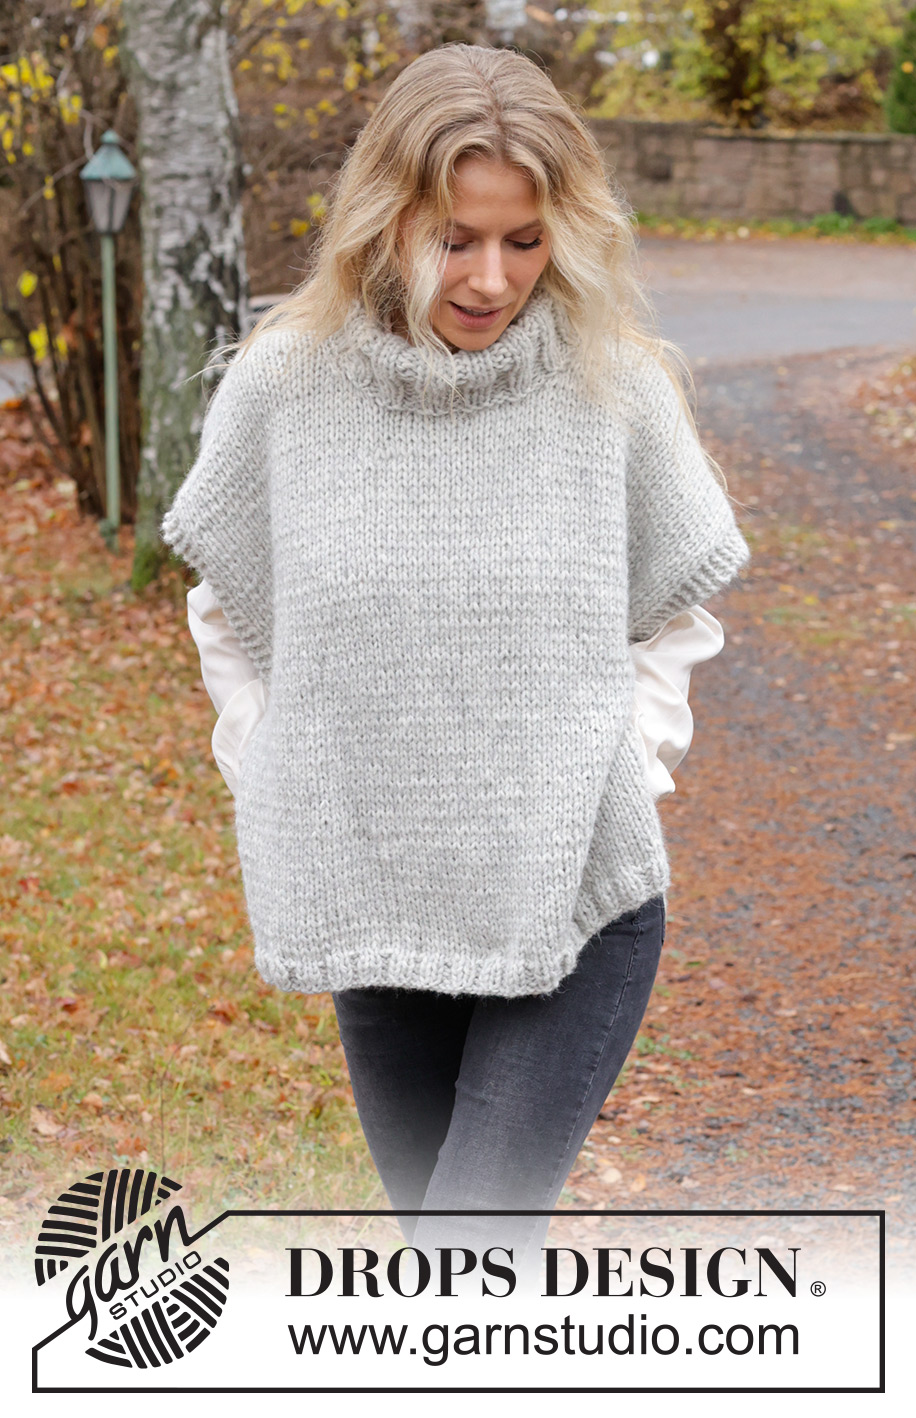
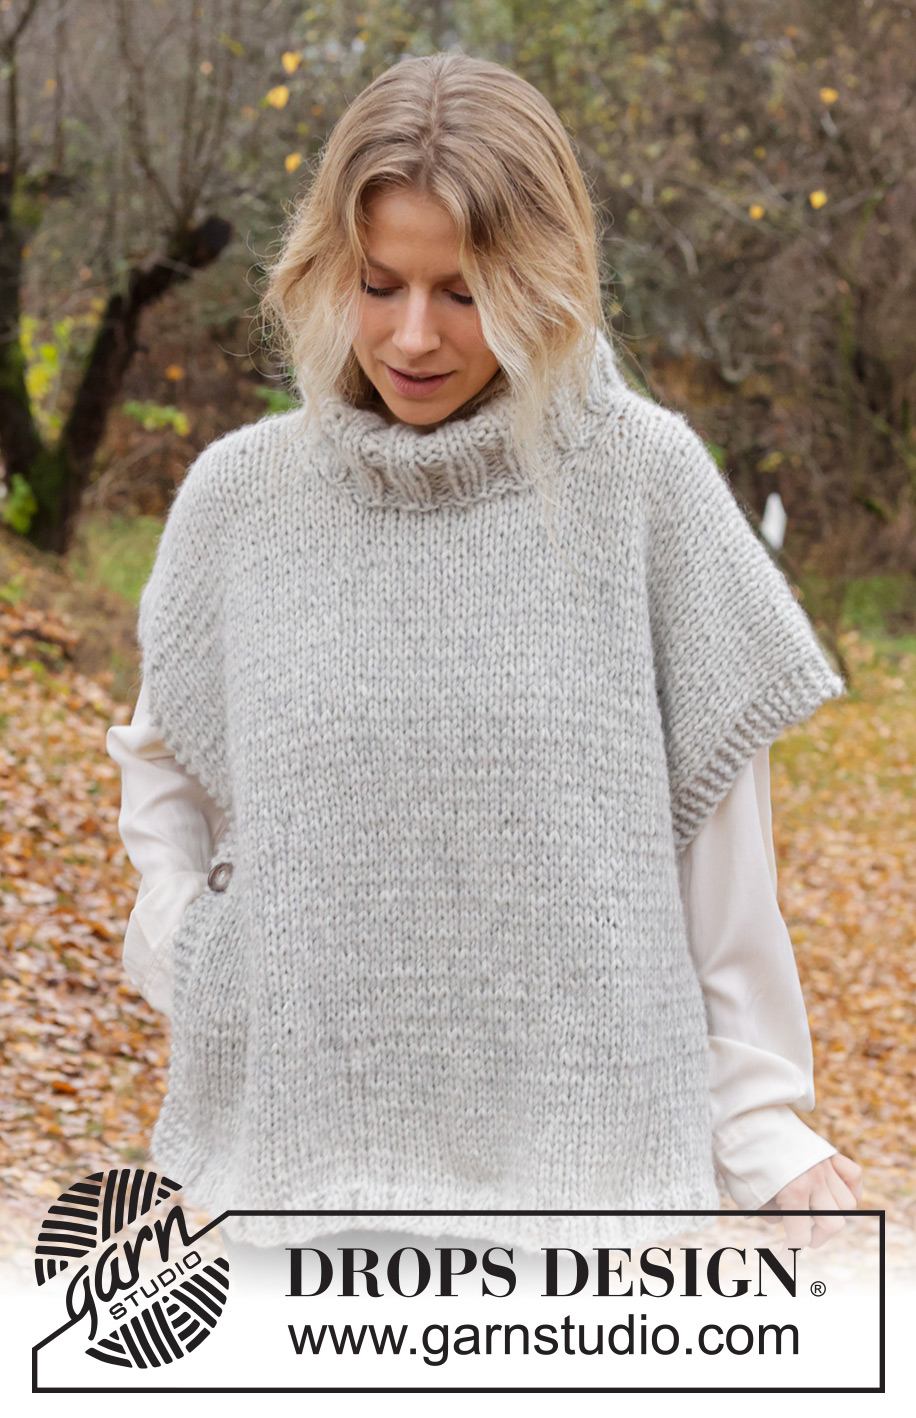
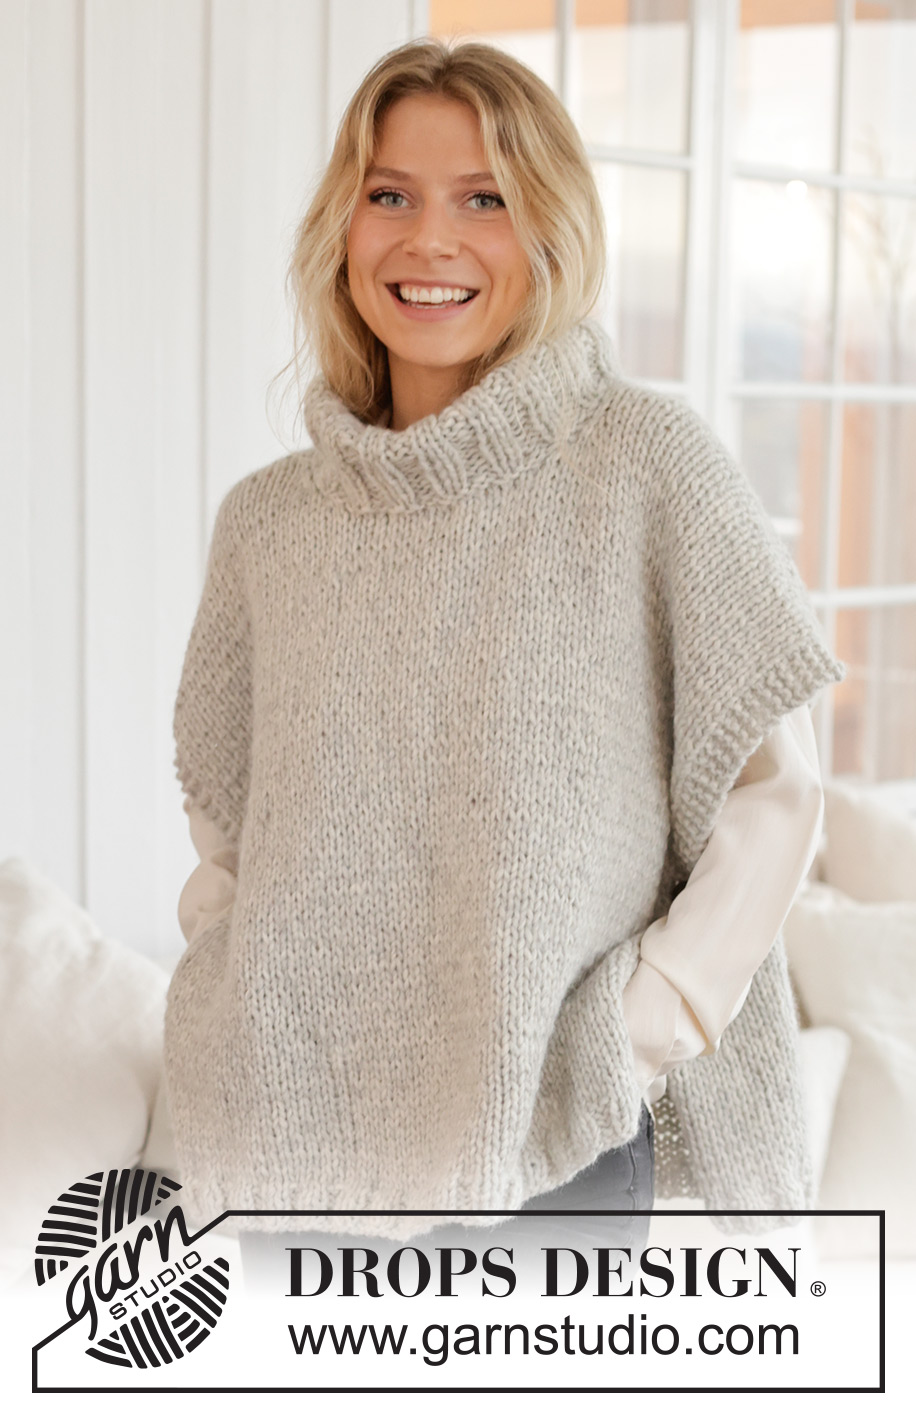
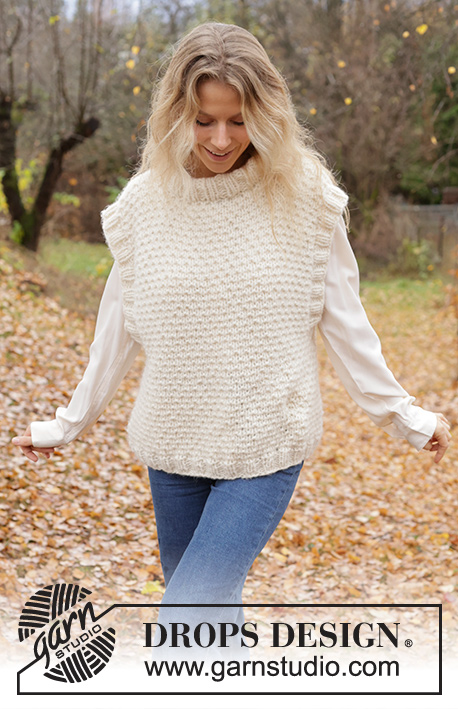
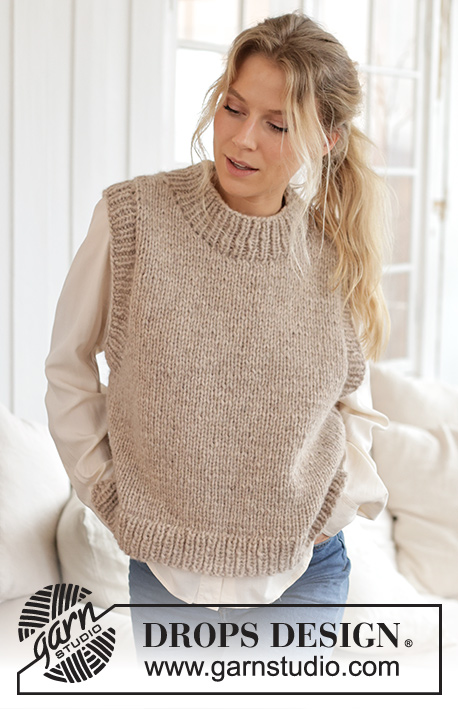
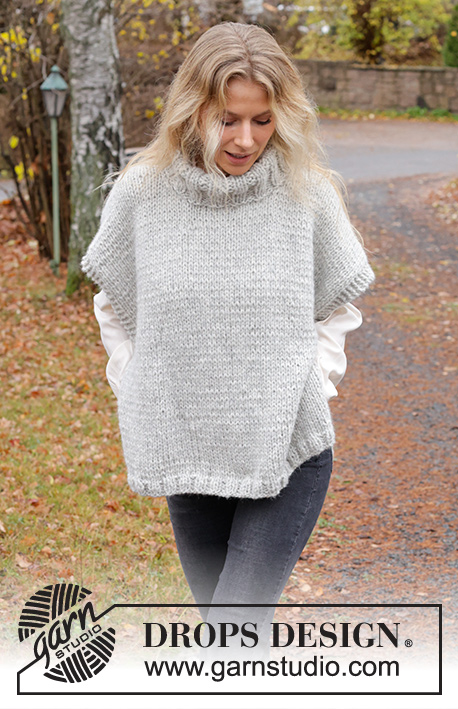
Knitted vest/slipover in 1 strand DROPS Wish or 2 strands DROPS Air. The piece is worked in stocking stitch and garter stitch, with high/double neck. Sizes S - XXXL.
DROPS 226-59 |
|
|
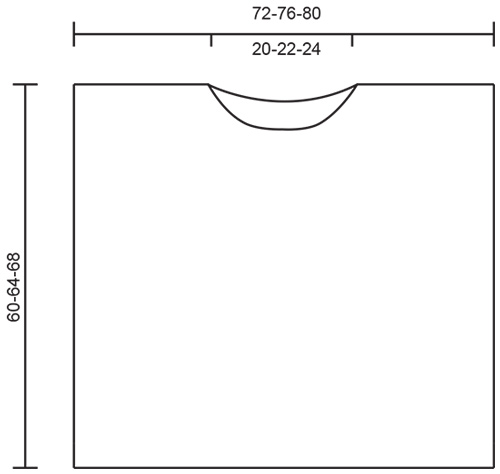
------------------------------------------------------- EXPLANATIONS FOR THE PATTERN: ------------------------------------------------------- RIDGE/GARTER STITCH (worked back and forth): Knit all rows. 1 ridge = knit 2 rows. BUTTONHOLES: Make buttonholes in each side of front piece. The 2 first buttonholes are worked when the piece measures 14 cm, the 2 second buttonholes are worked when the piece measures 28 cm. Work the buttonholes as follows: 2 edge stitches in garter stitch, make 1 yarn over, knit 2 together, work until there are 4 stitches left, knit 2 together, 1 yarn over and 2 edge stitches in garter stitch. On the next row knit the yarn overs to leave holes. DECREASE TIP: All decreases are worked from the right side! At the beginning of the row from the neck: Knit 1, slip 1 stitch as if to knit, knit 1 and pass the slipped stitch over the knitted stitch (= 1 stitch decreased). At the end of the row towards the neck: Work until there are 3 stitches left, knit 2 together, knit 1 (= 1 stitch decreased). ------------------------------------------------------- START THE PIECE HERE: ------------------------------------------------------- VEST – SHORT OVERVIEW OF THE PIECE: The front and back pieces are worked separately, back and forth. The neck is worked in the round to finish. BACK PIECE: Cast on 82-88-90 stitches with circular needle size 8 mm and 1 strand DROPS Wish or 2 strands DROPS Air. Work 4-5-6 edge stitches in GARTER STITCH – read description above, work rib (knit 2, purl 2) and finish with 4-5-6 edge stitches in garter stitch. When the rib measures 3 cm change to circular needle size 9 mm and work as follows from the right side: 4-5-6 edge stitches in garter stitch, work stocking stitch over 74-78-78 stitches and decrease 10-12-10 stitches evenly over these stitches, 4-5-6 edge stitches in garter stitch = 72-76-80 stitches. Continue with stocking stitch and 4-5-6 edge stitches in garter stitch on each side. REMEMBER THE KNITTING TENSION! When the piece measures 57-61-65 cm, cast off the middle 18-20-22 stitches for the neck and finish each shoulder separately. Cast off 1 stitch on the next row from the neck = 26-27-28 stitches on the shoulder. When the piece measures 60-64-68 cm, slip stitches on a thread. Work the other shoulder in the same way. FRONT PIECE: Cast on and work in the same way as the back piece until the piece measures 14 cm. Now start to work BUTTONHOLES – read description above. Continue in the same way as the back piece until the piece measures 54-56-58 cm. Place the middle 12-14-16 stitches on a thread for the neck and finish each shoulder separately. Cast off 2 stitches on the next row from the neck. Then continue by decreasing 1 stitch inside the 1 edge stitch by the neck - read DECREASE TIP in explanations, 2 times = 26-27-28 stitches. When the piece measures 60-64-68 cm, slip stitches on a thread. Work the other shoulder in the same way. ASSEMBLY: Use Kitchener stitches to graft/sew together the shoulder stitches that were placed on threads. Sew the buttons onto the back piece, matching the buttonholes on the front piece. HIGH/DOUBLE NECK: Knit up 64-68-72 stitches around the neck (including the stitches from the thread) with short circular needle size 8 mm. Purl 1 round. Work rib in the round (knit 2, purl 2) for 15 cm (high neck) or 20 cm (double neck). Cast off with knit over knit and purl over purl. Double neck: Fold the neck double to the inside and sew down. To avoid the neck being tight and rolling outwards, it is important that the seam is elastic. |
|
 |
|
Have you finished this pattern?Tag your pictures with #dropspattern #louiseslipover or submit them to the #dropsfan gallery. Do you need help with this pattern?You'll find 26 tutorial videos, a Comments/Questions area and more by visiting the pattern on garnstudio.com. © 1982-2026 DROPS Design A/S. We reserve all rights. This document, including all its sub-sections, has copyrights. Read more about what you can do with our patterns at the bottom of each pattern on our site. |
|


With over 40 years in knitting and crochet design, DROPS Design offers one of the most extensive collections of free patterns on the internet - translated to 17 languages. As of today we count 324 catalogues and 12290 patterns translated into English (UK/cm).
We work hard to bring you the best knitting and crochet have to offer, inspiration and advice as well as great quality yarns at incredible prices! Would you like to use our patterns for other than personal use? You can read what you are allowed to do in the Copyright text at the bottom of all our patterns. Happy crafting!
Post a comment to pattern DROPS 226-59
We would love to hear what you have to say about this pattern!
If you want to leave a question, please make sure you select the correct category in the form below, to speed up the answering process. Required fields are marked *.