
Popular categories
Looking for a yarn?


Comments / Questions (82)
![]() Kathrin wrote:
Kathrin wrote:
Ich habe nun das Vorder- und Rückenteil separat gestrickt. Wie führe ich denn jetzt beide zusammen? Es soll ja auf eine Rundnadel, aber was mache ich mit dem einen führenden Wollfaden ? Brauche da mal eine Anregung. Danke…
11.11.2025 - 11:57DROPS Design answered:
Liebe Kathrin, wenn beide Teile gestrickt sind, stricken Sie zuerst die Maschen vom Vorderteil bei einer Hinreihe dann stricken Sie sofort die Maschen vom Rückenteil, dann, aber die Runde vor die 6 letzten Maschen enden, damit die Runden vor den 12 Maschen krausrechts an beiden Seiten ohne "Stufe" beginnen. Viel Spaß beim Stricken!
21.11.2025 - 14:42
![]() Eulalia wrote:
Eulalia wrote:
Que es una hilera? Una pasada solo o dos? El anterior pregunta no me han contestado.
07.11.2025 - 18:48DROPS Design answered:
Hi Eulalia, 1 row/round in jersey is just one row/round. 1 garter ridge vertically = 2 rounds, i.e. knit 1 round and purl 1 round. Happy knitting!
20.11.2025 - 09:22
![]() Christiane wrote:
Christiane wrote:
Merci pour la réponse . Par contre dans les explications du modèle vous mentionnez que le tour débute avant les 12 points mousse. Mais si je comprends bien votre réponse les tours débutent à la fin du dos avant les 6 points mousse du devant.
05.11.2025 - 14:15DROPS Design answered:
Bonjour Christiane, la démarcation du changement des tours point mousse sera effectivement plus nette si vous commencez les tours avant les mailles point mousse. Bon tricot!
05.11.2025 - 17:10
![]() Christiane wrote:
Christiane wrote:
J’ai de la difficulté à comprendre comment débuter la partie où il faut tricoter en rond. Je sais comment tricoter en rond pour commencer un tricot mais je ne sais pas comment le faire quand on doit assemble le devant et le dos. Est ce que vous avez un tutoriel pour cela? mais pas quand le tricot est déjà
05.11.2025 - 04:43DROPS Design answered:
Bonjour Christiane, tricotez les mailles du devant sur l'endroit (celles qui étaient déjà sur l'aiguille), puis tricotez directement, à suivre, les mailles du dos que vous aviez mis en attente, sur l'endroit également, à la fin du dos, mettez un marqueur pour repérer le début des tours et tricotez le devant puis le dos de nouveau, vous tricotez désormais en rond. Bon tricot!
05.11.2025 - 07:49
![]() Eulalia wrote:
Eulalia wrote:
Cuando en punto jersey decis que se mengua cada 2 pasadas se refiere a que despues de menguar se hace una del reves i una del derecho? O se deben hacer dos derecho-revés?
29.10.2025 - 11:45
![]() Jensine Adler wrote:
Jensine Adler wrote:
Håber på hjælp. Min datter vil gerne strikke denne her. Kan det gå til en nybegynder? Anbefalinger til garn uden uld, evt bomuld og hør el. Bomuld og Viskose. Tak for hjælpen, Jensine adler
18.06.2025 - 16:41DROPS Design answered:
Hei Jensine. Denne kan fint strikkes av en nybegynner, men denne strikkes frem og tilbake og deretter sys den sammen. Om din datter helst ønsker å strikke mest mulig rettmasker, ville jeg ha gått for en vest som strikkes rundt og har minst mulig montering. Husk, bruk hjelpevideone som er lagt til oppskriften under Video. Om man ikke ønsker å bruke ull, ta en titt på ander kvaliteter i garngruppe B, f.eks Belle, Cotton Light og Muskat. Bare husk å overholde den oppgitte strikkefastheten i oppskriften. mvh DROPS Design
23.06.2025 - 09:57
![]() Claudette wrote:
Claudette wrote:
Combien de balles de laine pour faire le débardeur u-920 ?
04.05.2025 - 21:58DROPS Design answered:
Bonjour Claudette, vous trouverez les quantités nécessaires indiquées pour chaque taille dans l'onglet "Explications" en haut de page; autrement dit, il faut ici par exemple en taille S: 450 g DROPS Karisma/50 g la pelote = 9 pelotes Karisma en taille S. Bon tricot!
05.05.2025 - 08:46
![]() Ellen wrote:
Ellen wrote:
I diagrammet er A1 og A2 ens. Enten A1 eller A2 burde vel vise alm. retmasker, ellers giver det ikke mening. Men hvilket af dem? Eller hvis alle ribkanter skal være med drejet ret, hvorfor så ikke nøjes med ét diagram?
13.04.2025 - 11:43DROPS Design answered:
Hej Ellen, alle retmasker i ribben skal strikkes drejet (undtagen dem midt i A.3) tror bare det er en fejl at vi har lavet 2 ens diagrammer, så det skal du ikke tage hensyn til :)
24.04.2025 - 14:54
![]() Angie wrote:
Angie wrote:
Jeg strikker strl M. Hvor mange masker ska det være på pinnen når jeg ska begynne på V-halsen? (Altså når arbeidet måler 42 cm). Jeg begynte med 91 og har minsket 1 maske i hver side for ermehull til 42 cm. Så ska jeg sette en tråd rundt midtmasken og sette alle masker etter midtmasken på vent, hvor mange masker er dette? I strl M.
08.10.2024 - 12:20DROPS Design answered:
Hei Angie, Du feller for ermehullene 10 ganger på begge sider. Da har du 71 masker igjen på pinnen. Midtmasken settes på en tråd med 35 masker før og etter denne masken til hver skulder. God fornøyelse!
10.10.2024 - 10:23
![]() Peppi wrote:
Peppi wrote:
Moikka! Onko kavennusvinkki 3:ssa virhe? Takapuolella kerroksen alussa kavennettavat ja kerroksen lopussa kavennettavat silmukka määrät eivät täsmää.
27.09.2024 - 14:55DROPS Design answered:
Olet oikeassa, ohjeessa oli virhe. Kerroksen alussa kavennetaan 1 ainaoikeinneulotun reunasilmukan ja 3 oikean silmukan jälkeen. Ohjeeseen on tehty korjaus.
27.09.2024 - 18:52
|
||||||||||||||||
Skyscraper Vest#skyscrapervest |
||||||||||||||||
 |
 |
|||||||||||||||
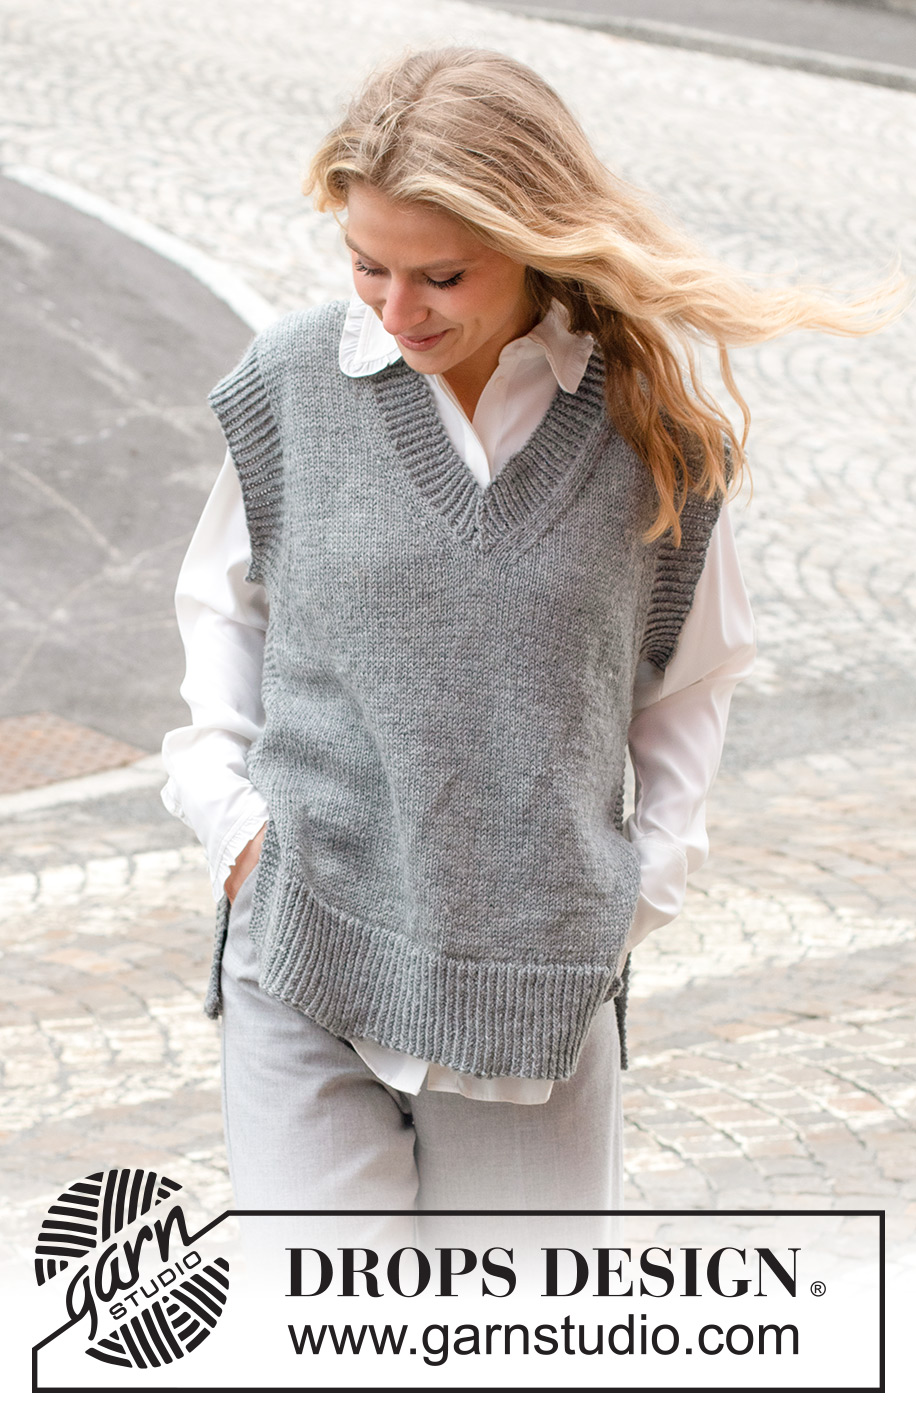
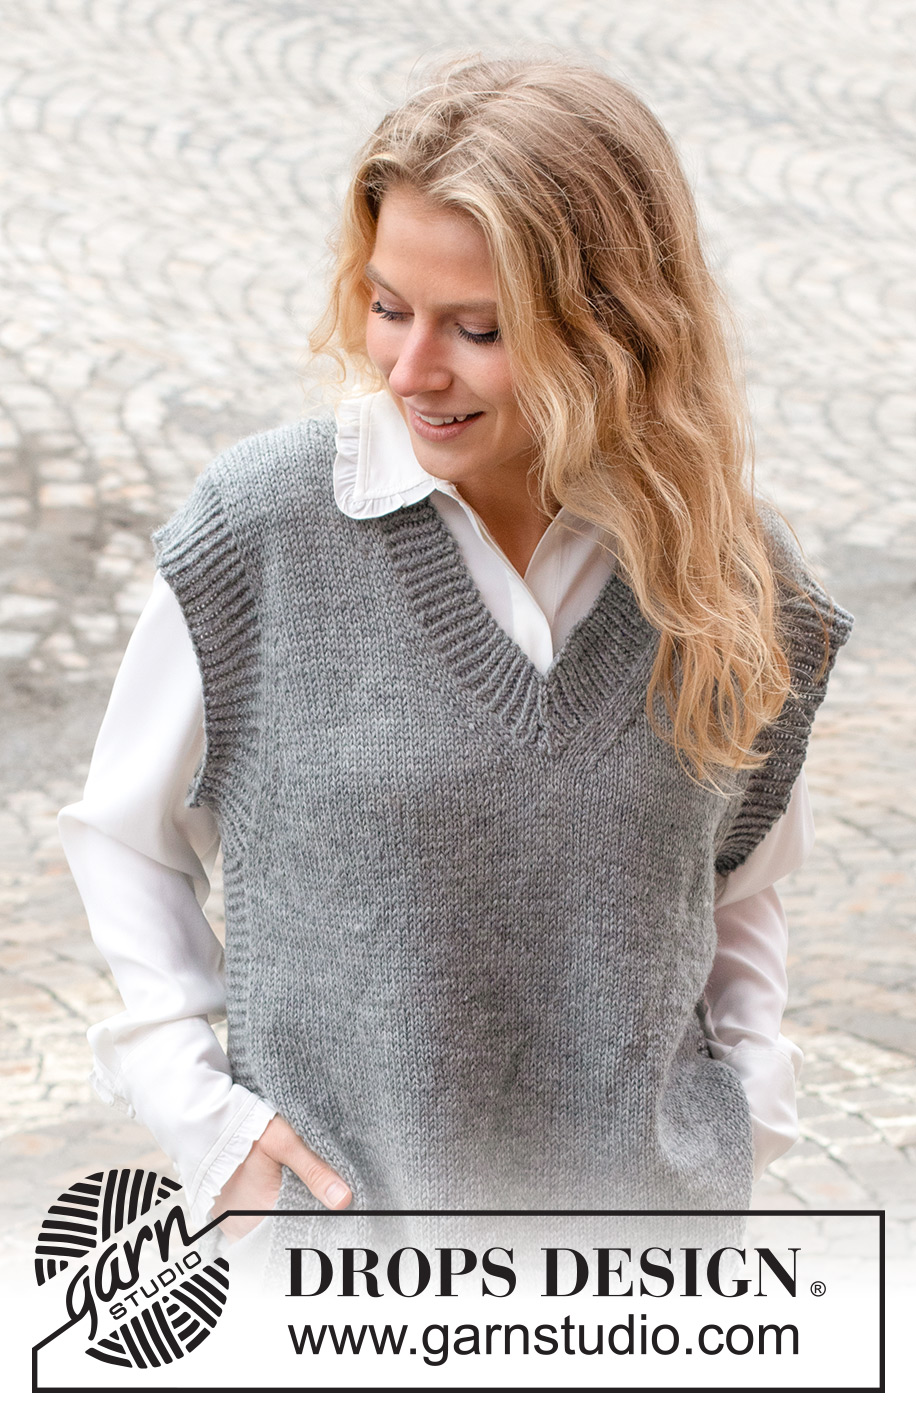
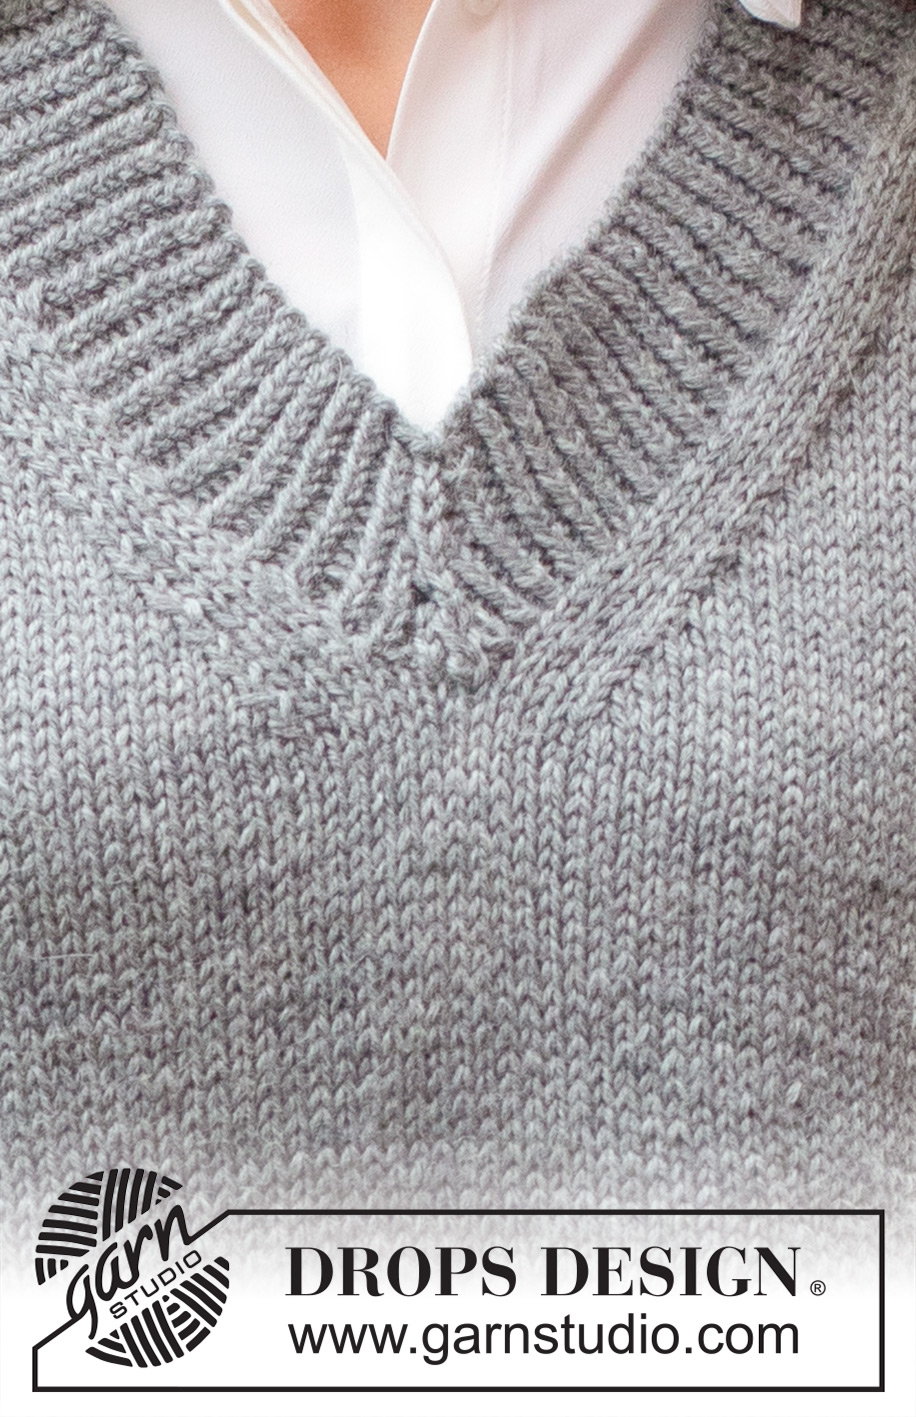
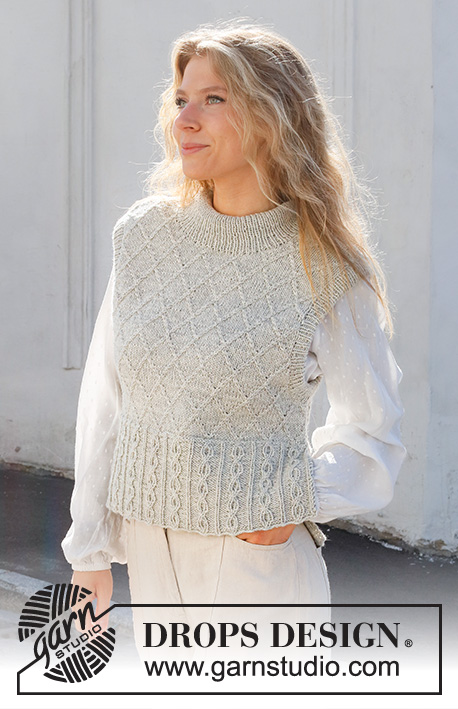
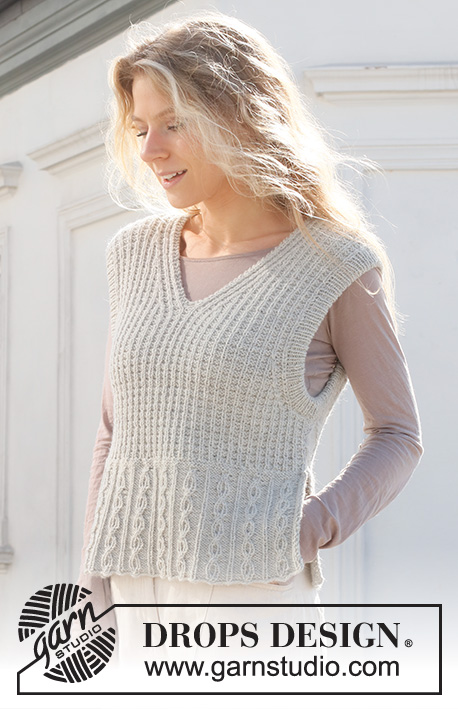
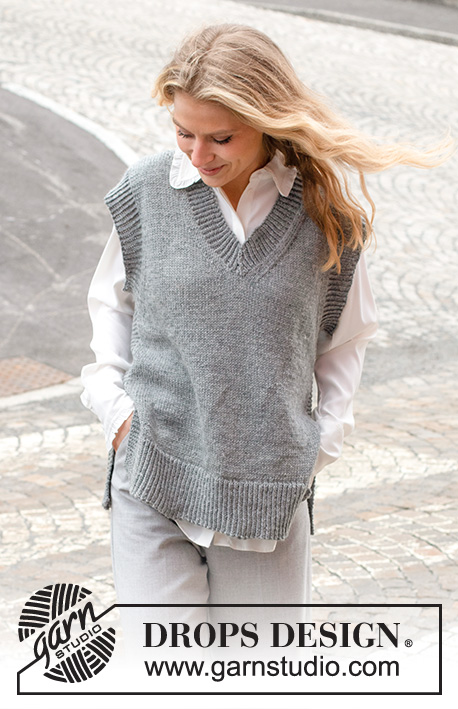
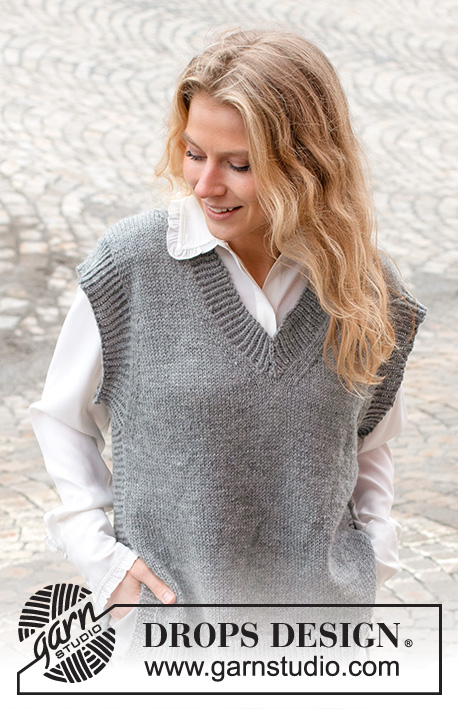
Knitted vest / slipover in DROPS Karisma. Piece is knitted with V-neck, edges in rib and vents in the sides. Size: S - XXXL
DROPS 228-3 |
||||||||||||||||
|
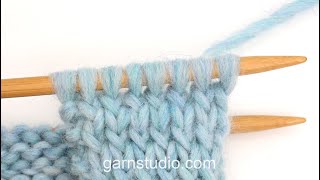
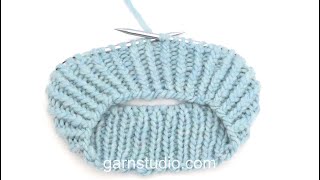
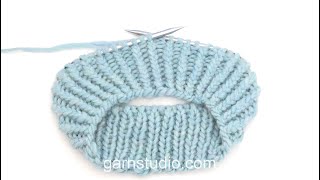
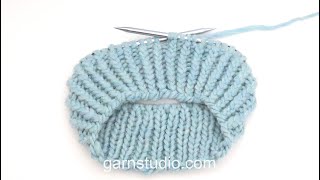
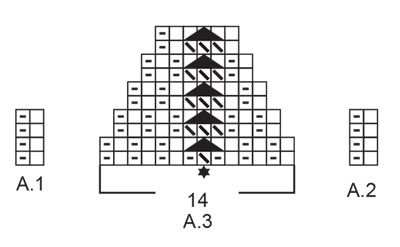
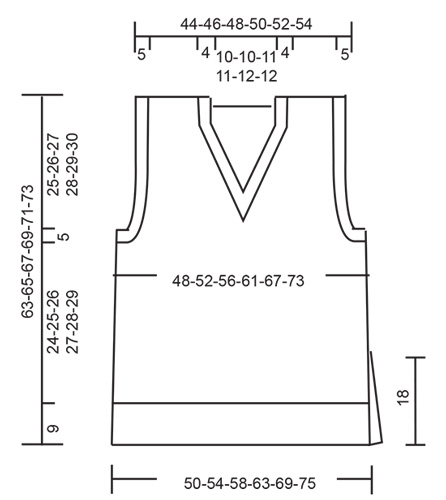
---------------------------------------------------------- EXPLANATION FOR THE PATTERN: ---------------------------------------------------------- GARTER STITCH (worked in the round): 1 ridge vertically = 2 rounds, i.e. knit 1 round and purl 1 round. GARTER STITCH (back and forth): Knit all rows. 1 ridge vertically = knit 2 rows. PATTERN: See diagrams A.1 to A.3. Diagrams show all rows in pattern seen from the right side. DECREASE TIP-1 (evenly): To calculate how to decrease evenly, use the total number of stitches on row (e.g. 119 stitches), minus edge stitches (e.g. 12 stitches) , and divide the remaining 107 stitches by number of increases/decreases to be done (e.g. 20) = 5.3. If decreasing knit in this example approx. every 4th and 5th stitch and every 5th and 6th stitch together. DECREASE TIP-2 (applies to sides of body): Decrease 1 stitch on each side of stitches in garter stitch as follows: Work until 2 stitches remain before stitches in garter stitch, knit 2 together, work 12 stitches in garter stitch, slip 1 stitch knitwise, knit 1, pass slipped stitch over stitch worked. DECREASE TIP-3: All decreases are done from the right side! Decrease at beginning of row as follows: Decrease 1 stitch after 1 edge stitch in garter stitch and 3 knit stitches as follows: Slip 1 stitch knitwise, knit 1, pass slipped stitch over stitch worked (= 1 stitch decreased). Decrease at end of row as follows: Decrease 1 stitch before 3 knit stitches and 1 edge stitch in garter stitch as follows: Work until 6 stitches remain on needle, knit 2 together, knit 3, work 1 edge stitch in garter stitch (= 1 stitch decreased). CAST-OFF TIP: To avoid a tight cast-off edge when casting off, you may use a larger needle. If this still is too tight make 1 yarn over after approx. every 4th stitch while casting off (cast off yarn overs as stitches). ---------------------------------------------------------- START THE PIECE HERE: ---------------------------------------------------------- VEST – SHORT SUMMARY OF PIECE: Work back piece and front piece back and forth on circular needle upwards until vent is done, then slip the 2 part on to same circular needle and work in the round on circular needle up to armhole. Divide piece for front piece and back piece, and finish each part separately back and forth. Work sleeve edges and neck edge in the round on circular needle. BACK PIECE: Cast on 119-129-139-151-165-179 stitches on circular needle size 3.5 mm with DROPS Karisma. Work rib as follows: 6 stitches in GARTER STITCH – read explanation above, A.1 until 7 stitches remain, work first stitch in A.1, 6 stitches in garter stitch. Continue back and forth like this until piece measures 9 cm. Work next row as follows from right side: Work garter stitch as before over the first 6 stitches, knit the next 107-117-127-139-153-167 stitches and decrease at the same time 20-22-24-26-28-30 stitches evenly – read DECREASE TIP-1, work in garter stitch as before over the last 6 stitches = 99-107-115-125-137-149 stitches. Switch to circular needle size 4.5 mm. Now work in stocking stitch with 6 stitches in garter stitch in each side. REMEMBER THE KNITTING TENSION! When piece measures 18 cm – adjust so that next row is worked from right side, put piece aside. Work front piece. FRONT PIECE: Work as on back piece. BODY: Slip stitches on front piece and back front piece on to same circular needle size = 198-214-230-250-274-298 stitches. Begin round before 12 stitches in garter stitch in one side. Continue in stocking stitch and 12 stitches in GARTER STITCH in each side - read explanation above. When piece measures 20 cm, decrease 1 stitch on each side of the 12 stitches in garter stitch - read DECREASE TIP-2. Repeat decrease when piece measures 28-29-30-31-32-33 cm = 190-206-222-242-266-290 stitches. When piece measures 33-34-35-36-37-38 cm, cast off 12-12-14-16-18-20 stitches in each side for armholes (i.e. cast off the 12 stitches in garter stitch and 0-0-1-2-3-4 stitches on each side of garter stitches). Then finish front and back piece separately. BACK PIECE: = 83-91-97-105-115-125 stitches. Continue back and forth in stocking stitch with 1 edge stitch in garter stitch in each side. At the same time on next row from right side begin decrease for armhole - read DECREASE TIP-3. Decrease like this every other row 1-1-3-7-12-18 times, then every 4th row 7-9-8-6-4-1 times (= 8-10-11-13-16-19 stitches decreased for armhole in each side) = 67-71-75-79-83-87 stitches. Continue to work until piece measures 61-63-65-67-69-71 cm. Now cast off the middle 33-33-35-35-37-37 stitches for neck and finish each shoulder separately. Then on next row from the neck, decrease 1 stitch = 16-18-19-21-22-24 stitches remain on shoulder. When piece measures 63-65-67-69-71-73 cm, cast off. Work the other shoulder the same way. FRONT PIECE: = 83-91-97-105-115-125 stitches. Continue back and forth in stocking stitch with 1 edge stitch in garter stitch in each side. At the same time decrease for armholes the same way as on back piece. When piece measures 41-42-43-44-45-46 cm, slip the middle stitch on front piece on a stitch holder (= middle stitch), and slip all stitches after this middle stitch on a stitch holder (= right front piece). Stitches before middle stitch are still on the needle (= left front piece). Left front piece: Continue back and forth with stocking stitch, 1 edge stitch in garter stitch in each side and decrease for armholes as before, at the same time on next row from right side begin decrease for V-neck: Work until 6 stitches remain towards the neck, knit 2 together (= 1 stitch decreased), knit 3, 1 edge stitch in garter stitch. Decrease like this every other row 11-11-11-11-11-11 times, then every 4th row 6-6-7-7-8-8 times (= 17-17-18-18-19-19 stitches decreased for V-neck) = 16-18-19-21-22-24 stitches remain for shoulder. Continue to work until piece measures approx. 63-65-67-69-71-73 cm. Cast off. Right front piece: Continue back and forth with stocking stitch, 1 edge stitch in garter stitch in each side and decrease for armholes as before, at the same time on next row from right side begin decrease for V-neck: Work 1 edge stitch in garter stitch, knit 3, slip 1 stitch knitwise, knit 1, pass slipped stitch over (= 1 stitch decreased), work the rest of row. Decrease like this every other row 11-11-11-11-11-11 times, then every 4th row 6-6-7-7-8-8 times (= 17-17-18-18-19-19 stitches decreased for neck) = 16-18-19-21-22-24 stitches remain for shoulder. Continue to work until piece measures approx. 63-65-67-69-71-73 cm. Cast off. ASSEMBLY: Sew shoulder seams with grafting/kitchener stitches inside cast-off edges. SLEEVE EDGES: Begin from right side where piece was divided for armhole. Use circular needle size 3.5 mm and pick up approx. 132 to 154 stitches around the entire armhole (number of stitches must be divisible by 2). Work rib according to diagram A.1 in the round for 4½-5 cm. Cast off stitches with knit over knit and purl over purl. Repeat around the other armhole. NECK EDGE: Begin mid on top of one shoulder with circular needle size 3.5 mm and DROPS Karisma and pick up 158 to 188 stitches inside 1 edge stitch in garter stitch around the entire neck edge including middle stitch on stitch holder mid front (number of stitches must be divisible by 2). Work rib according to pattern A.2 in the round - adjust so that pattern is worked according to A.3 over the 14 stitches mid front (stitch with star in A.3 should be middle stitch mid front), and so that pattern fits knit 1 twisted / purl 1 in the round on first round worked. Continue in the round and decrease as shown in A.3 until rib measures 4 cm. Cast off with knit over knit and purl over purl, at the same time decrease as before over the middle 3 stitches mid front. |
||||||||||||||||
Diagram explanations |
||||||||||||||||
|
||||||||||||||||
 |
||||||||||||||||
 |
||||||||||||||||
Have you finished this pattern?Tag your pictures with #dropspattern #skyscrapervest or submit them to the #dropsfan gallery. Do you need help with this pattern?You'll find 33 tutorial videos, a Comments/Questions area and more by visiting the pattern on garnstudio.com. © 1982-2026 DROPS Design A/S. We reserve all rights. This document, including all its sub-sections, has copyrights. Read more about what you can do with our patterns at the bottom of each pattern on our site. |
||||||||||||||||


With over 40 years in knitting and crochet design, DROPS Design offers one of the most extensive collections of free patterns on the internet - translated to 17 languages. As of today we count 325 catalogues and 12298 patterns translated into English (UK/cm).
We work hard to bring you the best knitting and crochet have to offer, inspiration and advice as well as great quality yarns at incredible prices! Would you like to use our patterns for other than personal use? You can read what you are allowed to do in the Copyright text at the bottom of all our patterns. Happy crafting!
Post a comment to pattern DROPS 228-3
We would love to hear what you have to say about this pattern!
If you want to leave a question, please make sure you select the correct category in the form below, to speed up the answering process. Required fields are marked *.