
Popular categories
Looking for a yarn?


Comments / Questions (47)
![]() Carla Smit Legerstee wrote:
Carla Smit Legerstee wrote:
Volgens mij is de berekening van 248 steken en meerder 48 is volgens mij 296 steken
09.01.2025 - 14:32DROPS Design answered:
Dag Carla,
Inderdaad, zo te zien klopt het aantal steken niet en moet het 296 zijn, zoals je aangeeft. Ik zal het doorgeven aan de ontwerpafdeling om te controleren en eventueel aan te passen. In principe kun je gewoon verder met het aantal aangegeven meerderingen en daarna de boordsteek.
11.01.2025 - 13:53
![]() Christina Kuronen-Pettersson wrote:
Christina Kuronen-Pettersson wrote:
Wie ist die Antwort auf meine 2. Frage ?
28.10.2024 - 10:02DROPS Design answered:
Liebe Frau Kuronen-Pettersson, meinen Sie, wie Sie diese Raglanzunahmen stricken sollten? Wenn glatt dann rechts verschränkt, deshalb hatte ich solche Anleitungen in die vorige Antwort verlinkt. Viel Spaß beim Stricken!
28.10.2024 - 13:09
![]() Christina Kuronen-Pettersson wrote:
Christina Kuronen-Pettersson wrote:
Kann man diesen Pullover auch glatt rechts stricken, also ohne Muster A1 und A2 ? Wie werden die zugenommenen Maschen bei der Raglanzunahme in der nächsten Reihe gestrickt re oder li ? Danke für die Hilfe
27.10.2024 - 18:33DROPS Design answered:
Liebe Frau Kuronen-Pettersson, wahrscheinlich - hier finden Sie alle Pullover die von oben nach unten mit Raglanzunahmen (alle Maschenprobe) gestrickt werden - vielleicht finden Sie einen davon, der Ihnen inspirieren wird. Viel Spaß beim Stricken!
28.10.2024 - 09:45
![]() Christina Kuronen-Pettersson wrote:
Christina Kuronen-Pettersson wrote:
Es geht um den Halsausschnitt. Er ist entweder zu klein oder zu groß. ich habe es mit der Nadel 3,5 und 4 mm versucht. Können Sie mir die richtige Nadelstärke sagen. Maschenprobe habe ich gemacht,konnte ich nicht so viel mit anfangen. Vielen Dank
19.10.2024 - 18:33DROPS Design answered:
Liebe Frau Kuronen-Pettersson, die Halsblende wird mit Nadeln Nr 3,5 gestrickt, sollte Ihre Maschenprobe mit der Nadeln Nr 4,5 stimmen, dann sollte die Halsblende richtig sein. Viel Spaß beim Stricken!
21.10.2024 - 08:34
![]() Ria wrote:
Ria wrote:
Dag, in het patroon staat dat er onderaan het lijf een x aantal steken gemeerderd moet worden. Is dat niet vreemd? Meestal is onderaan een trui het aantal steken het minste. Moet je juist niet minderen onderaan de trui?
10.10.2024 - 21:52DROPS Design answered:
Dag Ria,
Dit meerderen wordt bewust gedaan om te voorkomen dat de boord het werk gaat samen trekken.
19.10.2024 - 11:28
![]() Phuong Anh wrote:
Phuong Anh wrote:
If increased 1 yo on each side of A1. So why you said increased 8sts on the round? That was supposed to be 16sts? Im so confused
02.10.2024 - 17:41DROPS Design answered:
Dear Mrs Anh, you work A.1 on each raglan line, ie a total of.4 times in the round, and to increase for raglan you will increase on each side of A.1 - so that you will increase a total of 8 stitches on each round: 1 stitch at the beg of front/sleeve/back/sleeve after A.1 + 1 stitch at the end of front/sleeve/back/sleeve before next A.1. Happy knitting!
03.10.2024 - 09:06
![]() Phuong Anh wrote:
Phuong Anh wrote:
I think you should write more clearly on increased raglan part. It was like 'yo,PM,yo'. You make me so confused cuz i do like just yo,PM and move to next diagram. I've just increased on side, I was make for 12cm to realize that was a mistakes :) god dame
02.10.2024 - 11:00
![]() Phuong Anh wrote:
Phuong Anh wrote:
I think you should write more clearly on increased raglan part. It was like 'yo,PM,yo'. You make me so confused cuz i do like just yo,PM and move to next diagram. I've just increased on side, I was make for 12cm to realize that was a mistakes :) god dame
02.10.2024 - 07:24
![]() Paul Goldberg wrote:
Paul Goldberg wrote:
I see that there are other comments about the pattern A1 and A2, but it is not clear to me how exactly the pattern works. Is A1 the body and A2 for the sleeves? Do they go on the same row? Any help will be greatly appreciated. Thanks
29.08.2024 - 12:22DROPS Design answered:
Dear Mrs Goldberg, diagram A.1 is for raglan lines and diagram A.2 is for sleeves and body, the number of sts is uneven so that pattern starts and ends the same (to make it symmetrical). Happy knitting!
30.08.2024 - 07:54
![]() Laura wrote:
Laura wrote:
Hi, when i’m doing the raglan increases, should my marker go before or after yarn overs? Thank you!
06.04.2024 - 23:36DROPS Design answered:
Dear Laura, you should do the yarnovers before and after the A.1 pattern. The best would be to keep the markers between the yarnovers and the A.1 pattern. Happy Knitting!
07.04.2024 - 01:20
|
|||||||
Sjøbris#sjoebrissweater |
|||||||
 |
 |
||||||
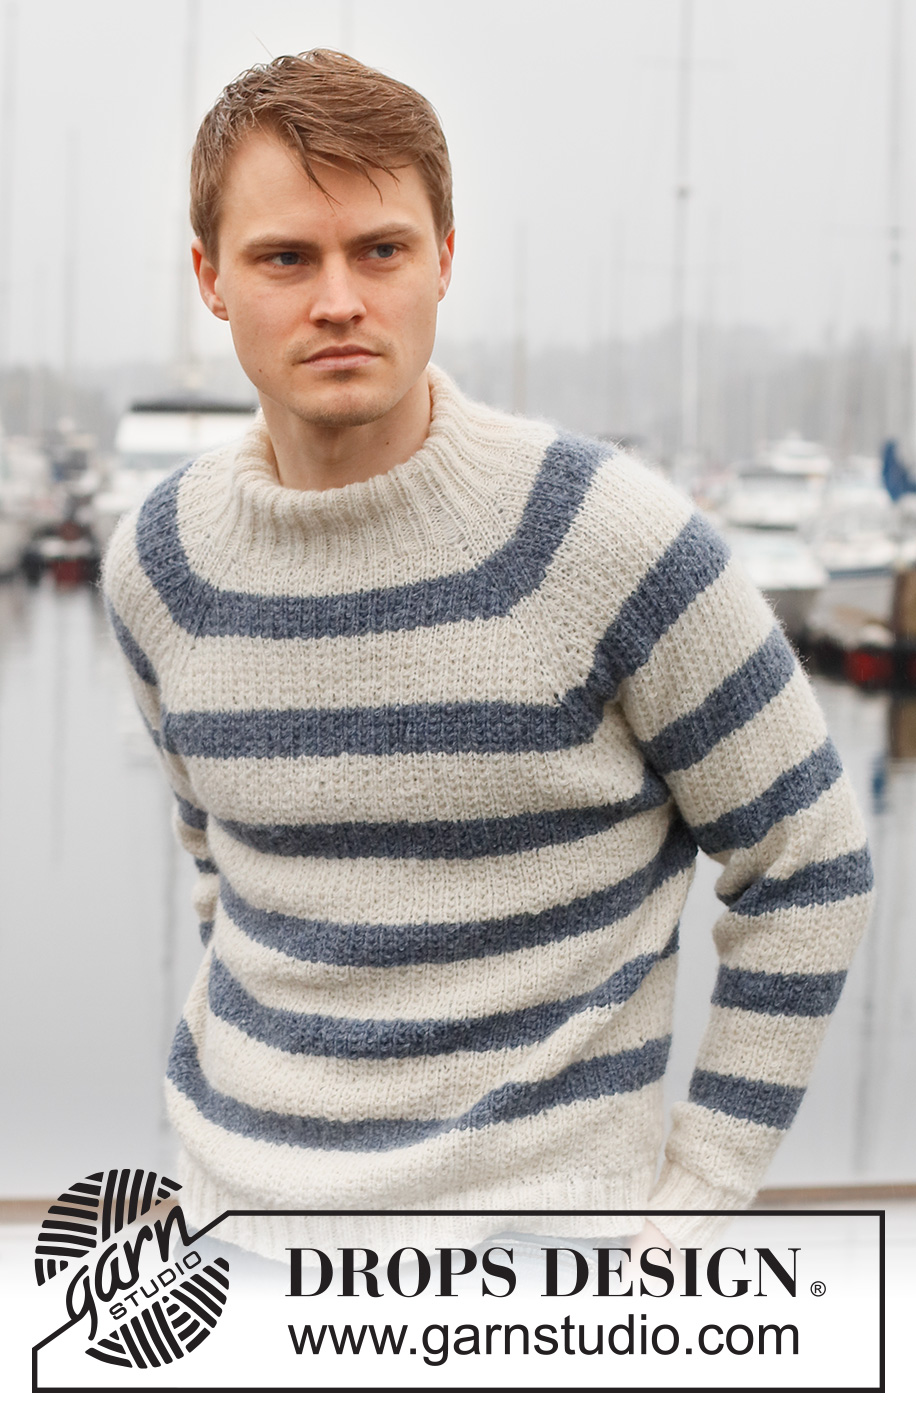
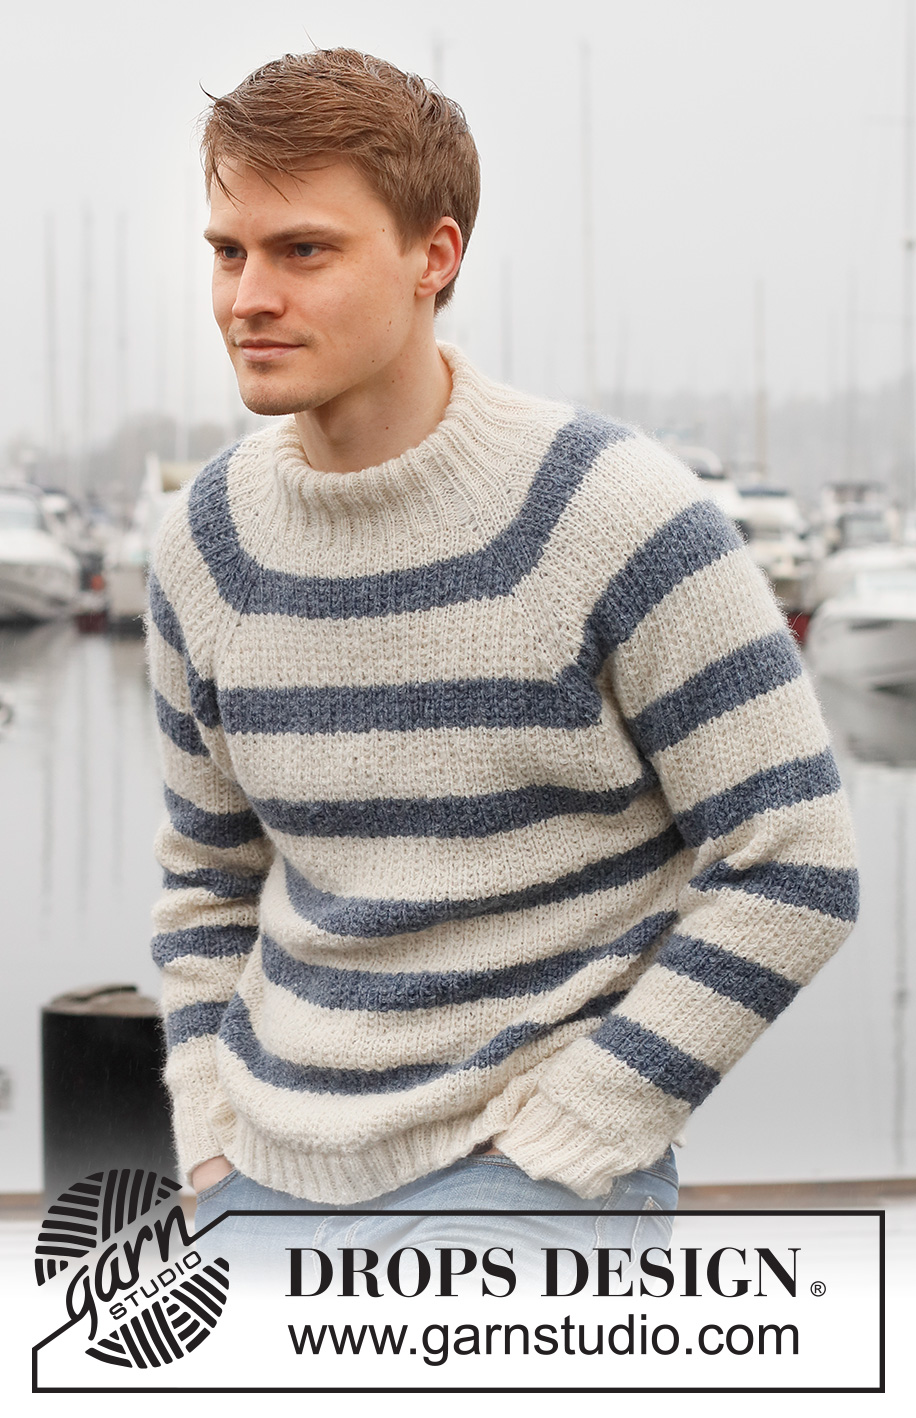
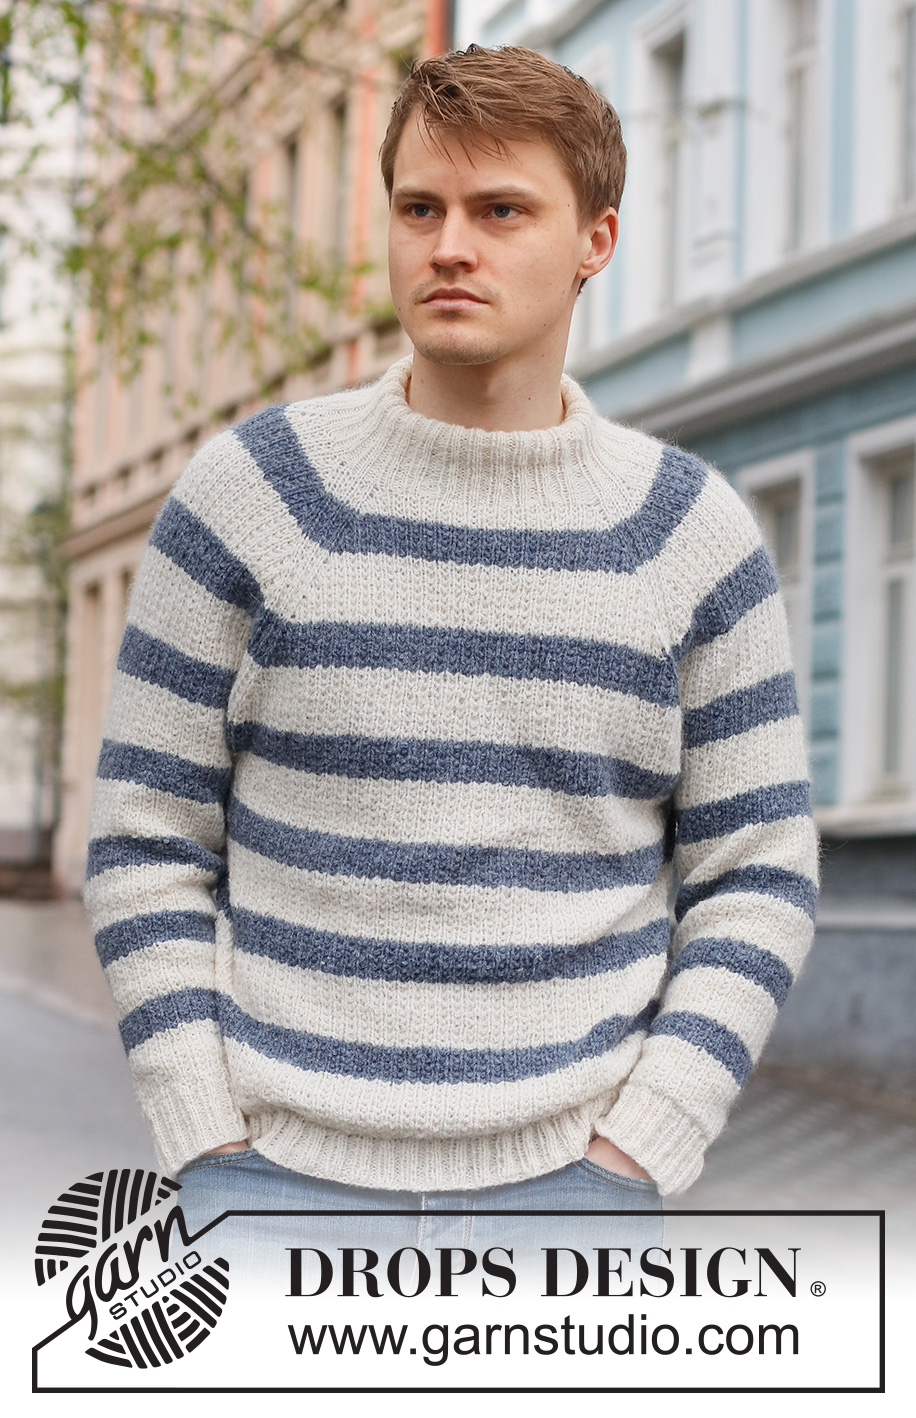
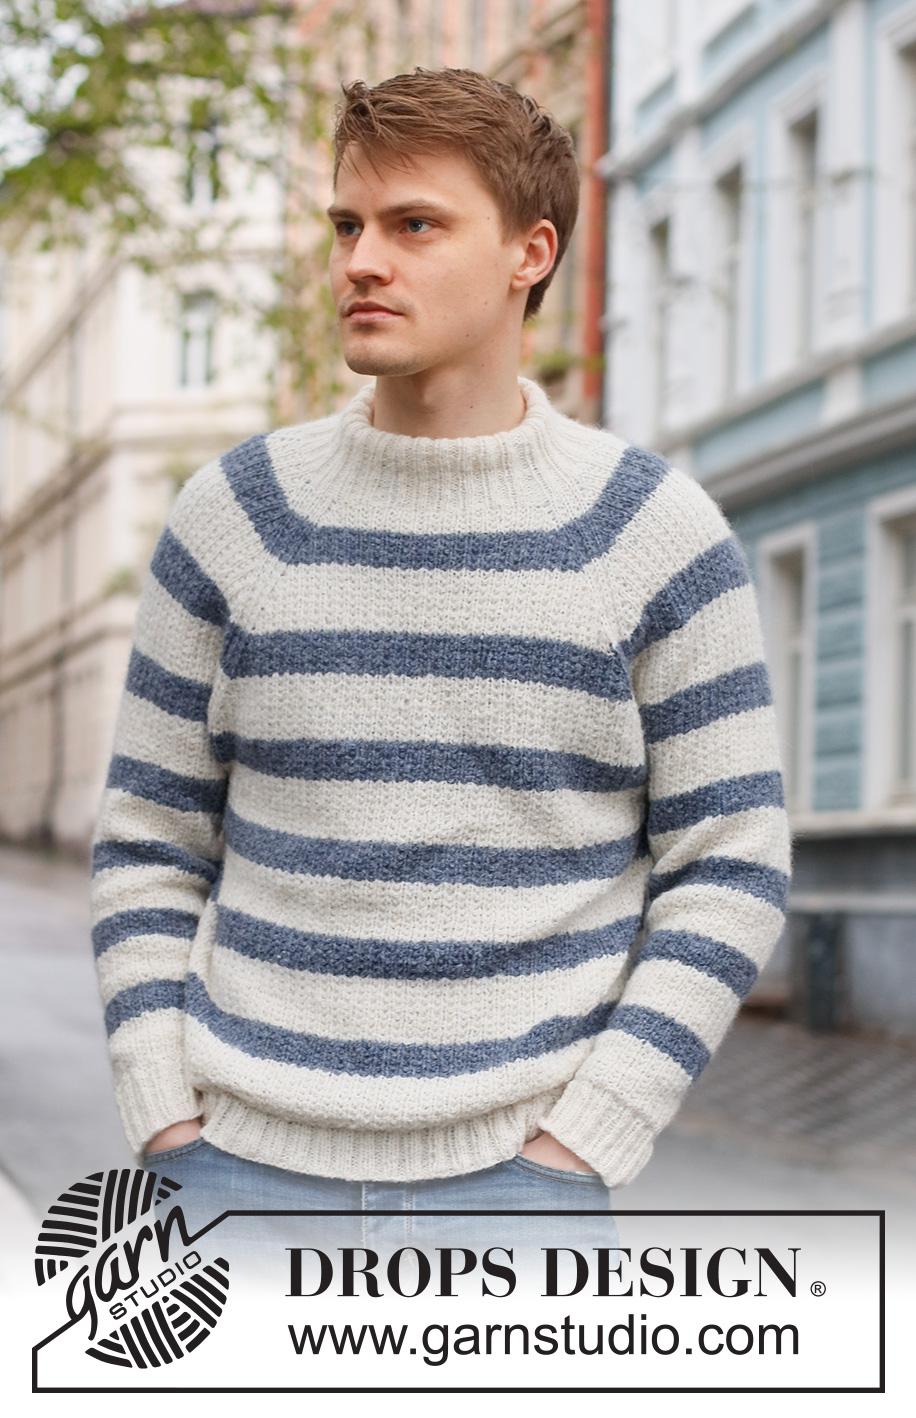
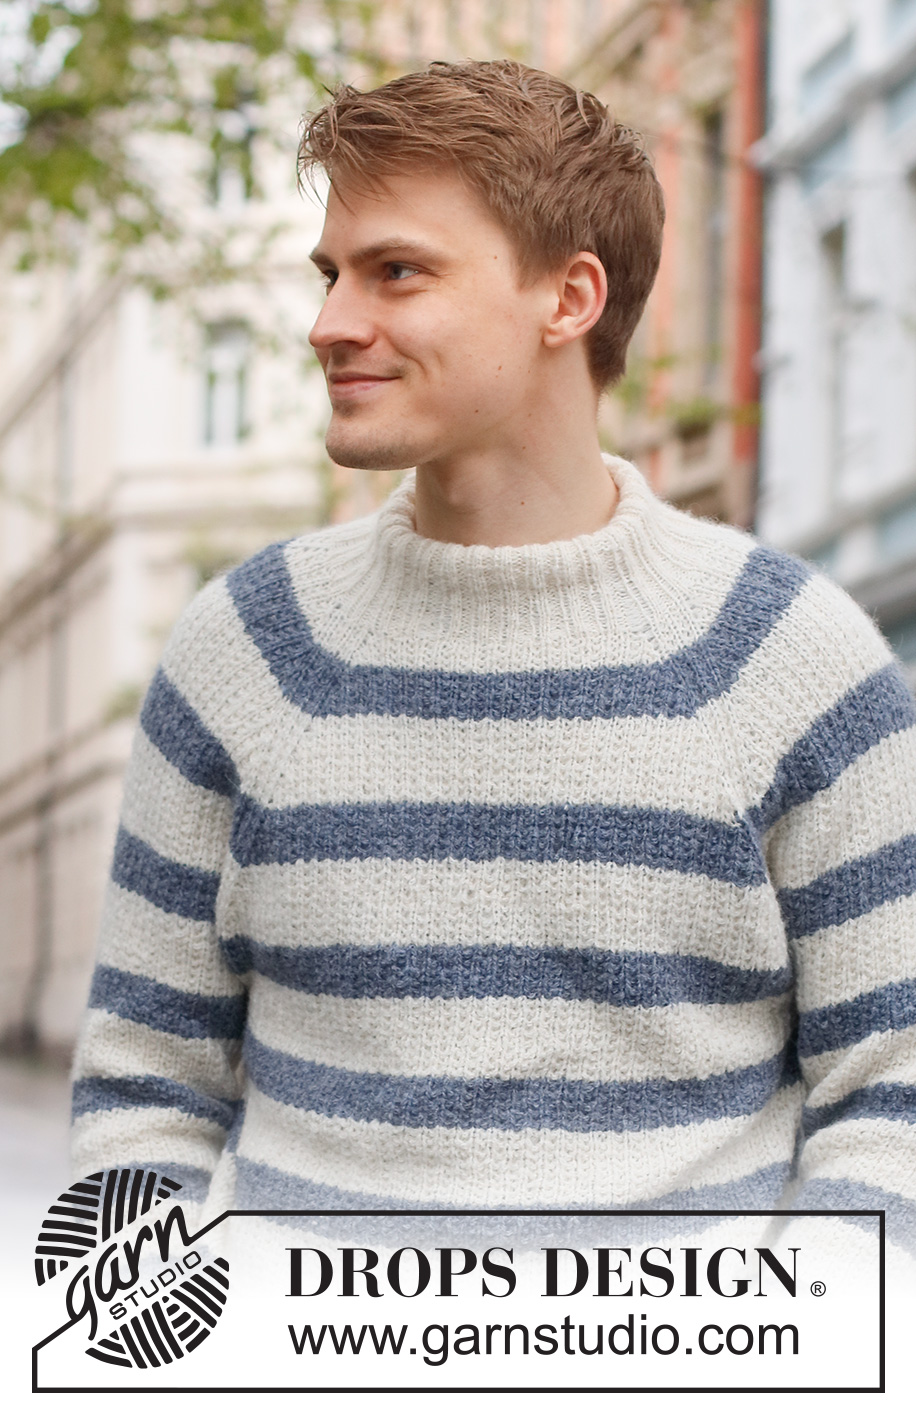
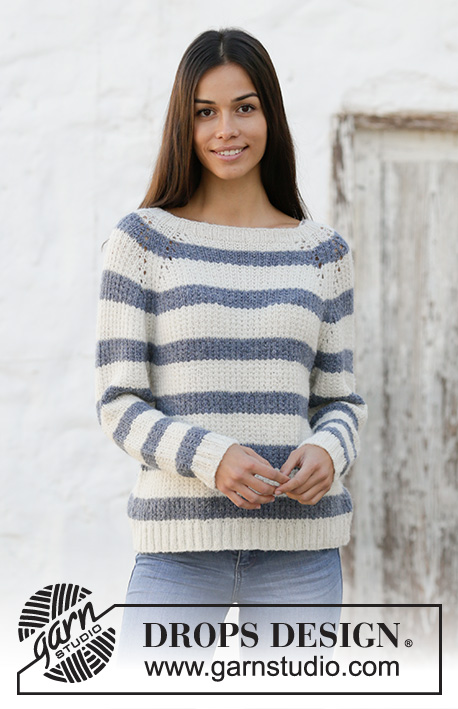
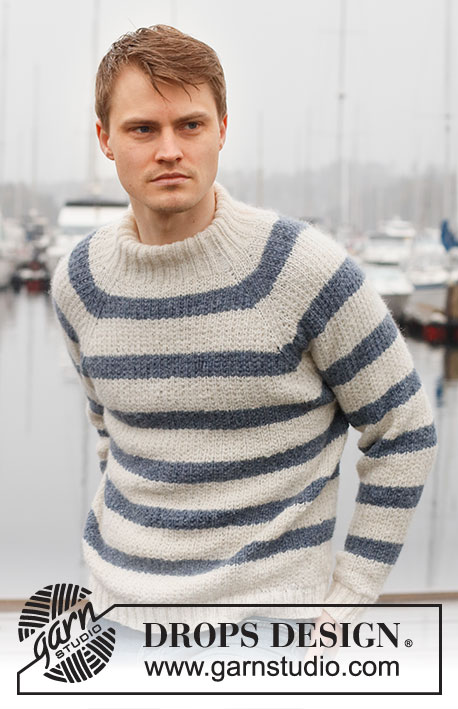
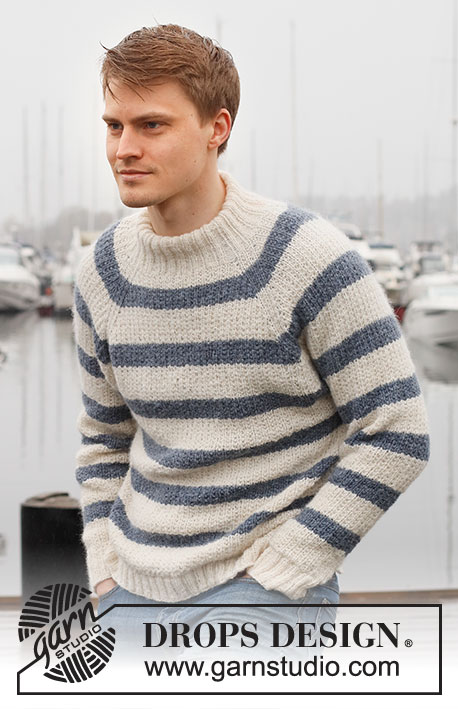
Knitted jumper for men in DROPS Sky. The piece is worked top down with raglan, stripes and textured pattern. Sizes S - XXXL.
DROPS 224-1 |
|||||||
|
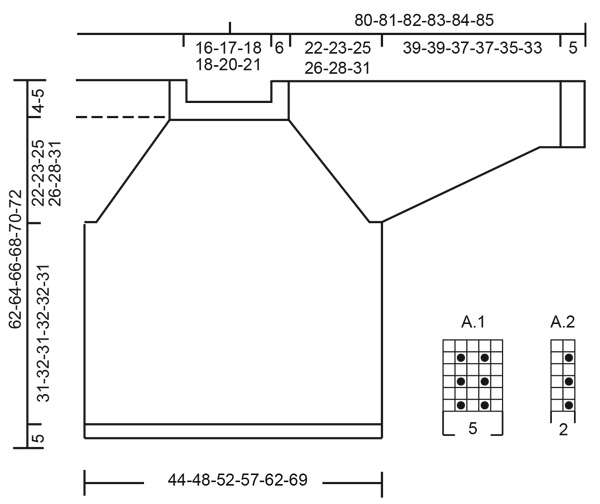
------------------------------------------------------- EXPLANATIONS FOR THE PATTERN: ------------------------------------------------------- DECREASE/INCREASE TIP (evenly spaced): To work out how to decrease/increase evenly, count the total number of stitches to be decreased/increased over (e.g. 96 stitches) and divide by number of decreases/increases to be made (e.g. 8) = 12. In this example, decrease by knitting together each 11th and 12th stitch. When increasing, make 1 yarn over after each 12th stitch. On the next round knit the yarn overs twisted to avoid holes. PATTERN: See diagrams A.1 and A.2. RAGLAN: Increase to raglan by making 1 yarn over on each side of A.1; the yarn overs are worked twisted on the next round, then worked into A.2. STRIPES: The neck and the first 2 cm on the yoke are worked with white before starting the stripes. Then work alternately 3½-3½-3½-3-3-3½ cm with jeans blue and 5 cm with white until you have worked 6-6-6-7-7-7 jeans blue stripes on the yoke/body and 7-7-7-7-7-7 jeans blue stripes on the yoke/sleeves. Then finish the pieces with white. DECREASE TIP (sleeves): Decrease 1 stitch on either side of the marker-stitch as follows: Work until there are 2 stitches left before the marker-stitch, knit 2 together, knit 1 (marker-stitch), slip 1 stitch as if to knit, knit 1 and pass the slipped stitch over the knitted stitch. CASTING-OFF TIP: To avoid the cast-off edge being tight you can cast off with a larger size needle. If the edge is still tight, make 1 yarn over after approx. each 4th stitch at the same time as casting off; the yarn overs are cast off as normal stitches. ------------------------------------------------------- START THE PIECE HERE: ------------------------------------------------------- JUMPER – SHORT OVERVIEW OF THE PIECE: The neck and yoke are worked in the round with circular needle, top down. The yoke is divided for body and sleeves and the body is continued in the round with circular needle. The sleeves are worked with double pointed needles/short circular needle. NECK: Cast on 96-100-104-112-120-124 stitches with circular needle size 3.5 mm and white DROPS Sky. Work rib in the round (knit 2, purl 2) for 12 cm (the neck is later folded double and sewn down to the wrong side). Knit 1 round where you decrease 8-8-8-12-12-12 stitches evenly spaced – read DECREASE/INCREASE TIP in explanations above = 88-92-96-100-108-112 stitches. YOKE: Change to circular needle size 4.5 mm. Read STRIPES before continuing. Insert 1 marker thread on this round; it will be used when measuring the yoke. In addition insert 8 markers before continuing, which will be used when increasing to raglan: Insert 1 marker at the beginning of the round (= between back piece and sleeve), count 5 stitches and insert 1 marker here, count 7-7-9-9-11-11 stitches and insert 1 marker here (= sleeve), count 5 stitches and insert 1 marker here, count 27-29-29-31-33-35 stitches and insert 1 marker here (= front piece), count 5 stitches and insert 1 marker here, count 7-7-9-9-11-11 stitches and insert 1 marker here (= sleeve), count 5 stitches and insert 1 marker here. There are 27-29-29-31-33-35 stitches left between the last and the first marker (= back piece). Now work pattern and increase to RAGLAN – read description above, as follows: Work A.1 over the first 5 stitches, 1 yarn over, work A.2 over the next 7-7-9-9-11-11 stitches (= sleeve), 1 yarn over, work A.1 over the next 5 stitches, 1 yarn over, work A.2 over the next 27-29-29-31-33-35 stitches (= front piece), 1 yarn over, work A.1 over the next 5 stitches, 1 yarn over, work A.2 over the next 7-7-9-9-11-11 stitches (= sleeve), 1 yarn over, work A.1 over the next 5 stitches, 1 yarn over, work A.2 over the next 27-29-29-31-33-35 stitches (= back piece), 1 yarn over. You have increased 8 stitches on the round. REMEMBER THE KNITTING TENSION! Continue with the pattern, stripes and increase to raglan every 2nd round a total of 24-28-30-32-34-40 times = 280-316-336-356-380-432 stitches. Continue with stripes and pattern, but without further increases, until the piece measures 22-23-25-26-28-31 cm from the marker on the neck. Now divide the yoke for the body and sleeves as follows: Work the first 3-2-3-5-6-6 stitches as before (= back piece), place the next 59-69-73-73-77-89 stitches on 1 thread for the sleeve, cast on 7-7-9-9-11-11 new stitches (= in side under sleeve), work the next 81-89-95-105-113-127 stitches as before (= front piece), place the next 59-69-73-73-77-89 stitches on 1 thread for the sleeve, cast on 7-7-9-9-11-11 new stitches (= in side under sleeve), work the last 78-87-92-100-107-121 stitches (= the rest of the back piece). Body and sleeves are finished separately. THE PIECE IS NOW MEASURED FROM HERE! BODY: = 176-192-208-228-248-276 stitches. Continue the pattern and stripes as before over all stitches. When the piece measures 31-32-31-32-32-31 cm from the division, knit 1 round where you increase 36-36-40-44-48-56 stitches evenly spaced = 212-228-248-272-300-332 stitches. Change to circular needle size 3.5 mm and work rib (knit 2, purl 2) for 5 cm. Read CASTING-OFF TIP and cast off with knit over knit and purl over purl. The jumper measures approx. 62-64-66-68-70-72 cm from the shoulder down. SLEEVE: Place the 59-69-73-72-77-89 stitches from the thread on the one side of the piece on double pointed needles/short circular needle size 4.5 mm and knit up 1 stitch in each of the 7-7-9-9-11-11 stitches cast on under the sleeve = 66-76-82-82-88-100 stitches. Insert a marker in the middle stitch under the sleeve and begin the round here. Continue in the round, with stripes and pattern as before. When the piece measures 2 cm from the division, decrease 2 stitches under the sleeve – read DECREASE TIP. Decrease like this every 4-2½-2-2½-2-1 cm a total of 9-13-15-14-16-21 times = 48-50-52-54-56-58 stitches. Continue working until the piece measures 39-39-37-37-35-33 cm from the division (shorter measurements in larger sizes due to longer yoke). Knit 1 round where you increase 4-2-4-2-4-2 stitches evenly spaced = 52-52-56-56-60-60 stitches. Change to double pointed needles size 3.5 mm and work rib (knit 2, purl 2) for 5 cm. Remember CASTING OFF TIP and cast off with knit over knit and purl over purl. Work the other sleeve in the same way. ASSEMBLY: Fold the neck double to the wrong side. Sew the cast-on edge to the neckline, with long, loose stitches from the wrong side (making sure the seam is invisible on the right side and that it is not tight). |
|||||||
Diagram explanations |
|||||||
|
|||||||
 |
|||||||
Have you finished this pattern?Tag your pictures with #dropspattern #sjoebrissweater or submit them to the #dropsfan gallery. Do you need help with this pattern?You'll find 22 tutorial videos, a Comments/Questions area and more by visiting the pattern on garnstudio.com. © 1982-2026 DROPS Design A/S. We reserve all rights. This document, including all its sub-sections, has copyrights. Read more about what you can do with our patterns at the bottom of each pattern on our site. |
|||||||


With over 40 years in knitting and crochet design, DROPS Design offers one of the most extensive collections of free patterns on the internet - translated to 17 languages. As of today we count 324 catalogues and 12239 patterns translated into English (UK/cm).
We work hard to bring you the best knitting and crochet have to offer, inspiration and advice as well as great quality yarns at incredible prices! Would you like to use our patterns for other than personal use? You can read what you are allowed to do in the Copyright text at the bottom of all our patterns. Happy crafting!
Post a comment to pattern DROPS 224-1
We would love to hear what you have to say about this pattern!
If you want to leave a question, please make sure you select the correct category in the form below, to speed up the answering process. Required fields are marked *.