
Popular categories
Looking for a yarn?


Comments / Questions (97)
![]() Celine wrote:
Celine wrote:
Je suis désolée de ne pas m'en sortir seule pour réaliser mon pull, mais j'ai un soucis avec le dessin M1, j'ai beau recommencé et recommencé je n'obtient pas le nombre de maille qu'il faut pour le premier dessin du bas, y a t'il une explication supplémentaire que vous pourriez m'apporter?
18.02.2015 - 22:25DROPS Design answered:
Bonjour Céline, commencez bien M.1 en bas à droite et répétez *4 m end, 2 m ens à l'end* tout le rang sauf sur les 6 m de bordure de chaque côté, vous allez diminuer 1 m par motif de M1, soit par ex en taille S vous répétez 60 fois M.1 et diminuez 60 m sur ce rang. Tricotez 1 rang env sur l'env, au rang suivant, répétez *2 m ens à l'end, 1 m end, 2 m ens à l'end* tout le rang, vous diminuez 2 m par motif M1. Quand M1 est fait, il reste 3 m dans chaque motif. Bon tricot!
19.02.2015 - 09:11
![]() Sarah Bardsley wrote:
Sarah Bardsley wrote:
Please can you let me know if it's possible to knit this pattern using one thread of Drops Alpaca Boucle. I have bought 750 grams of this and would be using the same size needles the pattern states. Or should I use 2 threads of it or mix it with another yarn? I got slightly confused when I ordered the yarn so your advice would be appreciated. Thank you, Sarah x
16.10.2014 - 23:13DROPS Design answered:
Dear Sarah, 1 strand Alpaca Bouclé will not be enough, 1 strand each Alpaca Bouclé + 1 strand Alpaca could be a good option, but you should make a swatch first to check your tension. Happy knitting!
22.10.2014 - 09:32
![]() Lene wrote:
Lene wrote:
Aha, nå vet jeg hvor feilen ligger. På tredje omgang i fellingen blir det ikke to sammen - 1 -to sammen - 1, men 2 sammen - 1 - 2 sammen - 2 sammen - 1- 2 sammen - 2 sammen osv, er det mulig at jeg ikke så det. :-)Ergo har jeg fått 21 masker for mye på omgangen. Greit å finne ut av det :-)
20.08.2013 - 10:13
![]() Lene wrote:
Lene wrote:
Hvorfor ender jeg opp på 225 m etter felling i str. M. Det blir jo 21 m for mye. Ser andre har gjort samme feilen. Står bare ikke hva som er gjort feil her. ???
20.08.2013 - 09:39Paula Vieyra wrote:
I would like to knit this pattern with Verdi yarn.My size is Large,do you think that one ball would be enough?I will not kint the hood. Thank you
20.09.2012 - 21:39DROPS Design answered:
Dear Mrs Vieyra, the pattern requires 1400 m yarn in Symphony in size L, Verdi is only 1225 m, it's difficult to say how much yarn will be used for the hood, so that we'd suggest to have 2 balls Verdi to be sure you'll get enough yarn for the jacket. Happy knitting !
13.11.2012 - 10:56
![]() Bodil wrote:
Bodil wrote:
Hej ! Jag håller på med den här tröjan och jag får inte det att stämma med första M.1 : När all minskningar är gjorda ska det vara 216 m kvar. Jag får 23 m för mkt kvar, alltså 239 m. Är det någon som har/haft samma problem ? Tack på förhand för ett svar ! mvh Bodil
03.03.2012 - 19:10DROPS Design answered:
Hej, M.1 skall stickas totalt 6 ggr. Första v i M.1 minskar du 1 m per diagram dvs totalt 24 m, 3:e v i M.1 är det två minskningar dvs 48 m totalt. 288-24-48=216. Lycka till!
07.03.2012 - 14:55
![]() DROPS Deutsch wrote:
DROPS Deutsch wrote:
Die erste Reihe mit M1: 6 M. Krausrippe, danach M1: *4 glatt, 2 re. zusammenstricken* von *-* wiederholen und die letzten 6 M. Krausrippe stricken.
30.08.2011 - 10:14
![]() Alexandra wrote:
Alexandra wrote:
Ich stricke die Jacke in Größe S und bin an der Stelle, an der ich 192 Maschen auf der Nadel habe. Nun soll ich M1 stricken und verstehe es leider absolut nicht. Könnte mir bitte jemand genau erklären was ich machen muss. Ist es so richtig: 1 RM, 6M kraus, 7 M glatt,M1= 2 M re zusammen+ 4 re, 16 M gl, M1= 2M re zusammen+ 4Mre, 12 M glatt,M1= 2 M re zusammen+ 4M re,16 M glatt, M1= 2M re zusammen+4M re,7 M glatt,6 M kraus, 1 RM ??? Grüße
30.08.2011 - 00:30
![]() Lone Bjørnsen wrote:
Lone Bjørnsen wrote:
Når du strikker M1 skal du starte med rapporten forneden ( 4 ret, 2 sammen), næste pind(vrang siden) vrang, 3 pind, 3 pind (2 ret, 2 sammen) og derefter står der i opskriften vrang tilbage. Husk de 6 masker i hver siden som kant ikke skal med. Derefter glat som der står i opskriften. God fornøjelse, lækker strikke valg:-) Lone
08.05.2010 - 16:15
![]() Kathe Kristoffersen wrote:
Kathe Kristoffersen wrote:
Jeg strikker jakken i xxxl og er kommet til M1, jeg har på første pind strikket 6 ret masker, derefter 2 sammen og en ret, 2 sammen og en ret...osv til der er 6 masker tilbage som jeg har strikket ret...næste pind har jeg strikket de 6 første og sidste ret, og de der imellem vrang, men hvad skal jeg på 3. pind?? Venlig hilsen Kathe Kristoffersen
06.05.2010 - 12:21
|
|||||||
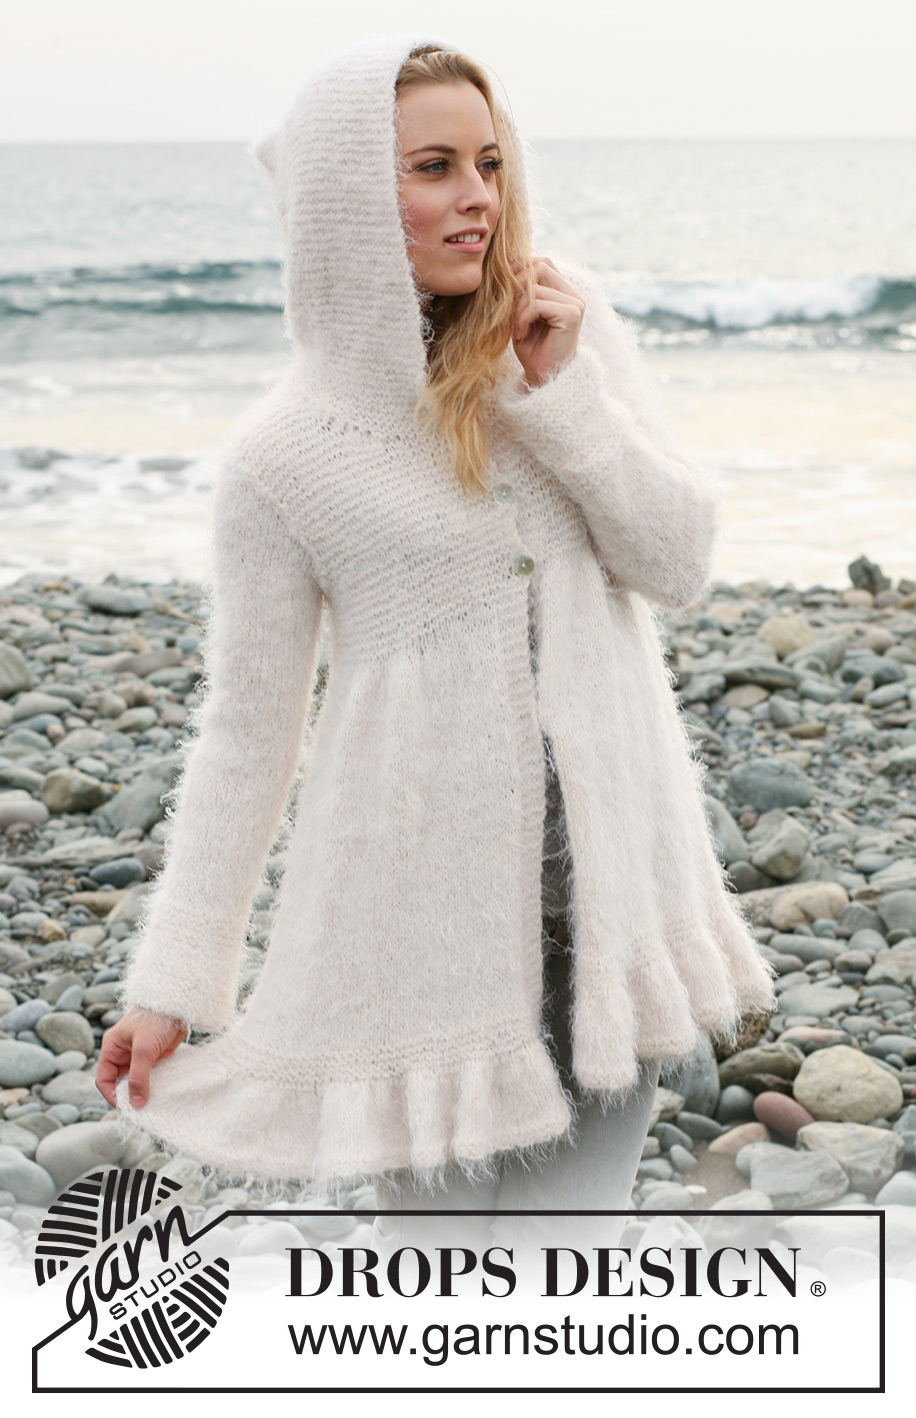
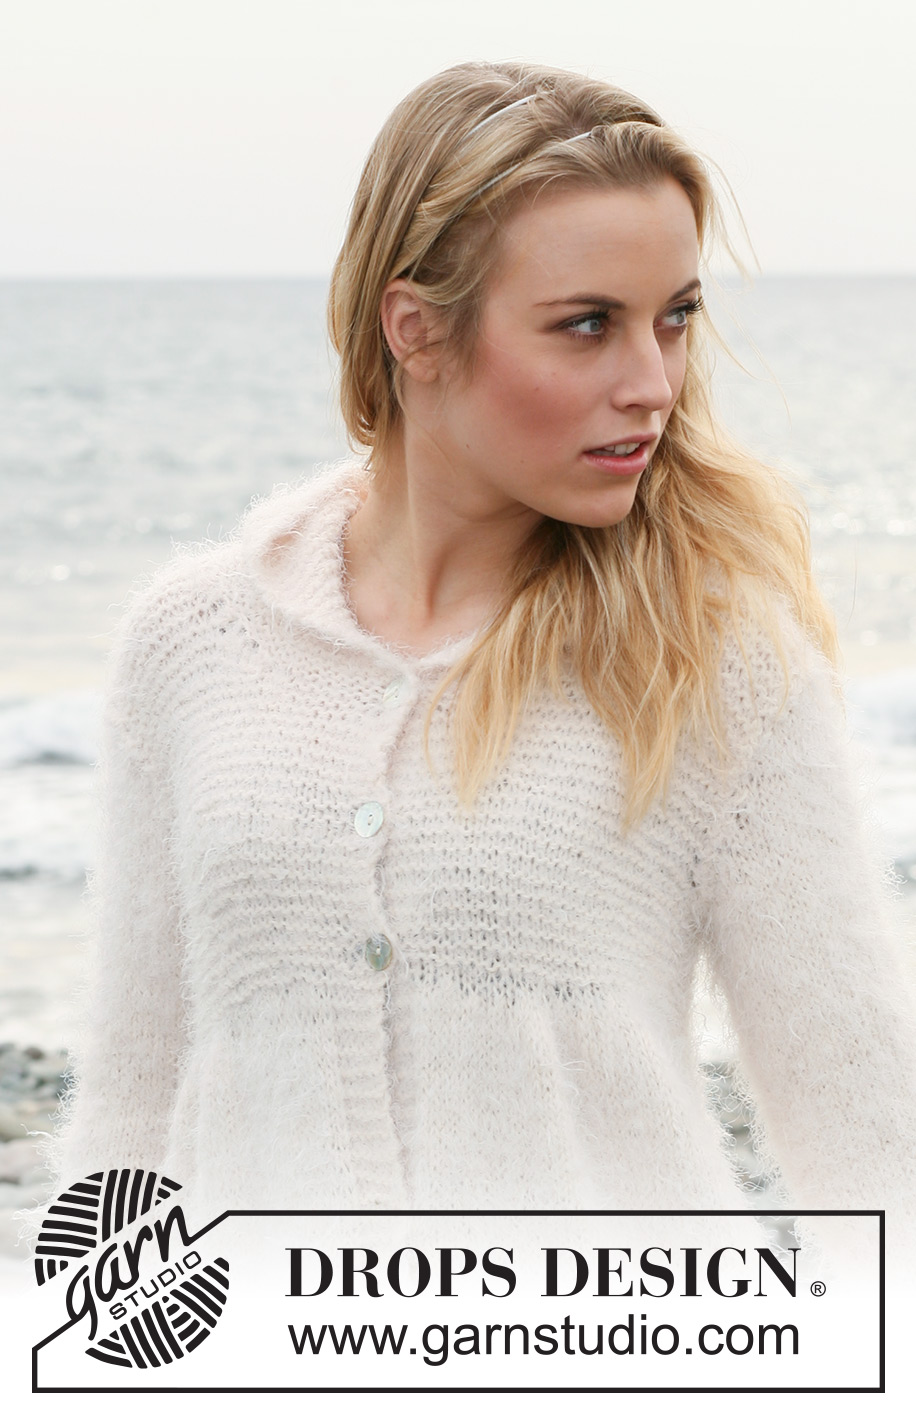
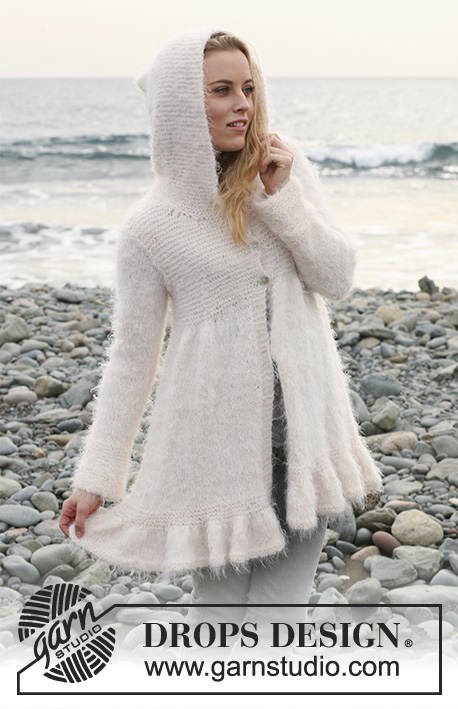
A Winter Tale#awintertalejacket |
|||||||
 |
 |
||||||
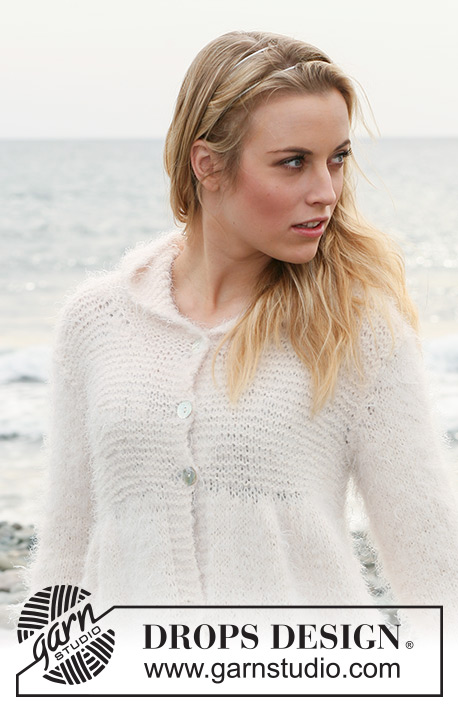
Knitted DROPS jacket with flounce border and hood in 1 thread ”Symphony” or 1 thread Melody or 1 thread ”Merino Extra Fine” + 1 thread ”Kid-Silk” or 1 thread “Alpaca” + 1 thread “Vivaldi”. Size S-XXXL.
DROPS 120-2 |
|||||||
|
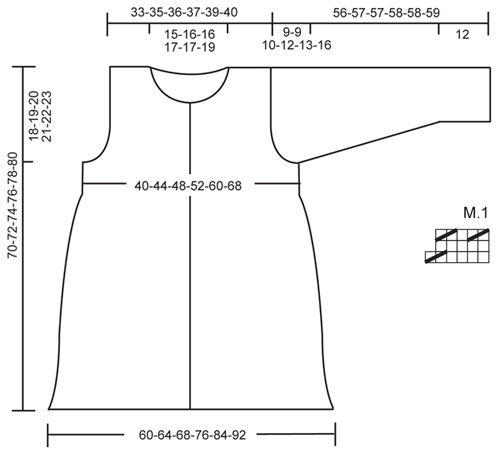
MEASUREMENT TIP: Because of the weight of the yarn make all measurements while the garment is hanging, otherwise it will be too long when worn. GARTER ST (back and forth on needle): K all rows. GARTER ST (in the round): K 1 round, P 1 round. PATTERN: See diagram M.1. (= 6 sts). Diagram shows the pattern from RS. BUTTONHOLES: Make buttonholes on right front band. 1 buttonhole = cast off 4th front band st from mid front and cast on 1 new st on next row. Make buttonholes when piece measures: Size S: 46, 54 and 62 cm Size M: 48, 56 and 64 cm Size L: 49, 57 and 65 cm Size XL: 50, 58 and 66 cm Size XXL: 51, 57, 63 and 69 cm Size XXXL: 50, 57, 64 and 71 cm -------------------------------------------------------- JACKET: Worked back and forth on circular needle. Cast on 372-396-420-468-516-564 sts (includes 6 front band sts each side) on circular needle size 6 mm with 1 thread Symphony (as pictured) or 1 thread Melody or 1 thread Merino Extra Fine + 1 thread Kid-Silk (= 2 threads) or 1 thread Alpca + 1 thread Vivaldi (= 2 threads). K 4 rows and continue in stocking st. SEE MEASUREMENT TIP! REMEMBER THE KNITTING TENSION! When piece measures 9 cm work next row from RS as follows: 6 GARTER STS – see above - M.1 on all sts until 6 sts remain and work these in 6 garter st. The 6 garter sts each side = front bands, work these in garter st throughout. After 1 vertical repeat of M.1 there are 192-204-216-240-264-288 sts on needle. P 1 row from WS, K 8 rows and continue in stocking st. READ ALL OF THE FOLLOWING SECTION BEFORE CONTINUING! When piece measures 45-46-47-48-49-50 cm work next row from RS as follows: 6 garter sts, 7-7-8-8-11-14 stocking sts, M.1 a total of 5-5-5-6-6-6 times, 16-22-26-26-33-40 stocking sts, M.1 a total of 5-5-5-6-6-6 times, 14-14-16-16-20-24 stocking sts, M.1 a total of 5-5-5-6-6-6 times, 16-22-26-26-33-40 stocking sts, M.1 a total of 5-5-5-6-6-6 times, 7-7-8-8-11-14 stocking sts, 6 garter sts. After 1 vertical repeat of M.1 like this there are 132-144-156-168-192-216 sts on needle. P 1 row from WS. Change to circular needle size 5.5 mm. Insert 2 markers in piece, 36-39-42-45-51-57 sts in from each side (back piece = 60-66-72-78-90-102 sts). Continue in garter st on all sts. AT THE SAME TIME when piece measures 46-48-49-50-51-50 cm make BUTTONHOLES on right front band – see above! When piece measures 52-53-54-55-56-57 cm cast off 6 sts each side (= 3 sts each side of marker) and complete front and back pieces separately. BACK PIECE: = 54-60-66-72-84-96 sts. Cast off to shape the armhole each side at the beg of every row: 2 sts 1-1-2-3-4-6 times and 1 st 0-2-2-2-5-6 times = 50-52-54-56-58-60 sts. Continue in garter st. When piece measures 68-70-72-74-76-78 cm cast off the middle 20-22-22-24-24-26 sts for neck and complete each shoulder separately. Cast off 1 st on neckline on next row = 14-14-15-15-16-16 sts left on shoulder. Cast off when piece measures 70-72-74-76-78-80 cm. LEFT FRONT PIECE: = 33-36-39-42-48-54 sts. Cast off for armhole at the side as described for back piece = 31-32-33-34-35-36 sts. When piece measures 63-65-67-68-70-72 cm slip 11 sts towards mid front on a stitch holder. Cast off to shape the neckline at the beg of every row from mid front: 2 sts 3 times and 1 st 0-1-1-2-2-3 times = 14-14-15-15-16-16 sts left on shoulder. Cast off when piece measures 70-72-74-76-78-80 cm. RIGHT FRONT PIECE: Like left front piece, but mirrored. NOTE! Remember BUTTONHOLES! SLEEVE: Worked in the round on double pointed needles. Cast on 34-34-36-36-38-40 sts on double pointed needles size 5.5 mm with 1 thread Symphony or 1 thread Melody or 1 thread Merino Extra Fine + 1 thread Kid-Silk (= 2 threads) or 1 thread Alpaca + 1 thread Vivaldi (= 2 threads). Work GARTER ST – see above! Insert a marker at beg of round. When piece measures 12 cm change to double pointed needles size 6 mm and continue in stocking st on all sts. When piece measures 13 cm inc 1 st each side of marker and repeat the inc on every 6-4-3.5-3-2.5-2 cm a total of 6-8-9-11-12-12 times = 46-50-54-58-62-64 sts. When piece measures 47-47-47-46-45-43 cm - NOTE! Less for the larger sizes because of longer sleeve cap and wider shoulder – cast off 6 sts mid under sleeve (= 3 sts each side of marker) and complete piece back and forth on needle. Cast off for sleeve cap each side at the beg of every row: 2 sts 1-2-2-2-2-1 times, 1 st 5-3-4-6-7-12 times, then 2 sts each side until piece measures 55-55-56-57-57-58 cm, now cast off 3 sts 1 time each side and cast off remaining sts. Piece measures approx 56-56-57-58-58-59 cm. ASSEMBLY: Sew shoulder seams. Set in sleeves. Sew on buttons. HOOD: Worked back and forth on circular needle. Pick up 70-74-74-78-78-84 sts round neckline (includes sts on stitch holders) on circular needle size 5.5 mm with 1 thread Symphony or 1 thread Melody or 1 thread Merino Extra Fine + 1 thread Kid-Silk (= 2 threads) or 1 thread Alpaca + 1 thread Vivaldi (2 threads). K 3 rows, then K 1 row, AT THE SAME TIME inc 14-14-14-16-16-18 sts evenly (do not inc on 6 sts each side over front bands) = 84-88-88-94-94-102 sts. Continue in garter st and cast off when hood measures 36-36-37-37-38-38 cm. Fold hood double and sew tog at the top. |
|||||||
Diagram explanations |
|||||||
|
|||||||
 |
|||||||
Have you finished this pattern?Tag your pictures with #dropspattern #awintertalejacket or submit them to the #dropsfan gallery. Do you need help with this pattern?You'll find 23 tutorial videos, a Comments/Questions area and more by visiting the pattern on garnstudio.com. © 1982-2026 DROPS Design A/S. We reserve all rights. This document, including all its sub-sections, has copyrights. Read more about what you can do with our patterns at the bottom of each pattern on our site. |
|||||||


With over 40 years in knitting and crochet design, DROPS Design offers one of the most extensive collections of free patterns on the internet - translated to 17 languages. As of today we count 324 catalogues and 12290 patterns translated into English (UK/cm). 12290
We work hard to bring you the best knitting and crochet have to offer, inspiration and advice as well as great quality yarns at incredible prices! Would you like to use our patterns for other than personal use? You can read what you are allowed to do in the Copyright text at the bottom of all our patterns. Happy crafting!
Post a comment to pattern DROPS 120-2
We would love to hear what you have to say about this pattern!
If you want to leave a question, please make sure you select the correct category in the form below, to speed up the answering process. Required fields are marked *.