
Popular categories
Looking for a yarn?


Comments / Questions (30)
![]() Lise Brissette wrote:
Lise Brissette wrote:
Est-il possible de convertir ce patron pour le tricoter avec une laine 20m X26 rgs. ? Si non, pouvez vous me suggérer un patron similaire, j’aime bien le col de celui-ci. Merci!
05.04.2026 - 22:25DROPS Design answered:
Bonjour Mme Brisette, vous pouvez vous inspirer d'un modèle de cette tension (retrouvez ici tous les pulls de 23-20 m pour 10 cm (filtrez en conséquence) et faire vos ajustements. Bon tricot!
08.04.2026 - 11:04
![]() Els wrote:
Els wrote:
De mouw meet ongeveer 40-39-38-37-36-35 cm vanaf de scheiding. L.S., klopt het dat deze maten, zowel in de beschrijving als in het afbeeld, in verkeerde volgorde staan? Groet van mij
21.03.2026 - 09:38DROPS Design answered:
Dag Els,
Ja, dat klopt. De grotere maten hebben een kleinere afmeting van de mouw, vanwege een grotere pas. De totale afmeting vanaf de hals is wel weer groter in de grotere maten.
22.03.2026 - 10:11
![]() Thorben wrote:
Thorben wrote:
Wenn meine Maschenprobe mit 8mm Nadeln passt, ist dies dann die Nadelstärke mit der ich die Halsblende stricke und mit 9mm den Rest, oder sind es dann 7mm für Blende und 8mm für den rest? LG
13.01.2026 - 13:31DROPS Design answered:
Lieber Thorben, die Maschenprobe 11 m x 15 Reihen glattrechts ist mit der Nadeln Nr 8 gestrickt, so wenn Sie diese Maschenprobe haben dann stimmt es, und das Bündchen stricken Sie dann mit der Nadeln Nr 7. Viel Spaß beim Stricken!
14.01.2026 - 10:15
![]() Catharina wrote:
Catharina wrote:
Hej tänker det här blir min första tröja. Kan jag sticka den i ert Karismagarn? VARFÖR måste jag byta stickstl. Kan man inte sticka med stl 8 rakt av. Är ganska ny nom stickning. Ok att börja med? Mvh
09.01.2026 - 07:06DROPS Design answered:
Hej Catharina, hvis du vil strikke i DROPS Karisma, så skal du finde et mønster fra samme garngruppe: Se her: Tröja i Karisma
29.01.2026 - 08:25
![]() Ula wrote:
Ula wrote:
Not sure what I did wrong or if the size is supposed to be extra oversize (I wear L/XL sweaters), but I chose size XL because I wanted a slightly oversized sweater, I used even less than 13 drops air wool and the sweater is HUGE. It was huge before blocking, I even did shorter sleeves because I knew they will get longer.Now the sweater is so long it almost covers my knees and the width of the sweater is so large I can pretty much wrap it around my body twice.And I am not a small girl.
21.12.2025 - 16:07DROPS Design answered:
Witaj Ulu, koniecznie zobacz kurs DROPS TUTAJ. Przed rozpoczęciem nowego projektu zawsze pamiętaj o wykonaniu próbki. Tylko gdy będzie zgodna z próbką podaną we wzorze, wymiary gotowego ubrania będą zgodne z miarami podanymi na schematycznym rysunku miar na dole swetra. Pozdrawiamy!
24.12.2025 - 00:16
![]() Samantha wrote:
Samantha wrote:
Hi, this is my first sweater project , sorry if I missed this information in the pattern instructions, do you recommend blocking for this pattern and are the finished garment measurements pre blocking?
16.11.2025 - 14:15DROPS Design answered:
Hi Samantha, No we do not recommend blocking when working sweaters. The finished garment measurements are therefore the measurements after you have finished your project. Regards, Drops team.
17.11.2025 - 07:00
![]() Line wrote:
Line wrote:
Hej kan det passe at hvis jeg vil strikke den i str. M i Drops Snow skal jeg købe 7 nøgler?
06.11.2025 - 12:33DROPS Design answered:
Hei Line. Nei, du trenger over dobbelt så mye, ca 15 nøster med DROPS Snow. mvh DROPS Design
17.11.2025 - 18:08
![]() Meike wrote:
Meike wrote:
Ich möchte gerne diesen Pullover mit einem Faden Air und einem Faden Kid Silk stricken, geht das und was muss ich bei den Zu ahnen und Abnahmen berücksichtigen?
03.11.2025 - 19:38DROPS Design answered:
Liebe Meike, Sie sollten die Maschenprobe einhalten, dann müssen Sie auch nichts bei den Zunahmen und Abnahmen umrechnen, wovon generell abzuraten ist. Sie sollten dazu statt 1 Faden Kid-Silk 2 Fäden Kid-Silk nehmen (plus den Faden Air), damit erreichen Sie eine vergleichbare Garnstärke wie mit 2 Fäden Air. Nehmen Sie die Nadelstärke, mit der Sie die Maschenprobe erreichen. Viel Spaß beim Stricken!
03.11.2025 - 22:43
![]() Mette wrote:
Mette wrote:
Jeg forstår ikke udtaget: Tag 1 maske ud på hver side af 2 masker - man sætter jo kun en markør?
06.02.2025 - 09:03DROPS Design answered:
Hej Mette, Raglanudtagningen sker på hver side af 2 masker ret i hver overgang... se forklaringen øverst :)
12.02.2025 - 11:17
![]() Luisa wrote:
Luisa wrote:
Buongiorno , grazie per questo bel modello con spiegazioni ; come faccio a sapere quanti cm corrispondono alle taglie ? Così da scegliere la più giusta ? Grazie cin anticipo Luisa
12.12.2024 - 18:35DROPS Design answered:
Buonasera Luisa, lo schema delle misure in cm è riportato in fondo alla pagina. Buon lavoro!
13.12.2024 - 22:46
|
|
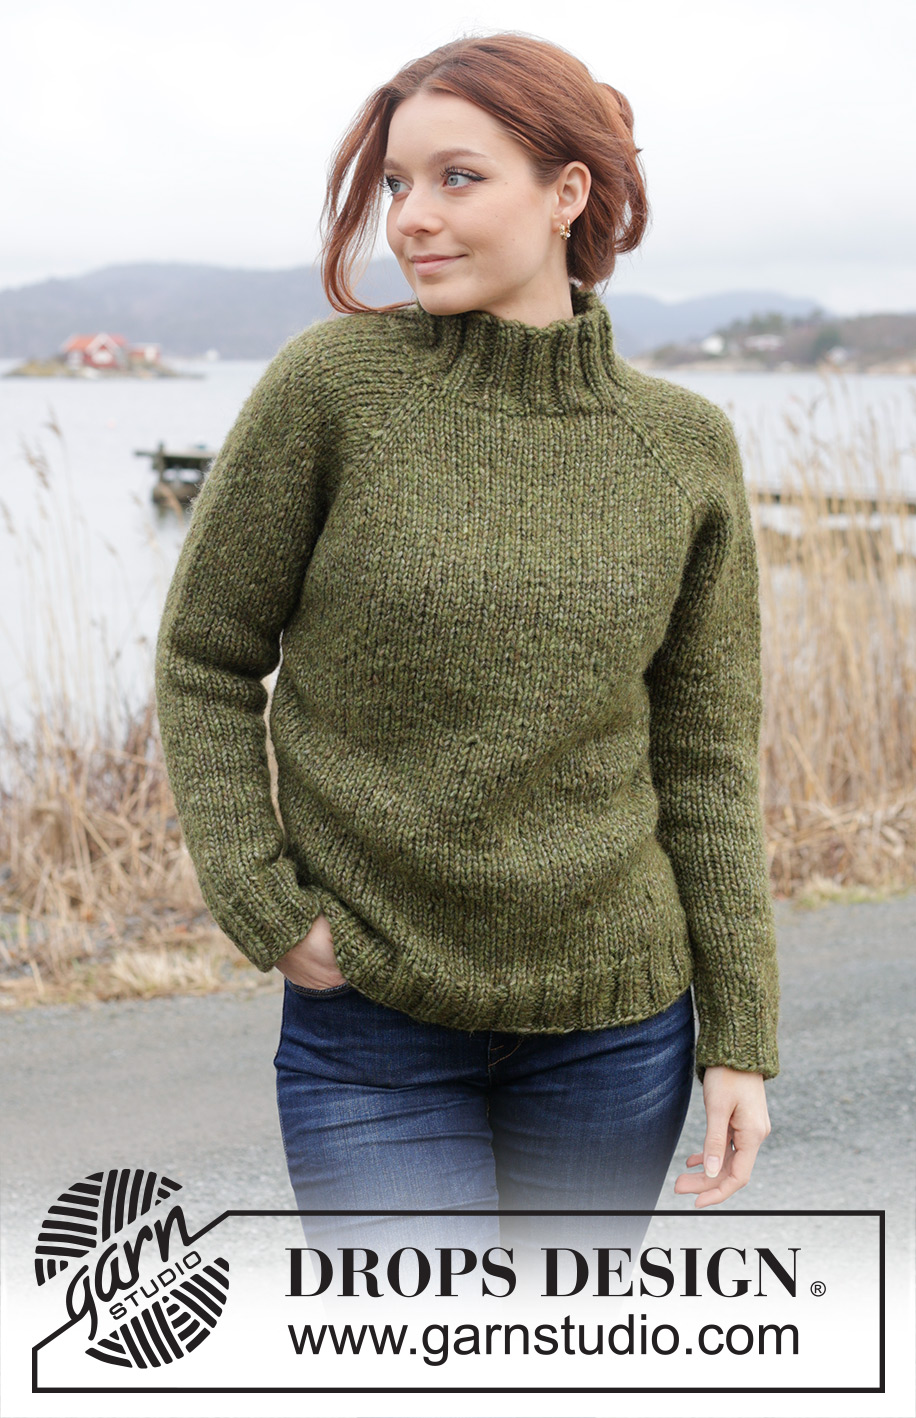
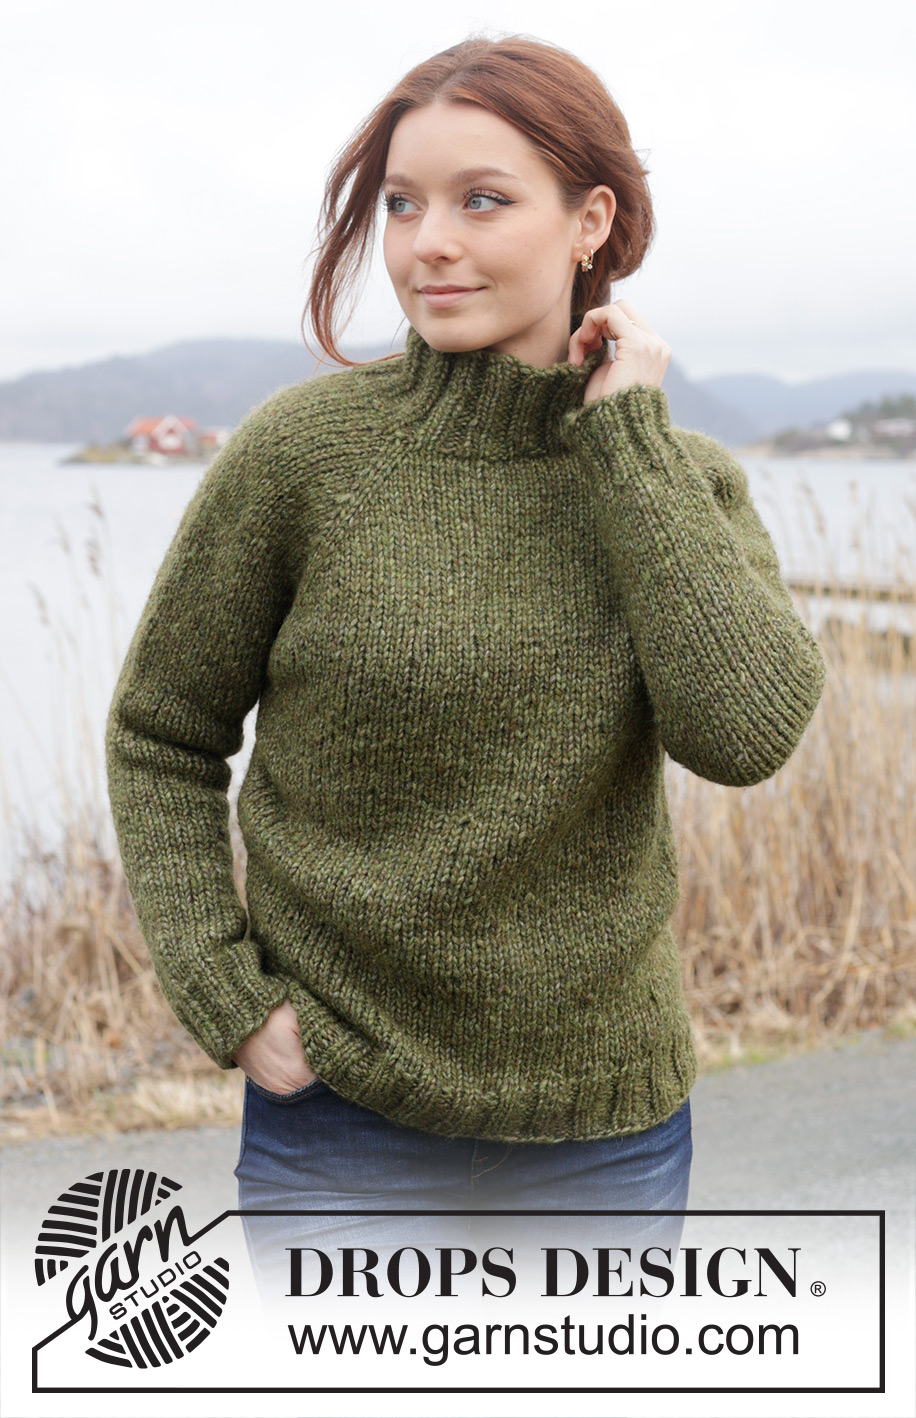
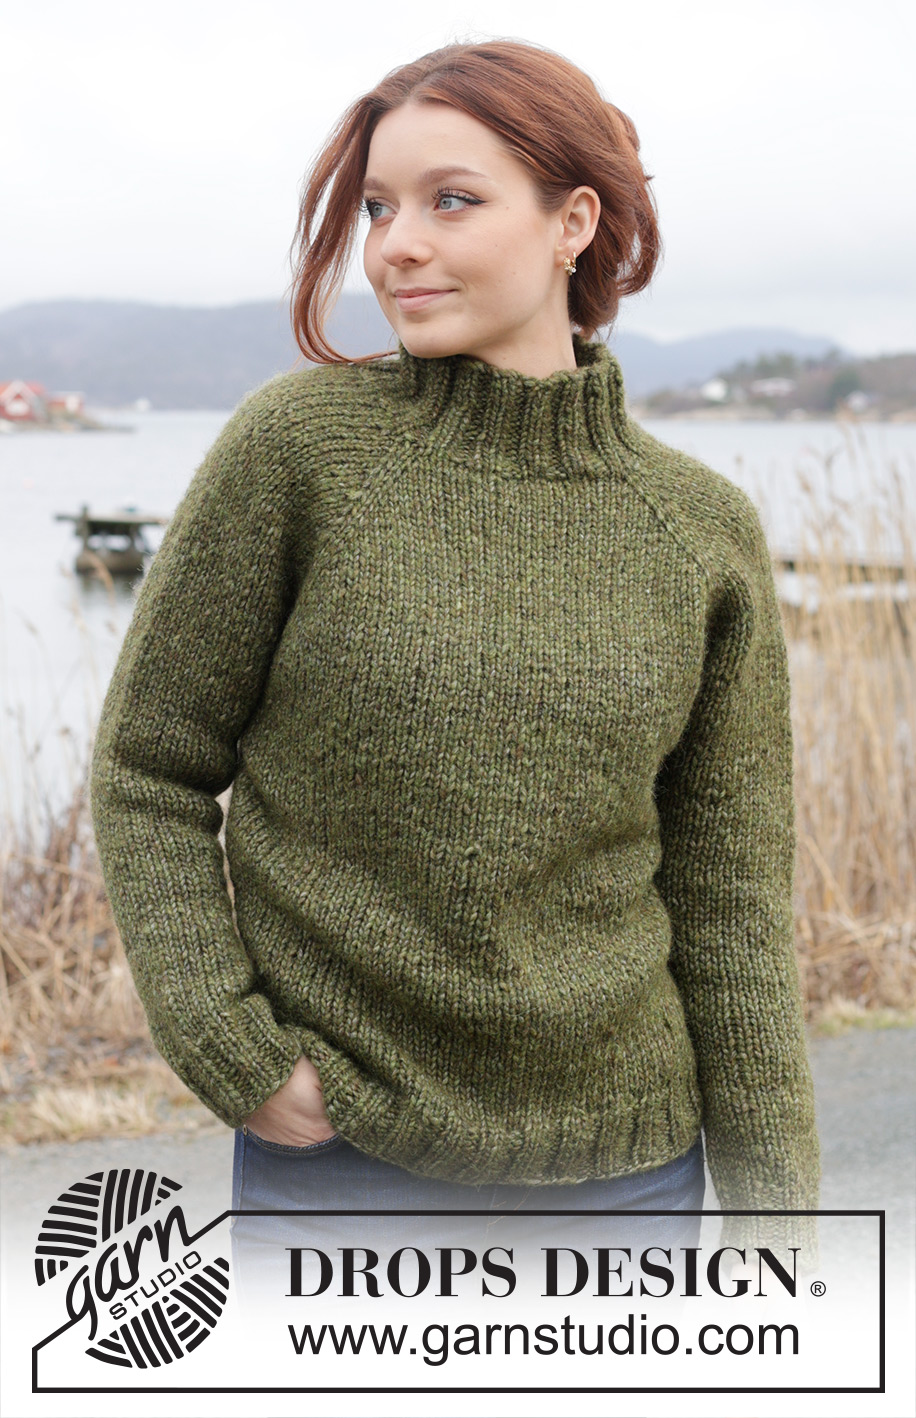
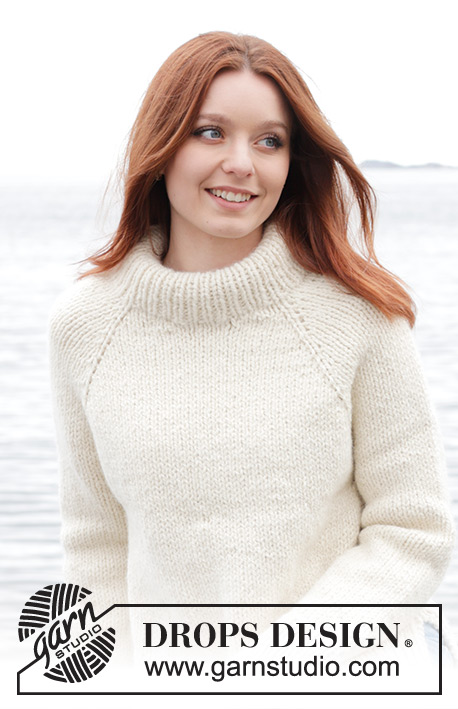
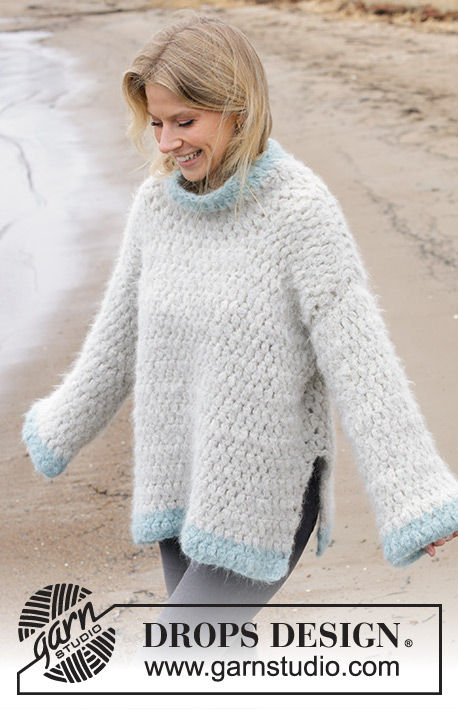
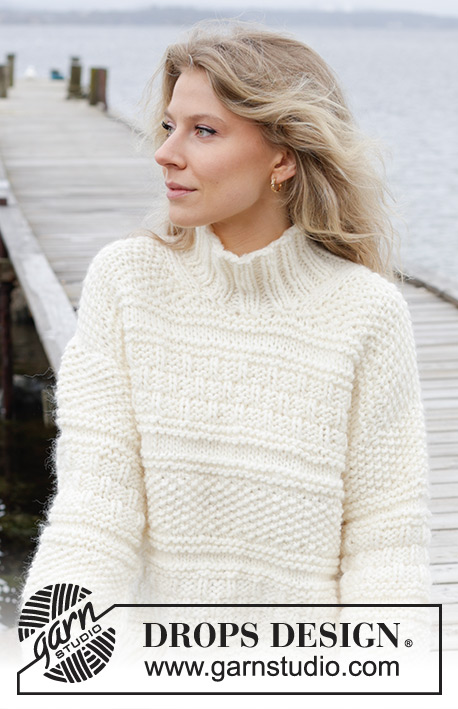
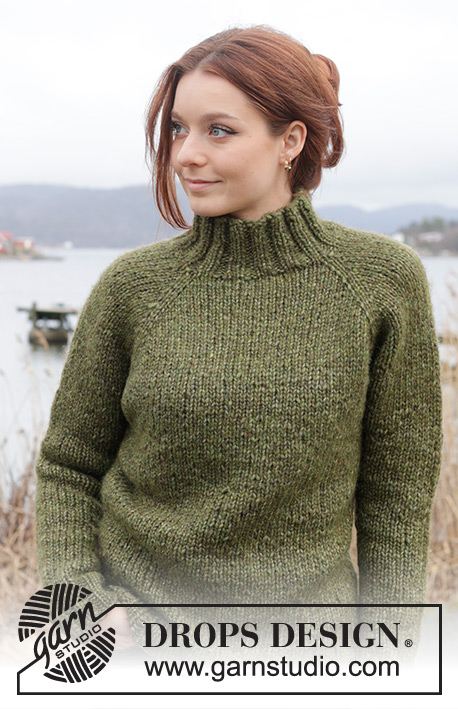
Mossy Slopes Jumper#mossyslopesjumper |
|
 |
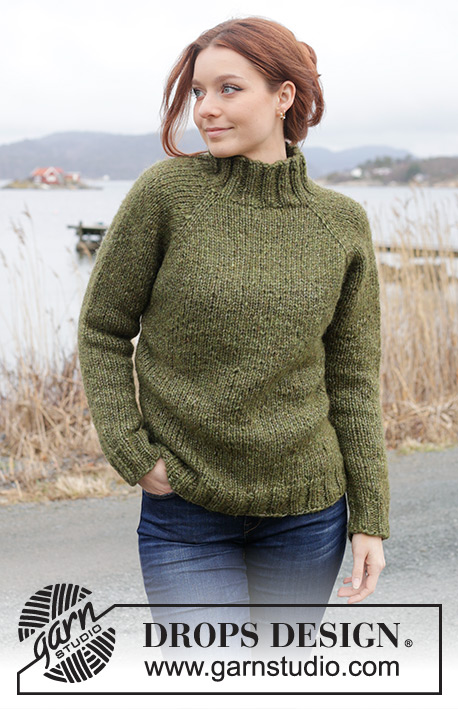 |
Knitted jumper in 2 strands DROPS Air or 1 strand DROPS Wish. The piece is worked top down, with high neck and raglan. Sizes XS - XXL.
DROPS 244-17 |
|
|
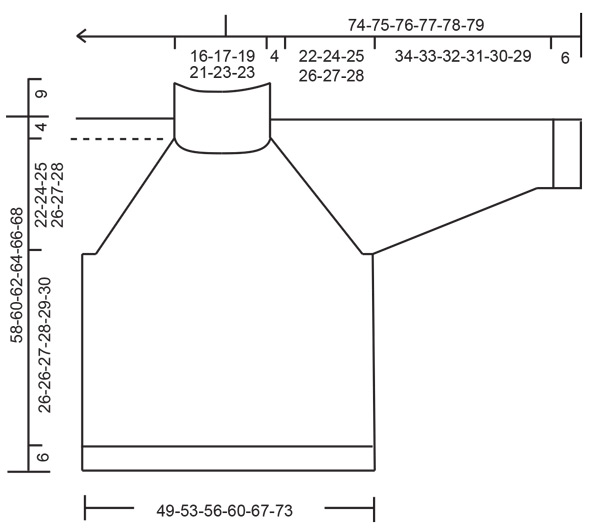
------------------------------------------------------- EXPLANATIONS FOR THE PATTERN: ------------------------------------------------------- RAGLAN: Increase 1 stitch on each side of 2 knitted stitches in each transition between body and sleeves (8 stitches increased on the round). Increase by making 1 yarn over which is knitted twisted on the next round to avoid a hole. Work the new stitches in stocking stitch. DECREASE TIP (for sleeves): Decrease 1 stitch on each side of the marker-thread as follows: Work until there are 3 stitches left before the marker-thread, knit 2 together, knit 2 (marker-thread sits between these 2 stitches), slip 1 stitch knit-wise, knit 1 and pass the slipped stitch over the knitted stitch (2 stitches decreased). ------------------------------------------------------- START THE PIECE HERE: ------------------------------------------------------- JUMPER – SHORT OVERVIEW OF THE PIECE: The neck and yoke are worked in the round with circular needle, from mid back and top down. The yoke is divided for body and sleeves and the body is continued in the round with circular needle. The sleeves are worked in the round with short circular needle/double pointed needles. NECK: Cast on 52-56-60-64-68-68 stitches with short circular needle size 8 mm and 2 strands DROPS Air or 1 strand DROPS Wish. Change to short circular needle size 7 mm and work rib in the round (knit 2, purl 2) for 9 cm. Insert 1 marker; the yoke is measured from this marker. YOKE: Insert 4 marker-threads without working the stitches as follows: Count 8-9-10-11-12-12 stitches (half back piece), insert 1 marker-thread here, count 10 stitches (sleeve) insert 1 marker-thread here, count 16-18-20-22-24-24 stitches (front piece) insert 1 marker-thread here, count 10 stitches (sleeve) insert 1 marker-thread here. There are 8-9-10-11-12-12 stitches left after the last marker-thread (half back piece). Change to circular needle size 8 mm. Work stocking stitch and increase for RAGLAN – read description above. Increase for raglan every 2nd round 14-16-17-17-19-21 times in total = 164-184-196-200-220-236 stitches. REMEMBER THE KNITTING TENSION! Continue with stocking stitch but without further increases, until the yoke measures 22-24-25-26-27-28 cm from the marker. Divide for the body and sleeves as follows: Knit 25-27-29-30-34-37 (half back piece), place the next 32-38-40-40-42-44 stitches on a thread for the sleeve, cast on 4-4-4-6-6-6 stitches (in side under sleeve), knit 50-54-58-60-68-74 (front piece), place the next 32-38-40-40-42-44 stitches on a thread for the sleeve, cast on 4-4-4-6-6-6 stitches (in side under sleeve), knit the last 25-27-29-30-34-37 stitches (half back piece). The body and sleeves are finished separately. BODY: = 108-116-124-132-148-160 stitches. Continue stocking stitch in the round for a further 26-26-27-28-29-30 cm (6 cm left; try the jumper on and work to desired length). Knit 1 round and increase 8-12-12-12-12-16 stitches evenly spaced = 116-128-136-144-160-176 stitches. Change to circular needle size 7 mm and work rib (knit 2, purl 2) for 6 cm. Cast off with rib. The jumper measures approx. 58-60-62-64-66-68 cm from the shoulder. SLEEVES: Place the 32-38-40-40-42-44 stitches from the thread on the one side of the piece on short circular needle/double pointed needles size 8 mm and knit up 1 stitch in each of the 4-4-4-6-6-6 stitches cast on under the sleeve = 36-42-44-46-48-50 stitches. Insert a marker-thread in the middle of the new stitches under the sleeve, which is used when decreasing under the sleeve. Continue stocking stitch in the round. When the sleeve measures 2 cm, decrease 2 stitches mid under sleeve – read DECREASE TIP. Decrease like this every 8-5-5-4-4½-5 cm a total of 4-6-6-7-6-5 times = 28-30-32-32-36-40 stitches. Continue working until the sleeve measures 34-33-32-31-30-29 cm from the division (or to desired length. There is approx. 6 cm left). Knit 1 round and increase 4-2-4-4-4-4 stitches evenly spaced = 32-32-36-36-40-44 stitches. Change to double pointed needles size 7 mm and work rib (knit 2, purl 2) for 6 cm. Loosely cast off with rib. The sleeve measures approx. 40-39-38-37-36-35 cm from the division. Work the other sleeve in the same way. |
|
 |
|
Have you finished this pattern?Tag your pictures with #dropspattern #mossyslopesjumper or submit them to the #dropsfan gallery. Do you need help with this pattern?You'll find 26 tutorial videos, a Comments/Questions area and more by visiting the pattern on garnstudio.com. © 1982-2026 DROPS Design A/S. We reserve all rights. This document, including all its sub-sections, has copyrights. Read more about what you can do with our patterns at the bottom of each pattern on our site. |
|


With over 40 years in knitting and crochet design, DROPS Design offers one of the most extensive collections of free patterns on the internet - translated to 17 languages. As of today we count 324 catalogues and 12290 patterns translated into English (UK/cm). 12290
We work hard to bring you the best knitting and crochet have to offer, inspiration and advice as well as great quality yarns at incredible prices! Would you like to use our patterns for other than personal use? You can read what you are allowed to do in the Copyright text at the bottom of all our patterns. Happy crafting!
Post a comment to pattern DROPS 244-17
We would love to hear what you have to say about this pattern!
If you want to leave a question, please make sure you select the correct category in the form below, to speed up the answering process. Required fields are marked *.