
Popular categories
Looking for a yarn?


Comments / Questions (18)
![]() Хельга wrote:
Хельга wrote:
Айяйяй, как не красиво без русского языка стало. Потеряли душу. Сочувствую.
11.10.2025 - 13:06
![]() Patrizia wrote:
Patrizia wrote:
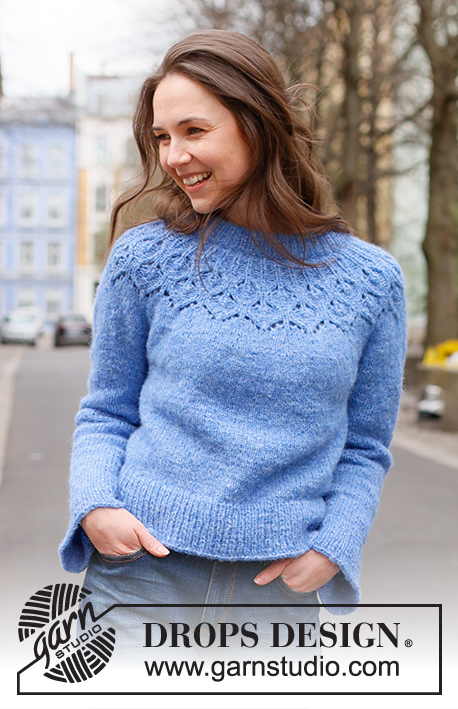
Vorrei capire come si esegue lo schema A.1 con l 'aumento del modulo da 8 a 14 maglie. Nel diagramma di questo schema ci sono due simboli diversi con la stessa esecuzione uno dei due potrebbe essere un errore. Grazie
26.08.2025 - 23:03DROPS Design answered:
Buonasera Patrizia, gli aumenti sono indicati nel diagramma. Il simbolo con il triangolino è corretto perchè è una doppia diminuzione che pareggia il doppio aumento del ferro prima. Buon lavoro!
27.08.2025 - 00:46
![]() Robyn wrote:
Robyn wrote:
Diagram explanations (chart symbols) the 9th and 10th symbols read exactly the same (slip 2 sts as if to knit tog., knit 1, pass 2 slipped stitches over st worked) - the ninth symbol is one box on chart, the 10th symbol is over3 boxes of chart yet they read the same? I don’t understand how are these to be worked or how is error to be fixed?
08.01.2025 - 20:10DROPS Design answered:
Dear Robyn, on round before the 9th symbol you knitted 3 stitches, now you will decrease 2 of the 3 sts working the 9th symbol - see also this video where we show how to work this part of the pattern. Happy knitting!
10.01.2025 - 10:11
![]() Marjolaine wrote:
Marjolaine wrote:
J’ai besoin d’aide pour la ligne 5 dans le patron 236-3
01.10.2024 - 01:17DROPS Design answered:
Bonjour Marjolaine, dans cette vidéo, nous montrons comment tricoter ces 3 rangs, à partir du 5ème rang dans ce modèle. Bon tricot!
01.10.2024 - 09:38
![]() Darchy wrote:
Darchy wrote:
Au sujet du diagramme : la flèche au rang 21 veut-elle dire qu'il ne faut pas tricoter une maille endroit au milieu du rang pour pour le tricoter après le jeté de la fin du rang ?
28.02.2024 - 21:26DROPS Design answered:
Bonjour Mme Darchy, au début de ce tour, tricotez la dernière maille du tour précédent avec les 2 premières mailles du tour suivant, puis la dernière maille de chaque motif avec les 2 premières mailles du motif suivant. Le jeté à la fin de chaque A.1 devient la première maille du motif suivant. Bon tricot!
29.02.2024 - 08:13
![]() Simone Litschel wrote:
Simone Litschel wrote:
Hallo! Wenn ich in der 7. Reihe des Diagramms A1 wirklich noch mal 2 Maschen pro Rapport abnehme, klappt es nicht, habe doch bereits in Reihe 6 aus drei Maschen eine durch Zusammenstricken gemacht . Wo steckt da der Fehler? Lg
08.10.2023 - 09:54DROPS Design answered:
Liebe Frau Litschel, bei der 5. Reihe nehmen Sie 2 Maschen aus 1 Masche zu - es sind dann 3 Maschen in der Mitte von A.1, bei der 6. Reihe werden diese 3 Maschen rechts gestrickt, und bei der 7. Reihe nehmen Sie 2 Maschen ab, so sind es nur 1 Masche in der Mitte. In diesem Video zeigen wir, wir dieses Muster gestrickt wird, sicher kann es Ihnen helfen. Viel Spaß beim stricken!
09.10.2023 - 09:02
![]() Aurora wrote:
Aurora wrote:
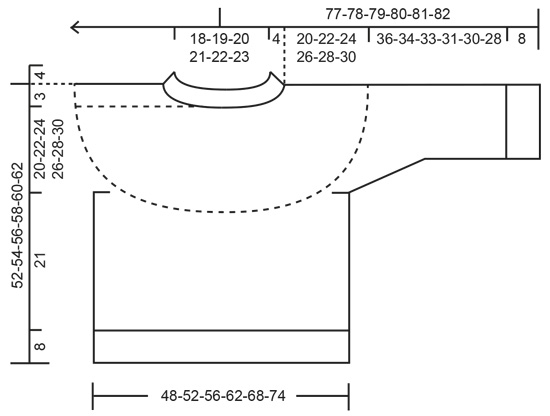
Bellissimo maglione e molto chiare le istruzioni!!
03.08.2023 - 15:53
![]() Louise Roderick wrote:
Louise Roderick wrote:
I am really battling to work from the pattern chart / diagram as I can't work out the symbols. Is it possible to get the pattern instructions written out? I am a experienced knitted and am frustrated that I am having difficulty with this one. Please help!!!!!
17.03.2023 - 19:40DROPS Design answered:
Dear Louise, our patterns are only available in the same format as posted online, with a mixture of charts and written instructions. You can indicate which part of the chart is giving you trouble and we can try to offer specific assistance on how to work a specific part of the chart. For more help reading charts, you can check out the following lesson: https://www.garnstudio.com/lesson.php?id=68&cid=19. Happy knitting!
19.03.2023 - 18:27
![]() Kate wrote:
Kate wrote:
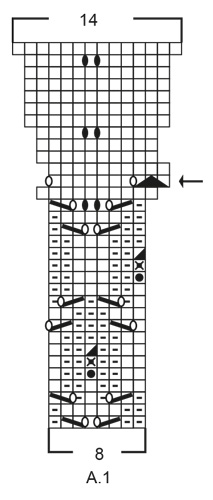
Hei. Diagrammet og mønsteret på genseren ser ikke ut til å være likt. Genseren har en "takket" bord som avslutning mot den glattstrikkede bolen. Denne borden ser jeg ikke på mønsterdiagrammet.
15.03.2023 - 14:35DROPS Design answered:
Hej Kate, jo det får du hvis du følger diagrammet (pind 17-21 skaber "takkerne" (husk at diagrammet starter nederst i højre hjørne) :)
17.03.2023 - 08:33
![]() Dana wrote:
Dana wrote:
Dobrý večer prečo sa pred pružným patentom pridávajú očká? Ďakujem.
23.02.2023 - 19:24DROPS Design answered:
Dobrý den, Dano, očka přidáváme proto, abychom vyrovnali stahování dílu - pružným vzorem by se jinak díl příliš zúžil a zdeformoval. Hodně zdaru! Hana
24.02.2023 - 05:29
|
||||||||||||||||||||||||||||||||||
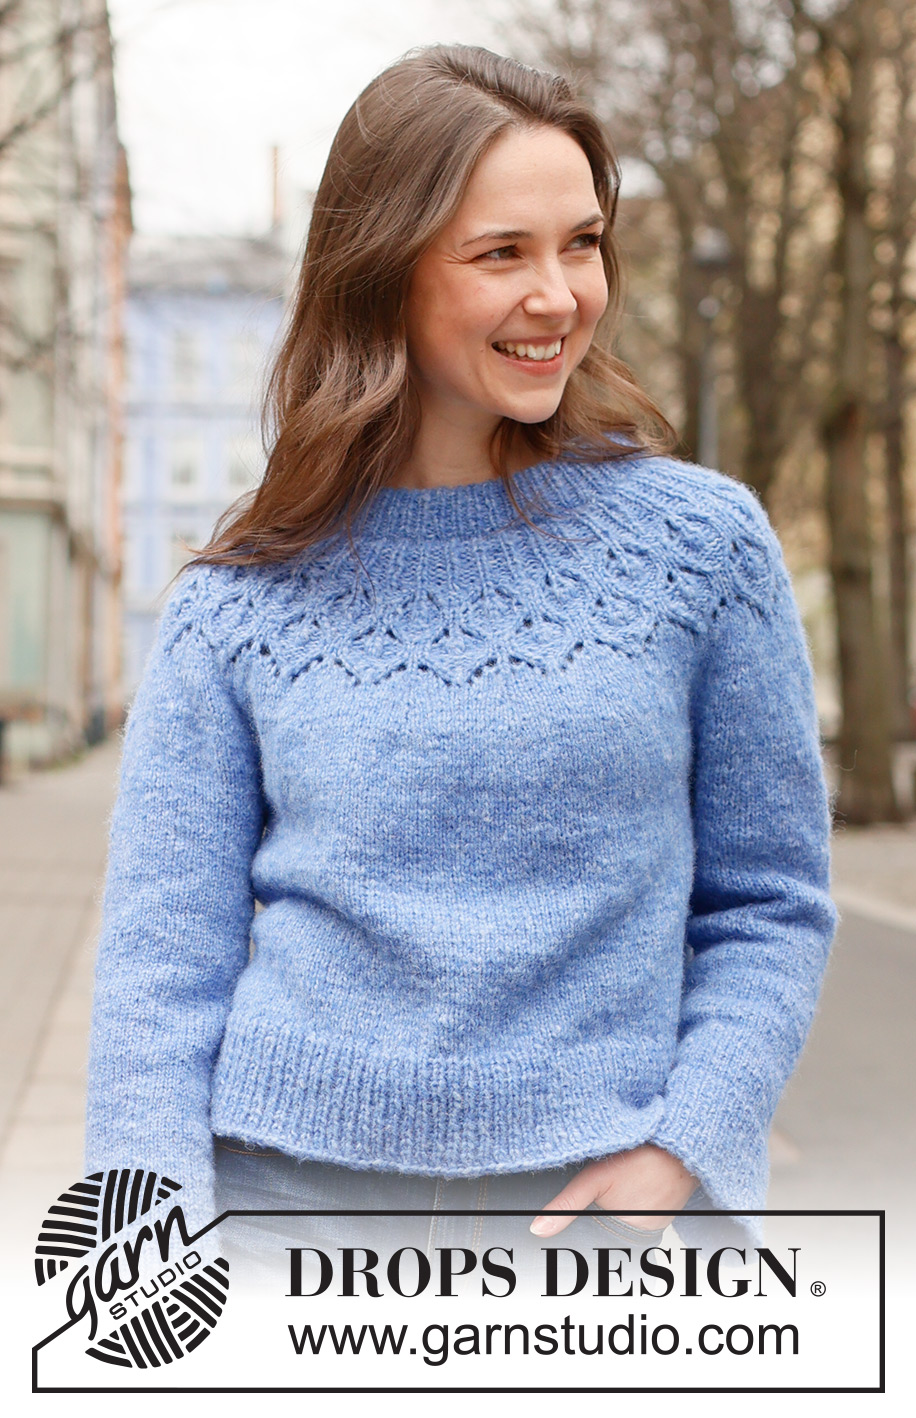
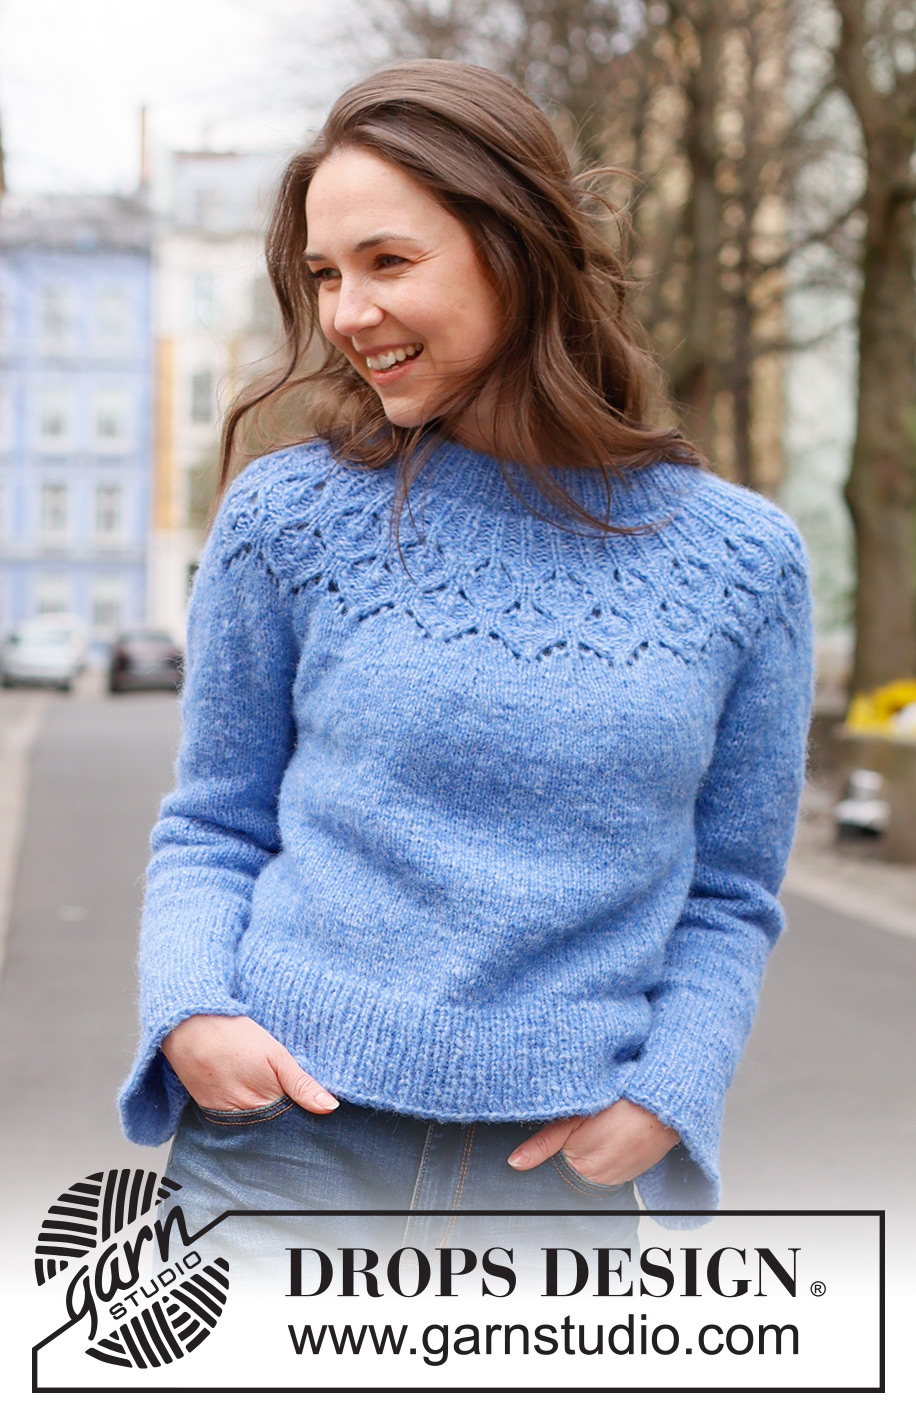
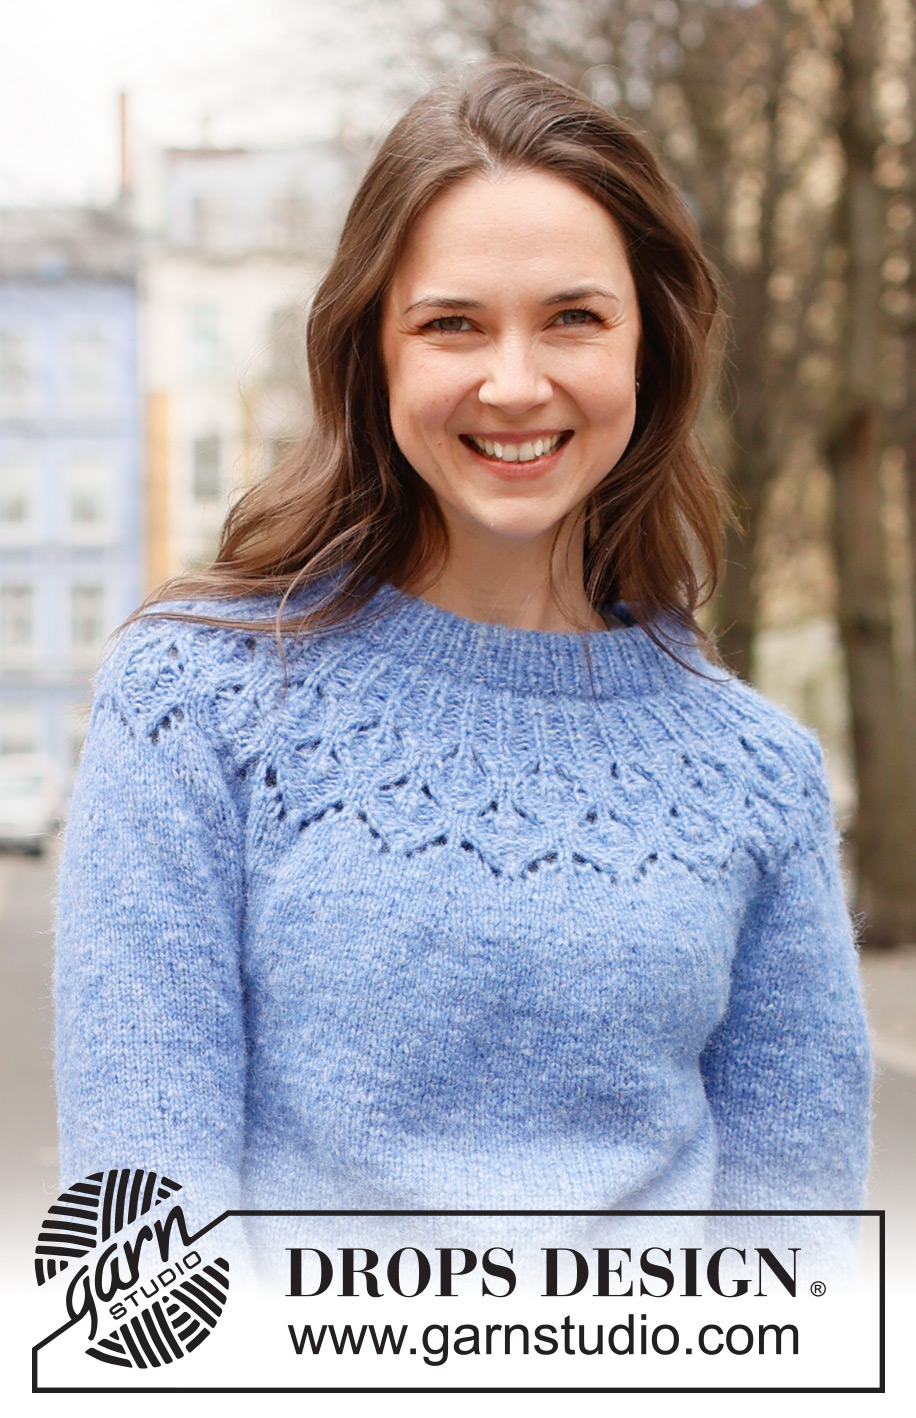
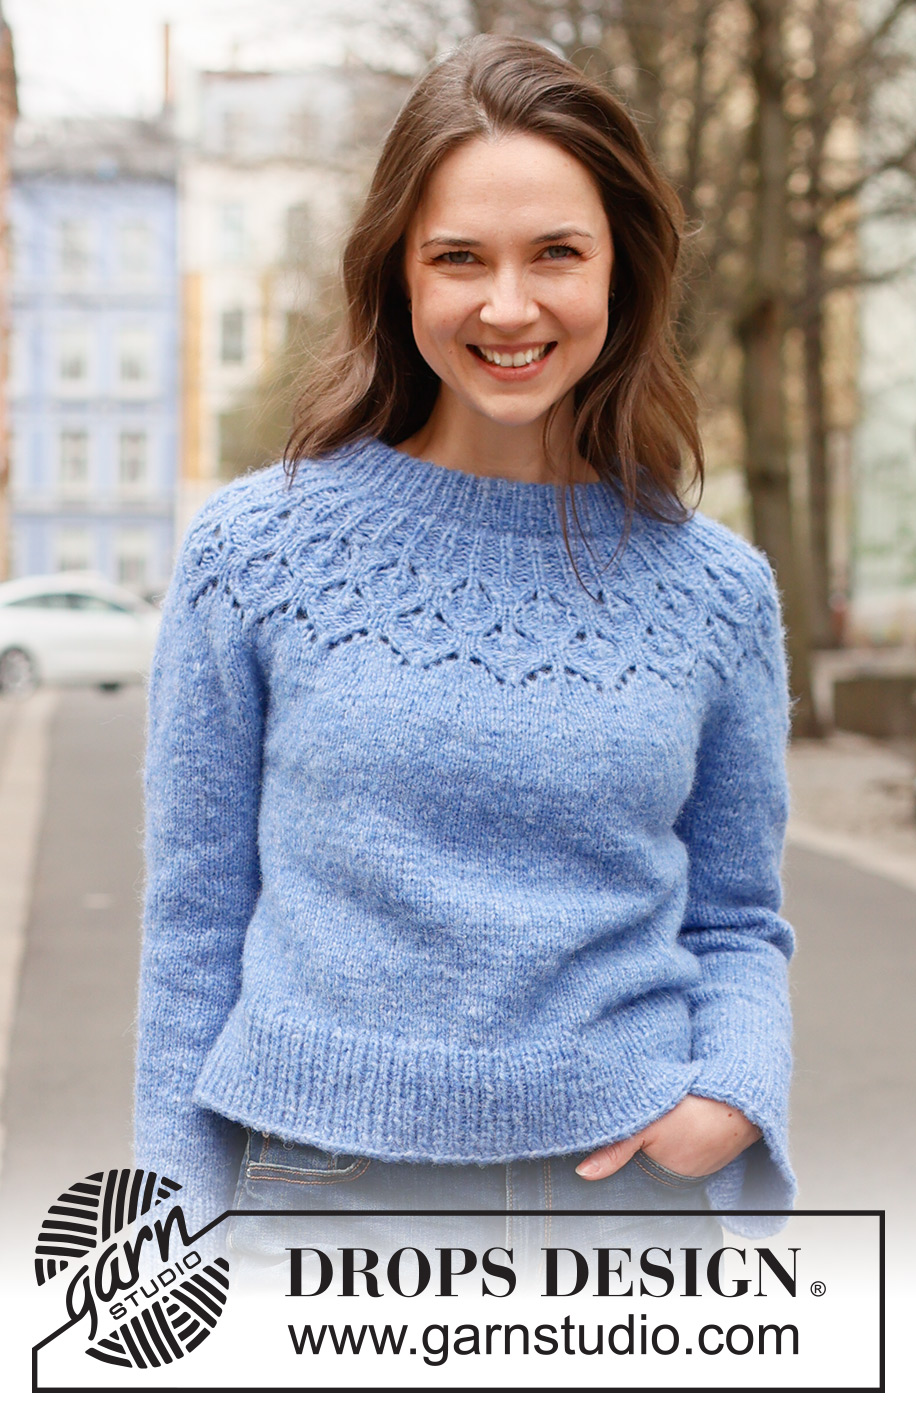
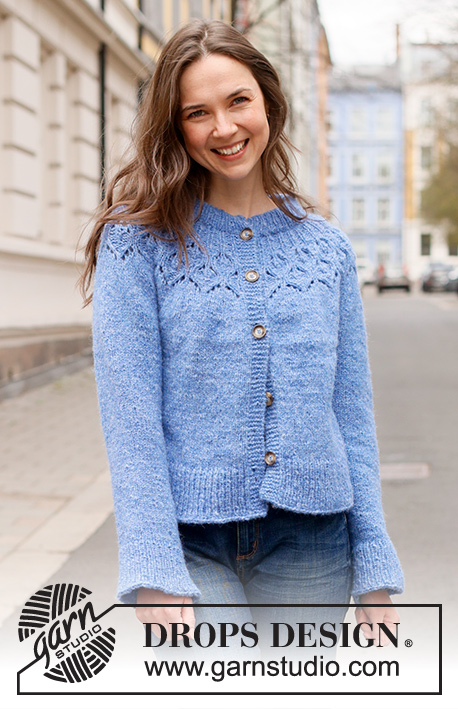
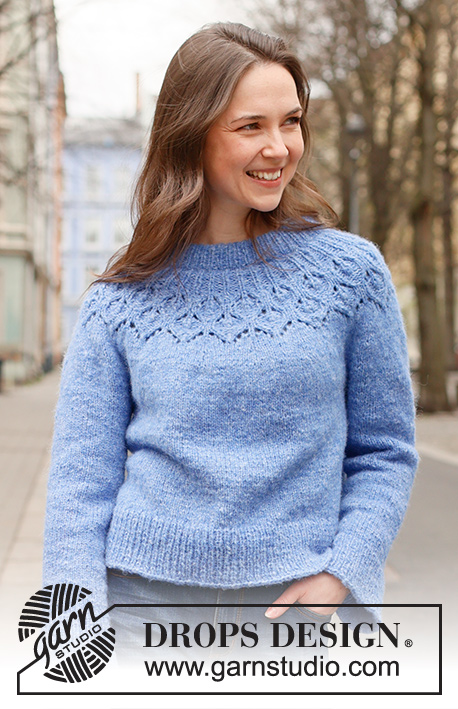
Rain Romance Sweater#rainromancesweater |
||||||||||||||||||||||||||||||||||
 |
 |
|||||||||||||||||||||||||||||||||
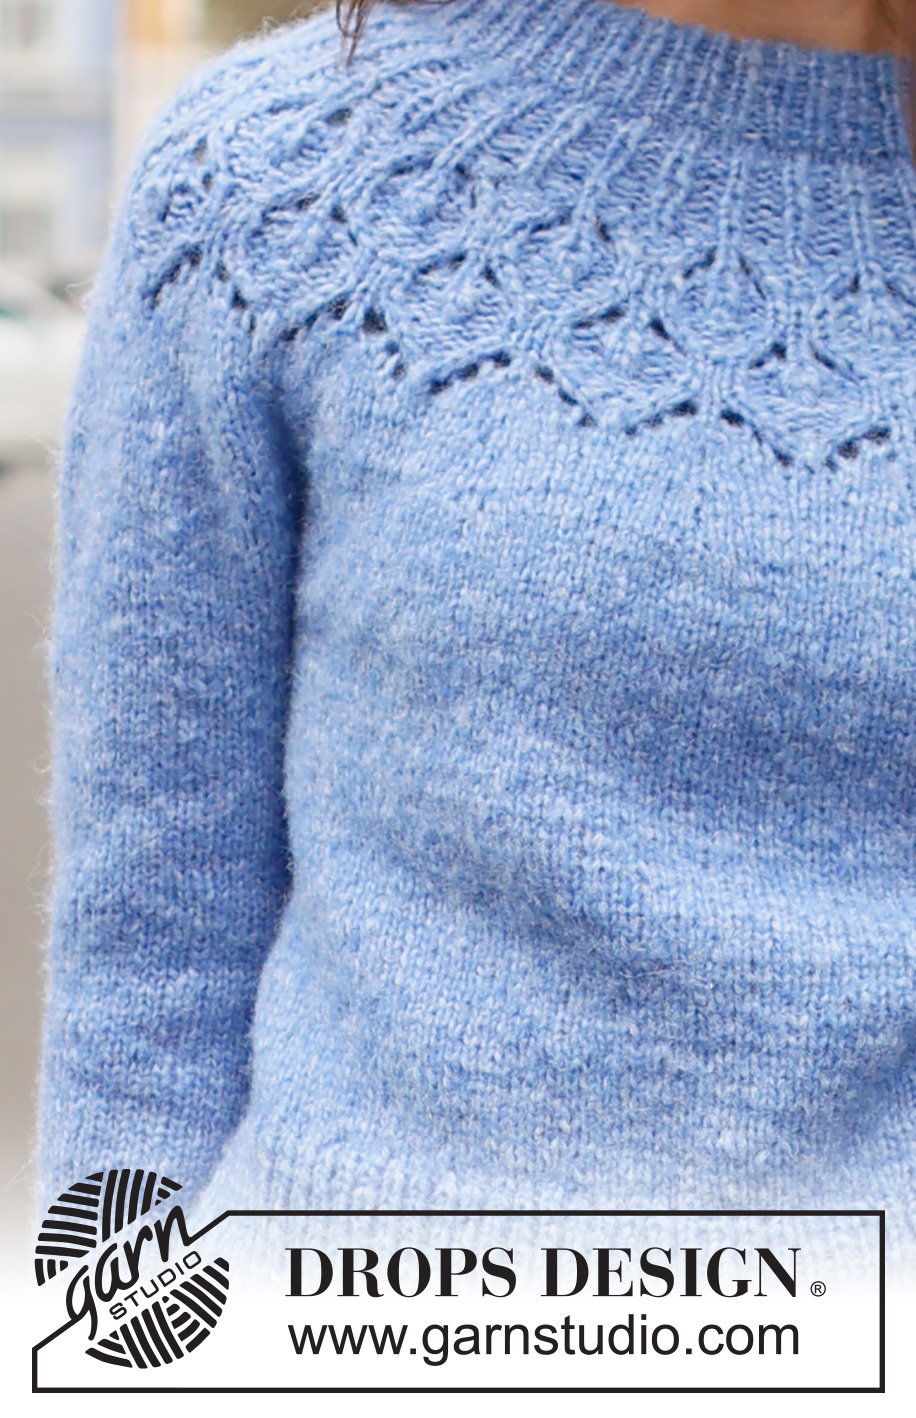
Knitted jumper in DROPS Air. Piece is knitted top down with double neck edge, round yoke and lace pattern. Size: S - XXXL
DROPS 236-3 |
||||||||||||||||||||||||||||||||||
|
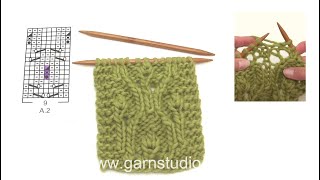
---------------------------------------------------------- EXPLANATION FOR THE PATTERN: ---------------------------------------------------------- PATTERN: See diagram A.1. DECREASE TIP (applies to sleeves): Begin 3 stitches before marker thread and knit 2 together, knit 2 (marker thread is between these 2 stitches), slip 1 stitch knitwise, knit 1, pass slipped stitch over stitch worked. ---------------------------------------------------------- START THE PIECE HERE: ---------------------------------------------------------- JUMPER - SHORT OVERVIEW OF THE PIECE: Work double neck edge and yoke in the round on circular needle from mid back, top down. Now divide yoke for body and sleeves. Work the body in the round on circular needle. Work sleeves in the round on double pointed needles/a short circular needle. DOUBLE NECK EDGE: Cast on 86-90-94-98-102-106 stitches with DROPS Air over a short circular needle size 5 and a short circular needle size 3.5 mm held together. Pull out short circular needle 5 mm and keep stitches on the short circular needle size 3.5 mm (cast is done like this to get an elastic cast-on edge). Knit 1 round. Then work rib (= knit 1/purl 1) for 8 cm. Fold the rib in so that the edge is double. Work 1 round rib while AT THE SAME TIME working every other stitch on needle together with every other stitch from cast-on edge. You now have a double neck edge. Insert 1 marker in middle of round. Work yoke as explained below. Measure yoke from this marker. YOKE: Switch to circular needle size 5 mm. Knit 1 round while increasing 22-24-26-34-42-44 stitches evenly = 108-114-120-132-144-150 stitches. Then work rib (knit 1/purl 2). SIZE S, M and L: When piece measures 3-3-4 cm from marker, increase all 2 purl stitches to 3 purl stitches (increase by making 1 yarn over before all 2 purl stitches) = 144-152-160 stitches. On next round purl yarn over twisted to avoid holes. SIZE XL, XXL and XXXL: When piece measures 2-3-3 cm from marker, increase every other 2 purl stitches to 3 purl stitches (increase by making 1 yarn over before every other 2 purl stitches) = 154-168-175 stitches. Continue rib (on first round, purl yarn overs twisted to avoid holes). When piece measures 4-5-5 cm from marker, increase the remaining 2 purl stitches to 3 purl stitches = 176-192-200 stitches. On next round purl yarn over twisted to avoid holes. ALL SIZES: Piece now measures approx. 4-4-5-5-6-6 cm from marker and there are 144-152-160-176-192-200 stitches on needle. Work A.1 18-19-20-22-24-25 times in total in the round on yoke. Continue this pattern. REMEMBER THE KNITTING TENSION! When A.1 has been worked vertically, piece measures approx. 19-19-20-20-21-21 cm from marker and there are 252-266-280-308-336-350 stitches on needle. Work until piece measures 19-21-22-23-24-25 cm from marker. Knit 1 round while increasing 4-6-12-20-8-14 stitches evenly = 256-272-292-328-344-364 stitches. Work in stocking stitch until piece measures 20-22-24-26-28-30 cm. Now divide piece for body and sleeves as follows: Work 38-41-44-49-53-57 stitches in stocking stitch, slip the next 52-54-58-66-66-68 stitches on a thread for sleeve, cast on 6-6-8-8-10-12 new stitches on row (in the side under sleeve), work 76-82-88-98-106-114 stitches in stocking stitch, slip the next 52-54-58-66-66-68 stitches on a thread for sleeve, cast on 6-6-8-8-10-12 new stitches on row (in the side under sleeve) and work the remaining 38-41-44-49-53-57 stitches in stocking stitch. Finish body and sleeves separately. NOW MEASURE PIECE FROM HERE! BODY: = 164-176-192-212-232-252 stitches. Work in stocking stitch until measures 21 cm from division. Knit 1 round while increasing 26-30-30-34-38-42 stitches evenly = 190-206-222-246-270-294 stitches. Switch to circular needle size 3.5 mm. Work rib (knit 1/purl 1) for 8 cm. Cast off somewhat loosely by knitting. Jumper measures approx. 52-54-56-58-60-62 cm from shoulder. SLEEVES: Slip the 52-54-58-66-66-68 stitches from thread in one side of piece on double pointed needles or a short circular needle size 5 mm and pick in addition up 1 stitch in each of the 6-6-8-8-10-12 new stitches cast on under sleeve = 58-60-66-74-76-80 stitches. Insert 1 marker thread mid under sleeve – in the middle of the 6-6-8-8-10-12 stitches that were cast on under sleeve. Begin round at the marker thread and work stocking stitch in the round. When piece measures 3-3-3-2-2-2 cm, decrease 2 stitches mid under sleeve - read DECREASE TIP. Decrease like this every 4-4-2½-2-2-1½ cm 4-4-6-9-9-10 times in total = 50-52-54-56-58-60 stitches. Work until sleeve measures 36-34-33-31-29-28 cm from division. 8 cm remain until finished measurements. Try the jumper and work to desired length before rib. Knit 1 round while increasing 10-10-10-12-12-12 stitches evenly = 60-62-64-68-70-72 stitches. Switch to double pointed needles size 3.5 mm. Work rib (knit 1/purl 1) for 8 cm. Cast off somewhat loosely by knitting. Sleeve measures approx. 44-42-41-39-37-36 cm. Work the other sleeve the same way. |
||||||||||||||||||||||||||||||||||
Diagram explanations |
||||||||||||||||||||||||||||||||||
|
||||||||||||||||||||||||||||||||||
 |
||||||||||||||||||||||||||||||||||
 |
||||||||||||||||||||||||||||||||||
Have you finished this pattern?Tag your pictures with #dropspattern #rainromancesweater or submit them to the #dropsfan gallery. Do you need help with this pattern?You'll find 31 tutorial videos, a Comments/Questions area and more by visiting the pattern on garnstudio.com. © 1982-2026 DROPS Design A/S. We reserve all rights. This document, including all its sub-sections, has copyrights. Read more about what you can do with our patterns at the bottom of each pattern on our site. |
||||||||||||||||||||||||||||||||||


With over 40 years in knitting and crochet design, DROPS Design offers one of the most extensive collections of free patterns on the internet - translated to 17 languages. As of today we count 324 catalogues and 12290 patterns translated into English (UK/cm). 12290
We work hard to bring you the best knitting and crochet have to offer, inspiration and advice as well as great quality yarns at incredible prices! Would you like to use our patterns for other than personal use? You can read what you are allowed to do in the Copyright text at the bottom of all our patterns. Happy crafting!
Post a comment to pattern DROPS 236-3
We would love to hear what you have to say about this pattern!
If you want to leave a question, please make sure you select the correct category in the form below, to speed up the answering process. Required fields are marked *.