
Popular categories
Looking for a yarn?


Comments / Questions (52)
![]() Selva wrote:
Selva wrote:
Bonjour, Je ne comprends pas le diagramme A1, Au second rang, j'ai une maille en trop. Pourriez -vous m'expliquer ? Cdt.
16.03.2025 - 22:18DROPS Design answered:
Bonjour Mme Selva, c'est normal, vous avez fait 1 jeté entre les 2 mailles endroit vous avez donc 1 m en plus; au 3ème rang, vous allez diminuer cette maille en plus: glissez la 1ère de ces 3 mailles endroit comme pour la tricoter à l'envers, tricotez les 2 mailles suivantes à l'endroit et passez la maille glissée par-dessus les 2 mailles tricotées = il reste 2 mailles de nouveau. (n'oubliez pas le jeté du 2ème rang qu'il faudra laisser tomber au 3ème rang). Retrouvez ici comment tricoter ce type de petites torsades. Bon tricot!
17.03.2025 - 09:51
![]() Kath wrote:
Kath wrote:
Where's A1? I don't see it in the pattern.
13.05.2022 - 23:52DROPS Design answered:
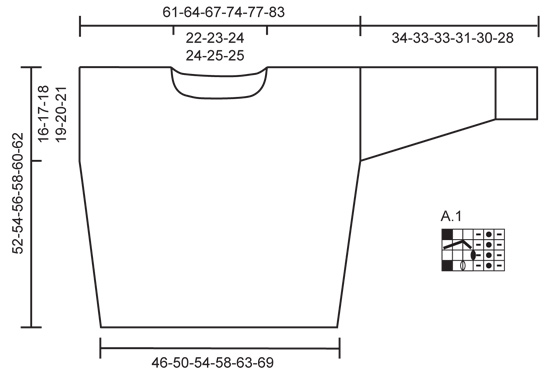
Dear Kath, you can find chart A.1 just under the sleeve in the measurements sketch, below the pattern instructions. Happy knitting!
15.05.2022 - 22:32
![]() Eva wrote:
Eva wrote:
Nagyon orulok, hogy vannak ezek a mintak, de a megadott fonalmennyiseg nem elegendo. Hogy leget az, higy a magyar leirasban kevesebbet adnak meg, mint pl az angolnal?
25.12.2021 - 20:08
![]() Jackie wrote:
Jackie wrote:
This is a lovely jumper and worth the time and effort it took to work out the pattern! Last advice very helpful however you do need to remember that rows 1 and 3 you start with the pattern as stated but with rows 2 and 4 you need to first do 4 stitches (plus the edge stitch makes 5 total) as follows: K (edge stitch), K1, P1 twisted, K1 then do the pattern. Also, don't forget to drop the yarn overs in row 3. They are there purely to make the thread loose enough to go over 2 stitches.
12.08.2020 - 17:39
![]() Victoria wrote:
Victoria wrote:
Thank you so much :)
09.07.2020 - 16:16
![]() Victoria wrote:
Victoria wrote:
I have read the lesson but still find it confusing - perhaps it is my age. I cannot see how hard it would be to provide 4 lines of pattern for those of us who are struggling with the digram
08.07.2020 - 17:12DROPS Design answered:
Hi Victoria, The jumper is worked back and forth, so the rows alternate from the right side to the wrong side (when working from the wrong side, you work from left to right). Starting on the right side the pattern is as follows Row 1: P1, K1 twisted, P1, K1. 1YO, K1, repeat. Row 2: P3, 1YO, K1, P1 twisted, K1, repeat Row 3: P1, K1 twisted, P1, slip 1, k2, psso, repeat Row 4: P2, K1, P1 twisted, K1, repeat. Happy knitting!
09.07.2020 - 07:39
![]() Victoria wrote:
Victoria wrote:
I have read all the Q&As but I'm still struggling with the pattern in the A1 diagram. Is it possible to PLEASE just write out the full instructions. From the numbers of questions here I am sure many knitters would appreciate it. Thx
08.07.2020 - 15:54DROPS Design answered:
Dear Victoria, The DROPS patterns are knitted and crocheted by thousands and thousands of people around the world. We understand however that in certain countries, with different knitting/crochet traditions than Scandinavia, our patterns might be written in a way that differs from what some are used to. But of course we want everyone to understand our patterns, so that’s why we have created an extensive library of tutorial videos as well as step by step lessons that explain how to follow the techniques we use and how to read the diagrams in our patterns. Give them a try!
08.07.2020 - 16:43
![]() Mia wrote:
Mia wrote:
Hello, other than the garter edge stitch, how do we knit the 4 stitches in row 2 that we knitted at the end of row 1, before we start on the A.1 Diagram (pattern?) I am saying this because in row 1 we are not finishing the row with the same 6 stitches that are part of the A.1 Diagram. The 4 stitches are extra, not part of the A.1 Diagram. Can you please describe row 2 right at the start? like edge garter stitch, ...... Thank you
30.03.2020 - 09:16DROPS Design answered:
Dear Mia, from RS you work: 1 edge st in garter st, repeat A.1 until 4 sts remain and work these 4 sts like this: P1, K1 twisted, P1, 1 edge st in garter st. From WS work: 1 edge st in garter st, K1, P1 twisted, K1, repeat A.1 (reading now from the left towards the right), 1 edge st in garter st. read more about diagrams here. Happy knitting!
30.03.2020 - 11:30
![]() Lotte Meincke wrote:
Lotte Meincke wrote:
Hvad gør man, når der står at “omslaget slippes ned på næste pind”??? (Opskrift 153-12) Findes der videoer, der viser, hvad der menes med symbolerne? Mvh Lotte
13.02.2020 - 12:20DROPS Design answered:
Hej Lotte, prøv at lave en lille strikkeprøve over de 5 masker i diagrammet, med 2 kantmasker i hver side 1.pind strikker du 2 kantm, 1vr, 1drejet ret, 1vrang, 1ret, 1 omslag, 1ret, 2 kantm 2.pind strikker du (fra vrangen) 2kantm, 3 vrang, 1omslag, 1 ret, 1 drejet vrang, 1ret, 2kantm 3.pind strikker du (fra retten) 2 kantm, 1vrang, 1drejet ret, 1vrang, slip omlaget af pinden så der bliver hul, tag 1 m løst af p som om den strikkes vrang, 2ret, løft den løse maske over de 2ret, 2kantm 4.pind strikker du fra vrangen, 2kantm, 2vrang, 1ret, 1 drejet vrang,1ret, 2kantm Strik gerne de 4 pinde 2-3 gange i højden så du kan se systemet. God fornøjelse!
14.02.2020 - 11:22
![]() Manuela wrote:
Manuela wrote:
Herzlichen Dank für die rasche Antwort, natürlich gleich ausprobiert und klappt wunderbar. Möchte jedoch darauf hinweisen dass dann die Beschreibung des Symbols nicht korrekt ist, bei dieser wird nämlich davon gesprochen diesen Umschlag in der nächsten Reihe rechts zu stricken ! LG und danke nochmal
30.09.2019 - 17:07
|
||||||||||||||||||||||
Ibiza#ibizasweater |
||||||||||||||||||||||
|
|
||||||||||||||||||||||
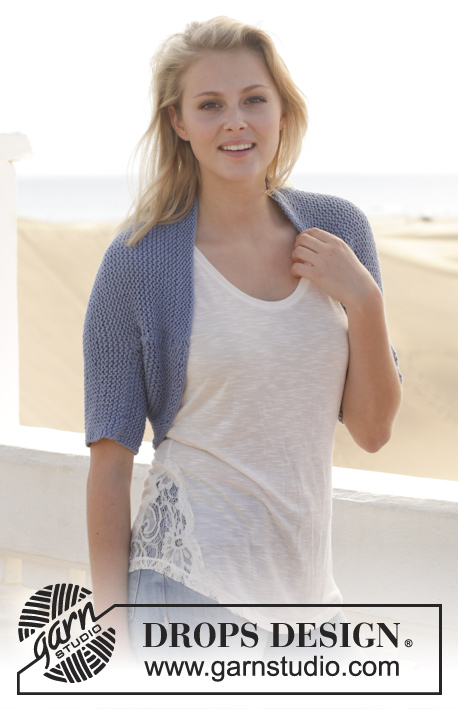
Knitted DROPS jumper with lace pattern in ”Paris”. Size: S - XXXL.
DROPS 153-12 |
||||||||||||||||||||||
|
GARTER ST (back and forth on needle): K all rows. 1 ridge = K2 rows. PATTERN: See diagram A.1. The diagram shows all rows in pattern seen from RS. ---------------------------------------------------------- JUMPER: Worked back and forth on needle in parts and sewn tog when finished. FRONT PIECE: Cast on 76-83-88-94-103-113 sts (includes 1 edge st in each side) on needle size 5.5 mm / US 9 and work 3 ridges in garter st. Then work in stockinette st with 1 edge st in GARTER ST - see explanation above - in each side of piece. When piece measures approx. 2 cm / ¾", inc 1 st in each side, inc with 1 YO inside 1 edge st, work YO twisted on next row to avoid holes. Repeat inc approx. every 3-3½-3½-3-3½-3½ cm / 1"-1¼"-1¼"-1"-1¼"-1¼" 11-10-10-12-10-10 more times (= 12-11-11-13-11-11 times in total) = 100-105-110-120-125-135 sts on needle. Work until piece measures 36-37-38-39-40-41 cm / 14¼"-14½"-15"-14¼"-15¾"-16⅛", insert a marker in each side, marks where to sew in sleeves. Then work as follows from RS: 1 edge st in garter st, repeat A.1 until 4 sts remain on row, P 1, K 1 twisted, P 1 and 1 edge st in garter st. Work the twisted st P twisted from WS. Work like this until piece measures 46-48-50-52-54-56 cm / 18"-19"-19¾"-20½"-21¼"-22" adjust after one whole repetition of A.1 vertically. Work the first 35-37-39-44-46-51 sts as before, bind off the next 30-31-32-32-33-33 sts and work the rest of row as before. Work each shoulder separately - AT THE SAME TIME bind off 1 st at beg of every row from neck 3 times in total = 32-34-36-41-43-48 sts remain on each shoulder. Continue until piece measures 52-54-56-58-60-62 cm / 20½"-21¼"-22"-22¾"-23½"-24½" and bind off. BACK PIECE: Work as front piece BUT work until piece measures 50-52-54-56-58-60 cm / 19¾"-20½"-21¼"-22"-22¾"-23⅛" before binding off for neck - adjust after one whole repetition of A.1 vertically. Work as before over the first 33-35-37-42-44-49 sts, bind off the next 34-35-36-36-37-37 sts and work the rest of row as before. Work each shoulder separately - AT THE SAME TIME bind off 1 st at beg of next row from neck = 32-34-36-41-43-48 sts remain on each shoulder. Work until piece measures 52-54-56-58-60-62 cm / 20½"-21¼"-22"-22¾"-23½"-24½" and bind off. SLEEVE: Cast on 45-45-50-50-53-53 sts on needle size 5.5 mm / US 9 (includes 1 edge st in each side) and work 3 ridges back and forth on needle. Then work as follows: 1 edge st in garter st, P 0-0-0-0-2-2, A.1 until 4-4-4-4-5-5 sts remain, P 1, K 1 twisted, P 1-1-1-1-2-2 and 1 edge st in garter st. Work the twisted st P twisted from WS. Work until piece measures 12 cm / 4¾", adjust after one whole repetition of A.1 vertically. Then work in stockinette st while at the same time inc 1 st inside 1 edge st in garter st in each side, repeat inc approx. every 6½-4½-4½-3½-4-2½ cm / 2½"-1¾"-1¾"-1¼"-1½"-⅛" 3-4-4-5-4-5 more times (= 4-5-5-6-5-6 times in total) = 53-55-60-62-63-65 sts on needle. Work until piece measures 34-33-33-31-30-28 cm / 13½"-13"-13"-12 ¼"-11¾"-11" and bind off (shorter measurements in the larger sizes because of wider body). Make another sleeve the same way. ASSEMBLY AND NECK EDGE: Sew one shoulder seam, leave the other open. Pick up 80-100 sts from RS around the neck edge. Work 3 ridges back and forth on needle, bind off. Sew the other shoulder seam and side of neck edge. Sew in sleeves inside the two markers inserted on front and back piece. Sew underarm and side seams in one inside 1 edge st. |
||||||||||||||||||||||
Diagram explanations |
||||||||||||||||||||||
|
||||||||||||||||||||||
 |
||||||||||||||||||||||
Have you finished this pattern?Tag your pictures with #dropspattern #ibizasweater or submit them to the #dropsfan gallery. Do you need help with this pattern?You'll find 19 tutorial videos, a Comments/Questions area and more by visiting the pattern on garnstudio.com. © 1982-2026 DROPS Design A/S. We reserve all rights. This document, including all its sub-sections, has copyrights. Read more about what you can do with our patterns at the bottom of each pattern on our site. |
||||||||||||||||||||||


With over 40 years in knitting and crochet design, DROPS Design offers one of the most extensive collections of free patterns on the internet - translated to 17 languages. As of today we count 324 catalogs and 12285 patterns - 12275 of which are translated into English (US/in).
We work hard to bring you the best knitting and crochet have to offer, inspiration and advice as well as great quality yarns at incredible prices! Would you like to use our patterns for other than personal use? You can read what you are allowed to do in the Copyright text at the bottom of all our patterns. Happy crafting!
Post a comment to pattern DROPS 153-12
We would love to hear what you have to say about this pattern!
If you want to leave a question, please make sure you select the correct category in the form below, to speed up the answering process. Required fields are marked *.