
Popular categories
Looking for a yarn?


Comments / Questions (61)
![]() Jacqueline Spencer wrote:
Jacqueline Spencer wrote:
I would like to receive this pattern
13.11.2020 - 19:23DROPS Design answered:
Dear Mrs Spencer, you can print this pattern for free clicking on the printer icon. Happy knitting!
16.11.2020 - 10:58
![]() Jacqueline Spencer wrote:
Jacqueline Spencer wrote:
Can you send me this pattern
13.11.2020 - 19:21
![]() Jacqueline Spencer wrote:
Jacqueline Spencer wrote:
How can I receive this pattern
13.11.2020 - 19:19
![]() Quijoux wrote:
Quijoux wrote:
Bonjour, je ne comprends pas comment faire pour les devants : Glisser ensuite en attente les mailles de l'encolure sur un arrêt de mailles au début de chaque rang à partir de l'encolure (après les avoir tricotées pour éviter de couper le fil) : 1 fois 7 m et 3-3-4-4-4-4 fois 1 m = il reste 14-16-17-19-22-24 m pour l'épaule. Par avance merci. Un tuto serait parfait !
28.10.2020 - 13:01DROPS Design answered:
Bonjour Mme Quijoux, pour le devant gauche, commencez sur l'envers (= à partir de l'encolure) et tricotez ainsi: tricotez les 7 premières mailles et glissez les en attente sur un fil, terminez le rang, tournez et tricotez le rang suivant; tournez et tricotez 1 m, mettez-la en attente, terminez le rang, tournez, tricotez le rang suivant; répétez ces 2 derniers rangs encore 2 ou 3 fois (= 3 ou 4 fois au total) = il doit vous rester 14-16-17-19-22-24 m pour l'épaule. Les mailles en attente seront ensuite reprises pour tricoter la capuche. Bon tricot!
28.10.2020 - 15:31
![]() EF wrote:
EF wrote:
Bonjour, comment diminuer 1m de chaque coté, sachant que les diminutions au point de riz c'est par 3 mailles???
23.10.2020 - 16:34DROPS Design answered:
Bonjour Mme EF, tricotez 2 m ens à l'end ou à l'envers en début/à la fin du rang - en fonction de la maille suivante (début du rang) ou précédente (en fin de rang). Bon tricot!
23.10.2020 - 16:52
![]() Jodi wrote:
Jodi wrote:
Can I get the pattern in English?
06.10.2020 - 12:30DROPS Design answered:
Dear Jodi, sure, all our patterns are available in English - click on the scroll down menu below picture to choose language. Happy knitting!
06.10.2020 - 15:12
![]() Beatriz wrote:
Beatriz wrote:
Hola, me podrían por favor explicar que quieren decir con montar 30-32-34-36-40 ptos para el delantero, no se le entiende nada, se supone que si mi caderas miden 100 centimetros para el delantero izquierdo o derecho debere montar aproximadamente la tercera parte o sea 33 a 35 centimetros segun si voy a poner botones o no, expliquen por favor como es que toman las medidas y como cuentan porque la verdad no entiendo nada, muchas gracias
11.03.2020 - 07:53
![]() Rene Gould wrote:
Rene Gould wrote:
Don't no if I'm reading pattern right for the right front for buttonholes do I make my first buttonhole after 19cm seems high up for first buttonhole as you usual have one at the bottom of right front could you please tell me if I'm right or wrong with the 19cm An then it's 9cm apart for other buttonholes thank you for your help in my last question don't no what I would have done without you top marks now I have this problem hope it's my last thanks again
07.02.2020 - 23:19DROPS Design answered:
Dear Mrs Gould, in first size, the first buttonhole is made when piece measures 19 cm then the next buttonholes are made with 9 cm between each. Happy knitting
10.02.2020 - 07:45
![]() Rene Gould wrote:
Rene Gould wrote:
Hi I'm stuck on this jacket pattern with hood number 132-9 the left front from where you have 66stitches then you have to slip stitches on every row at the neck I don't understand could you please help me from where the 66stitches are till the end of the left front then I will be able to do the right hopefully
06.02.2020 - 17:50DROPS Design answered:
Dear Mrs Gould, did you read the explanation in the answer below? the stitches from thread/stitch holders on each side of jacket (on front pieces) will be then worked when you pick up the stitches on hood. Happy knitting!
07.02.2020 - 07:45
![]() Rene Gould wrote:
Rene Gould wrote:
I\'m on the left front up to 66 stars I don\'t understand about putting first stitch on holder on every row for neck can you please help me
06.02.2020 - 15:24DROPS Design answered:
Dear Mrs Gould, when left front piece measures 66 cm, you will slip the stitches at the beginning of each row from WS (from neck) as follows: work the first 7 stitches and slip them on a thred, work row to the end, turn and work RS row. *Work 1 stitch and slip them on a thread, work row to the end, turn and work next row from RS*, repeat from *-* 2 more times (= there are now 10 stitches on a thread towards neck) = 14 sts remain for shoulder. Happy knitting!
06.02.2020 - 15:59
|
|
Aurora#aurorajacket |
|
 |
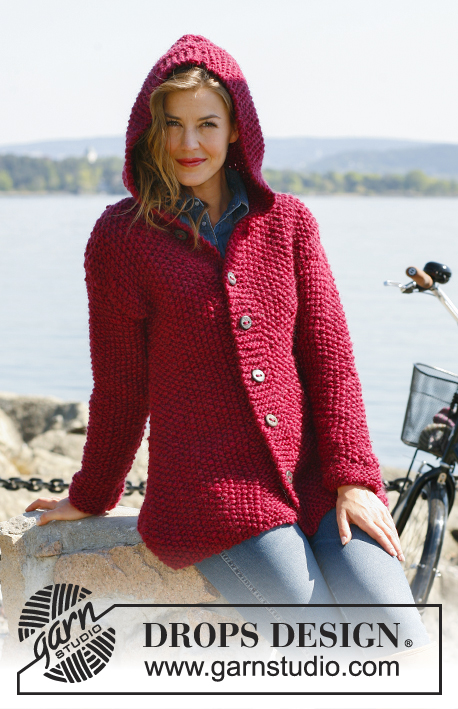 |
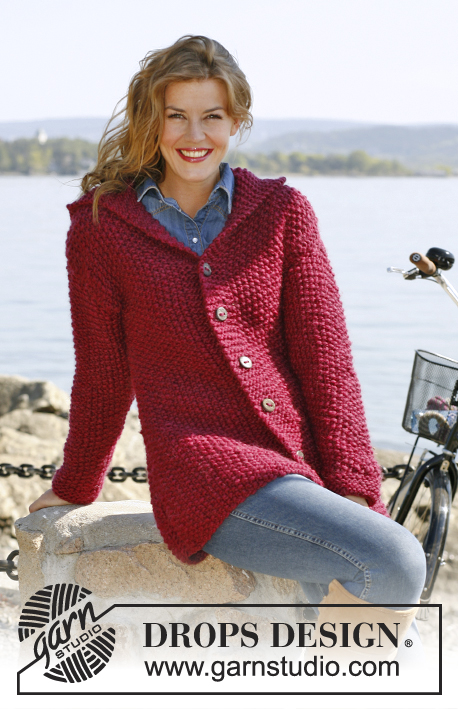
Knitted DROPS jacket in seed st with hood in ”Andes” or ”Snow”. Size: S - XXXL
DROPS 132-9 |
|
|
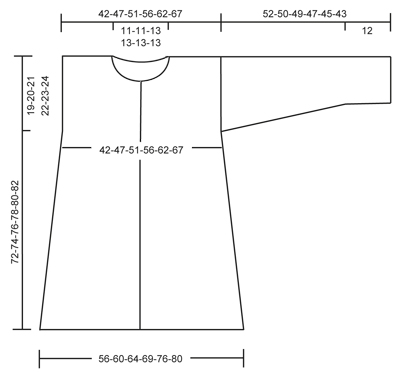
SEED ST: 1st row: * K 1, P 1 *, repeat from *-*. 2nd row: K over P and P over K. Repeat 2nd row. GARTER ST (back and forth on needle): K all rows. MEASURING TIP: Because of the weight of the garment all measurements must be done by holding the piece up otherwise the garment will be too long when worn. BUTTON HOLES: bind off for button holes on right front band.1 button hole = K 3rd and 4th st from mid front tog, then make 1 YO. Bind off for button holes when piece measures: SIZE S: 19, 28, 37, 46, 55 and 64 cm / 7½",11",14½",18",21½" and 25¼" SIZE M: 21, 30, 39, 48, 57 and 66 cm / 8¼",11¾",15¼",19",22½" and 26" SIZE L: 23, 32, 41, 50, 59 and 68 cm / 9",12½",16⅛",15¾",23¼" and 26¾" SIZE XL: 20, 30, 40, 50, 60 and 70 cm / 8",11¾",15¾",19¾",23⅝" and 27½" SIZE XXL: 22, 32, 42, 52, 62 and 72 cm / 8¾",12½",16½",20½",24⅜" and 28⅜" SIZE XXXL: 24, 34, 44, 54, 64 and 74 cm / 9½",13⅜",17¼",21¼",25¼" and 29⅛" KNITTING TIP (applies to hood): To avoid holes in the transitions where sts for neck were slipped on a stitch holder, pick up the yarn between 2 sts and work this strand tog with 1st st on row. -------------------------------------------------------- BACK PIECE: Worked back and forth on needle. Cast on 50-54-58-62-68-72 sts on needle size 10 mm / US 15 with Andes. Work in SEED ST - see explanation above! REMEMBER THE GAUGE! When piece measures 8 cm / 3⅛" - READ MEASURING TIP - dec 1 st in each side. Repeat dec every 8 cm / 3⅛" a total of 6 times = 38-42-46-50-56-60 sts. When piece measures 53-54-55-56-57-58 cm / 21"-21¼"-21⅝"-22"-22½"-22¾", insert 1 marker in each side (marks where armhole starts). When piece measures 70-72-74-76-78-80 cm / 27½"-28⅜"-29⅛"-30"-30¾"-31½, bind off the middle 8-8-10-10-10-10 sts for neck and finish each shoulder separately. Then bind off 1 st on next row from neck = 14-16-17-19-22-24 sts. Bind off when piece measures 72-74-76-78-80-82 cm / 28⅜"-29⅛"-30"-30¾"-31½"-32¼". LEFT FRONT PIECE: Worked back and forth on needle. Cast on 30-32-34-36-39-41 sts (includes 7 band sts towards mid front) on needle size 10 mm / US 15 with Andes. Work in GARTER ST - see explanation above - over the 7 band sts towards mid front and Seed st over the remaining sts. When piece measures 8 cm / 3⅛", beg to dec in the side as on back piece = 24-26-28-30-33-35 sts. When piece measures 53-54-55-56-57-58 cm / 21"-21¼"-21⅝"-22"-22½"-22¾", insert 1 marker in the side (marks where armhole starts). Continue to work until piece measures 66-68-70-72-74-76 cm / 26"-26¾"-27½"-28⅜"-29⅛"-30". Now slip sts on beg of every row from neck on 1 stitch holder (after they have been worked to avoid cutting the thread) as follows: 7 sts 1 time and 1 st 3-3-4-4-4-4 times = 14-16-17-19-22-24 sts remain on shoulder. Bind off when piece measures 72-74-76-78-80-82 cm / 28⅜"-29⅛"-30"-30¾"-31½"-32¼". RIGHT FRONT PIECE: Cast on and work as left front piece but reversed. In addition bind off for BUTTON HOLES on band - see explanation above! SLEEVE: Worked back and forth on needle. Cast on 24-24-26-26-28-28 sts on needle size 10 mm / US 15 with Andes. Work 8 rows in Garter st, continue in Seed st. At the same time when piece measures 12 cm / 4¾", inc 1 st in each side. Repeat inc every 8-7-7-5-5-4 cm / 3⅛"-2¾"-2¾"-2"-2"-1½" a total of 5-6-6-7-7-8 times = 34-36-38-40-42-44 sts. When piece measures 52-50-49-47-45-43 cm / 20½"-19¾"-19¼"-18½"-17¾"-17", loosely bind off all sts. NOTE: Shorter measurements in the larger sizes because of wider shoulder width. ASSEMBLY: Sew the shoulder seams. Sew in sleeves – see markers on front and back piece for where the sleeves should start. Sew sleeve and side seam in one, sew tog edge to edge in front loop of outermost st to avoid a chunky seam. Sew on buttons. HOOD: Pick up approx. 35 to 42 sts around the neck (including sts on stitch holders at the front) on needle size 10 mm / US 15 with Andes. K 1 row from WS while AT THE SAME TIME working to avoid holes in the transitions at the front of neck – READ KNITTING TIP. Then work 8 rows in Garter st. On next row from RS, inc evenly to 48-50-52-54-56-58 sts. NOTE: Do not inc over the outermost 7 sts in each side (= front bands). Continue in Garter st over the outermost 7 sts in each side and Seed st over the remaining sts until hood measures 47-47-48-48-49-49 cm / 18½"-18½"-19"-19"-19¼"-19¼", bind off. Fold the hood double and sew it tog at the top, sew edge to edge to avoid a chunky seam. |
|
 |
|
Have you finished this pattern?Tag your pictures with #dropspattern #aurorajacket or submit them to the #dropsfan gallery. Do you need help with this pattern?You'll find 10 tutorial videos, a Comments/Questions area and more by visiting the pattern on garnstudio.com. © 1982-2026 DROPS Design A/S. We reserve all rights. This document, including all its sub-sections, has copyrights. Read more about what you can do with our patterns at the bottom of each pattern on our site. |
|


With over 40 years in knitting and crochet design, DROPS Design offers one of the most extensive collections of free patterns on the internet - translated to 17 languages. As of today we count 324 catalogs and 12290 patterns - 12280 of which are translated into English (US/in).
We work hard to bring you the best knitting and crochet have to offer, inspiration and advice as well as great quality yarns at incredible prices! Would you like to use our patterns for other than personal use? You can read what you are allowed to do in the Copyright text at the bottom of all our patterns. Happy crafting!
Post a comment to pattern DROPS 132-9
We would love to hear what you have to say about this pattern!
If you want to leave a question, please make sure you select the correct category in the form below, to speed up the answering process. Required fields are marked *.