
Popular categories
Looking for a yarn?


Comments / Questions (45)
![]() Alejandrina wrote:
Alejandrina wrote:
¿Cómo se hace la estructura de resorte? Gracias
24.01.2013 - 14:20
![]() Maria wrote:
Maria wrote:
Zum Schluss, wenn ich noch 32 Maschen übrig habe (also 31 fM und 1 LM): Ich soll immer 2 Maschen zusammenhäkeln. Wie mache ich das am Anfang, also mit der LM und der 1. fM? Wenn ich erst die LM häkel und dann erst die nächsten beiden fM zusammen häkel, dann geht es doch am Ende nicht auf?Vielen Dank
18.01.2013 - 09:54DROPS Design answered:
Liebe Maria, häkeln Sie die Lm und die 1. M normal (da man mit der Lm nicht zusammen abmaschen kann) und beginnen Sie dann mit dem Zusammenhäkeln. Die Maschenzahl geht trotzdem auf.
20.01.2013 - 18:38
![]() Laura wrote:
Laura wrote:
Ik begrijp de volgende aanwijzing niet: "Herhaal dit minderen om de toer in totaal 5 keer en dan elke toer in totaal 1-2 keer = 32-32 stk over ". Wordt hier bedoeld dat je in totaal 10 toeren haakt bij het minderen. Dus 5 minderen en 5 niet. En wat bedoelen jullie dan met "en dan elke toer in totaal 1-2 keer". Volgens mij maak ik m nu veel te groot. Hoe veel toeren haak je in totaal?
08.01.2013 - 15:20DROPS Design answered:
Ja, om de toer is hetzelfde als in elke tweede toer. Dus eerst 5 keer om de toer (totaal 10 toeren) en dan nog 1 of 2 keer in elke toer.
11.01.2013 - 13:22
![]() Cindy wrote:
Cindy wrote:
Merci ! Mais pourquoi "tous les deux tours"?
26.10.2012 - 22:10DROPS Design answered:
Bonjour Cindy, les diminutions sont faites soit tous les 2 tours, soit tous les tours pour donner la forme voulue. Bon crochet !
30.10.2012 - 08:50
![]() Cindy wrote:
Cindy wrote:
Je ne comprends pas comment procéder après avoir effectué le tourde diminution toutes les 8 brides, pouvez vous me détailler les tours suivants?
23.10.2012 - 21:26DROPS Design answered:
Bonjour Cindy, pour diminuer 8 B, vous crochetez 1 B en moins entre les diminutions (=2 m écoulées ens) à chaque tour : ex. au 1er rang (8B, 1 dim), au 2ème rang (7B, 1 dim), au 3ème rang (6B, 1 dim), etc... Bon crochet !
24.10.2012 - 09:18
![]() Marie Storebø wrote:
Marie Storebø wrote:
Kan dere forklare eller lage en video der dere forklarer hva en kant med vrbord-struktur er? Skjønner ikke hva det er.
11.10.2012 - 08:42DROPS Design answered:
Heisann. Ditt ønske om video av kant med vrbord-struktur er notert og vil bli laget iløpet av høsten. Hekle 14 lm på nål 4 og hekle 1.rad slik: 1 halvst i 3.lm fra nålen, 1 halvst i hver av de 11 neste lm = 13 halvst, snu arb.(På beg av hver rad med halvst erstattes 1.halvst med 2 lm, raden avsluttes med 1 halvst i 2.lm fra beg av forrige rad). Videre hekles det halvst frem og tilbake men hver halvst hekles i bakre m-ledd (dvs ikke gjennom hele m) = vrbord-struktur.
15.10.2012 - 11:18
![]() DROPS Deutsch wrote:
DROPS Deutsch wrote:
Zuerst nimmt man bei jeder 2. R. ab (und das total 5 Mal). Danach bei jeder R. total 1 oder 2 Mal.
31.01.2012 - 09:03
![]() Julia wrote:
Julia wrote:
Hallo Leute, kann mir bitte einer helfen ich versteh das nicht ganz: gleichmässig verteilt 8 Stb abn. indem man die 9. und 10. (Grösse XS/S) oder die 10. und 11. M. (Grösse M/L) zusammenhäkelt – siehe oben. Bei jeder 2. R. total 5 Mal und danach bei jeder R. total 1-2 Mal = 32-32 Stb. Überhaupt das mit dem total 5 MAl. Danke
30.01.2012 - 21:10
![]() DROPS Design wrote:
DROPS Design wrote:
Hej, möstret stämmer. Vi har rättat till garnmängden. Hälsningar DROPS Design
18.11.2011 - 09:50
![]() Susanne wrote:
Susanne wrote:
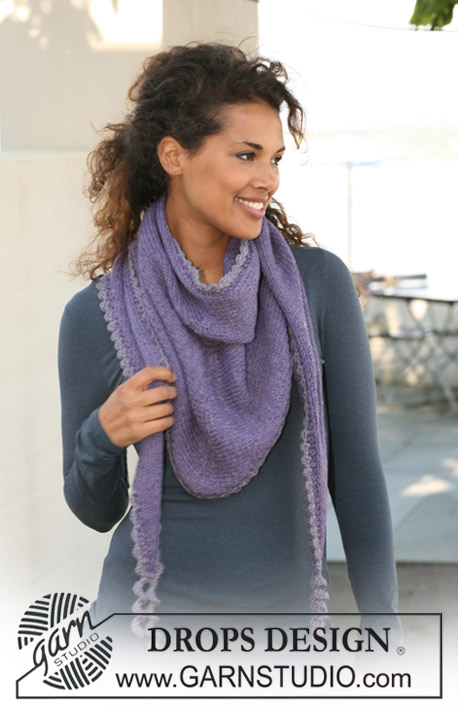
Hej! Får inte det att stämma! I det svenska mönstret står det: När det virkats 4 m st/../ Virka ihop var 10e 0 11e. Upprepa minskningen vartannat v totalt 5 ggr(= 9 v) sedan på varje v 1-2 ggr. det blir totalt 15 v om man lägger ihop alla, om man tittar på bilden så ser det inte ut att vara mer än max 11 v.... Och ska man följa mönstret så räcker definitivt inte 100 g. min virkfasthet är 16 st = 10 cm.....
10.11.2011 - 09:10
|
|
Winter Classic#winterclassicset |
|
|
|
|
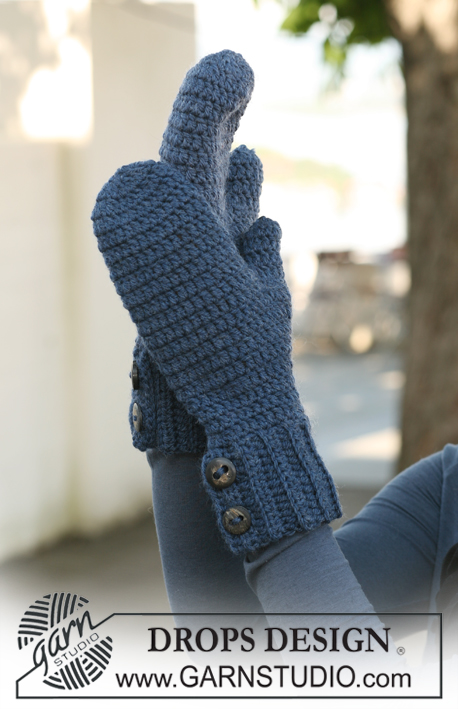
Crochet DROPS hat in ”Alaska”.
DROPS 126-21 |
|
|
CROCHET INFO-1: Replace first hdc on row with ch 2, finish row with 1 hdc in 2nd ch from beg of previous row. CROCHET INFO-2: Replace first dc on round with ch 3 and finish round with 1 sl st in 3rd ch from beg of round. Replace first sc on round with ch 1 and finish round with 1 sl st in ch from beg of round. CROCHET DC TOG: Work 1 dc, but wait with the last pull-through (= 2 sts on hook), work next dc, but when doing the last pull-through pull thread through all sts on hook = 1 dec dc. CROCHET SC TOG: Work 1 sc, but wait with the last pull-through, work next sc and pull thread through both sts on hook. -------------------------------------------------------- HAT: Crochet an edge first back and forth in rib-structure, then form a ring, pick up new sts round the ring and crochet the hat in the round towards the top. EDGE: Ch 14 with hook size 4 mm / G/6 with Alaska and work first row as follows: 1 hdc in 3rd ch from hook, 1 hdc in each of the next 11 ch = 13 hdc, turn piece. See CROCHET INFO-1. Continue with 1 hdc in each hdc but work each hdc in the back loop of st (i.e. not through the whole st) = rib-structure. When piece measures 52-56 cm / 20½"-22" make 2 buttonholes as follows: work 3 hdc, ch 2, skip 2 sts, 3 hdc, ch 2, skip 2 sts, 1 hdc in each of the last 3 sts, turn piece. Work 1 hdc in each hdc and 2 hdc in each ch space = 13 hdc, cut and fasten thread. HAT: Slip the edge tog to a ring with the 2 rows on the side with buttonholes sitting over the 2 rows the opposite side = buttonhole split. See CROCHET INFO-2. Beg by buttonhole split and crochet alternately 1 and 2 sc in each row all the way round NOTE: by buttonhole split crochet through both layers = approx 78-84 sc. Continue with 1 dc in each st, AT THE SAME TIME adjust no of sts to 80-88 dc by crochet 2 dc in 1 st with regular intervals. After 4 rounds with dc (piece now measures approx 11 cm / 4⅜") dec 8 dc evenly, i.e. work every 9th and 10th dc tog in Size XS/S and every 10th and 11th dc tog in Size M/L – see above. Repeat the dec on every other round a total of 5 times and then on every round a total of 1-2 times = 32-32 dc left. Now work 2 rounds with sc, AT THE SAME TIME work 2 sc tog all the way round on both rounds = 8-8 sc left. Cut the thread, pull it through remaining sts, tighten tog and fasten. Hat measures approx 23-24 cm / 9"-9½". Sew buttons to the edge. |
|
Have you finished this pattern?Tag your pictures with #dropspattern #winterclassicset or submit them to the #dropsfan gallery. Do you need help with this pattern?You'll find 8 tutorial videos, a Comments/Questions area and more by visiting the pattern on garnstudio.com. © 1982-2026 DROPS Design A/S. We reserve all rights. This document, including all its sub-sections, has copyrights. Read more about what you can do with our patterns at the bottom of each pattern on our site. |


With over 40 years in knitting and crochet design, DROPS Design offers one of the most extensive collections of free patterns on the internet - translated to 17 languages. As of today we count 324 catalogs and 12291 patterns - 12281 of which are translated into English (US/in).
We work hard to bring you the best knitting and crochet have to offer, inspiration and advice as well as great quality yarns at incredible prices! Would you like to use our patterns for other than personal use? You can read what you are allowed to do in the Copyright text at the bottom of all our patterns. Happy crafting!
Post a comment to pattern DROPS 126-21
We would love to hear what you have to say about this pattern!
If you want to leave a question, please make sure you select the correct category in the form below, to speed up the answering process. Required fields are marked *.