
Popular categories
Looking for a yarn?


Comments / Questions (19)
![]() Vanweddingen Ingrid wrote:
Vanweddingen Ingrid wrote:
Waar zijn die vasten gehaakt waarvan sprake is bij de bies? Ik begrijp niet hoe ik de bies moet haken en vast naaien aan de cirkels!?
17.06.2025 - 18:57DROPS Design answered:
Dag Ingrid,
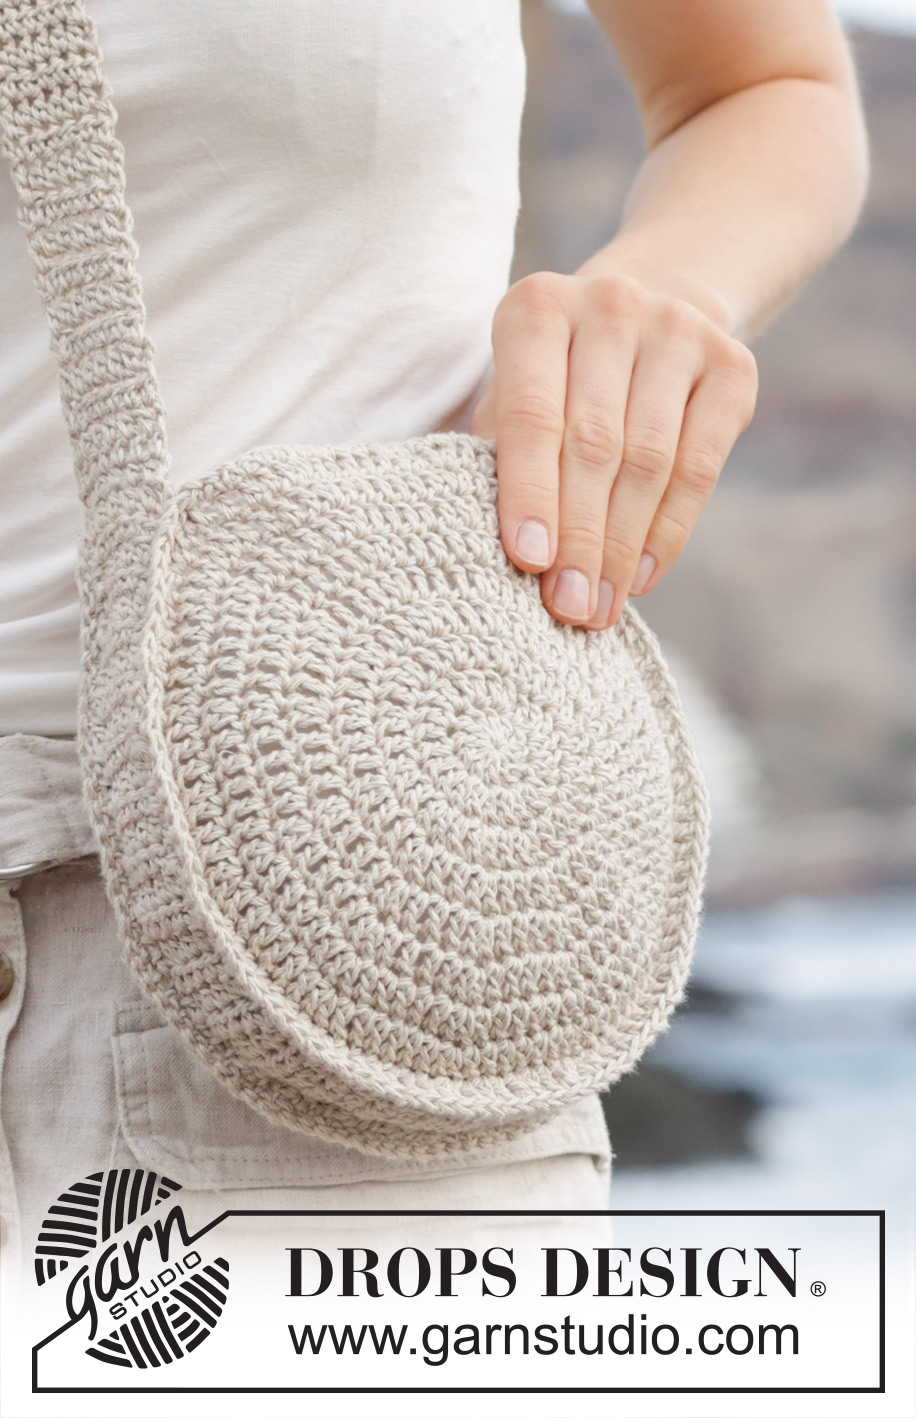
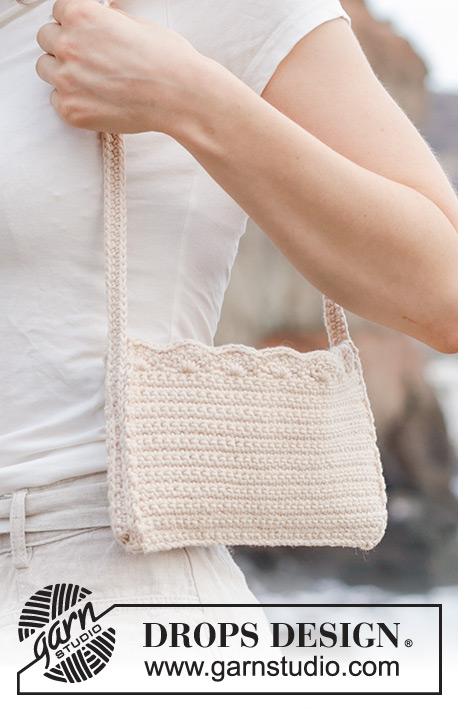
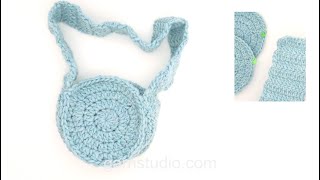
Op de eerste foto is te zien dat de bies aan de ene kant tegen cirkel 1 zit en aan de andere kant tegen cirkel 2. Om deze aan elkaar te haken, haak je vasten waarbij je de haaknaald steeds door de bies en de cirkel steekt, zodat je ze aan elkaar haakt.
17.06.2025 - 21:14
![]() Susana wrote:
Susana wrote:
Hello, what is the sewing technic used to sew both circles to the strap? There is no indication on the pattern or videos provided. Thank you
06.06.2025 - 12:30DROPS Design answered:
Dear Susana, we don't have any video to that specific seam, you will use a mix of these 2 videos: how to sew a pice worked with treble crochets (here) = circle on one side and how to sew squares together (here) = strap. Make sure to not tighten piece, you can first add pins on your work so that it might make the seam easier. Happy assembly!
06.06.2025 - 13:08
![]() Susana wrote:
Susana wrote:
Heya, can I kindly ask if on this part "Work 6 treble crochets back and forth until the band measures a total of 140 cm" I will still need to work the crochet information "At the beginning of each round/row of treble crochets work 3 chain stitches, which do not replace the first treble crochet but are in addition"? Thank you
04.06.2025 - 22:50DROPS Design answered:
Dear Susana, sure you still ned this info, this means you start each row with 3 chains to start row but these chains will not replace the first treble crochet, then crochet 1 treble crochet in each of the next 6 treble crochets = there are 6 treble crochets in total for the strap, repeat this row until the desired length. Happy crocheting!
05.06.2025 - 08:55
![]() Susana Araujo wrote:
Susana Araujo wrote:
What does the subtitle "1 treble crochet in stitch bellow" means? Is this on the 2nd stitch from the previous treble crochet ? Or around the actual chain stitch?
01.06.2025 - 23:40DROPS Design answered:
Dear Susana, in the stitch below means that the treble crochet in this round is worked inside the stitch (the treble crochet from the previous round), and not around the stitch; you can check herethe difference between around and in the stitch. Happy crochetting!
01.06.2025 - 23:54
![]() Svitlana wrote:
Svitlana wrote:
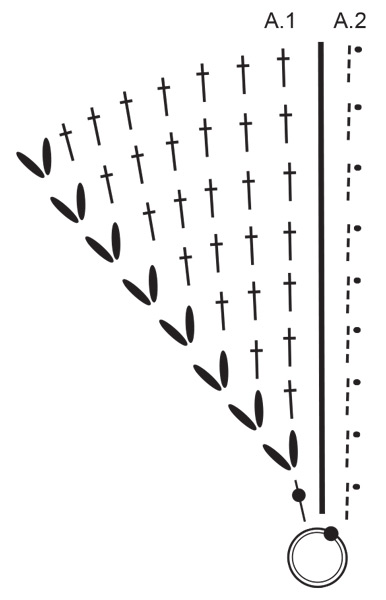
Hei ! Er det mulig å se diagram A1 og A2 til denne oppskriften ?
12.05.2025 - 10:37DROPS Design answered:
Hej Svitlana, ja du finder diagrammerne nederst i opskriften. Diagrammet starter ved cirklen nederst :)
12.05.2025 - 11:10
![]() Aoife Maeve wrote:
Aoife Maeve wrote:
Har dere instrukser på båndet med bilder som viser? jeg er en erfart hekler men det båndet gir ingen mening for meg
27.04.2025 - 12:59DROPS Design answered:
Hei Aoife. Først hekler du et bånd med 12 staver til det måler 47 cm (= bunnen på vesken), så legger du dette båndet dobbelt og hekler kortsiden (12 staver) sammen med 1 stav i hver stav gjennom begge lag, slik at kortsiden nå består av 6 staver. Du har nå et bånd med 12 staver som er brettet dobbelt. Fortsett med å hekle staver over de 6 stavene ca 93 cm. Legg oppleggskanten (med 12 staver) dobbelt og sy igjen (kortsiden). Det doble båndet skal nå sys fast langs kanten på sirkelene. mvh DROPS Design
05.05.2025 - 10:23
![]() Helga Eitel wrote:
Helga Eitel wrote:
Ich vermisse bei den Videos immer die Erklärungen zu dem betreffenden Objekt. Wie nähe ich z. B. den gehäkelten Rand so an die beiden runden Taschenhälften dass es eine Kante ergibt ? Wie man Stäbchen usw. häkelt wird wohl jeder wissen der eine Anleitung sucht.
19.03.2025 - 15:02
![]() Sylvie Guilbot wrote:
Sylvie Guilbot wrote:
Bonjour pour débuter combien de Brides dans le cercle magique ? merci
24.07.2024 - 08:35DROPS Design answered:
Bonjour Sylvie, le rond magique est presente ICI, mais faites-vous les brides au lieu des mailles serrees. Bon crochet!
24.07.2024 - 10:41
![]() Suzy wrote:
Suzy wrote:
Bonjour, pourquoi mon disque gondole merci
14.06.2024 - 08:53DROPS Design answered:
Bonjour Susy, pensez à bien conserver la bonne tension en largeur et en hauteur, ajustez la taille du crochet si besoin. Bon crochet!
14.06.2024 - 16:18
![]() SUJO83 wrote:
SUJO83 wrote:
Bonjour je désire faire 2 ances pouvez vous me dire comment faire merci
10.06.2024 - 13:53DROPS Design answered:
Bonjour Sujo83, tout dépend de ce que vous souhaitez comme résultat, vous pourrez peut-être trouver l'inspiration parmi tous nos modèles de sacs (cf ici), certains d'entre eux ont 2 anses. Bon crochet!
11.06.2024 - 07:47
|
||||||||||||||||
Tortilla Bag#tortillabag |
||||||||||||||||
 |
 |
|||||||||||||||
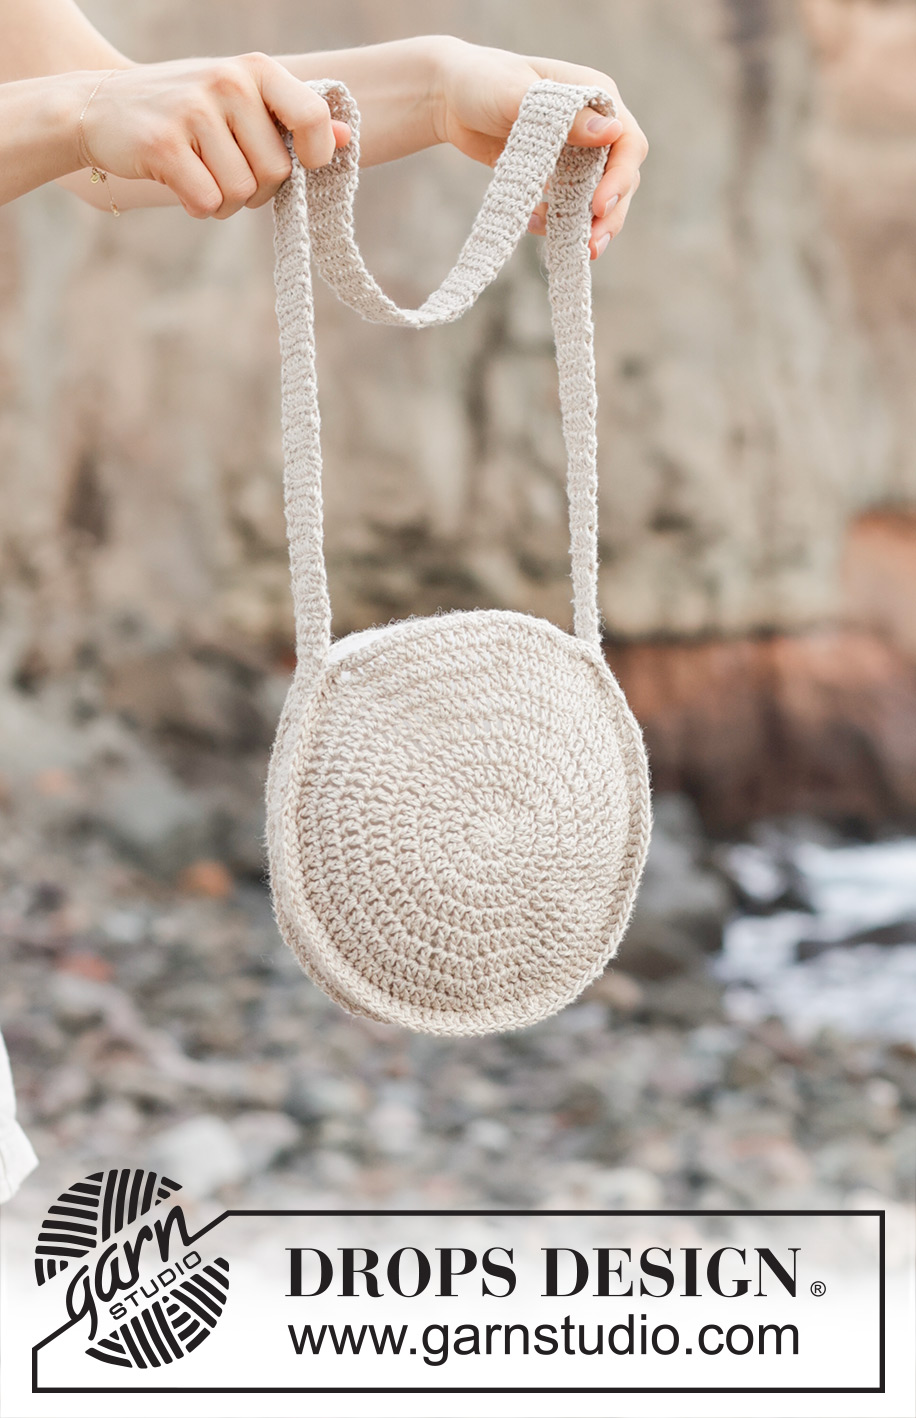
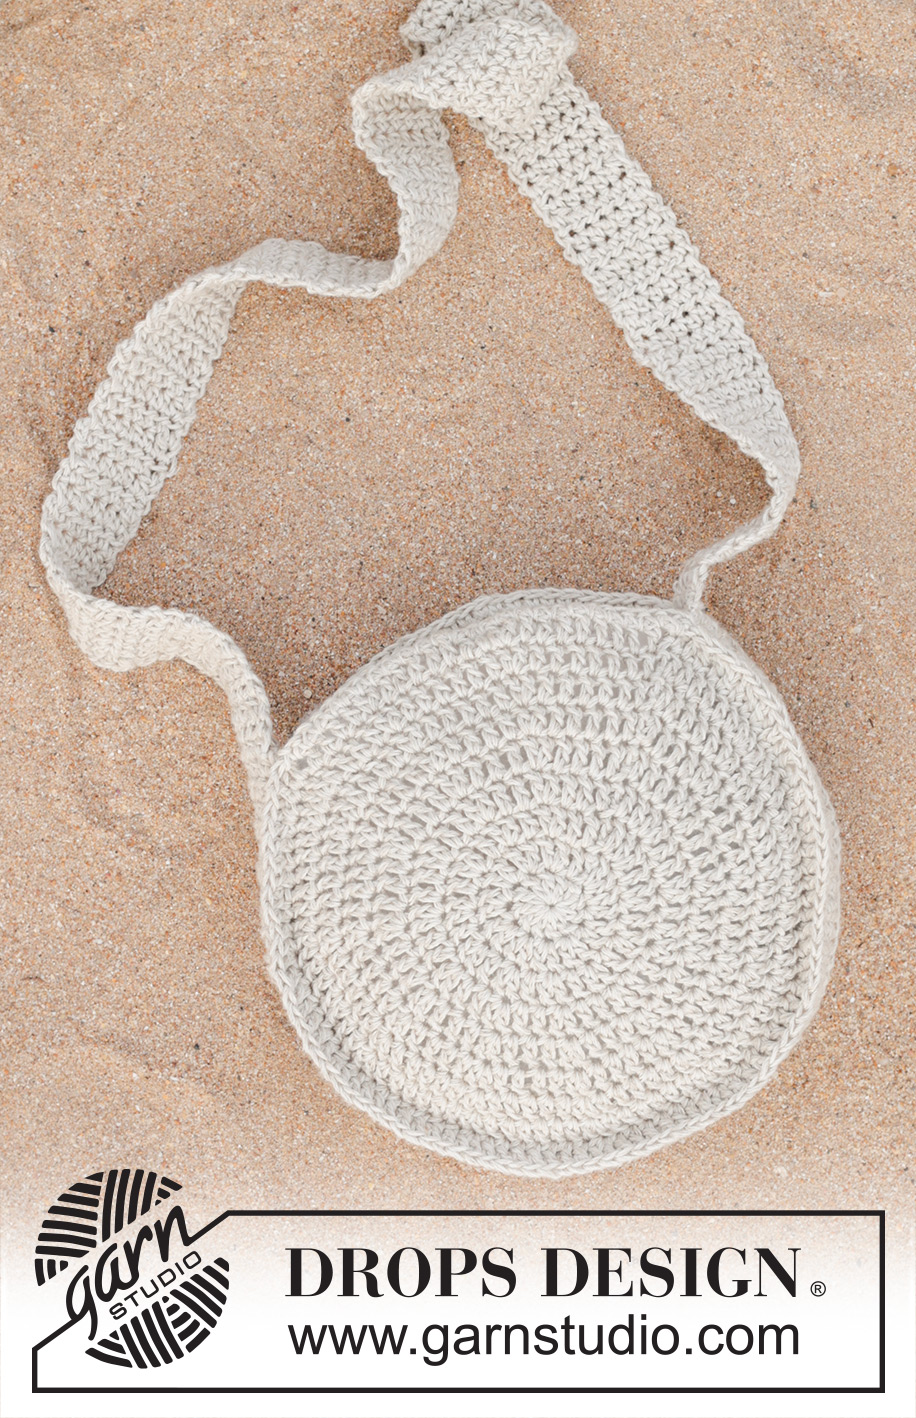
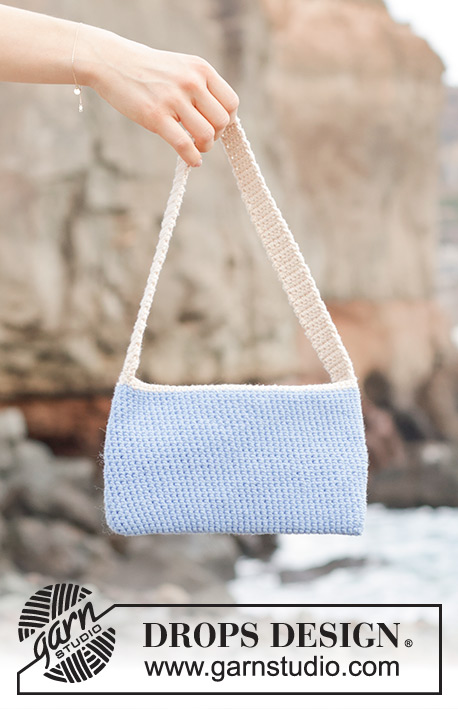
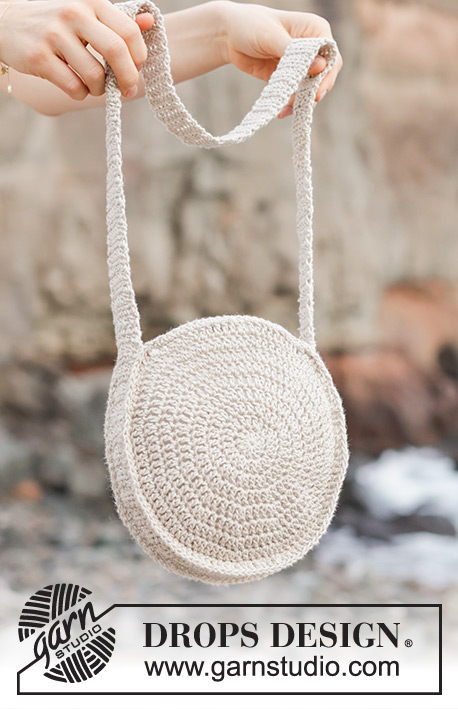
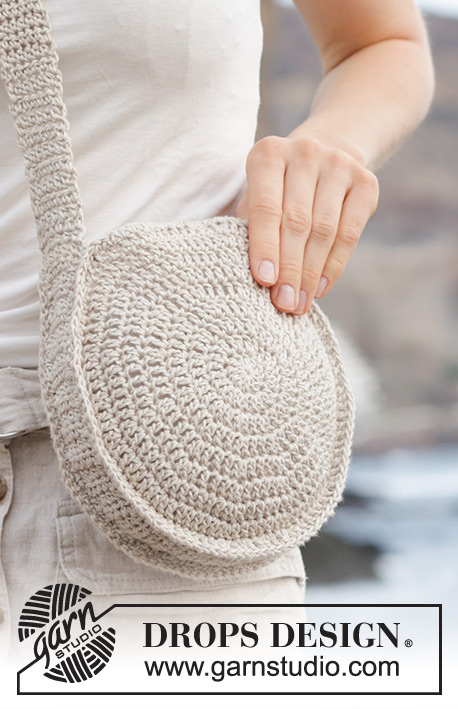
Crocheted round bag in DROPS Bomull-Lin.
DROPS 247-5 |
||||||||||||||||
|
------------------------------------------------------- EXPLANATIONS FOR THE PATTERN: ------------------------------------------------------- PATTERN: See diagrams A.1 and A.2. CROCHET INFORMATION: At the beginning of each round/row of double crochets work 3 chain stitches, which do not replace the first double crochet but are in addition. When working in the round, finish with 1 slip stitch in the third chain stitch at the beginning of the round. See diagram A.2. ------------------------------------------------------- START THE PIECE HERE: ------------------------------------------------------- BAG – SHORT OVERVIEW OF THE PIECE: 2 circles are worked in the round, from the middle outwards, then bands are worked for the strap and sides. The pieces are sewn together. CIRCLE: Work 4 chain stitches with hook size 4.5 MM = US 7 and DROPS Bomull-Lin. Form them into a ring with 1 slip stitch in the first chain stitch. Work in the round according to diagram A.1, working A.1 12 times on the round - diagram A.2 shows how the rounds begin and end and is worked in addition to A.1. REMEMBER THE CROCHET GAUGE! When the diagram is finished, the piece measures approx. 20 cm = 8" in diameter. Work 1 single crochet in each of the first 27 double crochets on the round. Cut and fasten the strand. Work 1 more circle in the same way. BAND: Work 15 chain stitches, turn and work 1 double crochet in the 4th chain stitch from the hook, then 1 double crochet in each chain stitch = 12 double crochets. Work back and forth like this for 47 cm = 18½" – read CROCHET INFORMATION above. Fold the band double, length-wise, and crochet together the short sides, with 1 double crochet in each double crochet, through both layers = 6 double crochets. Work 6 double crochets back and forth until the band measures a total of 140 cm = 55". ASSEMBLY: Fold the cast-on edge double so the whole band is 6 stitches wide and sew the edge down through both layers. The double band is now fastened to the edge of the circle – the single crochets on the circle mark the opening of the bag. Sew together as follows: Start where the single crochets end, sew one long-side of the double band to the double crochets outermost on the circle (there will be a small edge), continue sewing along the edge to the beginning of the single crochets – the double band stops here too. Sew the other side of the double band to the other circle in the same way. The other part of the band (which isn’t double) is the bag’s strap. |
||||||||||||||||
Diagram explanations |
||||||||||||||||
|
||||||||||||||||
 |
||||||||||||||||
Have you finished this pattern?Tag your pictures with #dropspattern #tortillabag or submit them to the #dropsfan gallery. Do you need help with this pattern?You'll find 10 tutorial videos, a Comments/Questions area and more by visiting the pattern on garnstudio.com. © 1982-2026 DROPS Design A/S. We reserve all rights. This document, including all its sub-sections, has copyrights. Read more about what you can do with our patterns at the bottom of each pattern on our site. |
||||||||||||||||


With over 40 years in knitting and crochet design, DROPS Design offers one of the most extensive collections of free patterns on the internet - translated to 17 languages. As of today we count 324 catalogs and 12291 patterns - 12281 of which are translated into English (US/in).
We work hard to bring you the best knitting and crochet have to offer, inspiration and advice as well as great quality yarns at incredible prices! Would you like to use our patterns for other than personal use? You can read what you are allowed to do in the Copyright text at the bottom of all our patterns. Happy crafting!
Post a comment to pattern DROPS 247-5
We would love to hear what you have to say about this pattern!
If you want to leave a question, please make sure you select the correct category in the form below, to speed up the answering process. Required fields are marked *.