
Popular categories
Looking for a yarn?


Comments / Questions (178)
![]() Heidi wrote:
Heidi wrote:
Hei, jeg er nybegynner og lurer på vanskelighetsgraden på denne vesten? Hadde forøvrig vært veldig fint om dere skrev ca vanskelighetsgrad i alle oppskriftene ;)
10.02.2021 - 12:04DROPS Design answered:
Hej Hedi. Denna är ikke vanskelig att strikke. Du har också flera videoer och leksjoner till hjälp om du skulle få problem. Mvh DROPS Design
11.02.2021 - 09:39
![]() Ulla Thorell wrote:
Ulla Thorell wrote:
Är det verkligen möjligt att använda rundsticka 60 cm 4,5 till 156 maskor Drops Air mix det står så i beskrivningen men är alldeles för många maskor för den längden på sticka tycker jag.
07.02.2021 - 19:51DROPS Design answered:
Hei Ulla. Om du syns det blir for mange masker på 60 cm, kan du bruke 80 cm. I oppskriften står det 60 cm eller 80 cm. mvh DROPS design
08.02.2021 - 14:21
![]() Moa Kockum wrote:
Moa Kockum wrote:
Hej! Jag vill sticka denna väst i Cotton Merino istället, men det garnet anges inte som alternativ när jag använder konverteraren. Borde jag ta en annan sort eller kan det bli bra ändå? Hur ska jag tänka?
07.02.2021 - 09:24DROPS Design answered:
Hej Moa. Till detta mönster kan du använda ett garn ur garngrupp C (eller A+A). Cotton Merino tillhör garngrupp B och därför kommer stickfastheten inte att passa till detta mönster och därmed inte måtten på plagget. Vill du använda DROPS Cotton Merino så bör du göra ett mönster som är gjort i garngrupp B, som t.ex. detta mönster. Använd konverteraren för att se hur mycket garn som går åt och tänk på att du måste få samma stickfasthet som uppges i mönstret. Mvh DROPS Design
08.02.2021 - 08:01
![]() Malene Philipsen wrote:
Malene Philipsen wrote:
Jeg kan ikke få antallet af masker til at pase når jeg skal strikke forstykke. Jeg har 108 m (str. xxxl) og skal lukke 2 m af 1 gang og 1 m af 12 gange. Det giver 14 m i alt, men I skriver, jeg skal have 80 m tilbage, dvs. 28 m der skal lukkes af? Har jeg lavet en fejl eller forstår jeg ikke opskriften?
02.02.2021 - 12:28DROPS Design answered:
Hei Marlene. Du skal felle av på hver pinne, altså i hver side. 2 masker 1 gang i hver side = 4 felte masker, deretter 1 maske i hver side 12 ganger = 24 felt masker. 4 + 24 felte masker = 28 masker. 108 masker - 28 felte masker = 80 masker. mvh DROPS design
08.02.2021 - 14:52
![]() Helle Pedersen wrote:
Helle Pedersen wrote:
Jeg skal strikke vesten i Kid-Silk. Skal jeg bruge pinde 4,5 og 5 som i denne opskrift eller pind 3,5 som, der står på garnet? Jeg vil jo gerne kunne følge opskriften.
01.02.2021 - 17:51DROPS Design answered:
Hej Helle. Om du ska bruke Kid-Silk till denna oppskrift må du bruke dubbel tråd för att få riktig strikkefasthed, så då må du nog bruke pinde 5 (eller den pinde som ger 17 masker i bredden og 22 pinde i højden med glatstrik). Mvh DROPS Design
02.02.2021 - 10:33
![]() Elisabeth Rahbek wrote:
Elisabeth Rahbek wrote:
Købte et kit / opskrift på norsk. Der er en grov fejl i starten. Man skal tage 8 masker ud, disse lægges til 156 til 164 masker. Jeg tror jo på tallet. I den danske opskrift skal de tages ind 156 til 148. Så passer det med indtag til ærmegab. Nu sidder jeg med 16 masker for meget ved ærmegab og en stor krop. Har endda betalt for den norske opskrift 🤣 skal jeg trævle det hele op, ødelægges garnet så ikke ? Hilsen Elisabeth Rahbek
25.01.2021 - 18:06DROPS Design answered:
Hei Elisabeth. Håper ikke du har kjøpt mønster fra oss, ALLE våre mønster er gratis og kan ses/lastes ned fra nettet. På begge oppskriftene (Norsk + Dansk) står det samme. Legg opp 156-172-184-200-220-240 masker, etter vrangborden FELLES det 8 masker jevnt fordelt = 148-164-176-192-212-232 masker. Hvilken utskrift har du det det står "tage 8 masker ud"? mvh DROPS design
27.01.2021 - 12:57
![]() Anette Iversen wrote:
Anette Iversen wrote:
Kan man stikke vesten i drops melodi bare med flere tråde. Hvis ja hvor mange tråde så ?
22.01.2021 - 21:11DROPS Design answered:
Hej Anette, Her har du veste som kan strikkes i DROPS Melody: Veste - DROPS Melody
27.01.2021 - 15:16
![]() Naja Caben wrote:
Naja Caben wrote:
Hej. Jeg er i tvivl om hvad jeg gør med “den anden del” når jeg strikker forstykket. Flyttes bagstykket ovre på andre pinde, eller hvordan gør man. Og hvad gør jeg så med tråd når jeg skal i gang med bagstykket? For tråden bruges vel til at strikke forstykket etc? Håber i kan svare mig på dette Naja😊
19.01.2021 - 19:50DROPS Design answered:
Hei Naja. Maskene til bakstykket kan enten bare være på rundpinnen ettersom du nå skal strikke forstykket frem og tilbake. Men om du ønsker kan du sette bakstykke maskene på en tråd eller en maskesamler. Når du er ferdig med forstykket, høyre skulderforstykke og venstre skulderforstykket skal du klippe tråden og da begynner du på bakstykket med denne tråden eller en ny tråd fra et nytt nøste (om du har igjen). mvh DROPS design
27.01.2021 - 13:06
![]() Dominique wrote:
Dominique wrote:
Hello, I am learning how to knit and have made this vest. I am having trouble with consistency of stitches when going from the circular knitting to the back and forth starting at the arm holes. When the piece is done, there is a visible line (difference) between the section I knitted in the round and the section I knitted back and froth. Is it a problem with tension? I am using knit on rs and purl on ws for the back and forth. Thanks for the help!
18.01.2021 - 12:45DROPS Design answered:
Dear Dominique,that might be a problem of tension, you might have worked either looser/tighter before/after dividing piece. Check your tension and change needle size if required. Happy knitting!
18.01.2021 - 15:23
![]() Sussie wrote:
Sussie wrote:
Jag skulle vilja sticka den i storlek XS. Finns det nån möjlighet att få de siffrorna i t ex hur många maskor man ska starta med?
11.01.2021 - 22:58DROPS Design answered:
Hei Sussie. Vi har dessverre ikke muligheten til å regne ut til en ny størrelse. Men om du ser på den oppgitte strikkefastheten på hvor mange masker du får på 10 cm, så kan du prøve å regne ut hvor mange masker du trenger for å få de cm du trenger til din størrelsen. mvh DROPS design
18.01.2021 - 13:54
|
|
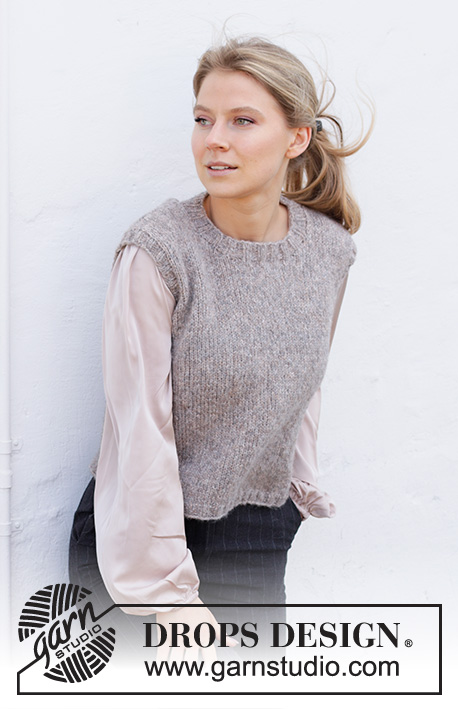
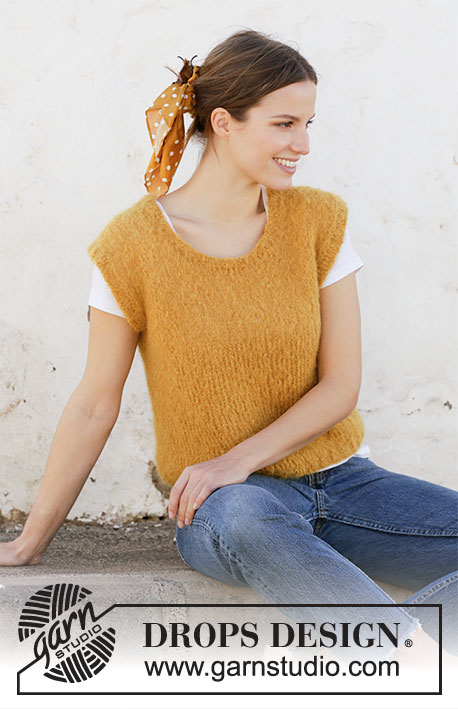
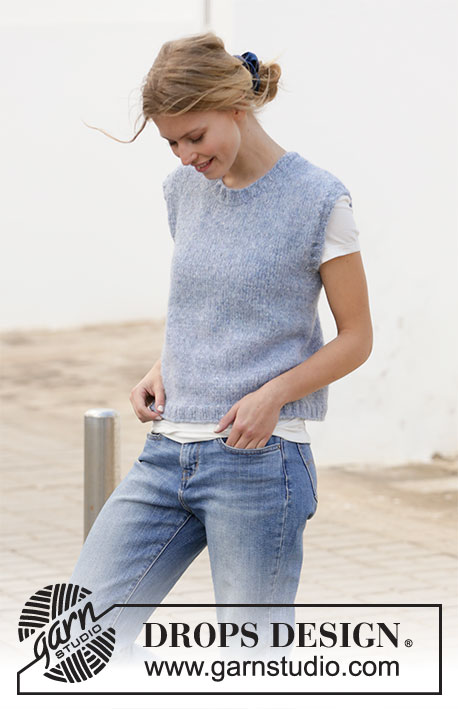
College Days#collegedaysvest |
|
 |
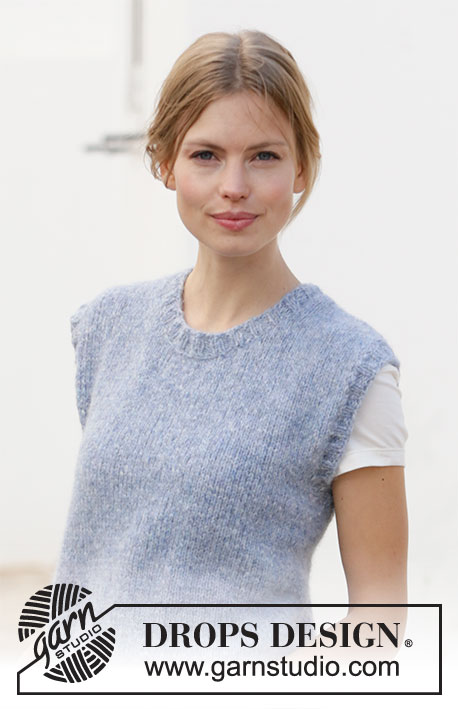 |
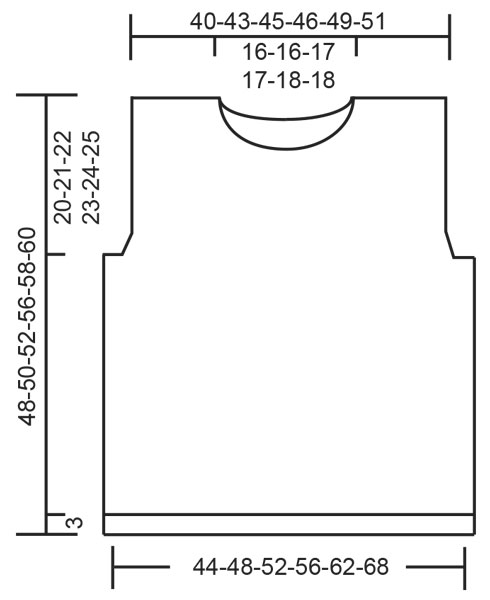
Knitted vest / slipover with round neck in DROPS Air. Sizes S – XXXL.
DROPS 210-28 |
|
|
------------------------------------------------------- EXPLANATIONS FOR THE PATTERN: ------------------------------------------------------- DECREASE TIP-1 (evenly spaced): To work out how to decrease evenly, count the total number of stitches on needle (e.g. 156 stitches) and divide by number of decreases to be made (e.g. 8) = 19.5. In this example decrease by knitting alternatively each 18th and 19th stitch and each 19th and 20th stitch together. ------------------------------------------------------- START THE PIECE HERE: ------------------------------------------------------- VEST – SHORT OVERVIEW OF THE PIECE: The piece is worked in the round with circular needle, bottom up as far as the armholes. Front and back pieces are finished separately back and forth. Neck and sleeve edges are worked in the round with circular needle to finish. BODY: Cast on 156-172-184-200-220-240 stitches with circular needle size 4.5 mm and Air. Knit 1 round, then work rib (knit 2, purl 2) for 3 cm. Change to circular needle size 5 mm. Work stocking stitch, decreasing 8 stitches evenly spaced on the first round = 148-164-176-192-212-232 stitches – read DECREASE TIP above. Insert 1 marker at the beginning of the round and 1 marker after the next 74-82-88-96-106-116 stitches. Allow the markers to follow your work onwards; they will be used when casting off for the armholes. Work stocking stitch until the piece measures 28-29-30-33-34-35 cm from the cast-on edge. REMEMBER THE KNITTING TENSION! On the next round cast off for the armholes, starting 3-3-3-4-4-4 stitches before the first marker; cast off 6-6-6-8-8-8 stitches (the marker sits in the middle of these stitches), work as before until there are 3-3-3-4-4-4 stitches left before the next marker, cast off the next 6-6-6-8-8-8 stitches (the marker sits in the middle of these stitches) and work to end of round. Front and back pieces are finished separately, back and forth on the needle. FRONT PIECE: = 68-76-82-88-98-108 stitches. Work stocking stitch and cast off for the armholes on each side at the beginning of each row as follows: Cast off 2 stitches 1 time and 1 stitch 1-3-4-6-9-12 times = 62-66-70-72-76-80 stitches. Continue working until the piece measures 38-40-40-44-44-46 cm (there is approx. 10-10-12-12-14-14 cm left to finished length). On the next row from the right side cast off for the neck as follows: Work the first 25-27-28-29-30-32 stitches, cast off the next 12-12-14-14-16-16 stitches and work the last 25-27-28-29-30-32 stitches. The shoulders are finished separately; do not cut the strand – continue with the right shoulder, from the wrong side. RIGHT SHOULDER ON FRONT PIECE: = 25-27-28-29-30-32 stitches. Work stocking stitch, starting from the wrong side, and cast off stitches for the neck at the beginning of each row from the right side as follows: Cast off 2 stitches 2 times and 1 stitch 4 times = 17-19-20-21-22-24 stitches. Continue working until the piece measures 48-50-52-56-58-60 cm from the cast-on edge. Cast off and cut the strand. LEFT SHOULDER ON FRONT PIECE: = 25-27-28-29-30-32 stitches. Work stocking stitch, starting from the right side and cast off stitches for the neck at the beginning of each row from the wrong side as follows: Cast off 2 stitches 2 times and 1 stitch 4 times = 17-19-20-21-22-24 stitches. Continue working until the piece measures 48-50-52-56-58-60 cm from the cast-on edge (match to the right shoulder). Cast off and cut the strand. BACK PIECE: = 68-76-82-88-98-108 stitches. Work stocking stitch and cast off stitches for the armholes on each side at the beginning of each row as follows: Cast off 2 stitches 1 time and 1 stitch 1-3-4-6-9-12 times = 62-66-70-72-76-80 stitches. Continue working until the piece measures 44-46-48-52-54-56 cm (there is approx. 4 cm left to finished length). On the next row from the right side, cast off for the neck as follows: Work the first 18-20-21-22-23-25 stitches, cast off the next 26-26-28-28-30-30 stitches and work the last 18-20-21-22-23-25 stitches. The shoulders are finished separately; do not cut the strand – continue with the left shoulder from the wrong side. LEFT SHOULDER ON BACK PIECE: = 18-20-21-22-23-25 stitches. Work stocking stitch, starting from the wrong side and cast off 1 stitch at the beginning of the next row from the right side = 17-19-20-21-22-24 stitches. Continue working until the piece measures 48-50-52-56-58-60 cm from the cast-on edge; match the front piece. Cast off and cut the strand. RIGHT SHOULDER ON BACK PIECE: = 18-20-21-22-23-25 stitches. Work stocking stitch, starting from the right side and cast off 1 stitch at the beginning of the next row from the wrong side = 17-19-20-21-22-24 stitches. Continue working until the piece measures 48-50-52-56-58-60 cm from the cast-on edge; match to the front piece. Cast off and cut the strand. ASSEMBLY: Sew the shoulder seams with grafting stitches. NECK: Start from the right side at one of the shoulder seams. Using circular needle size 4.5 mm knit up approx. 76 to 92 stitches inside the 1 stitch around the whole neck-line (number must be divisible by 4). Work rib (knit 2, purl 2) in the round for 2 cm. Cast off with knit over knit and purl over purl. EDGE AROUND ARMHOLES: Start from the right side where the piece was divided for the armhole. Using circular needle size 4.5 mm knit up approx. 84 to 124 stitches around the armhole (number must be divisible by 4). Work rib (knit 2, purl 2) in the round for 2 cm. Cast off with knit over knit and purl over purl. Work an edge around the other armhole in the same way. |
|
|
|
Have you finished this pattern?Tag your pictures with #dropspattern #collegedaysvest or submit them to the #dropsfan gallery. Do you need help with this pattern?You'll find 22 tutorial videos, a Comments/Questions area and more by visiting the pattern on garnstudio.com. © 1982-2025 DROPS Design A/S. We reserve all rights. This document, including all its sub-sections, has copyrights. Read more about what you can do with our patterns at the bottom of each pattern on our site. |
|


With over 40 years in knitting and crochet design, DROPS Design offers one of the most extensive collections of free patterns on the internet - translated to 17 languages. As of today we count 314 catalogues and 11820 patterns translated into English (UK/cm). 11820
We work hard to bring you the best knitting and crochet have to offer, inspiration and advice as well as great quality yarns at incredible prices! Would you like to use our patterns for other than personal use? You can read what you are allowed to do in the Copyright text at the bottom of all our patterns. Happy crafting!
Post a comment to pattern DROPS 210-28
We would love to hear what you have to say about this pattern!
If you want to leave a question, please make sure you select the correct category in the form below, to speed up the answering process. Required fields are marked *.