
Popular categories
Looking for a yarn?


Comments / Questions (5)
![]() Zoriana wrote:
Zoriana wrote:
Ja też wole modele z podwyższeniem ,wygodniej, sweter nie zsuwa się do tyłu .Była by bardzo pomocna taka opcja
16.03.2026 - 09:37DROPS Design answered:
Witaj Zoriano, takie głosy powtarzają się systematycznie, już zostało to zgłoszone do działu projektów :) Pozdrawiamy!
16.03.2026 - 16:34
![]() JoAna wrote:
JoAna wrote:
Wasze wzory sa super! Robie z nich coraz wiecej. Czy mozecie dodac "podwyższenie" jako opcja wyboru? Tak samo jak "kobieta/góra-dol/okragly karczek"- to bardzo pomocne.
13.03.2026 - 09:52DROPS Design answered:
Witaj JoAno, Twoje prośby pokrywają się z prośbami innych klientek. Zostały już zgłoszone do działu projektów. Pozdrawiamy!
16.03.2026 - 16:59
![]() Mraz Marie-Jo wrote:
Mraz Marie-Jo wrote:
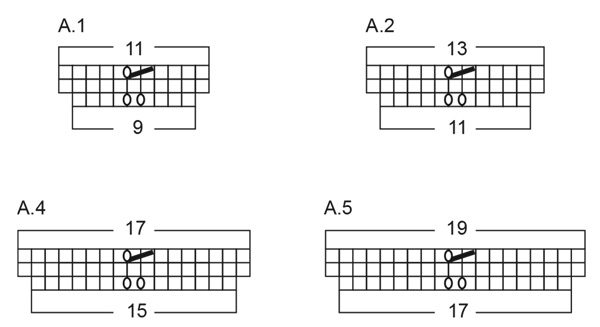
Je ne comprends pas le diagramme . Par exemple pour A1 : est ce que je tricote 5 mailles endroit, 1 jeté, 2 mailles endroit ensemble, 4 mailles endroit au premier rang, puis 2ème rang tout à l'endroit et 3ème rang 4 mailles endroit, 1 jeté, 1 jeté, 3 mailles endroit . Est ce bien cela ? Merci
12.03.2026 - 11:38DROPS Design answered:
Bonjour Mme Mraz, entre les 2 jetés vous n'avez qu'une seule maille à chaque fois, autrement dit vous tricotez A.1 ainsi: (4 m end, 1 jeté, 1 m end, 1 jeté, 4 m end) et répétez de (à) = vous tricotez chaque A.1 sur 9 mailles et vous obtenez 11 mailles après ce 1er tour. Au 3ème tour, tricotez: (4 m end, 2 m ens à l'end, 1 jeté, 5 m end) et répétez de (à). Bon tricot!
12.03.2026 - 15:49
![]() NellyBoonstra wrote:
NellyBoonstra wrote:
Ynskjer papir mønster
05.03.2026 - 16:49
![]() Maria wrote:
Maria wrote:
Buongiorno. Nella spiegazione del motivo c'è scritto: "1 gettato tra 2 maglie che viene lavorato a rovescio nel giro successivo per creare un buco". Credo che ci sia un errore. Nel giro successivo deve essere lavorato a diritto per creare un buco. È così? Grazie. Maria
01.03.2026 - 13:08DROPS Design answered:
Buonasera Maria, grazie per la segnalazione, abbiamo corretto il testo. Buon lavoro!
01.03.2026 - 20:55
|
||||||||||
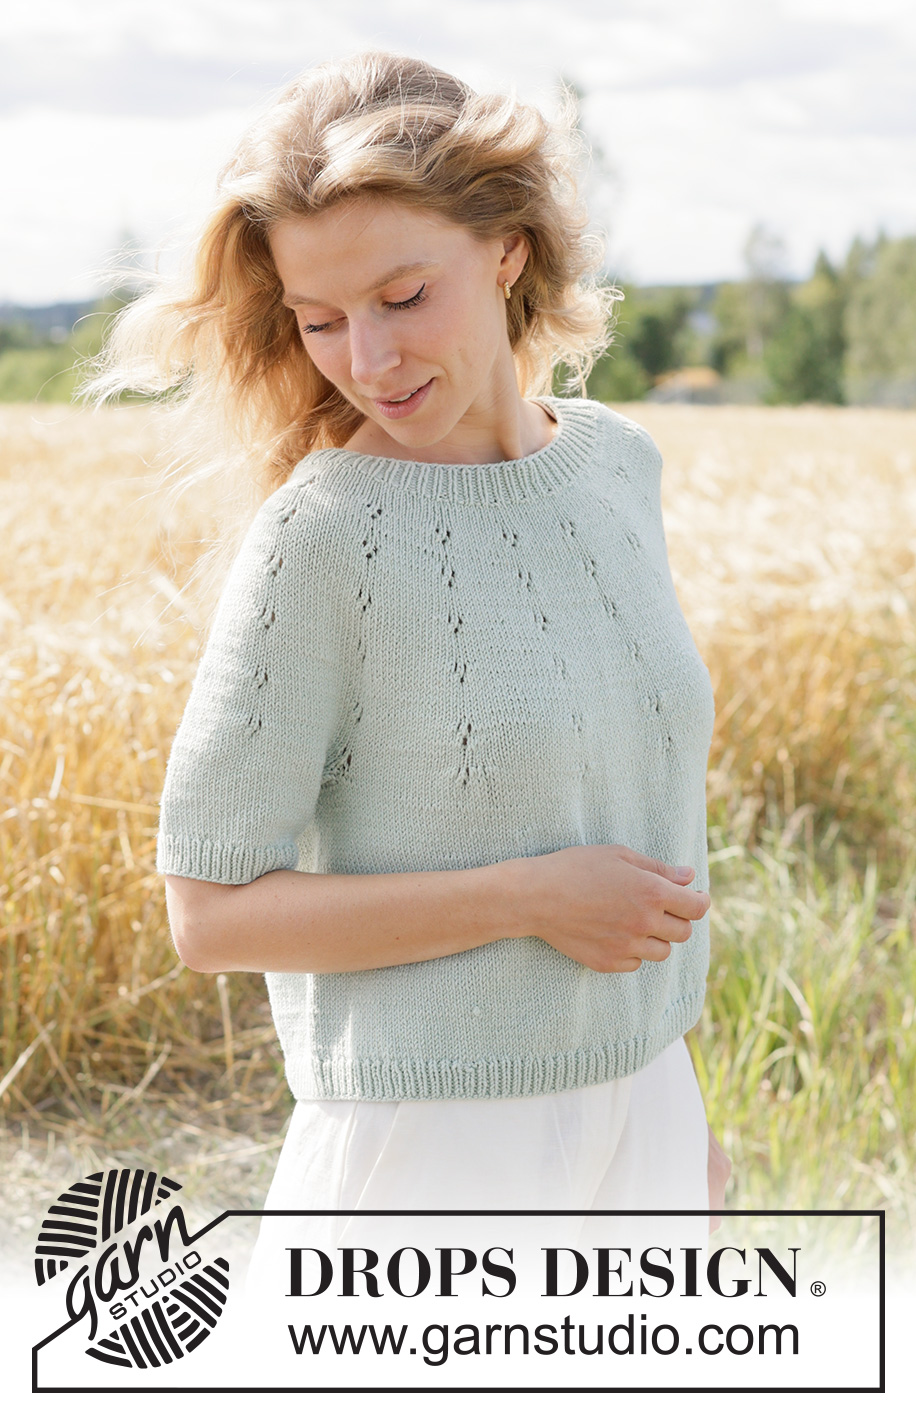
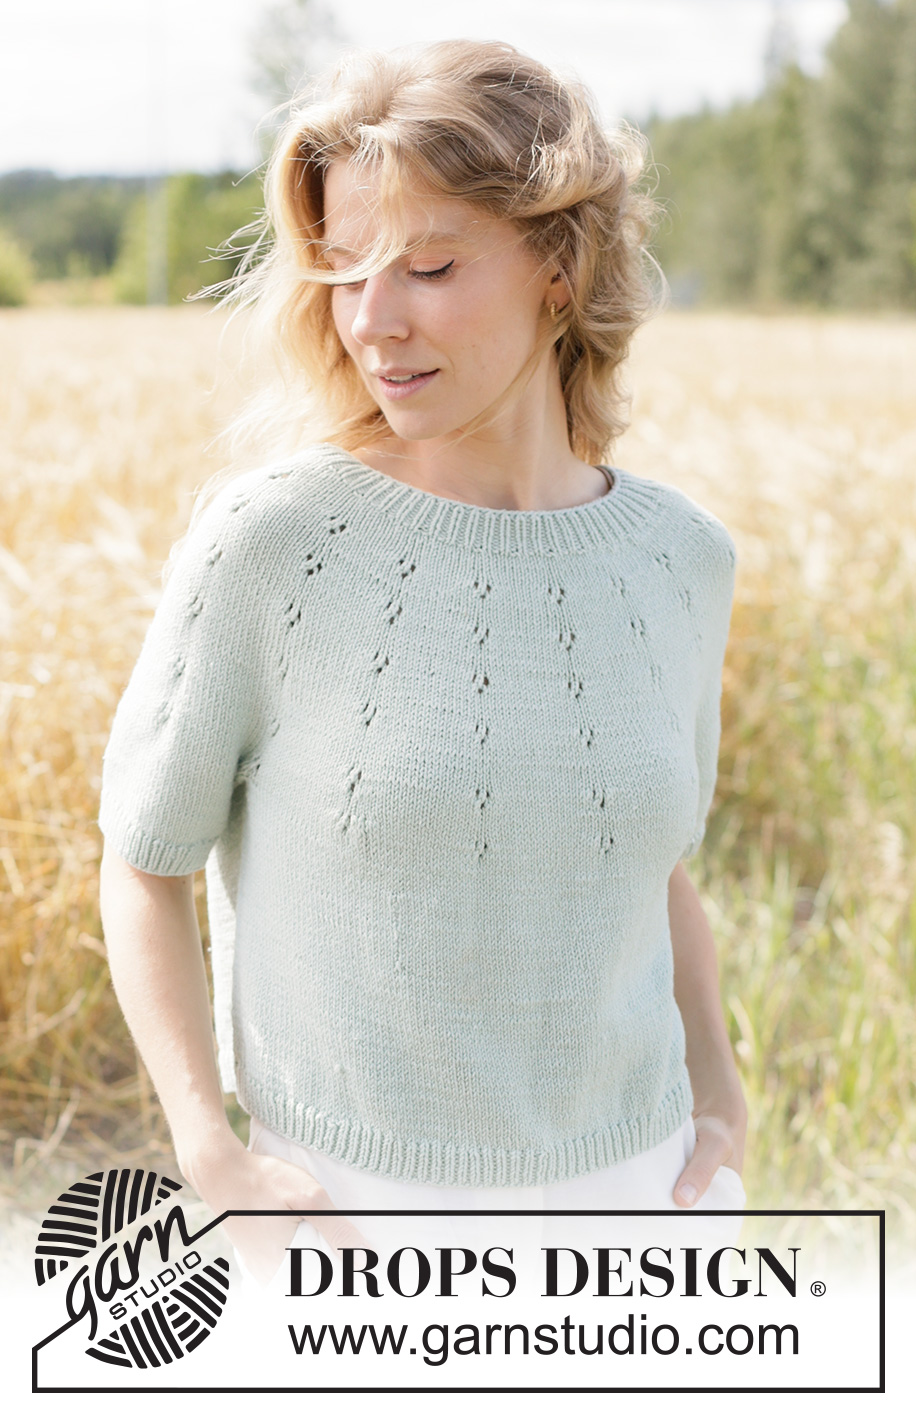
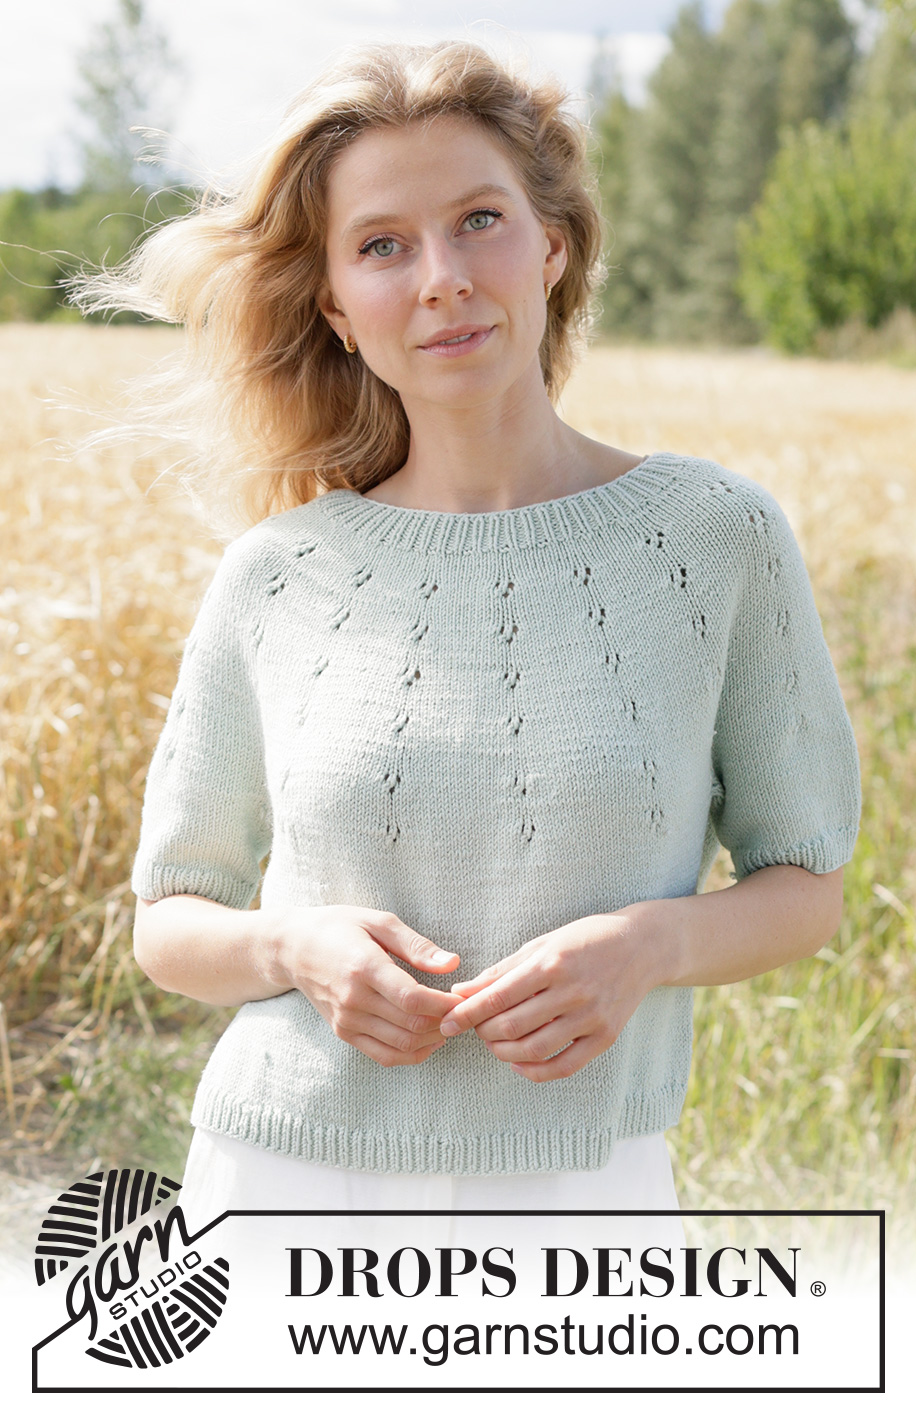
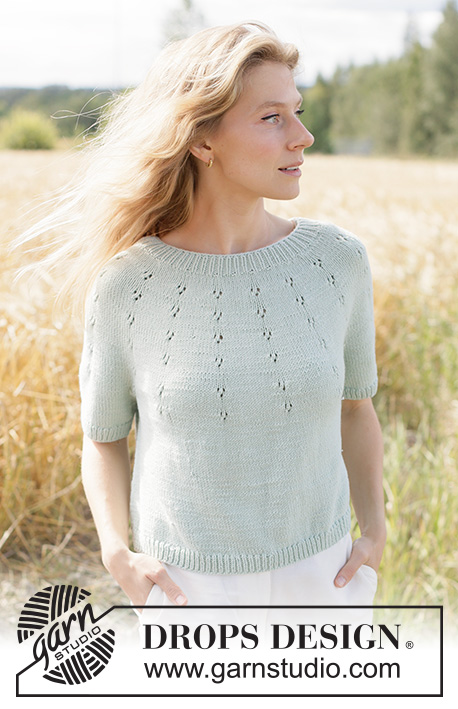
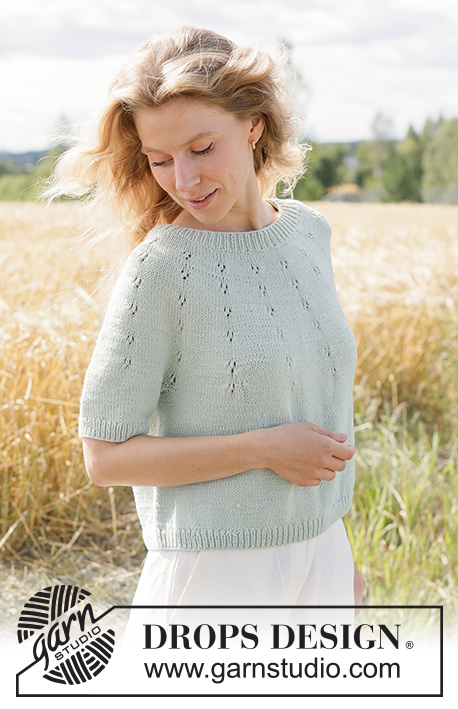
Mint Halo Sweater#minthalosweater |
||||||||||
 |
 |
|||||||||
Knitted jumper in DROPS Cotton Merino or DROPS Belle. The piece is worked top down with round yoke, lace pattern on the yoke and short sleeves. Sizes XS - XXXL.
DROPS 266-33 |
||||||||||
|
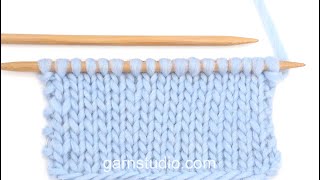
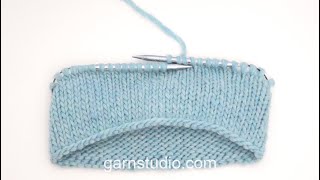
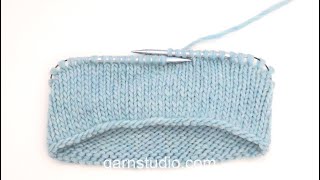
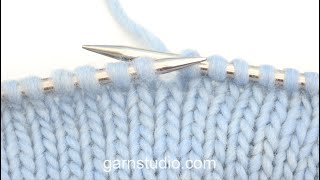
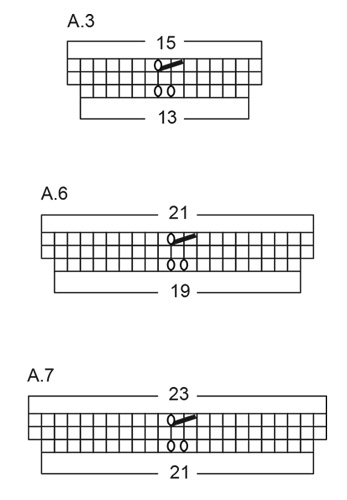
------------------------------------------------------- EXPLANATIONS FOR THE PATTERN: ------------------------------------------------------- INCREASE TIP: Increase 1 stitch by making 1 yarn over. On the next round, knit the yarn over twisted to avoid a hole. Then work the new stitch in stocking stitch. ELEVATION: To make the back of the neck slightly higher when working a round yoke, you can work an elevation at the beginning of the yoke as described here. Skip this section if you do not want an elevation. Insert 1 marker at the beginning of the round (mid-back). Read KNITTING TIP and work the next 6 rows back and forth as follows: ROW 1 (right side): Knit to 12-13-14-15-16-17-18 stitches past the marker-thread at the beginning of the round, turn. ROW 2 (wrong side): Purl 24-26-28-30-32-34-36, turn. ROW 3 (right side): Knit 36-39-42-45-48-51-54, turn. ROW 4 (wrong side): Purl 48-52-56-60-64-68-72, turn. ROW 5 (right side): Knit 60-65-70-75-80-85-90, turn. ROW 6 (wrong side): Purl 72-78-84-90-96-102-108, turn. Knit back to the marker-thread mid-back. Continue the yoke as described in the text. KNITTING TIP: When working short rows, there will be a small hole after each turn. This hole can be closed by tightening the strand or using the technique German Short Rows as follows: Slip the first stitch purl-wise, take the strand over the right needle and tighten well from the back (2 loops on the needle). These loops are worked together on the next row. PATTERN: See diagrams A.1 to A.7 (diagram A.7 only applies to sizes XXL and XXXL). SLEEVE TIP: When knitting up stitches under the sleeve, you can get a small hole in the transition between stitches on the body and sleeve. This hole can be closed by picking up the strand between 2 stitches and working this strand twisted together with the first stitch between body and sleeve. DECREASE TIP: Decrease 1 stitch on each side of the marker-thread as follows: Work until there are 3 stitches left before the marker-thread, knit 2 together, knit 2 (marker-thread sits between these 2 stitches), slip 1 stitch knit-wise, knit 1 and pass the slipped stitch over the knitted stitch (2 stitches decreased). ------------------------------------------------------- START THE PIECE HERE: ------------------------------------------------------- JUMPER – SHORT OVERVIEW OF THE PIECE: The pattern uses both long and short needles; start with the length which fits the number of stitches and change when necessary. The neck and yoke are worked in the round with circular needle, top down and from mid-back. If you would like an elevation, rows are worked back and forth before finishing the yoke in the round. When the yoke is finished, it is divided for the body and sleeves and the body continued in the round, while the sleeves wait. The sleeves are worked top down, in the round. If there is a «0» in your chosen size, skip the information and go straight to the next instruction. NECK: Cast on 104-108-112-116-120-126-130 stitches with circular needle size 3 mm and DROPS Cotton Merino or DROPS Belle – you can use the Italian cast-on method if you wish. Work rib in the round (knit 1, purl 1) for 3-3-3-3½-3½-4-4 cm. The round begins mid-back. Insert 1 marker in the middle of the round (mid-front), the piece is now measured from here. YOKE: Change to circular needle size 4 mm. Knit 1 round and increase 13-18-23-28-33-36-41 stitches evenly spaced – read INCREASE TIP = 117-126-135-144-153-162-171 stitches. You can now work an ELEVATION at the back – read explanation above. If you do not want an elevation, continue as follows. Work stocking stitch. Remember to maintain the knitting tension. When the yoke measures 2-2-2-2-3-3-3 cm from the marker, increase stitches by working PATTERN – read explanation above, as follows: A.1: Work A.1, 13-14-15-16-17-18-19 times on the round = 143-154-165-176-187-198-209 stitches. Work until A.1 is completed in height. Work stocking stitch until the yoke measures 5-5-5-5-6-6-6 cm from the marker. A.2: Work A.2, 13-14-15-16-17-18-19 times on the round = 169-182-195-208-221-234-247 stitches. Work until A.2 is completed in height. Work stocking stitch until the yoke measures 8-8-8-8-9-9-9 cm from the marker. A.3: Work A.3, 13-14-15-16-17-18-19 times on the round = 195-210-225-240-255-270-285 stitches. Work until A.3 is completed in height. Work stocking stitch until the yoke measures 11-11-11-11-12-12-12 cm from the marker. A.4: Work A.4, 13-14-15-16-17-18-19 times on the round = 221-238-255-272-289-306-323 stitches. Work until A.4 is completed in height. Work stocking stitch until the yoke measures 14-14-14-14-15-15-15 cm from the marker. A.5: Work A.5, 13-14-15-16-17-18-19 times on the round = 247-266-285-304-323-342-361 stitches. Work until A.5 is completed in height. Work stocking stitch until the yoke measures 17-17-17-17-18-18-18 cm from the marker. A.6: Work A.6, 13-14-15-16-17-18-19 times on the round = 273-294-315-336-357-378-399 stitches. Work until A.6 is completed in height. The pattern with increases is finished in sizes XS, S, M, L and XL – go to ALL SIZES. In sizes XXL and XXXL knit until the yoke measures 0-0-0-0-0-21-21 cm from the marker, then work A.7. A.7: Work A.7, 0-0-0-0-0-18-19 times on the round = 273-294-315-336-357-414-437 stitches. Work until A.7 is completed in height. Go to ALL SIZES. ALL SIZES: When the diagrams are finished, continue with stocking stitch. AT THE SAME TIME, on the first round increase 7-10-9-20-27-2-7 stitches evenly spaced = 280-304-324-356-384-416-444 stitches. Work until the yoke measures 20-20-21-22-23-25-27 cm from the marker. Now divide for the body and sleeves. DIVIDE FOR BODY AND SLEEVES: Knit 42-46-50-54-58-64-70 (= half the back piece), place the next 56-60-62-70-76-80-82 stitches on a stitch holder for the sleeves, cast on 8-8-10-10-12-12-14 stitches (mid-under the sleeve), knit 84-92-100-108-116-128-140 (= front piece), place the next 56-60-62-70-76-80-82 stitches on a stitch holder for the sleeves, cast on 8-8-10-10-12-12-14 stitches (mid-under the sleeve), knit the last 42-46-50-54-58-64-70 stitches (= half the back piece). The body and sleeves are finished separately. BODY: = 184-200-220-236-256-280-308 stitches. Continue with stocking stitch until the piece measures 38-40-42-43-44-46-48 cm from the marker mid-front. Change to circular needle size 3 mm. Work rib (knit 1, purl 1), AT THE SAME TIME increase 28-32-30-34-38-42-44 stitches evenly on the first round = 212-232-250-270-294-322-352 stitches. When the rib measures 3-3-3-3-4-4-4 cm, cast off slightly loosely with rib or with Italian cast-off. The jumper measures approx. 41-43-45-46-48-50-52 cm from the marker mid-front and 46-48-50-52-54-56-58 cm from the shoulder. SLEEVES: Place the 56-60-62-70-76-80-82 sleeve-stitches from one stitch holder onto circular needle size 4 mm and knit up 1 stitch in each of the 8-8-10-10-12-12-14 stitches cast on under the sleeve – read SLEEVE TIP = 64-68-72-80-88-92-96 stitches. Insert a marker-thread in the middle of the 8-8-10-10-12-12-14 stitches under the sleeve. The round starts by the marker-thread. Work stocking stitch in the round. AT THE SAME TIME, when the sleeve measures 2 cm from the division, decrease mid-under the sleeve – read DECREASE TIP as follows: Decrease 2 stitches every 2 cm 3-3-3-2-2-1-0 a total of 2 times = 58-62-66-76-84-90-96 stitches. Continue working until the sleeve measures 12-13-12-13-11-10-8 cm from the division. Change to double pointed needles size 3 mm. Work rib (knit 2, purl 2), AT THE SAME TIME increase 8-8-8-10-10-10-12 stitches evenly on the first round = 66-70-74-86-94-100-108 stitches. When the rib measures 3-3-3-3-4-4-4 cm, cast off slightly loosely with rib or Italian cast-off. The sleeve measures approx. 15-16-15-16-15-14-12 cm from the division. |
||||||||||
Diagram explanations |
||||||||||
|
||||||||||
 |
||||||||||
 |
||||||||||
 |
||||||||||
Have you finished this pattern?Tag your pictures with #dropspattern #minthalosweater or submit them to the #dropsfan gallery. Do you need help with this pattern?You'll find 35 tutorial videos, a Comments/Questions area and more by visiting the pattern on garnstudio.com. © 1982-2026 DROPS Design A/S. We reserve all rights. This document, including all its sub-sections, has copyrights. Read more about what you can do with our patterns at the bottom of each pattern on our site. |
||||||||||


With over 40 years in knitting and crochet design, DROPS Design offers one of the most extensive collections of free patterns on the internet - translated to 17 languages. As of today we count 324 catalogues and 12252 patterns translated into English (UK/cm). 12252
We work hard to bring you the best knitting and crochet have to offer, inspiration and advice as well as great quality yarns at incredible prices! Would you like to use our patterns for other than personal use? You can read what you are allowed to do in the Copyright text at the bottom of all our patterns. Happy crafting!
Post a comment to pattern DROPS 266-33
We would love to hear what you have to say about this pattern!
If you want to leave a question, please make sure you select the correct category in the form below, to speed up the answering process. Required fields are marked *.