
Popular categories
Looking for a yarn?


|
|||||||||||||||||||||||||
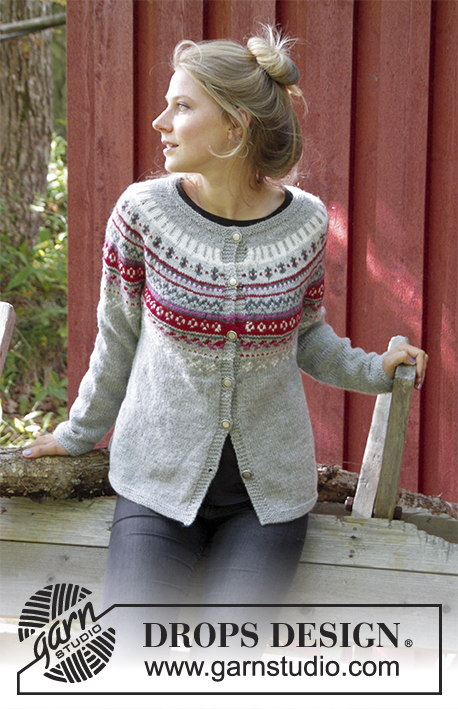
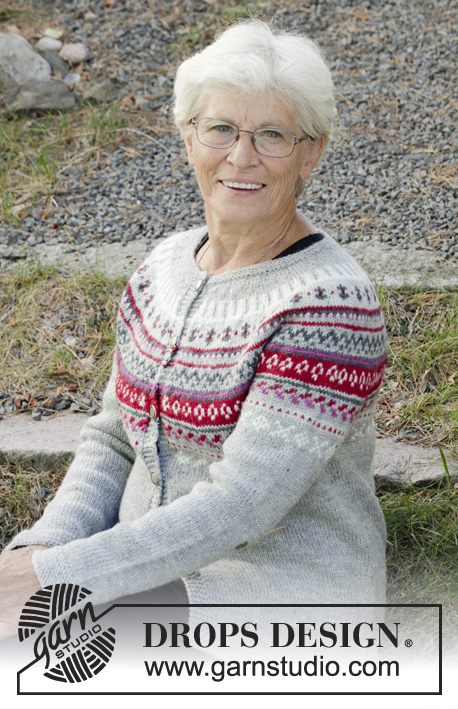
Winter Berries Jacket |
|||||||||||||||||||||||||
 |
 |
||||||||||||||||||||||||
Knitted jacket with round yoke, multi-coloured Norwegian pattern and A-shape, worked top down. Sizes S - XXXL. The piece is worked in DROPS Karisma.
DROPS 181-15 |
|||||||||||||||||||||||||
|
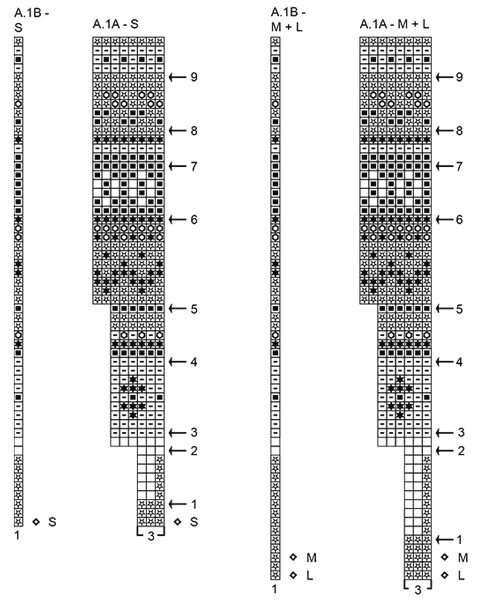
INFORMATION FOR THE PATTERN: RIDGE/GARTER STITCH (worked back and forth): 1 ridge = Knit 2 rows. RIDGE/GARTER STITCH (worked in the round): 1 ridge = 2 rounds. Knit 1 round and purl 1 round. ELEVATION: Insert 1 marker mid back. Start from the right side with light grey and knit until you have worked 11-12-13-14-15-16 stitches past the marker, turn, tighten the strand and purl 22-24-26-28-30-32 stitches. Turn, tighten the strand and knit 33-36-39-42-45-48 stitches, turn, tighten the strand and purl 44-48-52-56-60-64 stitches. Turn, tighten the strand and knit 55-60-65-70-75-80 stitches. Turn, tighten the strand and purl to end of the row (knit the band). INCREASE TIP-1: To work out how to increase evenly, count the total number of stitches on the needle (e.g. 100 stitches), minus the bands (e.g. 10 stitches) and divide by the number of increases to be made (e.g. 19) = 4.7. In this example, increase after alternately the 4th and 5th stitch by making 1 yarn over, on the next row work the yarn overs twisted to prevent holes. Do not increase over the bands. KNITTING TIP-1 (for the bands): On the rows where you have either stripes or pattern border, work the colour in the stripe or the background colour in pattern over the 5 band stitches in each side as well. KNITTING TIP-2 (for the multi-coloured pattern): To prevent the knitting tension becoming tighter when working pattern, it is important that the strands do not tighten at the back of the piece. You can increase a needle size when working pattern if this is a problem. PATTERN: See diagrams A.1 and A.2. Choose diagram for your size. The whole pattern is worked in stocking stitch. INCREASE TIP-2 (for the sides in the body): All increases are worked from the right side! Start 2 stitches before the marker thread, make 1 yarn over, knit 4 stitches (the marker thread sits in the middle of these 4 stitches), make 1 yarn over (= 2 stitches increased). On the next row (wrong side) purl the yarn overs twisted to prevent holes. DECREASE TIP (for mid under sleeve): Start 3 stitches before the marker thread, knit 2 together, knit 2 (the marker thread sits in the middle of these 2 stitches), slip 1 stitch as if to knit, knit 1, pass the slipped stitch over the knitted stitch (= 2 stitches decreased). BUTTONHOLE: Decrease for buttonhole on right band (when the garment is worn). In other words, work from the right side until there are 3 stitches left on the needle, make 1 yarn over, knit 2 together and finish with knit 1. On the next row, knit the yarn over so that there is a hole. The first buttonhole is worked on the first row from the right side after the garter stitch edge in the neck, then work the 5-5-5-6-6-6 next buttonholes with approx. 9-9-9-8-8-8 cm between each. ---------------------------------------------------------- JACKET: The piece is worked back and forth with circular needle from mid front and top down. The sleeves are worked in the round with short circular needle top down, change to double pointed needles when necessary. NECKLINE: Cast on 100-104-108-112-116-120 stitches (including 5 band stitches in each side towards mid front) with circular needle size 3.5 mm and light grey. Work 3 RIDGES – see description above. Knit 1 row from the right side where you increase 19-21-23-31-33-35 stitches evenly on row – read INCREASE TIP-1 and work BUTTONHOLE at the end of this row – see description above = 119-125-131-143-149-155 stitches on the needle. Continue by working yoke as described below. YOKE: Read KNITTING TIP-1 and 2! Change to circular needle size 4.5 mm and purl 1 row from the wrong side with 5 knitted stitches in each side for bands. For a better fit, you can now work an ELEVATION in the back of the neck – see description above. When the elevation has been completed, work the next row as follows from the right side: 5 band stitches in garter stitch, work A.1A until there are 6 stitches left on the needle (= 36-38-40-44-46-48 repeats of 3 stitches), work A.1B (= 1 stitch) and finish with 5 band stitches in garter stitch. Continue the pattern in this way and at the same time increase on each row marked with an arrow in A.1A as described below – read INCREASE TIP-1 (you always increase on a row from the right side) and REMEMBER THE KNITTING TENSION! On the row with arrow-1 increase 30-30-36-42-42-42 stitches evenly on row = 149-155-167-185-191-197 stitches. On the row with arrow-2 increase 24-27-30-33-36-36 stitches evenly on row = 173-182-197-218-227-233 stitches. On the row with arrow -3 increase 24-27-30-33-36-36 stitches evenly on row = 197-209-227-251-263-269 stitches. On the row with arrow -4 increase 20-26-28-28-30-36 stitches evenly on row = 217-235-255-279-293-305 stitches. On the row with arrow -5 increase 18-24-28-28-30-34 stitches evenly on row = 235-259-283-307-323-339 stitches. On the row with arrow -6 increase 16-16-16-16-16-24 stitches evenly on row = 251-275-299-323-339-363 stitches. On the row with arrow -7 increase 8-12-12-12-16-16 stitches evenly on row = 259-287-311-335-355-379 stitches. On the row with arrow -8 increase 8-12-12-12-16-16 stitches evenly on row = 267-299-323-347-371-395 stitches. On the row with arrow -9 increase 6-10-14-14-14-10 stitches evenly on row = 273-309-337-361-385-405 stitches. After the final increase, the piece measures approx 23-25-26-28-30-32 cm from the cast-on edge measured mid front. When A.1 has been worked 1 time vertically, work the next row as follows from the wrong side with light grey: 5 band stitches in garter stitch, purl 40-43-48-51-57-61 stitches (= front piece), place the next 52-64-68-74-74-76 stitches on 1 thread for sleeve, cast on 8-8-10-10-10-14 new stitches on the needle (= in the side under the sleeve), purl the next 79-85-95-101-113-121 stitches (= back piece), place the next 52-64-68-74-74-76 stitches on 1 thread for sleeve, cast on 8-8-10-10-10-14 new stitches on the needle (= in the side under the sleeve), purl 40-43-48-51-57-61 stitches and finish with 5 band stitches in garter stitch (= front piece). Body and sleeves are now finished separately. THE PIECE IS NOW MEASURED FROM HERE! BODY: = 185-197-221-233-257-281 stitches. Insert 1 marker thread, 49-52-58-61-67-73 stitches in from each side = 87-93-105-111-123-135 stitches between the marker threads on the back piece. The first row is worked as follows from the right side: 5 band stitches in garter stitch, work A.2A until there are 12 stitches left on the needle (= 14-15-17-18-20-22 repeats of 12 stitches), work A.2B (= 7 stitches) and finish with 5 band stitches in garter stitch. Continue the pattern in this way. When A.2 has been completed, work stocking stitch with light grey with 5 band stitches in garter stitch in each side. When the piece measures 4 cm from the separation, increase 2 stitches in each side – read INCREASE TIP-2 (= 4 stitches increased). Increase in this way every 4 cm a total of 8 times in each side = 217-229-253-265-289-313 stitches. Continue working until the piece measures 32-33-34-34-34-34 cm from the separation. Change to circular needle size 4 mm and work 4 ridges back and forth over all stitches. Cast off with knit from the right side, but to avoid the cast-off edge being tight, cast off with circular needle size 4.5 mm. The jacket measures approx. 58-60-62-64-66-68 cm from the shoulder down. SLEEVE: Place the 52-64-68-74-74-76 stitches from the thread on the one side of the piece on short circular needle size 4.5 mm and, in addition, knit up 1 stitch in each of the 8-8-10-10-10-14 stitches which were cast on under the sleeve, with light grey = 60-72-78-84-84-90 stitches on the needle. Insert 1 marker thread in the middle of the 8-8-10-10-10-14 stitches under the sleeve. Start the round here and knit 1 round. Then work A.2A in the round (= 5-6-6½-7-7-7½ repeats of 12 stitches). When A.2A has been completed, work stocking stitch with light grey. AT THE SAME TIME on the first round after A.2A decrease 2 stitches mid under the sleeve – read DECREASE TIP. Decrease in this way a total of 9-14-16-18-18-20 times; in S: Every 11th round, in M: Alternately every 6th and 7th round, in L: Alternately every 5th and 6th round, in XL and XXL: Alternately every 4th and 5th round and in XXXL: Alternately every 3rd and 4th round = 42-44-46-48-48-50 stitches. Continue working until the piece measures 38-37-37-35-34-32 cm from the separation. Change to double pointed needles size 3.5 mm and continue with GARTER STITCH in the round – see description above, for 4 cm. Cast off with knit, but to avoid the cast-off edge being tight, cast off with double pointed needles size 4.5 mm. The sleeve measures approx. 42-41-41-39-38-36 cm from the separation. Work the other sleeve in the same way. ASSEMBLY: Sew the buttons onto the left band. |
|||||||||||||||||||||||||
Diagram explanations |
|||||||||||||||||||||||||
|
|||||||||||||||||||||||||
|
|||||||||||||||||||||||||

|
|||||||||||||||||||||||||

|
|||||||||||||||||||||||||
|
Have you made this or any other of our designs? Tag your pictures in social media with #dropsdesign so we can see them! Do you need help with this pattern?You'll find tutorial videos, a Comments/Questions area and more by visiting the pattern on garnstudio.com. © 1982-2024 DROPS Design A/S. We reserve all rights. This document, including all its sub-sections, has copyrights. Read more about what you can do with our patterns at the bottom of each pattern on our site. |
|||||||||||||||||||||||||


With over 40 years in knitting and crochet design, DROPS Design offers one of the most extensive collections of free patterns on the internet - translated to 17 languages. As of today we count 304 catalogues and 11422 patterns - 11422 of which are translated into English (UK/cm).
We work hard to bring you the best knitting and crochet have to offer, inspiration and advice as well as great quality yarns at incredible prices! Would you like to use our patterns for other than personal use? You can read what you are allowed to do in the Copyright text at the bottom of all our patterns. Happy crafting!
Comments / Questions (11)
SUPER. TOUT TOMBE TOUT PILE. Je me suis affolée pour RIEN. J'ai compris maintenant. C'est très bien expliqué. Merci.
13.03.2024 - 16:36Bonjour \r\nJe viens de me lancer dans le gilet femme malgré vos explications , je n\'arrive pas à comprendre à quel moment je dois m\'occuper de la partie dos et devant. J\'en suis au rangs 41 pour la diminution 6.,si je ne me suis pas trompée.\r\nA QUEL MOMENT JE COMMENCE LA SEPARATION POUR LES MANCHES SVP. MERCI DE ME REPONDRE Véro
12.03.2024 - 17:51DROPS Design answered:
Bonjour Véro, vous devez augmenter pour l'empiècement jusqu'à la flèche-9 du diagramme A.1A; quand ces augmentations sont faites, tricotez encore jusqu'à ce que l'ouvrage mesure 23-25-26-28-30-32 cm de hauteur totale depuis le rang de montage le long du bord de l'un des devants - continuez en gris si besoin après le diagramme;. Vous allez maintenant diviser l'ouvrage et mettre les mailles des manches en attente pour tricoter le bas du gilet et les manches séparément. Bon tricot!
13.03.2024 - 07:47BonjourJe viens de me lancer dans le gilet femme avec le même motif, malgré vos explications et les explications , je n\'arrive pas à comprendre à quel moment je dois m\'occuper de la partie dos et devant , aussi pour séparer les manches. J\'en suisau rangs 41 pour la diminution 6. si je ne me suis pas trompée. Pouvez-vous me dire où je place les manches et ou je commence le dos devant.A QUEL MOMENT JE COMMENCE LA SEPARATION POUR LES MANCHES SVP. MERCI DE ME REPONDRE
12.03.2024 - 17:47Drops design 181/15 There is a correction on this pattern which states that "When A1 has been worked 1 time vertically work the next row as follows from the wrong side with light gray" There is nothing else to tell me what to do next. Please help
25.03.2020 - 08:37DROPS Design answered:
Dear Mrs Wilkinson, if you printed the pattern after the date of the correction,then the online pattern is right and already includes that correction. Happy knitting!
25.03.2020 - 10:10Hej! Jag har stickat denna kofta till mig själv och älskar den! Det var roligt att sticka uppifrån och ner och göra framkant etc direkt. Nu skulle jag vilja göra motsvarande i herrmodell. Dvs en kofta uppifrån och ner, runt ok samt något nordiskt mönster i garn motsvarande karisma. Går det att få tag på ett sådant mönster? Mvh Annika
07.02.2020 - 14:57DROPS Design answered:
Hej Annika, så här söker du :) nordisk - herr - uppifrån och ner
11.02.2020 - 11:51Bonjour, Je voudrais réaliser ce joli modèle. La couleur rose qui parait sur la photo ne me semble pas être la même que celle présentée qui est plus fuchsia. Que me conseillez-vous?
31.01.2020 - 18:40DROPS Design answered:
Bonjour Mme Haagen, en fonction de l'éclairage et de l'environnement, la même couleur peut apparaître différemment. N'hésitez pas à contacter votre magasin DROPS (même par mail ou téléphone) pour toute aide au choix des couleurs. Bon tricot!
03.02.2020 - 09:12Comment faire pour que la base du gilet ne roulotte pas ? Merci
05.03.2018 - 09:45DROPS Design answered:
Bonjour Mme Desgranges, vous pouvez bloquer votre gilet à la fin (humidifiez-le et faites le sécher à plat, avec des épingles si besoin). Bon tricot!
05.03.2018 - 09:55Sehr geehrtes Drops Team, laut Anleitung muss nach der 9 . Zunahme eine Rück-Reihe mit den stillgelegten Maschen gestrickt werden und danach die Ärmel und der Rumpfteil extra (Muster A.2a folgt), jedoch fehlen vom Muster A.1 noch drei Reihe vom Muster . Soll ich nun erst A.1 fertig Stricken ( wie auf dem Dazugehörigen Bild dargestellt) oder sofort A.2a stricken ? Wenn ja dann fehlen diese drei Reihen im Muster ! Mit freundlichen Grüßen
18.02.2018 - 11:06DROPS Design answered:
Liebe Frau Gold, ja A.1 müssen Sie bis zur Ende stricken, dann A.2 anfangen. Viel Spaß beim stricken!
19.02.2018 - 09:53I am unable to find out exactly how much yarn is needed for any of the sizes you've stated as well as exactly the measurement of the stated sizes. Am new knitted and really like this pattern. Can you help me please.
04.12.2017 - 07:32DROPS Design answered:
Dear Linda, for example, in size S you will need: 350 g colour 44 light grey, 50 g colour 01 off white, 50 g colour 13 cerise, 50 g colour 16 dark grey, 50 g colour 48 wine red and 50 g colour 72 light pearl grey. As for measurement, please see our lesson How to read a schematic drawing. Happy knitting!
04.12.2017 - 08:36Anna Lindborg wrote:
När jag har stickat förhöjningen till oket är det dags att börja sticka mönster enligt A1.1. När jag tittar i mönstret använder jag först ljust pärlgrå och sedan wienröd. Men när jag tittar på bilden av koftan ser jag tydligt att mönstret börjar med ljusgrå och natur. Har jag missförstått instruktionen, eller saknas den första ljusgrå/natur-delen av mönstret? Tack på förhand! Mvh Anna
16.11.2017 - 17:56DROPS Design answered:
Hej, delen med ljusgrå och natur finns med nederst i diagram A.1.
17.11.2017 - 17:24