
Looking for a yarn?


Comments / Questions (34)
![]() AgataRz wrote:
AgataRz wrote:
Chciałabym zwiększyć liczbę oczek - czy całkowita liczba oczek musi być podzielna przez jakąś liczbę?
16.05.2025 - 20:09DROPS Design answered:
Witaj Agato, możesz zwiększyć liczbę oczek na większy szal. Pamiętaj tylko gdzie masz oczko środkowe, czyli to z markerem. Pozdrawiamy!
19.05.2025 - 12:16
![]() Martine De Smedt wrote:
Martine De Smedt wrote:
I love this pattern but I would like to make this shawl longer, is this possible? Not wider but longer would be great. Tips? Thanks! Greetings 😊
13.05.2025 - 10:26DROPS Design answered:
Dear Martine, to lengthen the shawl you will also need to widen the piece a bit, due to the decreases and the necessary shaping; otherwise the pattern can't be maintained. You can check other diagonal shawls, some of them longer, by clicking on the "diagonal-knit" tag, in the "You might also like..." section at the top. Happy knitting!
18.05.2025 - 14:10
![]() Erika Cronje wrote:
Erika Cronje wrote:
Thanks for whoever posted the video, it made it very clear and my leaf is starting to look really good!!!
23.04.2025 - 21:27
![]() Erika Cronje wrote:
Erika Cronje wrote:
I have started but it does not look like yours, I frogged and started again but still has an odd shape. The description says you increase in the middle (the main vein) and decrease on BOTH sides, but the decreases according to pattern is just on one side, at end of RS row and beginning of WS row!!! Am I missing something?? I even checked back to see if there were not any amendments
15.04.2025 - 14:11DROPS Design answered:
Dear Erika, at the beginning you have a short side and a long side on each side of the central stitch. So you shorten the long side and lengthen the short side by working the inital rows. Later on, you will cast off at the beginning of right side rows, so you will be decreasing on each side. But you don't start the decreases at the beginning of the right side from the start. Happy knitting!
19.04.2025 - 19:21
![]() Josianne Pelletier wrote:
Josianne Pelletier wrote:
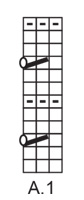
MA question suivante est: Est-ce que le diagramme A1 (qui se tricote sur 3 mailles) se répète jusqu'à la fin de mon rang? MERCI de préciser.
21.03.2025 - 20:14
![]() Josianne Pelletier wrote:
Josianne Pelletier wrote:
''Tricoter A.1 avec 1 maille lisière au point mousse de chaque côté – s'il n'y a pas suffisamment de mailles pour tricoter la diminution et le jeté (au 3ème et au 9ème rang de A.1), tricoter ces mailles à l'endroit''??? Les 3 mailles dans le diagramme A.1 sont répétées jusqu'à la fin du rang? Par exemple au rang 3 de A.1 on (tricote 1 maille end, 2 mailles ens., 1 jeté )et on recommence () jusqu'à la fin du rang?? MERCI pour votre explication!
18.03.2025 - 02:12DROPS Design answered:
Bonjour Mme Pelletier, le diagramme A.1 se tricote sur 3 mailles (= 1 m end, 2 m ens à l'end, 1 jeté), mais, si/quand votre nombre de mailles n'est pas divisible par 3, tricotez simplement les dernières mailles à l'endroit aux rangs 3 et 9 - vous pourrez ainsi terminer par 1 ou 2 mailles endroit au lieu des 3 mailles de A.1. Bon tricot!
18.03.2025 - 10:30
![]() Claire Noël De Tilly wrote:
Claire Noël De Tilly wrote:
Qu’entendez-vous par maille lisière? Est-ce qu’on fait la maille lisière seulement dans la section A1? (Non spécifiée dans la première section) Comment faire la maille lisière si nous tricotons 2 mailles ensemble en fin et début de rang tel que spécifié dans les explications de la section A1? Merci de m’aider.
14.10.2024 - 04:39DROPS Design answered:
Bonjour Mme De Tilly, lorsque l'on tricote A.1, on tricote la 1ère et la dernière maille toujours au point mousse - cette maille est déjà comprise dans le nombre de mailles, avant que l'on tricote A.1 les mailes lisières sont simplement la première et la dernière maille de chaque rang. Quand vous n'avez pas suffisamment de mailles pour le motif complet (1 diminution et son jeté), tricotez les mailles à l'endroit. Bon tricot!
14.10.2024 - 09:42
![]() Christine wrote:
Christine wrote:
Bonjour Le 1er rang est il : 1m endroit, 1 jeté, 1m endroit, 1 jeté, 130m endroit et 2m ensemble à l'endroit ? Merci par avance pour votre réponse. Cordialement. Christine
05.09.2024 - 11:23DROPS Design answered:
Bonjour Christine, tout à fait, en tricotant jusqu'à ce qu'il reste 2 mailles, vous tricoterez 130 mailles. Bon tricot!
06.09.2024 - 07:47
![]() Jessica wrote:
Jessica wrote:
Det står att man ska sticka mönster A1 med en kantmaska i varje sida och samtidigt fortsätta med ökn och minskn som innan. Gäller detta på varje varv i mönster A1, dvs första, 3e, 5e varvet osv gör man omslag på båda sidor om mittmaskan och stickar ihop sista två maskorna och på 2a, 4e,6e varvet osv stickar man ihop de första två maskorna? Hur gör man då med kantmaskor i sidan där man stickar ihop de två sista/första maskorna - ska kantmaskan vara utanför den minskningen?
29.08.2024 - 23:41
![]() Jessica wrote:
Jessica wrote:
Hej! När det står att man ska börja diagrammet efter 20 varv rätstickning, menas det efter de allra första 20 varven (inklusive allra första varvet) eller börjar man räkna där det står varv 1? Det är ju ett varv rätstickning först menar jag.
23.08.2024 - 19:26DROPS Design answered:
Hei Jessica. Start å räkna där det står varv 1. mvh DROPS Design
26.08.2024 - 10:56
|
|||||||||||||
New Fern#newfernshawl |
|||||||||||||
 |
 |
||||||||||||
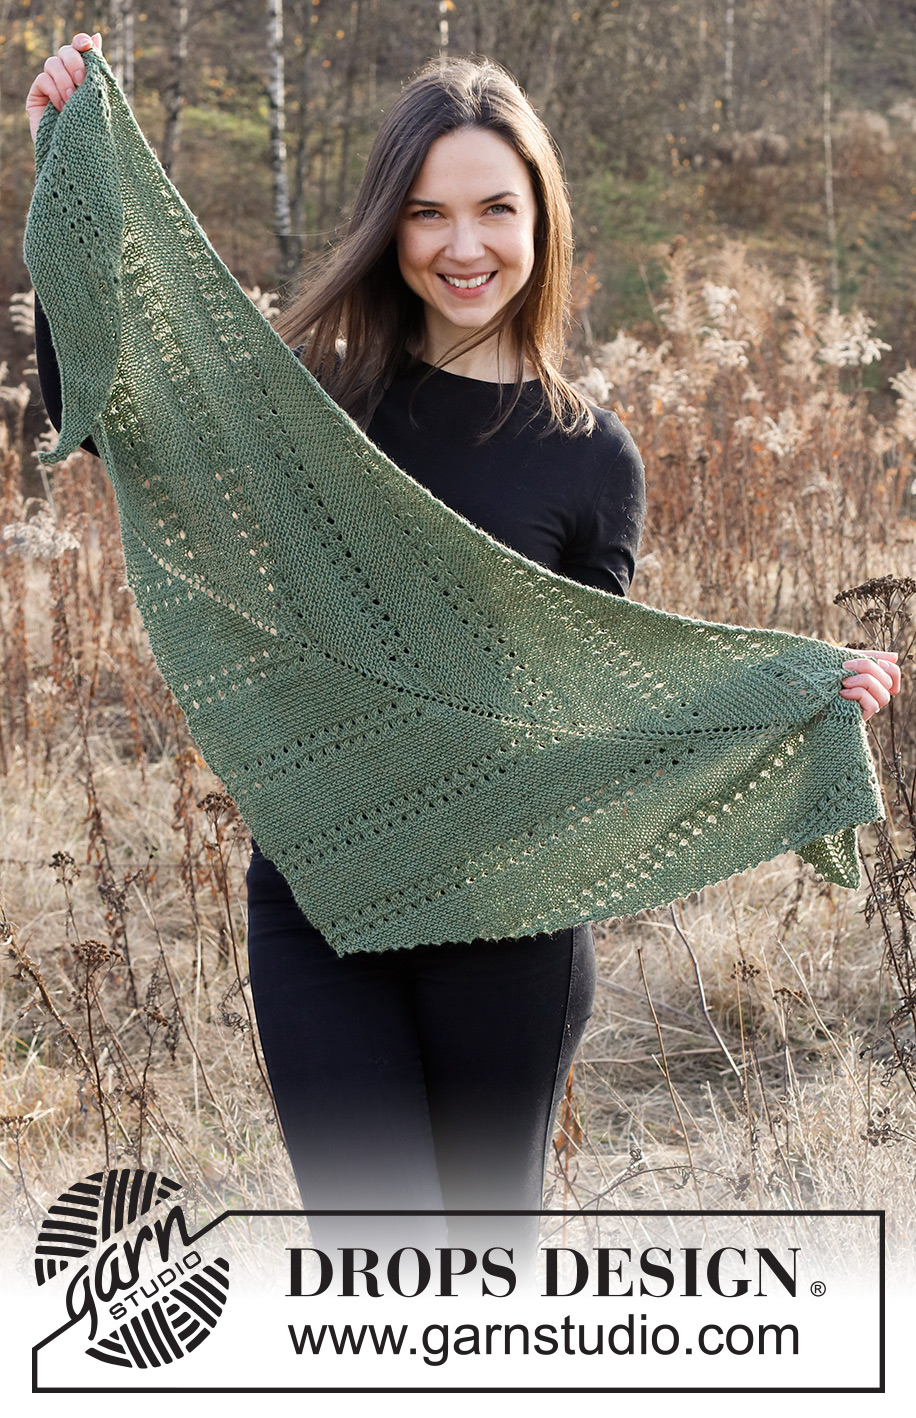
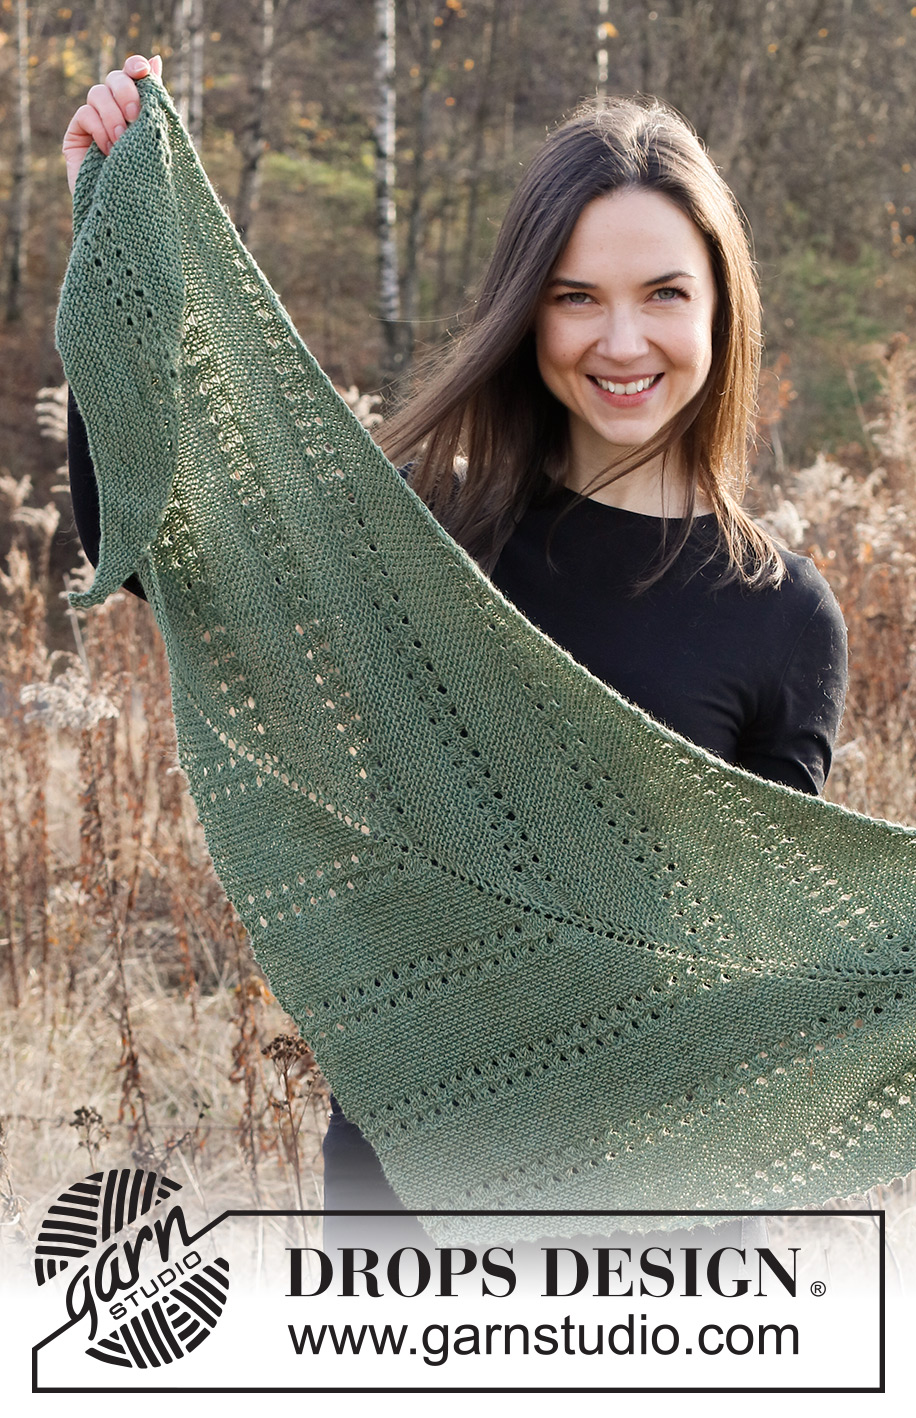
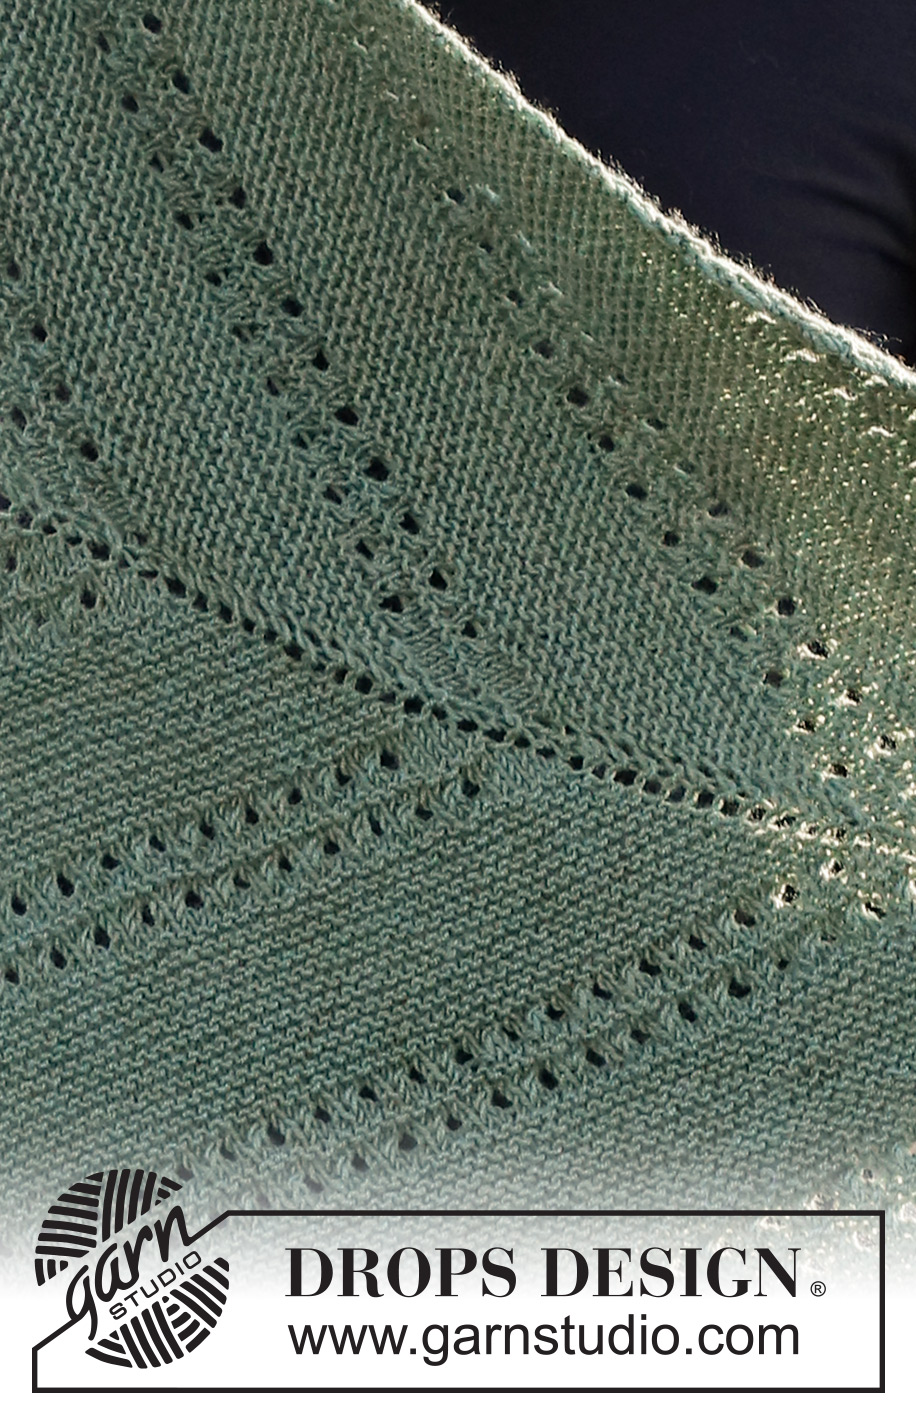
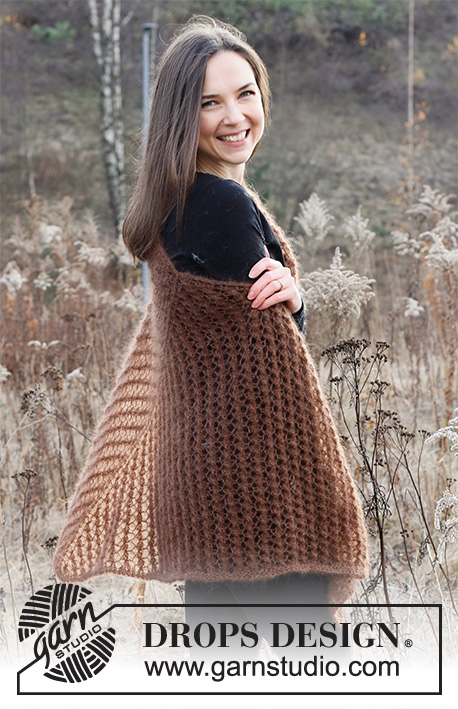
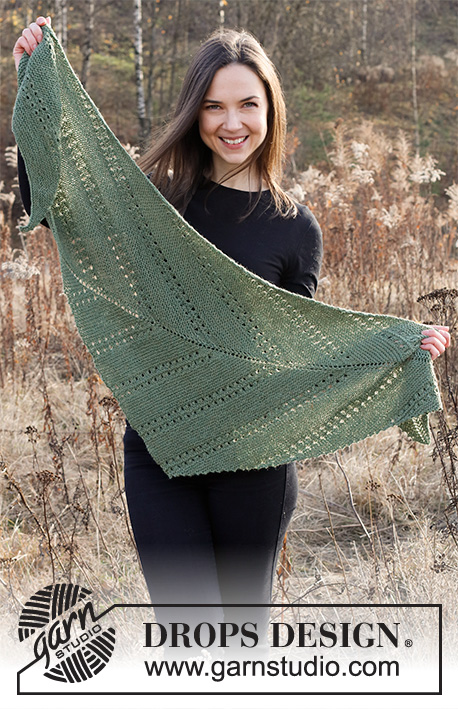
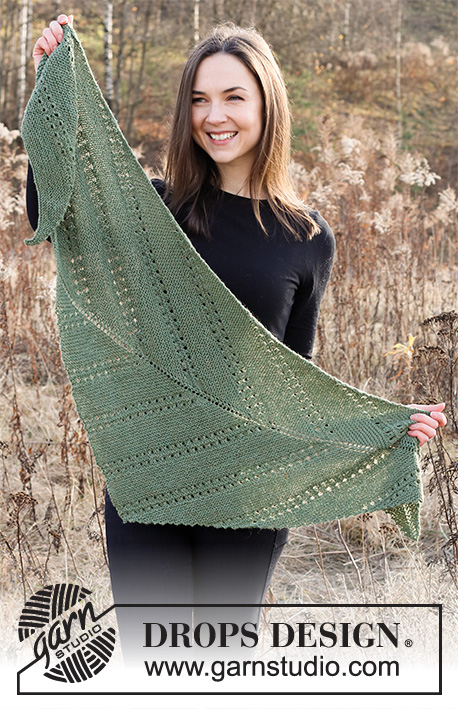
Knitted shawl in DROPS BabyMerino. The piece is worked at an angle with garter stitch and lace pattern.
DROPS 226-26 |
|||||||||||||
|
------------------------------------------------------- EXPLANATIONS FOR THE PATTERN: ------------------------------------------------------- RIDGE/GARTER STITCH (worked back and forth): Knit all rows. 1 ridge = knit 2 rows. PATTERN: See diagram A.1. The diagram shows all rows in the pattern from the right side. ------------------------------------------------------- START THE PIECE HERE: ------------------------------------------------------- SHAWL – SHORT OVERVIEW OF THE PIECE: The shawl is worked from the one short-side and across. Stitches are decreased on each side of the shawl and increased in the middle. SHAWL: Cast on 134 stitches with circular needle size 4.5 MM = US 7 and DROPS Baby Merino. Knit 1 row from the right side. Insert a marker at the beginning of the next row – marks the right side. Now work as follows: ROW 1 (right side): Knit 1, 1 yarn over, knit 1 and insert a marker in this stitch (= mid-stitch), 1 yarn over, knit until there are 2 stitches left, knit 2 together = 135 stitches. ROW 2 (wrong side): Knit 2 together, knit to end of row = 134 stitches. ROW 3 (right side): Knit as far as the mid-stitch, 1 yarn over, knit 1 (= mid-stitch), 1 yarn over, knit until there are 2 stitches left, knit 2 together. ROW 4 (wrong side): Knit 2 together, knit to end of row. Repeat rows 3 and 4 onwards (i.e. on rows from the right side you increase 2 stitches and decrease 1 stitch, on rows from the wrong side you decrease 1 stitch; the number of stitches remains the same). When you have worked 20 rows (= 10 ridges), work pattern as follows: Work A.1 with 1 edge stitch in garter stitch on each side – if there are not enough stitches to work the decrease and the yarn over (on 3rd and 9th row in A.1), knit these stitches, AT THE SAME TIME, continue to increase and decrease as before. REMEMBER THE KNITTING GAUGE! Continue with alternately 10 ridges and A.1 until you have increased 80 times on each side of the marker = 134 stitches (160 rows). Continue with the pattern (= alternately 10 ridges and A.1 1) decreasing and increasing as before, AT THE SAME TIME at the beginning of each row from the right side, binding off alternately 2 and 3 stitches. When you have worked a total of 7 repeats of A.1 in height finish the piece with garter stitch (continue to decrease at the beginning of each row from the right side). When there are 9 stitches left, bind off. Cut and fasten the strand. |
|||||||||||||
Diagram explanations |
|||||||||||||
|
|||||||||||||
|
|||||||||||||
Have you finished this pattern?Tag your pictures with #dropspattern #newfernshawl or submit them to the #dropsfan gallery. Do you need help with this pattern?You'll find 15 tutorial videos, a Comments/Questions area and more by visiting the pattern on garnstudio.com. © 1982-2025 DROPS Design A/S. We reserve all rights. This document, including all its sub-sections, has copyrights. Read more about what you can do with our patterns at the bottom of each pattern on our site. |
|||||||||||||


With over 40 years in knitting and crochet design, DROPS Design offers one of the most extensive collections of free patterns on the internet - translated to 17 languages. As of today we count 314 catalogs and 11822 patterns - 11812 of which are translated into English (US/in).
We work hard to bring you the best knitting and crochet have to offer, inspiration and advice as well as great quality yarns at incredible prices! Would you like to use our patterns for other than personal use? You can read what you are allowed to do in the Copyright text at the bottom of all our patterns. Happy crafting!
Post a comment to pattern DROPS 226-26
We would love to hear what you have to say about this pattern!
If you want to leave a question, please make sure you select the correct category in the form below, to speed up the answering process. Required fields are marked *.