Kommentare / Fragen (430)
![]() Gertraud Söllradl hat geschrieben:
Gertraud Söllradl hat geschrieben:
Sg. Damen und Herren! In Ihrer Anleitung steht, dass beim Humdepulli Karisma nach dem Rundstricken für die Beine Maschen auf einen Hilfsfaden kommen und über die restlichen Maschen (Rücken) hin- und zurückgestrickt werden muss. Wie soll das bei Rundstricknadeln funktionieren? Vielen Dank für Ihre Mühe! Freundliche Grüße Gertraud Söllradl
25.01.2015 - 16:51DROPS Design hat geantwortet:
Antwort siehe oben! :-)
26.01.2015 - 09:34
![]() Lillian hat geschrieben:
Lillian hat geschrieben:
Mønster og maskeantall stemmer ikke overens på str medium! Det burde dere fikse.
21.01.2015 - 00:24DROPS Design hat geantwortet:
Hej Lilian. Der er ikke nogen fejl. Du skal strikke: Str M: * M.2, 2 vr *, gjenta fra *-* 3 ganger, M.2, * M.3, M.2 *, gjenta fra *-* 3 ganger, M.1 (= midt opp på ryggen), * M.2, M.3 *, gjenta fra *-* 3 ganger. Dvs, 6x3 (18)+ 4 + 18x3 (54) + 24 + 18x3 (54) = 154 m.
21.01.2015 - 15:39Shari Schadler hat geschrieben:
After debating the difficulty of trying to follow your style of pattern, it took me two days but I converted it to a line by line North American style pattern. I began to knit last evening and it's turning out gorgeous. Not bad for a new cabler!! Thanks for a beautiful pattern folks at Drops!! My sweet Zoey will love this coat while she is riding with me in my wheelchair.
20.01.2015 - 22:36
![]() Shari Schadler hat geschrieben:
Shari Schadler hat geschrieben:
Is there anywhere I could download this pattern with less complicated, row by row instructions? I would dearly love to make this for my little dog Zoey (Shih-poo) as she gets cold very easy in our harsh winters. I got as far as the (k) knit increase to 76 sts., but when it begins M's (instead of 'cbl') etc., I get frustrated and lost. Please help me. God Bless, Shari Lynn
18.01.2015 - 10:09DROPS Design hat geantwortet:
Dear Mrs Schadler, M.1, M.2 and M.3 are the name of diagrams you can find at the bottom of the page - please click here to read more about diagrams. Happy knitting!
19.01.2015 - 14:30
![]() Josephine hat geschrieben:
Josephine hat geschrieben:
Hallo, ich stricke XS auf einem Nadelspiel und habe 12 cm gestrickt. Nun liegen die ersten 10 M (M2, 2li, M2) auf einem Hilfsfaden. Laut Beschreibung muss ich nun eine li M abnehmen und das restliche Muster (2 li, M3, M2, M1, M2, M3, 2 li) und dann eine li M abnehmen stricken. Dieses Muster dann hin und her für 6 cm. Danach wird das Muster vom Hilfsfaden für auch 6 cm gestrickt und beide Teile wieder auf das Nadelspiel genommen. Mir ist nicht klar wo sich dabei 2 Löcher für die Beine ergeben?
14.01.2015 - 22:43DROPS Design hat geantwortet:
Die stillgelegten M befinden sich an der Bauchunterseite. Sie stricken zunächst die Rücken-M 6 cm lang weiter und dann die M der Bauchunterseite ebenso lang. Wenn Sie dann wieder alle M auf das Nadelspiel legen, haben Sie 2 Schlitze, die jeweils 6 cm lang sind - nämlich die seitlichen Ränder der je 6 cm lang gestrickten Stücke. Diese Schlitze sind die Beinausschnitte und die am Anfang abgenommenen Linksmaschen dienen der leichten Formung der Beinausschnitte.
15.01.2015 - 00:30Michael Curtner hat geschrieben:
I was going to ask a question but after reviewing the questions of other even more experienced (I've been knitting for 40+ years and I taught myself cables from a book) knitters, I've decided this pattern is too vague & very annoyingly complicated to be enjoyable. I think I'll just work from the collar which I already have done and make up my own pattern from there, possibly using some of the measurements as they seem to be close to what the dog I'm making this for will require.
12.01.2015 - 20:33Marja Wakeford hat geschrieben:
Thank you for the explanation about the leg openings. I 'see' it now!
21.12.2014 - 20:28
![]() Siv Gulliksen hat geschrieben:
Siv Gulliksen hat geschrieben:
Strikker til en hanhund dachs, har denne oppskriften åpning under så han kan tisse? Hvis ikke hvordan kan jeg gjøre d?
19.12.2014 - 09:48DROPS Design hat geantwortet:
Hei Siv. Ja, den er aaben nederst, men pröv eventuelt jakken paa undervejs saa den passer praecis.
19.12.2014 - 19:03
![]() Felicia hat geschrieben:
Felicia hat geschrieben:
Holy cow. Now I am more confused. So when there are 4 m.2 in the xs do I just keep repeating the first m.2 row until the end and then move up to the 2nd m.2 for the next round?. Ugh. I am feeling really cIueless. I was moving up the ladder each time there was an m.2. So at the end of the first row I had done 4 rungs on the diagram. I was doing the same thing for the others that repeated in the row as well. That may be why it wasn't looking right.:(
19.12.2014 - 01:40DROPS Design hat geantwortet:
Dear Felicia, M.2 is worked over 4 sts in width and 8 rows in height, ie when you work M2,P2,M2, on first row, you will work K4,P2,K4 (from RS = in the round), then on 2nd round, you will *cross the sts for cable, K3 rounds and cable, K2 rounds (then repeat diagram from beg, ie K1 round and repeat from *. read more about diagrams here. Happy knitting!
19.12.2014 - 08:58Marja Wakeford hat geschrieben:
I am confused about the leg opening. There seems to be only one 'hole'. Is this correct? There appears to be two sleeves in the the picture of the completed sweater. Could you please explain? Thank you.
18.12.2014 - 16:46DROPS Design hat geantwortet:
Dear Mrs Wakeford, there should be 2 holes, ie when dividing work at 4 ¾”-6 ¼”-8”, you slip the first 10-16-22 sts on a st holder, bind off next st, work remaining sts, turn and bind off 1 st at the beg of next round (= 1 st bound off each side of st holder). Happy knitting!
19.12.2014 - 08:41
The Lookout |
|||||||||||||||||||
 |
 |
||||||||||||||||||
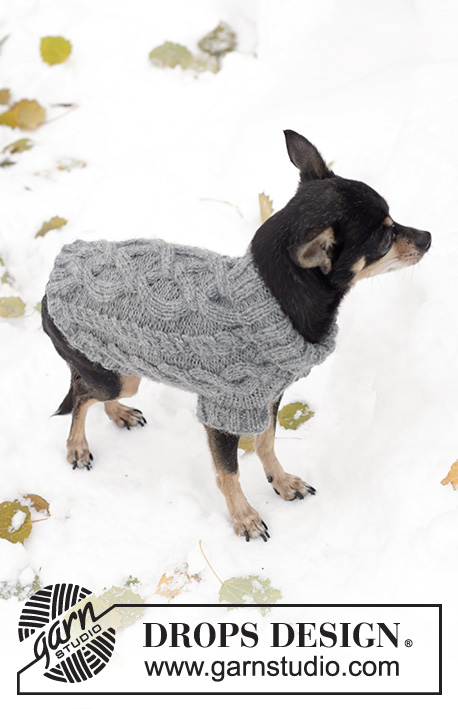
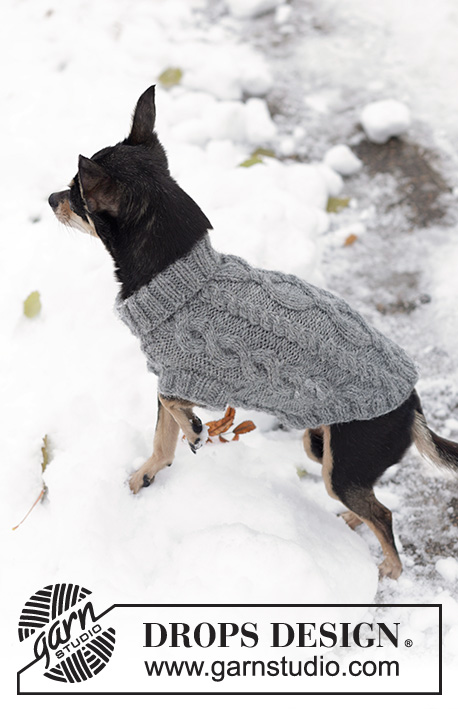
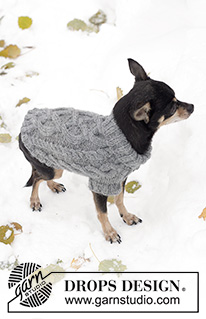
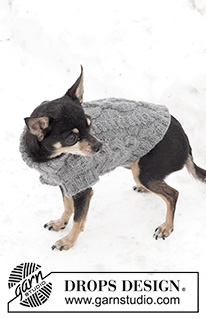
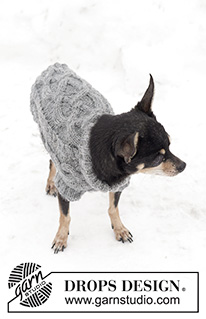
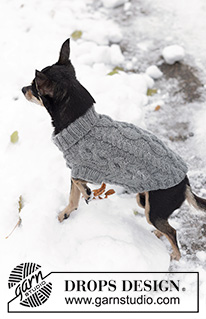
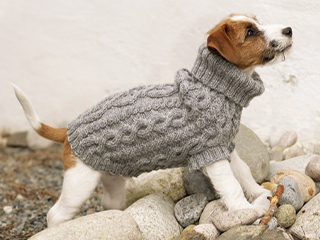
Gestrickter Pullover für Hunde mit Zopfmuster in DROPS Karisma
DROPS 102-43 |
|||||||||||||||||||
|
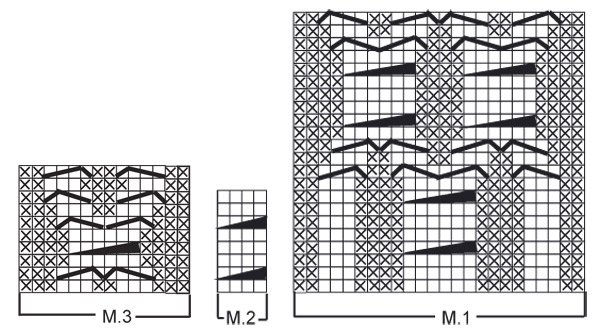
--------------------------- HINWEISE ZUR ANLEITUNG --------------------------- RIPPENMUSTER: * 2 Maschen rechts, 2 Maschen links * , von *-* wiederholen. ZUNAHMETIPP: 1 Masche zunehmen, indem 1 Umschlag gearbeitet wird. In der nächsten Reihe den Umschlag verschränkt stricken, um ein Loch zu vermeiden MUSTER: Siehe Diagramm M.1 bis M.3. Die Diagramme zeigen alle Reihen, wie sie auf der Vorderseite erscheinen, Hin-Reihen werden von rechts nach links, Rück-Reihen von links nach rechts gelesen. ------------------------------------ DIE ARBEIT BEGINNT HIER ------------------------------------ HUNDEPULLOVER - KURZBESCHREIBUNG DER ARBEIT: Der Pullover wird in Runden ab dem Halsausschnitt nach unten gestrickt, dann wird die Arbeit für die Vorderbeine geteilt und es wird in Hin- und Rück-Reihen über einen Teil des Rückens weitergestrickt. Dann wird ein Teil des Bauchs gestrickt, die Teile werden wieder zusammengesetzt und es wird in Runden weitergestrickt. An der unteren Bauchmitte werden Maschen abgekettet und es werden über ein paar Zentimeter Abnahmen gearbeitet. Zuletzt wird ein Rippenmuster um den ganzen Pullover gestrickt und es werden Maschen aus den Beinausschnitten aufgefasst und es werden Bündchen im Rippenmuster um die Beinausschnitte gestrickt. HUNDEPULLOVER Anschlag: 60-80-100 Maschen auf Nadelspiel Nr. 3 mit mittelgrau. 8-10-12 cm im Rippenmuster stricken (= Kragen, der später zur Hälfte umgeschlagen wird). Zur kurzen Rundnadel Nr. 4 wechseln. 1 Runde glatt rechts stricken und dabei gleichzeitig 16-32-54 gleichmäßig verteilt zunehmen - siehe ZUNAHMETIPP = 76-112-154 Maschen. Nun wie folgt im Muster stricken: Größe XS: M.2 (4 Maschen), 2 Maschen links , M.2 (4 Maschen), (= die ersten 10 Maschen unter dem Bauch), 3 Maschen links, M.3 (14 Maschen), M.2 (4 Maschen), M.1 (24 Maschen) (= obere Rückenmitte), M.2 (4 Maschen), M.3 (14 Maschen) und 3 Maschen links Größe S: * M.2, 2 Maschen links *, von *-* 2 x arbeiten, M.2, * M.3, M.2 *, von *-* 2 x arbeiten, M.1 (= obere Rückenmitte), * M.2, M.3 *, von *-* 2 x arbeiten Größe M: * M.2, 2 Maschen links *, von *-* 3 x arbeiten, M.2, * M.3, M.2 *, von *-* 3 x arbeiten, M.1 (= obere Rückenmitte), * M.2, M.3 *, von *-* 3 x arbeiten GLEICHZEITIG bei einer Länge von 12-16-20 cm (ab dem Anschlagrand) die Arbeit für die Vorderbeine wie folgt aufteilen (dabei darauf achten, dass die Arbeit dann aufgeteilt wird, wenn die Verzopfung in einer Hin-Reihe erfolgen kann): Die ersten 10-16-22 Maschen stilllegen (= Bauch), wenden und im Muster hin- und zurück weiterstricken, dabei je 1 Masche am Anfang der nächsten 2 Reihen abnehmen = 64-94-130 Maschen (= Rücken). Im Muster hin und zurück über diese Maschen 6-8-10 cm weiterstricken (die Arbeit hat eine Länge von insgesamt 18-24-30 cm). Darauf achten, dass die nächste Reihe eine Hin-Reihe ist, den Faden abschneiden. Diese Maschen nun stilllegen. Nun werden die Maschen des Bauchs gestrickt, dafür die Bauch-Maschen, die vorher stillgelegt wurden, wieder auf die Nadel nehmen. Je 1 neue Masche beidseitig anschlagen = 12-18-24 Maschen. Weiter im Muster hin- und zurückstricken, mit je 1 Masche links beidseitig. Wenn 6-8-10 cm gestrickt wurden, alle Maschen wieder auf dieselbe Nadel nehmen = 76-112-154 Maschen, dabei darauf achten, dass die nächste Reihe eine Hin-Reihe ist. Bei einer Länge von insgesamt 24-31-38 cm 12-20-28 Maschen an der unteren Bauchmitte abketten. Dann die Arbeit in Hin- und Rück-Reihen weiterstricken – gleichzeitig beidseitig, d.h. am Anfang jeder Reihe, wie folgt abketten: 3 Maschen 1-1-1 x, 2 Maschen 2-3-4 x, 1 Masche 2-3-4 x, 2 Maschen 2-3-4 x und 3 Maschen 1-1-1 x = 32-50-74 Maschen übrig. Die Arbeit hat nun eine Länge von ca. 30-39-48 cm. FERTIGSTELLEN: Rippenmusterrand: Die restlichen Maschen auf die kurzen Rundnadel Nr. 3 legen und zusätzlich Maschen aus der Abkettkante auffassen, sodass insgesamt ca. 84-108-140 Maschen auf der Nadel sind. 2-3-4 cm in Runden im Rippenmuster stricken, dann die Maschen locker abketten, wie sie erscheinen, d.h. rechte Maschen rechts und linke Maschen links abketten. Beinbündchen: Ca. 36-44-52 Maschen auf Nadelspiel Nr. 3 aus der einen Beinöffnung auffassen. 2-3-4 cm in Runden im Rippenmuster stricken, dann die Maschen locker abketten, wie sie erscheinen, d.h. rechte Maschen rechts und linke Maschen links abketten. Um die Öffnung des anderen Beins wiederholen. |
|||||||||||||||||||
Erklärungen zum Diagramm |
|||||||||||||||||||
|
|||||||||||||||||||
 |
|||||||||||||||||||
Haben Sie diese Anleitung nachgearbeitet?Dann taggen Sie Ihre Fotos mit #dropspattern oder schicken Sie sie an die #dropsfan Galerie Brauchen Sie Hilfe bei dieser Anleitung?Sie finden 24 Videotutorials, einen Kommentar/Fragen-Bereich und vieles mehr, wenn sie die Anleitung bei garnstudio.com aufrufen. © 1982-2026 DROPS Design A/S. Wir besitzen alle Rechte. Dieses Dokument, einschließlich aller Untersektionen, hat Urheberrechte. Mehr dazu, was Sie mit unseren Anleitungen machen können, finden Sie ganz unten auf der Seite zu jeder Anleitung. |
|||||||||||||||||||







Kommentieren Sie die Anleitung DROPS 102-43
Wir würden gerne Ihre Meinung zu diesem Modell erfahren!
Wenn Sie eine Frage stellen möchten, prüfen Sie bitte, dass Sie die richtige Kategorie im unten stehenden Formular gewählt haben - so bekommen Sie schneller eine Antwort. Die obligatorischen Felder sind mit einem * gekennzeichnet.