
Popular categories
Looking for a yarn?


Comments / Questions (36)
![]() Katarina Ahlbeck wrote:
Katarina Ahlbeck wrote:
Varför i hela fridens dar skall jag inte ta skissen på allvar? Det är den jag tittar på när jag har fastnat för ett mönster för att ordentligt kunna se hur plagget skall se ut. Fotona är inte alltid riktigt tydliga. Jag borde kanske insett att det inte går att få halsringningen djupare fram, om man inte gör förkortade varv.
19.07.2016 - 16:44DROPS Design answered:
Hej Katarina. Den angiver maalene - det er alt.
20.07.2016 - 15:14
![]() Leducq wrote:
Leducq wrote:
Bonsoir,avec un depart de 83mailles(y compris 1ml pour tourner ) donc 82ms ensuite nous ajoutons pour le raglans dans les 4 marqueurs( 4fois 4 brides donc une augmentation de 16 brides a chaques rang sur 8 rangs pour une taille 10 ans soit128 brides en plus des 82 soit 210 brides .comment faite vous pour trouver 222 brides de plus vous dite a mme Durat que l on crochette de bas en haut alors que dans les explications c est de haut en bas cordialement mme Leducq
09.06.2016 - 21:56DROPS Design answered:
Bonjour Mme Leducq, la robe se crochète de haut en bas en commençant par l'encolure. On commence par 82 ms et on augmente d'abord 12 B = 94 B, puis on augmente 8 fois 16 B (8x16 = 128), on a 94+128=222 B. Bon crochet!
10.06.2016 - 09:02
![]() Rudaz Françoise wrote:
Rudaz Françoise wrote:
Très joli modèle que j'ai réalisé dans toutes les tailles. Mais c'est impossible de mettre 6 mailles pour l'épaule dans toutes les tailles. Il faut adapter cela. Pour la taille 5/6 ans jusqu'à 9/10 j'ai mis 12 mailles.
17.09.2015 - 22:05DROPS Design answered:
Bonjour Mme Rudaz, l'empiècement se crochetant de haut en bas, on a bien 6 m pour toutes les tailles pour les manches, puis on va augmenter pour le raglan de façon différente pour chaque taille pour terminer avec 32-44 B (cf taille) pour la manche. Bon crochet!
18.09.2015 - 09:13
![]() Angela Leimeister wrote:
Angela Leimeister wrote:
Ist das richtig, dass ich für das rückenteil mit nur 24m beginne, die vorderteile aber je 17m haben. habe das so jetzt 6 reihen gehäkelt, aber ich finde, dass das rückenteil zu schmal, bzw. die vorderteile zu weit werden. bitte um kurze rückantwort. vielen dank im voraus. mit freundlichen grüßen angela leimeister
22.06.2015 - 17:52DROPS Design answered:
An sich sollte es so richtig sein. Die Vorderteile haben in der Summe immer etwas mehr M, da die Blenden noch mit eingerechnet werden, die Vorderteile überlappen sich beim Schließen ja.
24.06.2015 - 11:22
![]() Dang wrote:
Dang wrote:
Pour la taille de 7-8 ans, quand on change de bridge au point d'éventail, ce n'est pas plutôt 27 arceaux que 26 selon l'explication ?
23.05.2015 - 20:45Eva wrote:
Love the pattern, I converted it to fit a doll.what I am missing are the buttonholes or did I missunderstand something in the pattern ?
22.05.2015 - 22:42DROPS Design answered:
Dear Eva, the buttons have been added. Thank you, happy crocheting!
26.05.2015 - 13:56
|
|
Lovely Rose#lovelyrosecardigan |
|
 |
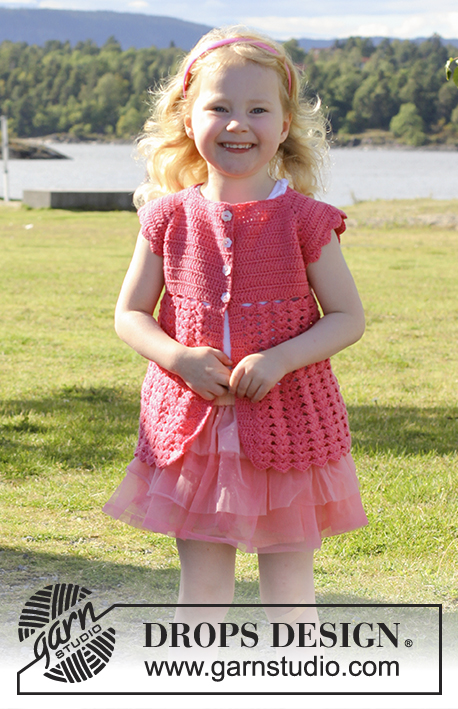 |
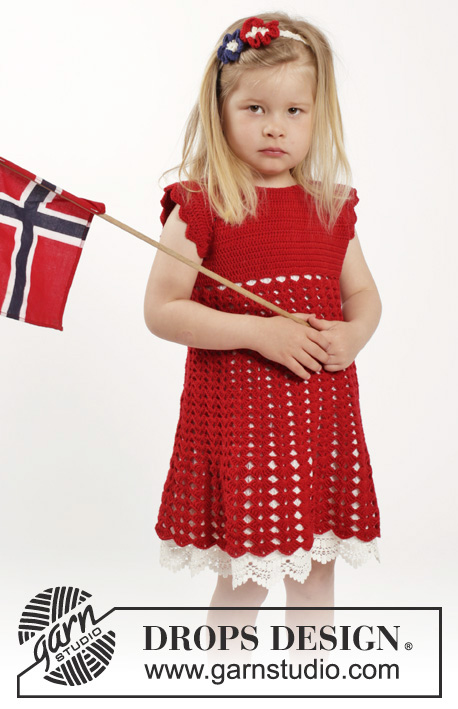
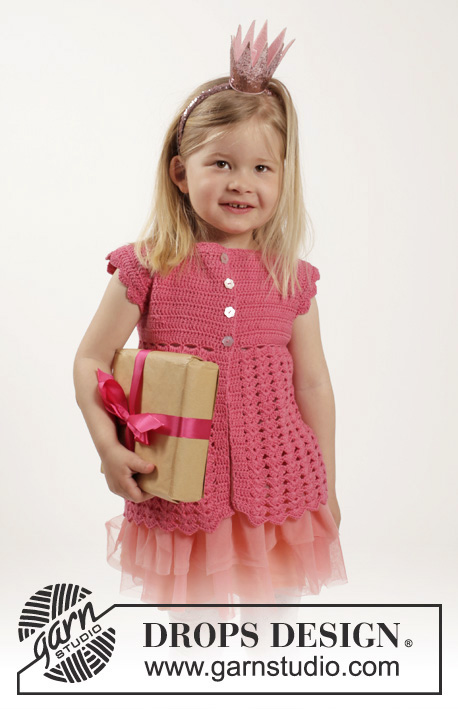
Crochet cardigan with raglan, short sleeves and fan edges, worked top down in DROPS Cotton Merino or DROPS Belle. Size children 1 - 10 years.
DROPS Children 26-1 |
|
|
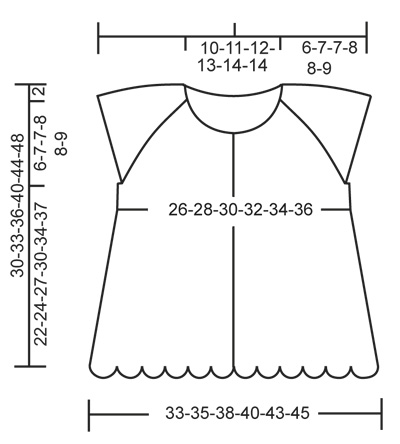
CROCHET INFO: Replace 1st tr at beg of every tr row with 3 ch. INCREASE TIP: Inc 1 tr by working 2 tr in same st. ---------------------------------------------------------- JACKET: The piece is worked top down. Worked back and forth from mid front. YOKE: Work 67-71-75-79-83-83 loose ch (incl 1 ch to turn with) on hook size 3.5 mm with Cotton Merino or Belle. Work 1 dc in 2nd ch from hook, then work 1 dc in every ch the entire row = 66-70-74-78-82-82 dc on row. Now insert 4 markers in piece for raglan as follows (beg mid front – NOTE: Do NOT work while inserting markers): Skip 15-16-17-18-19-19 dc (= right front piece), insert 1 marker in next dc, skip 6 dc (= sleeve), insert 1 marker in next dc, skip 20-22-24-26-28-28 dc (= back piece), insert 1 marker in next dc, skip 6 dc (= sleeve) and insert last marker in next dc (there are now 15-16-17-18-19-19 dc on left front piece after last marker). READ ALL OF THE FOLLOWING SECTION BEFORE CONTINUING: READ CROCHET INFO and work next row as follows from RS: Work 1 tr in every dc but in every dc with marker work 2 tr + 2 ch + 2 tr = 78-82-86-90-94-94 tr on row (= 12 tr inc on row). Then inc for raglan: Continue with tr, and work 2 tr + 2 ch + 2 tr in every ch-space in every raglan line (= 16 tr inc on row). Repeat inc on every row 4-5-5-6-6-7 more times (= 5-6-6-7-7-8 times in total) = 158-178-182-202-206-222 tr on row. REMEMBER THE CROCHET TENSION! Work next row as follows from RS: Work 1 tr in each of the first 26-29-30-33-34-36 tr (= right front piece), skip the next 32-36-36-40-40-44 tr (= sleeve), work 8 ch, work 1 tr in each of the next 42-48-50-56-58-62 tr (= back piece), skip the next 32-36-36-40-40-44 tr (= sleeve), work 8 ch and work 1 tr in each of the last 26-29-30-33-34-36 tr (= left front piece). Sleeve caps are now done. BODY: Work 1 row with tr (work 1 tr in every tr from previous row and 1 tr in every ch under each sleeve – remember CROCHET INFO) = 110-122-126-138-142-150 sts on row. NOW MEASURE PIECE FROM HERE! Continue with 1 tr in every tr until piece measures 3-4-4-4-5-5 cm, on last row inc 4-2-3-1-2-4 tr evenly - READ INCREASE TIP = 114-124-129-139-144-154 tr. Now work fan pattern as follows: ROW 1: 1 dc in each of the first 5 tr (= band), *4 ch, skip 4 tr, 1 dc in next tr *, repeat from *-*, finish with 4 ch, skip 4 dc and 1 dc in each of the last 5 tr (= band) = 21-23-24-26-27-29 ch-spaces. ROW 2: 1 tr in each of the first 5 dc, 3 tr + 2 ch + 3 tr in every ch-space, 1 tr in each of the last 5 dc. Repeat 2nd row until piece measures 13-15-17-18-20-21 cm. WORK NEXT ROW AS FOLLOWS: 1 tr in each of the first 5 tr, 4 tr + 2 ch + 4 tr in every ch-space, 1 tr in each of the last 5 tr. Repeat this row until piece measures 21-23-26-29-33-36 cm WORK NEXT ROW AS FOLLOWS: 1 tr in each of the first 5 tr, 4 dtr + 2 ch + 4 dtr in every ch-space, 1 tr in each of the last 5 tr. Work this rows a time, fasten off. ADJUSTING NECKLINE: To get a better fit work to adjust the neckline. Insert 1 marker in st in each corner in neck, i.e. at beg of every raglan line. Work on hook size 3.5 mm as follows: Beg mid front and work 1 dc in every st until 1 st remain before st with marker, work 1 htr in next st, 1 tr in st with marker and 1 htr in next st, then work 1 dc in every st until 1 st remain before next st with marker, 1 htr in next st, 1 tr in st with marker and 1 htr in next st, then work 1 dc in every st until 1 st remain before st with marker, work 1 htr in next st, 1 tr in st with marker and 1 htr in next st, then work 1 dc in every st until 1 st remain before next st with marker, 1 htr in next st, 1 tr in st with marker and 1 htr in next st, work 1 dc in every dc until mid front. Turn piece and work 1 dc in every dc back to mid front but at every marker work 3 dc tog, i.e. work 1 dc in htr but wait with last YO and pull through, work 1 dc in st with marker but wait with last YO and pull through, work 1 dc in next htr but now pull last YO through all 4 sts on hook (= 8 dc dec). NECK EDGE: Work around the neck as follows: 1 dc in first st, * 3 ch, skip 2 sts, 1 dc in next st *, repeat from *-* the entire row, fasten off. FAN EDGE AROUND SLEEVE CAPS: Work as follows: Work 1 dc in each of the 8 sts mid under sleeve, then work fan edge around the sleeve opening as follows: * Skip 2 tr, in next st work 3 tr + 2 ch + 3 tr, skip 2 tr, 1 dc in next st *, repeat from *-* and finish with 1 sl st in first dc from beg of round (= approx. 9-9-10-10-11 fans along sleeve cap). Fasten off. Repeat at the bottom around the other sleeve cap. Fasten 4 buttons evenly on the left piece. The buttons will be closed trough 2 tr on the right band. |
|
 |
|
Have you finished this pattern?Tag your pictures with #dropspattern #lovelyrosecardigan or submit them to the #dropsfan gallery. Do you need help with this pattern?You'll find 9 tutorial videos, a Comments/Questions area and more by visiting the pattern on garnstudio.com. © 1982-2026 DROPS Design A/S. We reserve all rights. This document, including all its sub-sections, has copyrights. Read more about what you can do with our patterns at the bottom of each pattern on our site. |
|


With over 40 years in knitting and crochet design, DROPS Design offers one of the most extensive collections of free patterns on the internet - translated to 17 languages. As of today we count 325 catalogues and 12298 patterns translated into English (UK/cm). 12298
We work hard to bring you the best knitting and crochet have to offer, inspiration and advice as well as great quality yarns at incredible prices! Would you like to use our patterns for other than personal use? You can read what you are allowed to do in the Copyright text at the bottom of all our patterns. Happy crafting!
Post a comment to pattern DROPS Children 26-1
We would love to hear what you have to say about this pattern!
If you want to leave a question, please make sure you select the correct category in the form below, to speed up the answering process. Required fields are marked *.