
Popular categories
Looking for a yarn?


Comments / Questions (41)
![]() Marie wrote:
Marie wrote:
Lurer litt på halskanten til jakken. Det står at det skal strikken to rader med halvstaver rundt, altså første runde blir 34 halvstaver. Snur du og går enda en runde rundt? På bilde ser det nesten ut som de har heklet to "trekanter". Har dere et mer utfyllende forklaring?
17.09.2015 - 06:48DROPS Design answered:
Hej Marie, Hæklekanten står beskrevet nederst i opskriften: Videre fortsettes det slik rundt kragen: * 3 lm, 1 st i 1.lm, hopp over ca 1,5 cm, 1 fm i neste m *, gjenta fra *-* rundt hele kragen og stopp 1 cm over øverste knapp
17.09.2015 - 09:46
![]() Birgit wrote:
Birgit wrote:
Merci pour votre réponse. Avez vous une astuce pour que l'assemblage des manches soit le plus régulier possible, avec les augmentations, nous avons des "escaliers" comment faire pour que ceux ci n'apparaissent pas lors de la couture. Merci. Belle fin de journée Birgit
26.02.2015 - 18:04DROPS Design answered:
Bonjour Birgit, vous pouvez épingler les 2 pièces pour bien les positionner avant de les coudre. Bon assemblage!
27.02.2015 - 09:13
![]() Birgit wrote:
Birgit wrote:
Merci pour les explications de la bordure, pour le col : "avec le fil écru crocheter en db en allers retours sur les 34 (...) dB autour de l'encolure. OK, mais combien de fois ? un simple aller retour ou plusieurs ? (ce sont les S qui me posent problème)Encore une fois merci pour votre aide et votre patience. Belle fin de journée. Birgit
19.02.2015 - 16:47DROPS Design answered:
Bonjour Birgit, on crochète 2 rangs sur ces 34 dB, cette mention manquait et a été corrigée, merci. Bon crochet!
19.02.2015 - 18:17
![]() Clara wrote:
Clara wrote:
Et combien de rangs allers/retour doit-on faire pour les dB autour de l'encolure? Encore mervi pour votre aide
31.01.2015 - 09:25DROPS Design answered:
Bonjour Clara, à 26-36 cm (cf taille), on crochète 1 rang en plaçant 1 marqueur à 10-13 dB du bord (milieu devant), puis on crochète encore 1 rang en laissant 10-13 dB non travaillées côté encolure et en augm. 1 dB au marqueur, puis on met en attente, on crochète le devant gauche puis le dos. Bon crochet!
02.02.2015 - 09:19
![]() Wolletje wrote:
Wolletje wrote:
Hoi frida, alsik de laatste toer van het linkervoorpand haak dan kom ik niet uit met de hoogte omdat ik dan nog de laatste steken voor de hals moet doen
22.01.2015 - 15:47
![]() Frida wrote:
Frida wrote:
Jag fattar verkligen inte minskningen. Hur många ska man minska på varje varv på bakstycket? Gör storlek 9/12? ( den 3:e). Ska man minska 1 på varje varv i början. Eller v a r 17:e? Sen 3 st 5 gånger? ??
04.06.2014 - 09:00DROPS Design answered:
Hej Frida. Du haekler 12/18 mnd. Saa du minskar 17 halvst paa 1 gang i hver side og 5 halvst 3 ggr = 50 halvst på varvet.
04.06.2014 - 17:19
![]() Marie wrote:
Marie wrote:
Bonjour. Est-ce normal que ça fasse un genre d'escalier lors des augmentations pour les manches du gilet ?
31.03.2014 - 04:40DROPS Design answered:
Bonjour Marie, les augmentations pour les manches vont effectivement former un genre d'escalier mais qui ne se verra ensuite plus quand on fera la couture sous les manches. Bon crochet!
31.03.2014 - 09:41
![]() Sille wrote:
Sille wrote:
Ich habe die Jacke gehäkelt und dabei einen Knäuel mehr verbraucht als angegeben. Lässt sich gut nachhäkeln.
12.02.2014 - 14:37
![]() Anna wrote:
Anna wrote:
Sorry, ik denk dat er iets mis gegaan, ik zie maar een halve zin...
26.11.2013 - 16:00DROPS Design answered:
Probeer even te vernieuwen (F5).
26.11.2013 - 16:25
![]() Anna wrote:
Anna wrote:
Hierdoor kom ik dus ook niet goed uit met de hoogte van de mouw, ik krijg ook een te smal mouwtje als ik de meerderingen zo doe. Bij het achterpand kan ik aan beide kanten tegelijk meerderen en hoef ik geen toer terug te haken. Dan krijg ik een andere verhouding, ik minder sneller qua hoogte dan bij het voorpand. Ik kom er maar niet achter waar ik het fout doe en hoop dat u mij kunt helpen.
25.11.2013 - 17:51DROPS Design answered:
Hoi Anna. Zie reactie hieronder.
26.11.2013 - 15:25
|
|
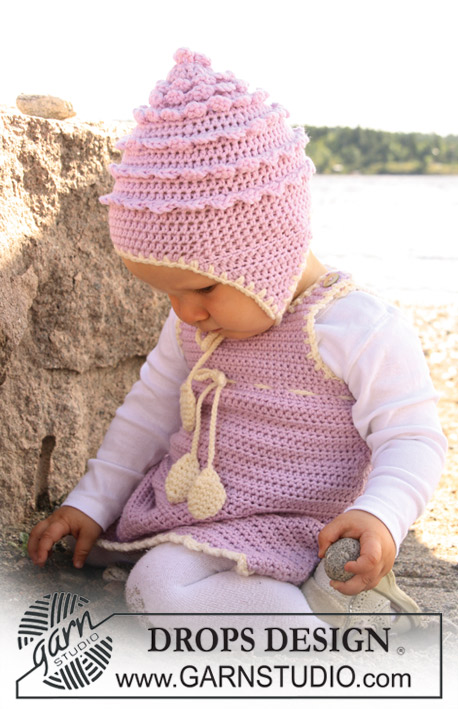
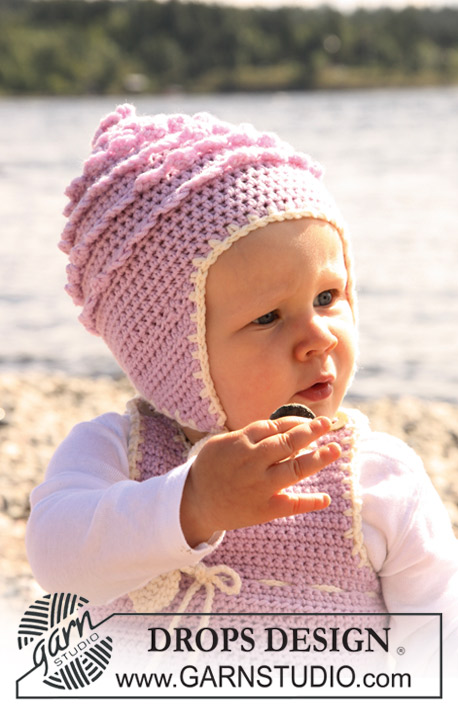
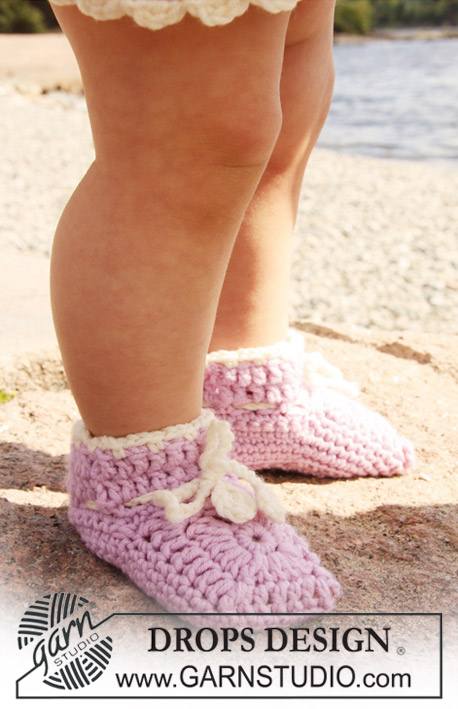
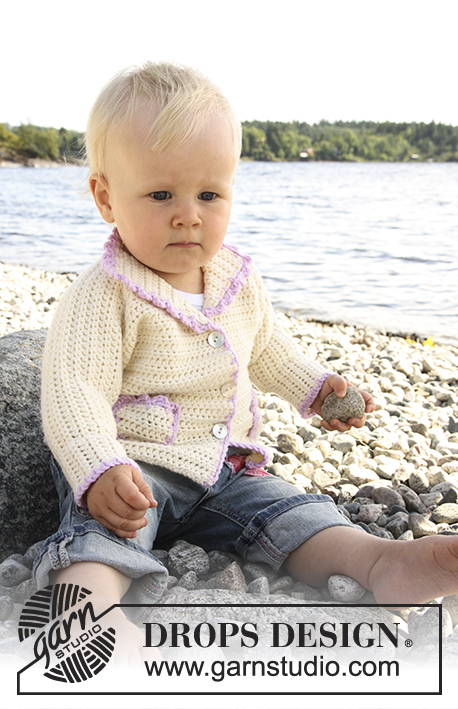
Sophie by the Sea#sophiebytheseajacket |
|
 |
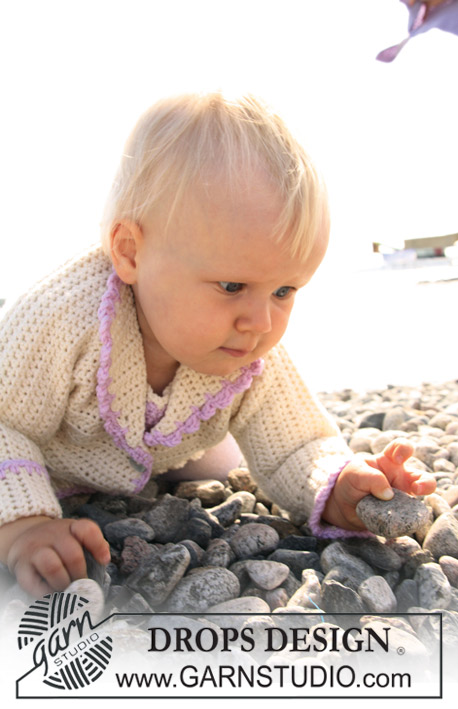 |
Crochet jacket with pockets for baby and children in DROPS Merino Extra Fine
DROPS Baby 20-17 |
|
|
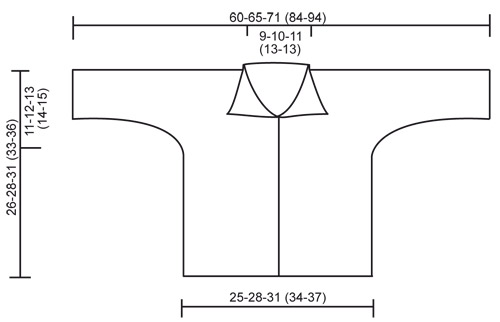
JACKET: CROCHET INFO: Replace first htr on row with 2 ch. Finish each row with 1 htr in 2nd ch from beg of previous row. INCREASING TIP (applies to sleeves): Inc for sleeve at the end of every row as follows: crochet the same number of ch as htr to be inc, turn piece and crochet 1 dc in 2nd ch from hook (= 2 dc at beg of row = 1 ch + 1 dc), then crochet 1 htr in each of the remaining ch. Continue as before. At the end of next row towards the side crochet 1 dc in the last htr before inc for sleeve. Do this to make line under armhole more even. DECREASING TIP (applies to sleeves): Dec at the beg of every row from the side as follows: replace the number of htr to be dec minus 1 htr with 1 sl st in each htr, 1 ch, skip the last htr to be dec and continue as before. Do this to make line under armhole even. BUTTONHOLES: Make buttonholes on right front band. 1 BUTTONHOLE = replace 2nd htr from mid front with 1 ch. On next row crochet 1 htr in the ch. Make buttonholes when piece measures: SIZE 1/3 MONTHS: 8, 12 and 16 cm. SIZE 6/9 MONTHS: 9, 13 and 17 cm. SIZE 12/18 MONTHS: 10, 15 and 20 cm. SIZE 2 YEARS: 11, 16 and 21 cm. SIZE 3/4 YEARS: 11, 17 and 23 cm. --------------------------------------------------------- JACKET: Crochet front pieces first, then inc for sleeves, slip front pieces tog, dec for sleeves and continue on back piece from neckline down. RIGHT FRONT PIECE: See CROCHET INFO! Crochet 29-31-35 (38-41) ch (includes 2 ch to turn with) with crochet hook size 4.5 mm and off-white. Crochet first row as follows from mid front: 1 htr in 3rd ch from hook, 1 htr in each of the next 3 ch, * skip 1 ch, 1 htr in each of the next 4 ch *, repeat from *-* until 3-5-4 (2-5) ch remain, skip 1 ch, crochet 1 htr in each of the remaining 2-4-3 (1-4) ch = 23-25-28 (30-33) htr on row, turn piece. Continue with 1 htr in each htr. REMEMBER THE CROCHET TENSION. Remember buttonholes on front band – SEE ABOVE. When piece measures 15-16-18 (19-21) cm inc for sleeve at the end of every row towards the side – See INCREASING TIP: 5 htr 2-2-3 (3-4) times and then 18-20-17 (25-25) htr 1 time = 51-55-60 (70-78) htr on row for shoulder/sleeve. Continue with 1 htr in each htr. When piece measures 26-28-31 (33-36) cm insert a marker 10-11-12 (13-13) htr from mid front – NOW MEASURE PIECE FROM HERE! On next row do NOT crochet on the 10-11-12 (13-13) htr towards mid front, but 1 htr in each of the remaining 41-44-48 (57-65) htr, AT THE SAME TIME inc 1 htr by marker by crochet 2 htr in the outermost htr by marker. There are now 42-45-49 (58-66) htr on row. Put piece aside. LEFT FRONT PIECE: Like right front piece, but mirrored – NOTE! do not make buttonholes on front band. BACK PIECE: Crochet htr on the 42-45-49 (58-66) htr on left front piece (sleeve/shoulder), crochet 12-14-16 (18-18) ch (= neckline back piece) and crochet htr on the 42-45-49 (58-66) htr on right front piece = 96-104-114 (134-150) htr. Continue with 1 htr in each htr until piece measures 7-7.5-7.5 (8-8) cm. Now dec sleeve sts each side at the beg of every row as follows – See DECREASING TIP: 18-20-17 (25-25) htr 1 time and then 5 htr 2-2-3 (3-4) times = 40-44-50 (54-60) htr on row. Continue with htr. Finish when back piece measures 26-28-31 (33-36) cm – fold piece double by marker on shoulder and measure to front pieces. NECKLINE: Crochet 2 rows with htr back and forth on the 34-38-42 (46-46) htr round neck with crochet hook size 4.5 mm and off-white. POCKETS: Crochet 5-6-7 (8-9) ch (includes 2 ch to turn with) with crochet hook size 4.5 mm and off-white. Crochet 1 htr in 3rd ch from hook, 1 htr in each of the next 2-3-4 (5-6) ch = 4-5-6 (7-8) htr. Turn piece. Continue with 1 htr in each htr, AT THE SAME TIME inc 1 htr each side by working 2 htr in the outermost htr each side. Repeat the inc each side on every row a total of 3 times = 10-11-12 (13-14) htr. Continue with htr until pocket measures approx 5-5-6 (7-7) cm. Cut and fasten thread. Now crochet a border round the whole pocket with crochet hook size 4.5 mm and light pink as follows – beg in top right hand corner: 1 dc in first st, * 3 ch, 1 tr in first ch, skip approx 1.5 cm, 1 dc in next st *, repeat from *-* along the upper edge of pocket (= approx 4-4-5 (5-6) loops), then continue as follows round the rest of pocket: * 1 ch, skip 1 row/1 htr, 1 dc in next st *, repeat from *-* and finish with 1 ch and 1 sl st in first dc from beg of round. Crochet 1 more pocket in the same way. ASSEMBLY: Sew sleeve and side seams, edge to edge with neat sts – make sure to have an even seam under sleeves. Sew buttons to left front band. Sew a pocket to each front piece approx 3-3-4 (5-6) cm from bottom edge and approx 5-5-6 (6-7) cm from mid front. CROCHET BORDER: Crochet a border along both front bands and collar with crochet hook size 4.5 mm with light pink – beg at bottom of right front piece: 1 dc in first st,* 1 ch, skip 1 row, 1 dc in next st *, repeat from *-* up to 1 cm past the top buttonhole, now continue as follows round collar: * 3 ch, 1 tr in first ch, skip approx 1.5 cm, 1 dc in next st *, repeat from *-* round collar down to 1 cm before the top button, and now continue as follows along left front band: * 1 ch, skip 1 row, 1 dc in next st *, repeat from *-* and finish at bottom of left front piece. Crochet a border round both sleeve edges with crochet hook size 4.5 mm with light pink as follows: 1 dc in first st, * 1 ch, skip 1 row, 1 dc in next st *, repeat from *-* and finish with 1 ch and 1 sl st in first dc. |
|
 |
|
Have you finished this pattern?Tag your pictures with #dropspattern #sophiebytheseajacket or submit them to the #dropsfan gallery. Do you need help with this pattern?You'll find 11 tutorial videos, a Comments/Questions area and more by visiting the pattern on garnstudio.com. © 1982-2026 DROPS Design A/S. We reserve all rights. This document, including all its sub-sections, has copyrights. Read more about what you can do with our patterns at the bottom of each pattern on our site. |
|


With over 40 years in knitting and crochet design, DROPS Design offers one of the most extensive collections of free patterns on the internet - translated to 17 languages. As of today we count 325 catalogues and 12298 patterns translated into English (UK/cm). 12298
We work hard to bring you the best knitting and crochet have to offer, inspiration and advice as well as great quality yarns at incredible prices! Would you like to use our patterns for other than personal use? You can read what you are allowed to do in the Copyright text at the bottom of all our patterns. Happy crafting!
Post a comment to pattern DROPS Baby 20-17
We would love to hear what you have to say about this pattern!
If you want to leave a question, please make sure you select the correct category in the form below, to speed up the answering process. Required fields are marked *.