
Popular categories
Looking for a yarn?


Comments / Questions (44)
![]() Eva-Lena wrote:
Eva-Lena wrote:
Bakstycke- ska man virka från ärmslut eller mitt i bakstycke efter man virkat 8 cm . Stl 2/3 år.. det är det som jag är förbryllad att virka från vilken sida för att minska också på ärmar ...tacksam för tydligare förklaring. Vänligen
15.08.2024 - 19:19DROPS Design answered:
Hej Eva-Lena. Det er samma antal maskor du har ökat till ärm som du ska minska igen: Du minskar från ytterkanten: MINSKNINGSTIPS (gäller ärmarna): Minska i början på varje varv från sidan så här: Ersätt det antal halvst som ska minskas minus 1 halvst med 1 sm i varje halvst, virka 1 lm, hoppa över den sista halvst som skall minskas och virka sedan som tidigare. Detta görs så att man inte får en hackig kant under ärmen.
21.08.2024 - 09:27
![]() Marie wrote:
Marie wrote:
Hej, jag har svårt att förstå ökningen vid ärmen. Vad betyder 5 hst 2 gånger och sedan 18 hst 1 gång? Ska de virkas i samma maska?
02.03.2024 - 17:24DROPS Design answered:
Hej Marie, se ÖKNINGSTIPS, du laver først 5 lm, vender og virkar 5 halvst, det gør du 2 ggr, og så virkar du 18 lm, vender og virkar 18 halvst
05.03.2024 - 14:35
![]() Annie wrote:
Annie wrote:
Jeg klarer ikke å forstå helt økningen på forsidene for å få til plass til ermene. Man går nemlig fra 25 til 55 hdc. Er det en video man kan se på?
15.03.2023 - 18:59DROPS Design answered:
Hej Annie, har du læst ØKETIPS (gjelder ermene): Det økes til erme på slutten av hver rad mot siden slik: hekle like mange lm som det ant halvst som skal økes, snu arb, hekle 1 fm i 2.lm fra nåla (det er nå 2 fm på beg av raden = 1 lm + 1 fm), hekle 1 halvst i hver av de resterende lm før det hekles videre som før. På slutten av neste rad mot siden hekles det 1 fm i siste halvst før det økes ut til erme. Dette gjøres for å unngå en svært hakkete linje under ermet.
17.03.2023 - 08:36
![]() Kia Andersson wrote:
Kia Andersson wrote:
Hej, tänkte använda mig av detta mönster till en Tomtefar i stl 9 mån-1år, men vill inte ha kragen. Kan man virka något extra varv på halskanten utan att det ser konstigt ut? Har aldrig virkat en kofta. Tacksam för svar. Mvh Kia
29.06.2021 - 13:44DROPS Design answered:
Hej Kia, det går helt fint at ændre mønsteret når du kommer op til kragen. Vi har desværre ikke mulighed for at skrive opskriften om :)
30.06.2021 - 14:45
![]() Evelin wrote:
Evelin wrote:
Ang. framstyckena. Det står virka tills arb mäter 36cm sätt en markör 13 halvst in. På nästa varv virkas det inte över de 13 halvst. Jag förstår inte hur jag ska göra här. Ska jag dra upp de 13 halvst och börja på nästa varv därifrån, ska jag virka varvet ut och klippa av tråden för att kunna börja på nästa varv 13 halvst in? Hur ska jag göra?
24.03.2019 - 16:04DROPS Design answered:
Hei Evelin. Om du tilpasser at raden du hekler etter å ha satt merketråden er en rad fra vrangsiden så kan du hekle frem til det gjenstår 13 halvstaver (mot midt foran), og så snu arbeidet og hekle tilbake. God fornøyelse
02.04.2019 - 09:30
![]() Franzi wrote:
Franzi wrote:
Ich habe Probleme mit den Ärmeln. Wie genau werden die denn gehäkelt? Ich habe 23 Maschen. Nehme ich dann auf einmal 5 HbSt auf? Was bedeutet 2-2-3 (3-4) dann dahinter? Und wie komme ich auf die Maschenzahl von 51-55-60 (70-78), wenn ich doch nur 18-20-17 (25-25) H-Stb aufnehme? Ich freue mich, wenn mir jemand helfen kann! Liebe Grüße und vielen Dank
03.09.2018 - 07:07DROPS Design answered:
Liebe Franzi, nach 15 cm schlagen Sie auf der Seite (= Ärmel) in jeder Reihe 5 H-Stb 2 x und 18 H-Stb 1 x: 23 + 5 +- 5 + 18 = 51 H-Stb. Viel Spaß beim häkeln!
03.09.2018 - 15:29
![]() Merete wrote:
Merete wrote:
Lurer på fellingen på bakstykket. Jeg forstår hvordan jeg skal gjøre det på begynnelsen av første rad med felling, og hekler halvstaver videre. Men når jeg er ferdig å hekle halvstaver, skal jeg da fortsette med kjedemasker ut raden på samme måte som jeg gjorde på begynnelsen av raden? Eller skal jeg bare snu med en gang jeg er ferdig med halvstavene? Da vil det vel ikke bli likt på begge sidene, for kjedemaskene bygger vel også noen millimeter ut...
06.03.2018 - 11:04DROPS Design answered:
Hej Merete, de masker du skal felle sidst på pinden, lader du bare være og snuer uden at hækle kædemasker. God fornøjelse!
13.03.2018 - 16:01
![]() Caroline wrote:
Caroline wrote:
Tusen tack för snabbt svar! Så långt har jag förstått med åldrarna men vad menas med det sista "5 halvst 2-2-3 (3-4) ggr och sedan 18-20-17 (25-25) halvst 1 gång = 51-55-60 (70-78) ", hur kan det bli 55?
25.10.2016 - 14:37DROPS Design answered:
Hej Caroline. Du har 25 halv st og tager ud i siden som fölger: 2 ganger 5 halv st (+10) og 1 gang 20 halv st = 25+10+20 = saa har du 55 halv st i alt paa omg
25.10.2016 - 14:47
![]() Caroline wrote:
Caroline wrote:
Vad betyder siffrorna inom parentes: "När arb mäter 15-16-18 (19-21) cm läggs det upp nya halvst till ärm, lägg upp i slutet på varje varv mot sidan – LÄS ÖKNINGSTIPS: 5 halvst 2-2-3 (3-4) ggr och sedan 18-20-17 (25-25) halvst 1 gång = 51-55-60 (70-78) halvst på varvet till axel/ärm ". Får det inte till att bli 55 halvst? Mvh, Caroline
25.10.2016 - 12:59DROPS Design answered:
Hej Caroline. Alle tallene henviser til hvilken störrelse du laver. Du har str 1/3 - 6/9 - 12/18 mnd (2 - 3/4) år og det er saa lig 2-2-3 (3-4) ggr
25.10.2016 - 14:31
![]() Marie wrote:
Marie wrote:
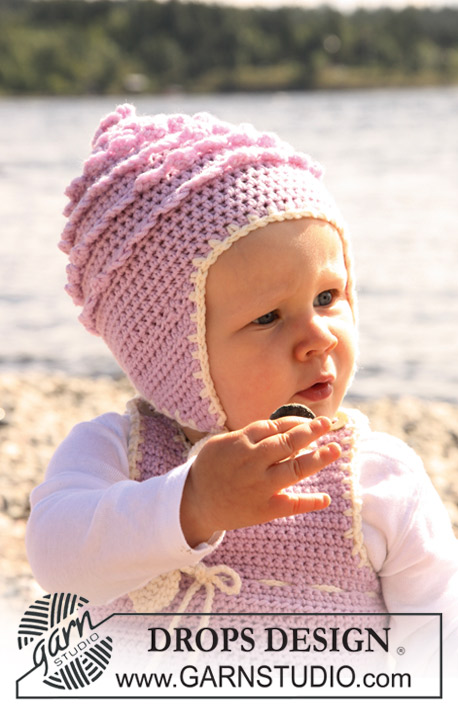
Lurer litt på halskanten til jakken. Det står at det skal strikken to rader med halvstaver rundt, altså første runde blir 34 halvstaver. Snur du og går enda en runde rundt? På bilde ser det nesten ut som de har heklet to "trekanter". Har dere et mer utfyllende forklaring?
17.09.2015 - 20:08DROPS Design answered:
Hej igen Marie, Ja det stemmer du hækler en hel række om til den anden side af halsen, snur og hækler tilbage hele rækken ud. God fornøjelse!
18.09.2015 - 15:00
|
|
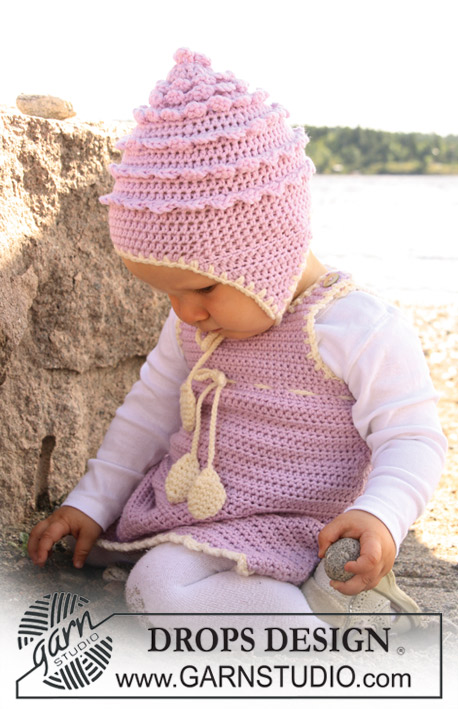
Sophie by the Sea#sophiebytheseajacket |
|
 |
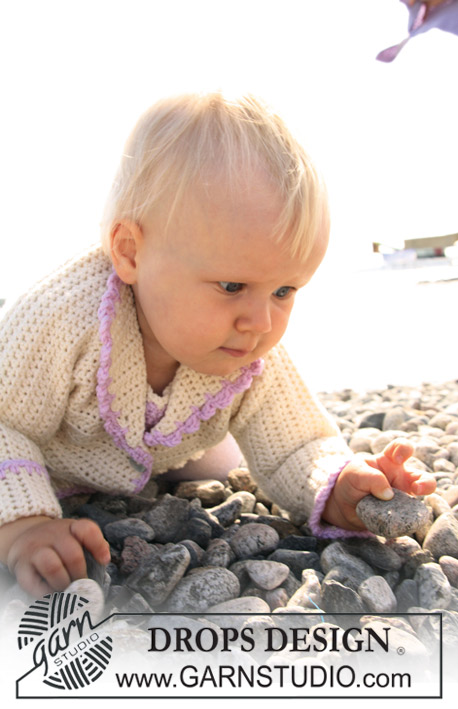 |
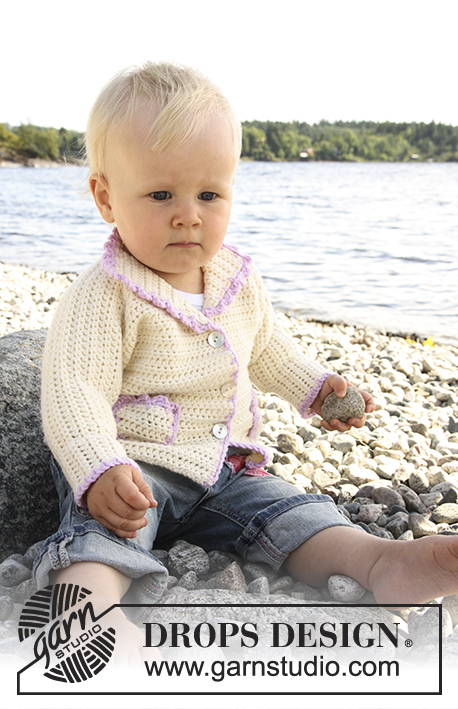
Crochet jacket with pockets for baby and children in DROPS Merino Extra Fine
DROPS Baby 20-17 |
|
|
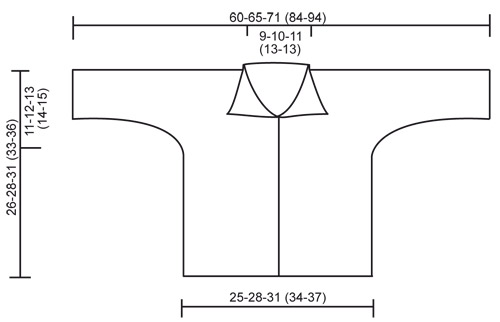
JACKET: CROCHET INFO: Replace first htr on row with 2 ch. Finish each row with 1 htr in 2nd ch from beg of previous row. INCREASING TIP (applies to sleeves): Inc for sleeve at the end of every row as follows: crochet the same number of ch as htr to be inc, turn piece and crochet 1 dc in 2nd ch from hook (= 2 dc at beg of row = 1 ch + 1 dc), then crochet 1 htr in each of the remaining ch. Continue as before. At the end of next row towards the side crochet 1 dc in the last htr before inc for sleeve. Do this to make line under armhole more even. DECREASING TIP (applies to sleeves): Dec at the beg of every row from the side as follows: replace the number of htr to be dec minus 1 htr with 1 sl st in each htr, 1 ch, skip the last htr to be dec and continue as before. Do this to make line under armhole even. BUTTONHOLES: Make buttonholes on right front band. 1 BUTTONHOLE = replace 2nd htr from mid front with 1 ch. On next row crochet 1 htr in the ch. Make buttonholes when piece measures: SIZE 1/3 MONTHS: 8, 12 and 16 cm. SIZE 6/9 MONTHS: 9, 13 and 17 cm. SIZE 12/18 MONTHS: 10, 15 and 20 cm. SIZE 2 YEARS: 11, 16 and 21 cm. SIZE 3/4 YEARS: 11, 17 and 23 cm. --------------------------------------------------------- JACKET: Crochet front pieces first, then inc for sleeves, slip front pieces tog, dec for sleeves and continue on back piece from neckline down. RIGHT FRONT PIECE: See CROCHET INFO! Crochet 29-31-35 (38-41) ch (includes 2 ch to turn with) with crochet hook size 4.5 mm and off-white. Crochet first row as follows from mid front: 1 htr in 3rd ch from hook, 1 htr in each of the next 3 ch, * skip 1 ch, 1 htr in each of the next 4 ch *, repeat from *-* until 3-5-4 (2-5) ch remain, skip 1 ch, crochet 1 htr in each of the remaining 2-4-3 (1-4) ch = 23-25-28 (30-33) htr on row, turn piece. Continue with 1 htr in each htr. REMEMBER THE CROCHET TENSION. Remember buttonholes on front band – SEE ABOVE. When piece measures 15-16-18 (19-21) cm inc for sleeve at the end of every row towards the side – See INCREASING TIP: 5 htr 2-2-3 (3-4) times and then 18-20-17 (25-25) htr 1 time = 51-55-60 (70-78) htr on row for shoulder/sleeve. Continue with 1 htr in each htr. When piece measures 26-28-31 (33-36) cm insert a marker 10-11-12 (13-13) htr from mid front – NOW MEASURE PIECE FROM HERE! On next row do NOT crochet on the 10-11-12 (13-13) htr towards mid front, but 1 htr in each of the remaining 41-44-48 (57-65) htr, AT THE SAME TIME inc 1 htr by marker by crochet 2 htr in the outermost htr by marker. There are now 42-45-49 (58-66) htr on row. Put piece aside. LEFT FRONT PIECE: Like right front piece, but mirrored – NOTE! do not make buttonholes on front band. BACK PIECE: Crochet htr on the 42-45-49 (58-66) htr on left front piece (sleeve/shoulder), crochet 12-14-16 (18-18) ch (= neckline back piece) and crochet htr on the 42-45-49 (58-66) htr on right front piece = 96-104-114 (134-150) htr. Continue with 1 htr in each htr until piece measures 7-7.5-7.5 (8-8) cm. Now dec sleeve sts each side at the beg of every row as follows – See DECREASING TIP: 18-20-17 (25-25) htr 1 time and then 5 htr 2-2-3 (3-4) times = 40-44-50 (54-60) htr on row. Continue with htr. Finish when back piece measures 26-28-31 (33-36) cm – fold piece double by marker on shoulder and measure to front pieces. NECKLINE: Crochet 2 rows with htr back and forth on the 34-38-42 (46-46) htr round neck with crochet hook size 4.5 mm and off-white. POCKETS: Crochet 5-6-7 (8-9) ch (includes 2 ch to turn with) with crochet hook size 4.5 mm and off-white. Crochet 1 htr in 3rd ch from hook, 1 htr in each of the next 2-3-4 (5-6) ch = 4-5-6 (7-8) htr. Turn piece. Continue with 1 htr in each htr, AT THE SAME TIME inc 1 htr each side by working 2 htr in the outermost htr each side. Repeat the inc each side on every row a total of 3 times = 10-11-12 (13-14) htr. Continue with htr until pocket measures approx 5-5-6 (7-7) cm. Cut and fasten thread. Now crochet a border round the whole pocket with crochet hook size 4.5 mm and light pink as follows – beg in top right hand corner: 1 dc in first st, * 3 ch, 1 tr in first ch, skip approx 1.5 cm, 1 dc in next st *, repeat from *-* along the upper edge of pocket (= approx 4-4-5 (5-6) loops), then continue as follows round the rest of pocket: * 1 ch, skip 1 row/1 htr, 1 dc in next st *, repeat from *-* and finish with 1 ch and 1 sl st in first dc from beg of round. Crochet 1 more pocket in the same way. ASSEMBLY: Sew sleeve and side seams, edge to edge with neat sts – make sure to have an even seam under sleeves. Sew buttons to left front band. Sew a pocket to each front piece approx 3-3-4 (5-6) cm from bottom edge and approx 5-5-6 (6-7) cm from mid front. CROCHET BORDER: Crochet a border along both front bands and collar with crochet hook size 4.5 mm with light pink – beg at bottom of right front piece: 1 dc in first st,* 1 ch, skip 1 row, 1 dc in next st *, repeat from *-* up to 1 cm past the top buttonhole, now continue as follows round collar: * 3 ch, 1 tr in first ch, skip approx 1.5 cm, 1 dc in next st *, repeat from *-* round collar down to 1 cm before the top button, and now continue as follows along left front band: * 1 ch, skip 1 row, 1 dc in next st *, repeat from *-* and finish at bottom of left front piece. Crochet a border round both sleeve edges with crochet hook size 4.5 mm with light pink as follows: 1 dc in first st, * 1 ch, skip 1 row, 1 dc in next st *, repeat from *-* and finish with 1 ch and 1 sl st in first dc. |
|
|
|
Have you finished this pattern?Tag your pictures with #dropspattern #sophiebytheseajacket or submit them to the #dropsfan gallery. Do you need help with this pattern?You'll find 11 tutorial videos, a Comments/Questions area and more by visiting the pattern on garnstudio.com. © 1982-2025 DROPS Design A/S. We reserve all rights. This document, including all its sub-sections, has copyrights. Read more about what you can do with our patterns at the bottom of each pattern on our site. |
|


With over 40 years in knitting and crochet design, DROPS Design offers one of the most extensive collections of free patterns on the internet - translated to 17 languages. As of today we count 314 catalogues and 11821 patterns translated into English (UK/cm).
We work hard to bring you the best knitting and crochet have to offer, inspiration and advice as well as great quality yarns at incredible prices! Would you like to use our patterns for other than personal use? You can read what you are allowed to do in the Copyright text at the bottom of all our patterns. Happy crafting!
Post a comment to pattern DROPS Baby 20-17
We would love to hear what you have to say about this pattern!
If you want to leave a question, please make sure you select the correct category in the form below, to speed up the answering process. Required fields are marked *.