
Popular categories
Looking for a yarn?


Comments / Questions (1)
![]() Francine wrote:
Francine wrote:
Bonjour,je ne comprends pas les diminutions pour les oreilles. Après les 5 mailles est-ce que je tricote les 13 premières mailles et est-ce que je coupe le fil? J’ai mis les dernières mailles sur l’aiguille de droite.Je suis dans une impasse…..c’est pas clair. Merci de m’éclairer!
22.03.2026 - 18:47DROPS Design answered:
Bonjour Francine, mettez les 12 premières mailles de l'aiguille gauche sur la droite (sans les tricoter), ne coupez pas le fil, on garde juste environ 5 cm de fil derrière parce que l'on va maintenant diminuer à partir du milieu de l'oreille en tricotant ensemble à l'endroit les mailles de part et d'autre de la maille centrale - vous allez diminuer un peu comme dans cette vidéo: la maille centrale est glissée dans la vidéo mais mise sur l'aiguille devant l'ouvrage ici, vous tricotez la dernière maille sur l'aig. droite avec la 1ère m sur l'aiguille gauche ensemble et vous passe la m centrale par-dessus la maille obtenue, et vous répétez cette diminution jusqu'à ce qu'il ne reste que la maille centrale. Bon tricot!
23.03.2026 - 09:33
|
||||
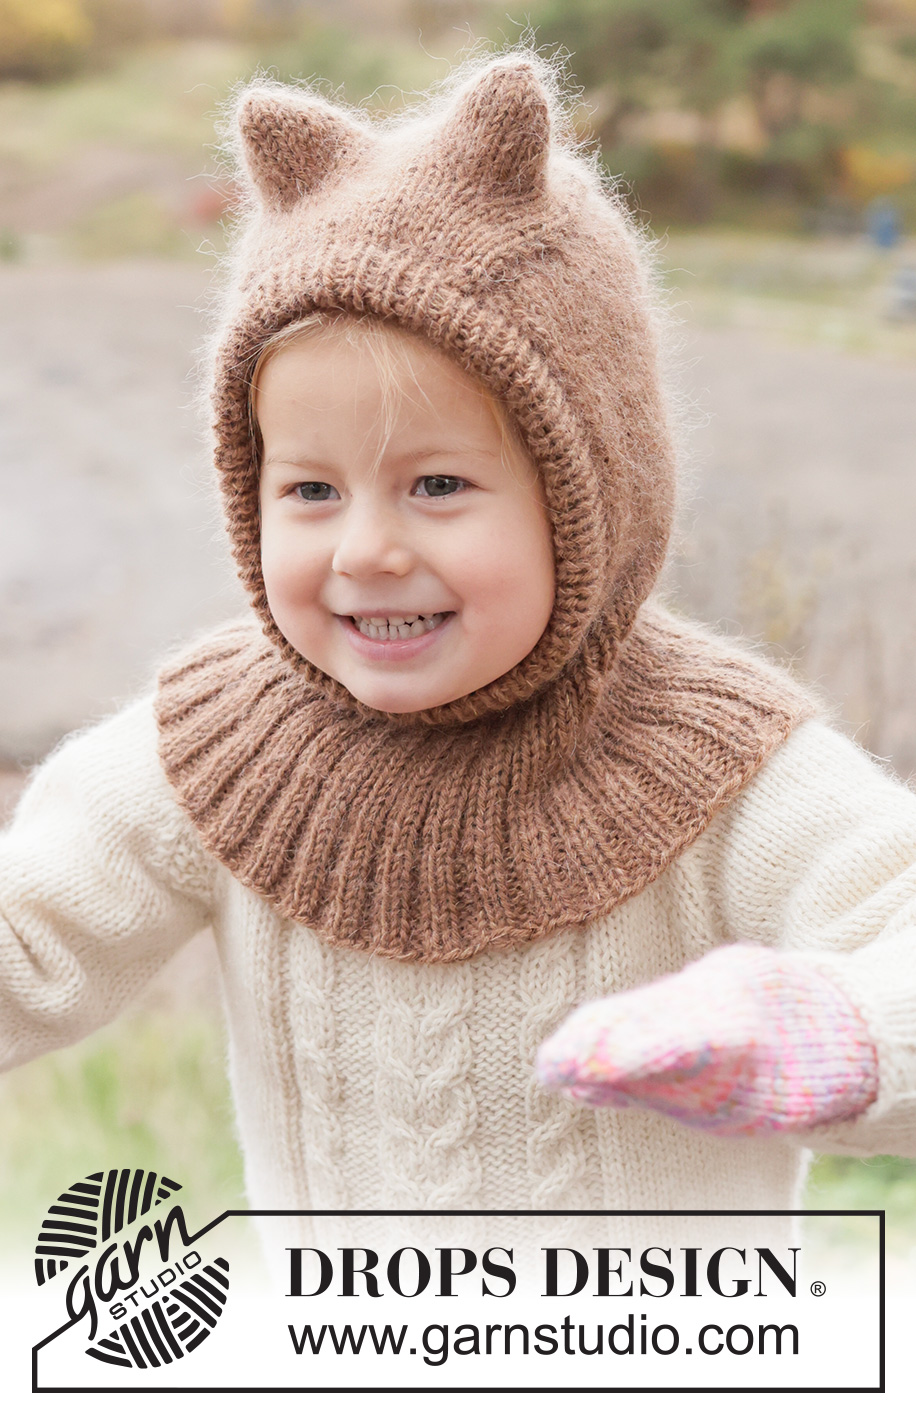
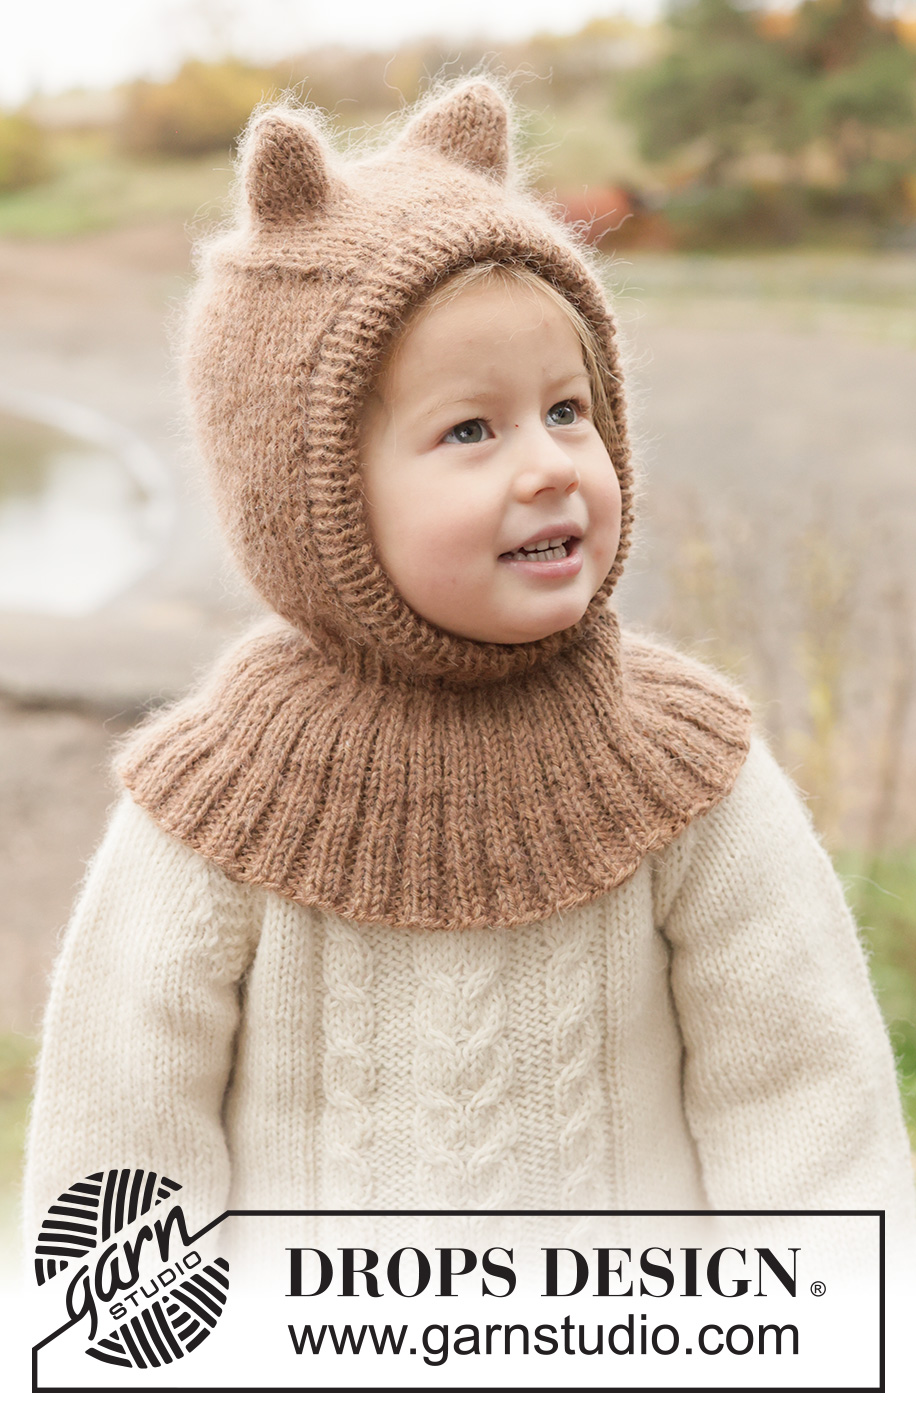
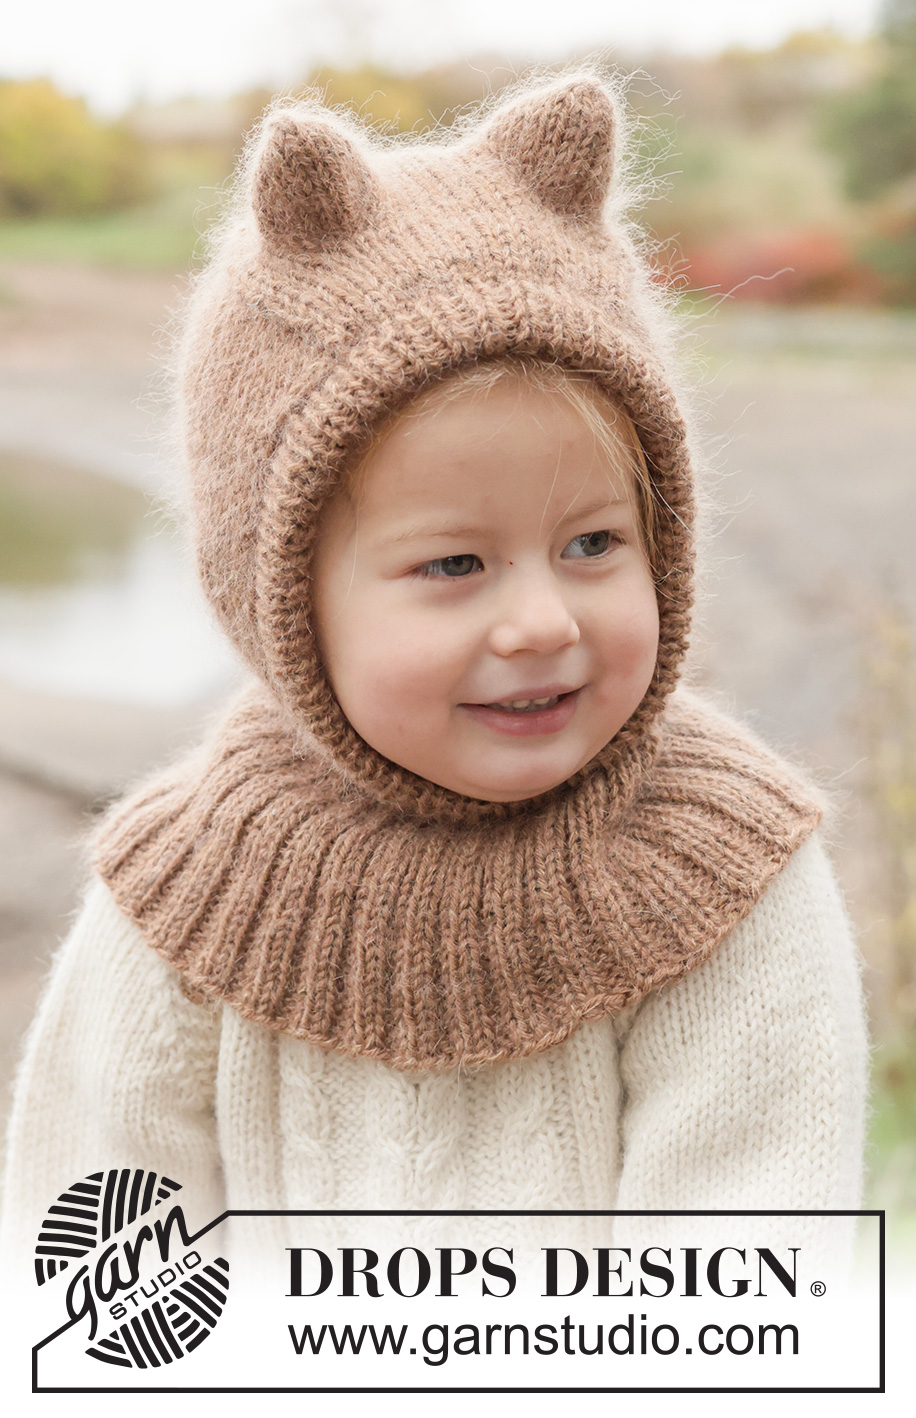
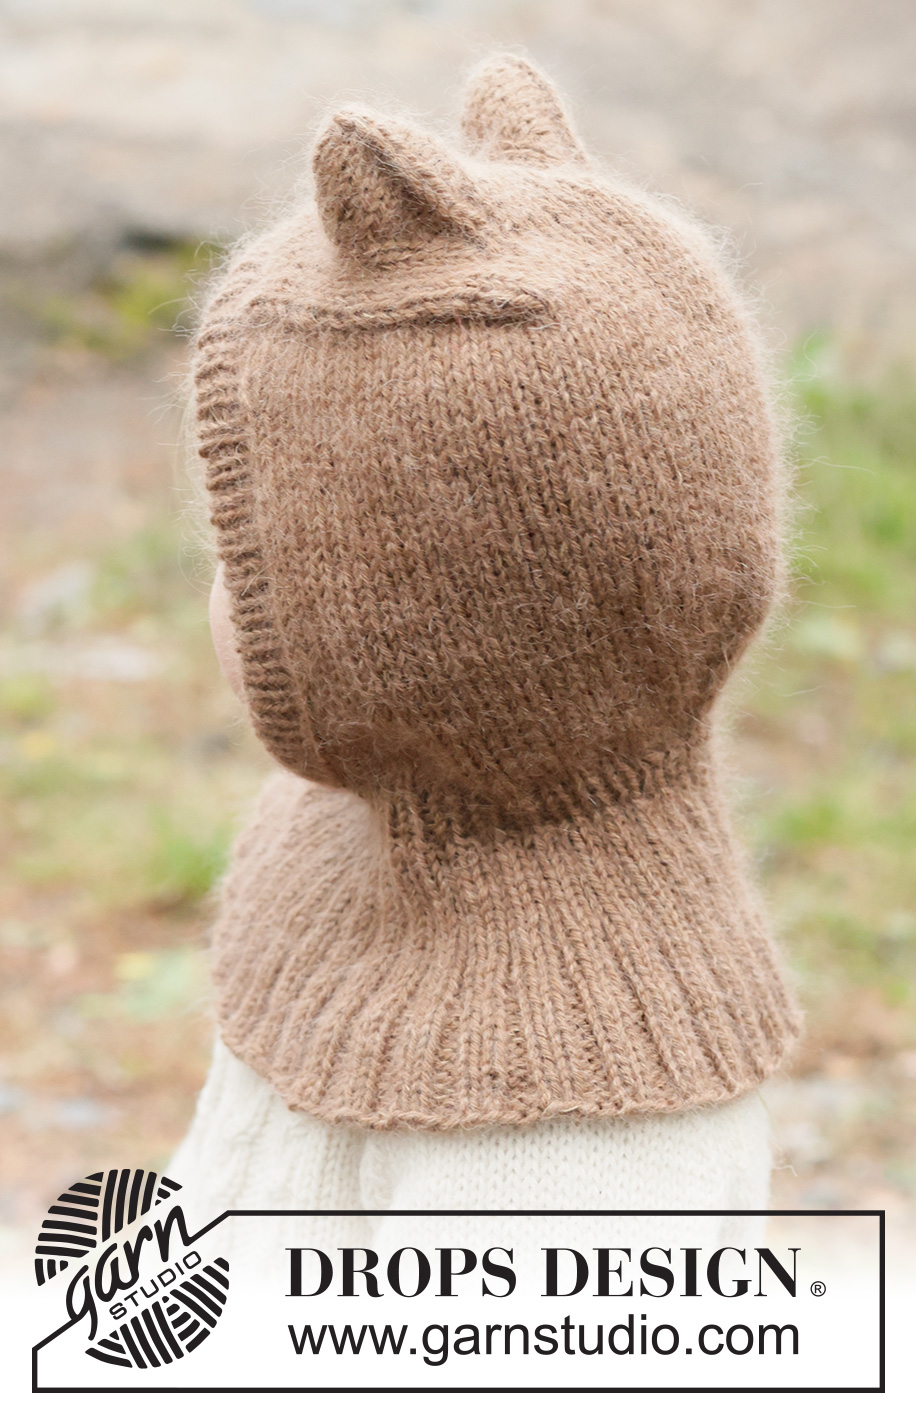
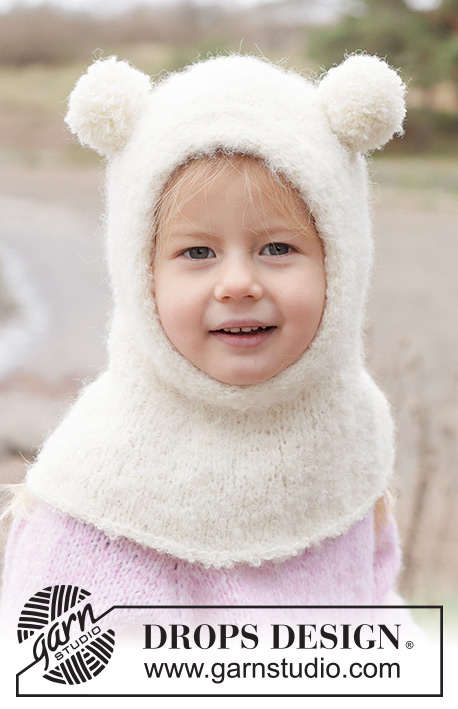
Forest Cub Balaclava#forestcubbalaclava |
||||
 |
 |
|||
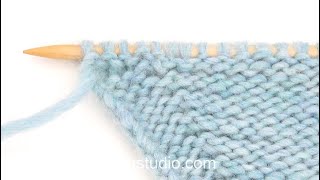
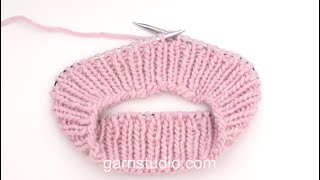
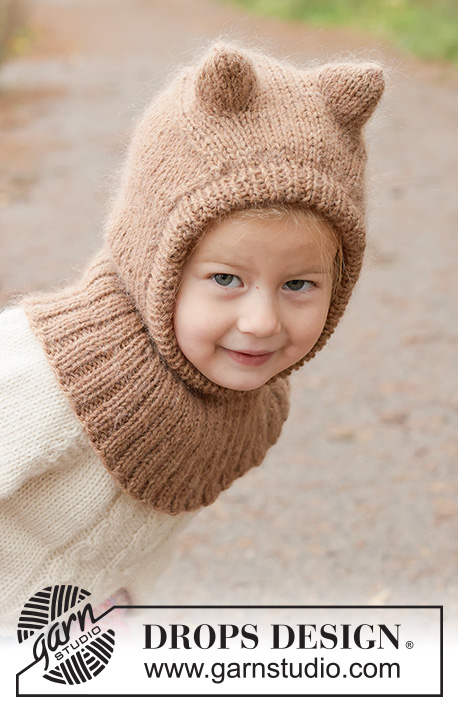
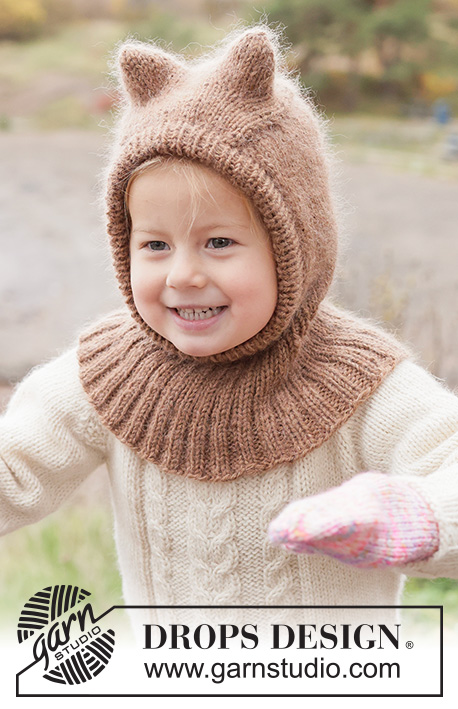
Knitted balaclava for children in DROPS Lima and DROPS Kid-Silk. The piece is worked top down with ears. Sizes 2 - 14 years.
DROPS Children 50-1 |
||||
|
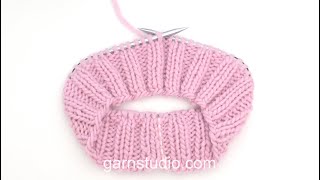
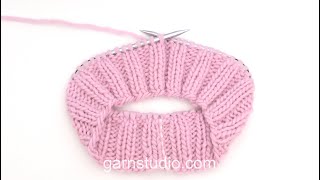
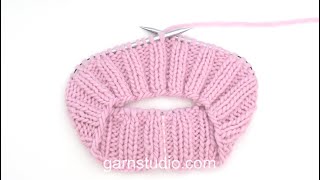
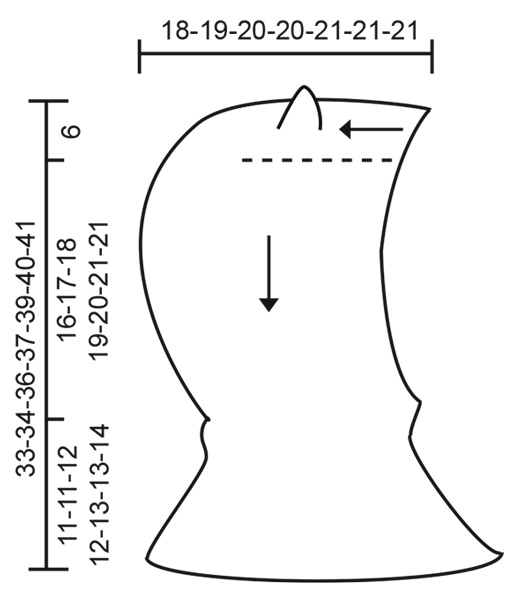
------------------------------------------------------- EXPLANATIONS FOR THE PATTERN: ------------------------------------------------------- INCREASE TIP-1: INCREASE 1 STITCH TOWARDS THE RIGHT - from RIGHT SIDE: Use left needle to pick up strand between 2 stitches from row below, pick up strand from the back and knit in the stitch loop that is on the front of the needle. INCREASE 1 STITCH TOWARDS THE LEFT - from RIGHT SIDE: Use left needle to pick up strand between 2 stitches from row below, pick up strand from the front and knit in the stitch loop that is on the back of the needle. INCREASE TIP-2: INCREASE 1 STITCH TOWARDS THE LEFT - from WRONG SIDE: Use left needle to pick up strand between 2 stitches from row below, pick up strand from the front and purl in the stitch loop that is on the back of the needle. INCREASE 1 STITCH TOWARDS THE RIGHT - from WRONG SIDE: Use left needle to pick up strand between 2 stitches from row below, pick up strand from the back and purl in the stitch loop that is on the front of the needle. EAR DECREASES: 25 ear-stitches. Knit 2 and 2 stitches together until there is 1 stitch left on the row (24 decreased stitches) as follows: Place 12 stitches purl-wise from the left needle onto the right needle (without working them), loosen the yarn to 5 cm at the back so the height of the ear is not affected, knit 1 (= middle ear-stitch), place this stitch on a cable needle in front of the piece, * move 1 stitch from right to left needle and knit 2 together, place the new stitch on the cable needle, pass the first stitch on the cable needle over the new stitch (= 1 stitch left on cable needle) *, work from *-* until all 25 ear-stitches have become 1 stitch on the cable needle, place this last stitch back on the right needle and tighten the strand well. On the next row, the hole left after the ear stitch can be closed by picking up the strand between the ear-stitch and the next stitch and knitting them twisted together. ------------------------------------------------------- START THE PIECE HERE: ------------------------------------------------------- BALACLAVA - SHORT OVERVIEW OF THE PIECE: The pattern uses both long and short needles; start with the length which fits the number of stitches and change when necessary. The top piece is worked back and forth, from mid-forehead backwards. Stitches are increased and decreased for the ears, then stitches are knitted up on both sides and the piece is continued back and forth, downwards. When the hood is finished, stitches are cast on under the face-opening and the neck is worked in the round. An edge is worked around the face-opening to finish. TOP PIECE: Cast on 21-21-21-23-23-23-23 stitches with circular needle size 5 mm, with DROPS Lima and DROPS Kid-Silk (2 strands). Cast-on edge = mid-forehead. Work stocking stitch back and forth for 4-4-4-4-4-5-5 cm, with the last row from the wrong side. Remember the knitting tension. Now increase 4 stitches for the ears (2 stitches on each ear) both from the right and wrong side as follows: ROW 1 (right side) – read INCREASE TIP-1: Knit 5-5-5-6-6-6-6, increase 1 stitch towards the right, knit 1 (ear-stitch), increase 1 stitch towards the left, knit 9, increase 1 stitch towards the right, knit 1 (ear-stitch), increase 1 stitch towards the left, knit 5-5-5-6-6-6-6 = 25-25-25-27-27-27-27 stitches. ROW 2 (wrong side) – read INCREASE TIP-2: Purl 5-5-5-6-6-6-6, increase 1 stitch towards the left, purl 3 (ear-stitches), increase 1 stitch towards the right, purl 9, increase 1 stitch towards the left, purl 3 (ear-stitches), increase 1 stitch towards the right, purl 5-5-5-6-6-6-6 = 29-29-29-31-31-31-31 stitches. Continue increasing like this, always on the outside of the previously increased ear-stitches. There are always 5-5-5-6-6-6-6 stitches on each side of the piece after/before the increases and 9 stitches between the increases mid-top. Work a total of 12 increase-rows = 25 stitches on each ear = 69-69-69-71-71-71-71 stitches. The 25 ear-stitches will now become 1 stitch on each ear as follows: Knit 5-5-5-6-6-6-6, work EAR DECREASES – read explanation above (25 stitches become 1), knit 9, work EAR DECREASES across the second ear (25 stitches become 1), knit 5-5-5-6-6-6-6 = 21-21-21-23-23-23-23 stitches. Continue stocking stitch back and forth until the piece measures 12-13-14-14-15-15-15 cm. Cut the strand. The top-piece is finished. HOOD: Now knit up stitches along both sides of the top-piece, inside the outermost stitch, as follows: Start from the corner of the cast-on edge from the right side and knit up 21-22-24-24-26-26-26 stitches along one side, (right-hand side when the cast-on edge is towards you), knit the 21-21-21-23-23-23-23 stitches from the top piece, knit up from the right side 21-22-24-24-26-26-26 stitches along the other side (left-hand side when the cast-on edge is towards you) = 63-65-69-71-75-75-75 stitches. The piece is now measured from the knitted up row. Work as follows: ROW 1 (wrong side): Purl all stitches. ROW 2 (right side): Knit 1, slip 1 stitch, knit 1 and pass the slipped stitch over the knitted stitch, knit until there are 3 stitches left, knit 2 together, knit 1 (2 decreased stitches). Work ROWS 1 and 2 a total of 4 times (8 rows worked) = 55-57-61-63-67-67-67 stitches. Continue stocking stitch back and forth until the piece measures 12-13-14-15-16-17-17 cm from the knitted-up row. Insert 1 marker in the middle stitch on the row, with 27-28-30-31-33-33-33 stitches on each side of the marker-stitch. Now increase on each side, at the same time as decreasing mid-back each side of the marker-stitch, remember INCREASE TIP-1, as follows: ROW 1 (right side): Knit 2, increase 1 stitch towards the left, knit until there are 3 stitches left before the marker-stitch, knit 2 together, knit 3 (marker-stitch is the middle of these 3 stitches), slip 1 stitch, knit 1 and pass the slipped stitch over the knitted stitch, knit until there are 2 stitches left on the row, increase 1 stitch towards the right, knit 2 (2 increased and 2 decreased stitches) = 55-57-61-63-67-67-67 stitches. ROW 2 (wrong side): Purl all stitches. Work ROWS 1 and 2 a total of 4 times (8 rows worked) = 55-57-61-63-67-67-67 stitches. On the next row from the right side knit all stitches, then cast on 7-9-9-11-9-11-13 stitches at the end of the row = 62-66-70-74-76-78-80 stitches. The piece measures approx. 16-17-18-19-20-21-21 cm from the knitted-up row. Insert 1 marker. The piece is now measured from here. Work the neck as follows. NECK: Work rib in the round (knit 1, purl 1) for 2 cm. Now increase to knit-2, purl-1 as follows: * Knit 1, increase 1 stitch towards the left – remember INCREASE TIP-1, purl 1 *, work from * - * to end of round = 93-99-105-111-114-117-120 stitches. Work the new rib (knit 2, purl 1) until the neck measures 5-5-6-6-6-6-6 cm from the marker. Now increase to knit-2, purl-2 as follows: * Knit 2, increase 1 stitch towards the left – remember INCREASE TIP-2, purl 1 *, work from * - * to end of round = 124-132-140-148-152-156-160 stitches. Work the new rib (knit 2, purl 2) until the neck measures 11-11-12-12-13-13-14 cm from the marker. Cast off with rib. EDGE: Now work an edge around the face-opening. Use circular needle size 4 mm and 1 strand of each quality. Start in the middle of the cast-on stitches mid-front. Knit up 84-88-92-96-100-104-106 stitches around the opening from the right side: the stitch count must be divisible by 2. From the right side, work rib in the round (knit 1, purl 1) for 4-4-4½-4½-5-5-5 cm. Cast off with rib. Fold the cast-off edge to the inside and fasten to the knitted-up edge, sewing in every 2nd stitch and making sure the seam is not tight. |
||||
Diagram explanations |
||||
|
||||
 |
||||
Have you finished this pattern?Tag your pictures with #dropspattern #forestcubbalaclava or submit them to the #dropsfan gallery. Do you need help with this pattern?You'll find 29 tutorial videos, a Comments/Questions area and more by visiting the pattern on garnstudio.com. © 1982-2026 DROPS Design A/S. We reserve all rights. This document, including all its sub-sections, has copyrights. Read more about what you can do with our patterns at the bottom of each pattern on our site. |
||||


With over 40 years in knitting and crochet design, DROPS Design offers one of the most extensive collections of free patterns on the internet - translated to 17 languages. As of today we count 325 catalogues and 12291 patterns translated into English (UK/cm). 12291
We work hard to bring you the best knitting and crochet have to offer, inspiration and advice as well as great quality yarns at incredible prices! Would you like to use our patterns for other than personal use? You can read what you are allowed to do in the Copyright text at the bottom of all our patterns. Happy crafting!
Post a comment to pattern DROPS Children 50-1
We would love to hear what you have to say about this pattern!
If you want to leave a question, please make sure you select the correct category in the form below, to speed up the answering process. Required fields are marked *.