
Popular categories
Looking for a yarn?


Comments / Questions (5)
![]() Linda wrote:
Linda wrote:
Faccio riferimento alla prima riga dello schema A2. Non avevo capito come fare gli aumenti, guardando nei video ho trovato il tutorial. Grazie comunque per la gentile risposta!
03.12.2024 - 23:59
![]() Linda wrote:
Linda wrote:
Non capisco come fare gli aumenti -1. C'è un video? Grazie
03.12.2024 - 21:51DROPS Design answered:
Buonasera Linda, a quale parte del modello sta facendo riferimento? Buon lavoro!
03.12.2024 - 22:39
![]() Heather wrote:
Heather wrote:
Are the cable increases, the only increases on yoke?
05.10.2024 - 16:46DROPS Design answered:
Dear Heather, the increases for the yoke are included in the A.2 chart, so there are no extra increases. Happy knitting!
06.10.2024 - 13:58
![]() Helle wrote:
Helle wrote:
Frost cardigan
10.08.2024 - 13:08
![]() Ritva Aaltonen wrote:
Ritva Aaltonen wrote:
This is so romantic, IT IS Romance
08.08.2024 - 21:41
|
||||||||||||||||||||||||||||||||||||||||||||||||||||||||||||||||||||||
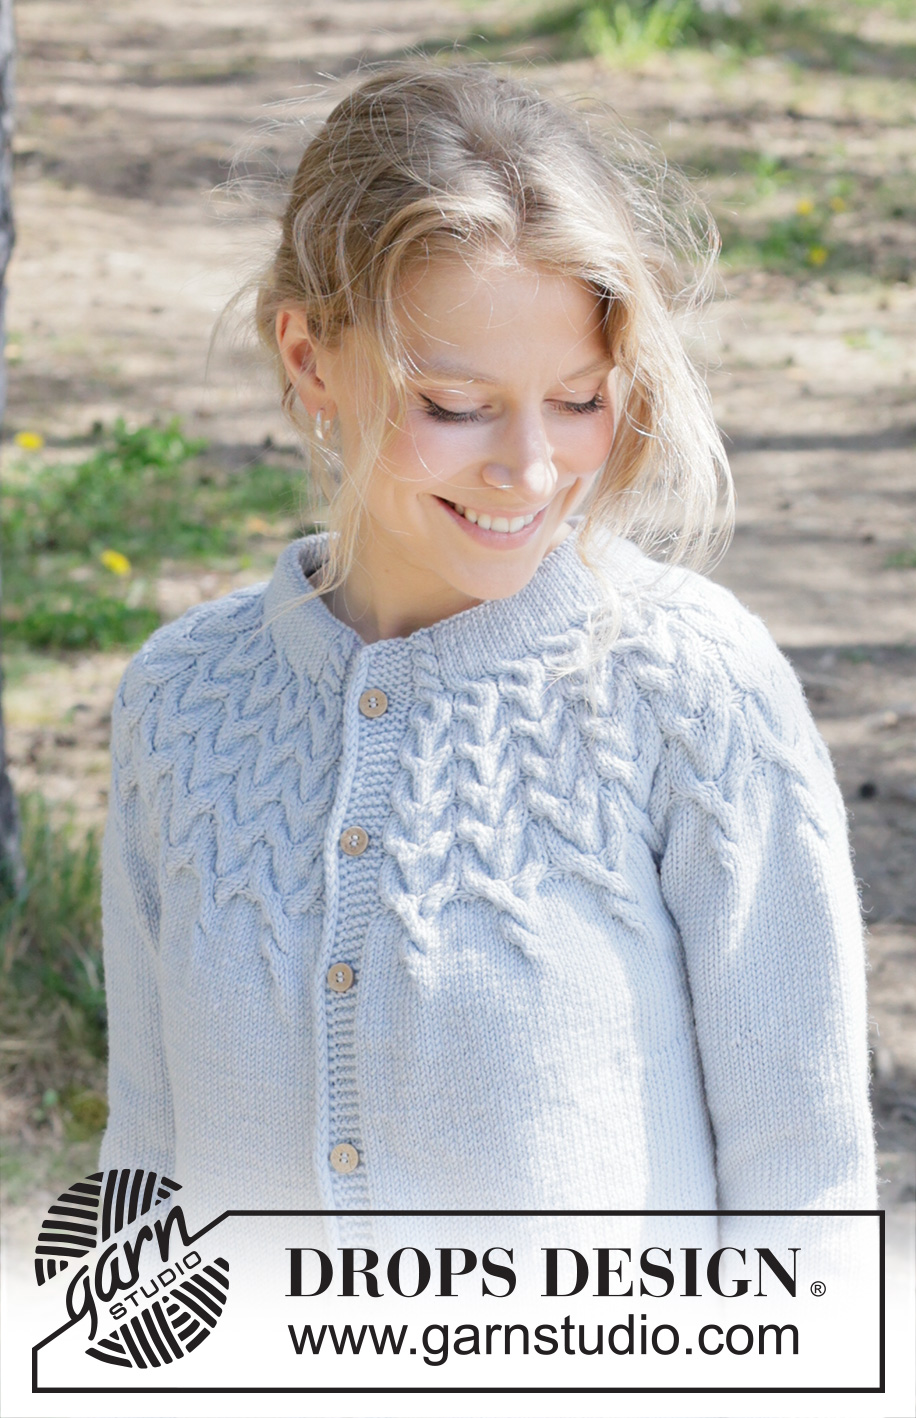
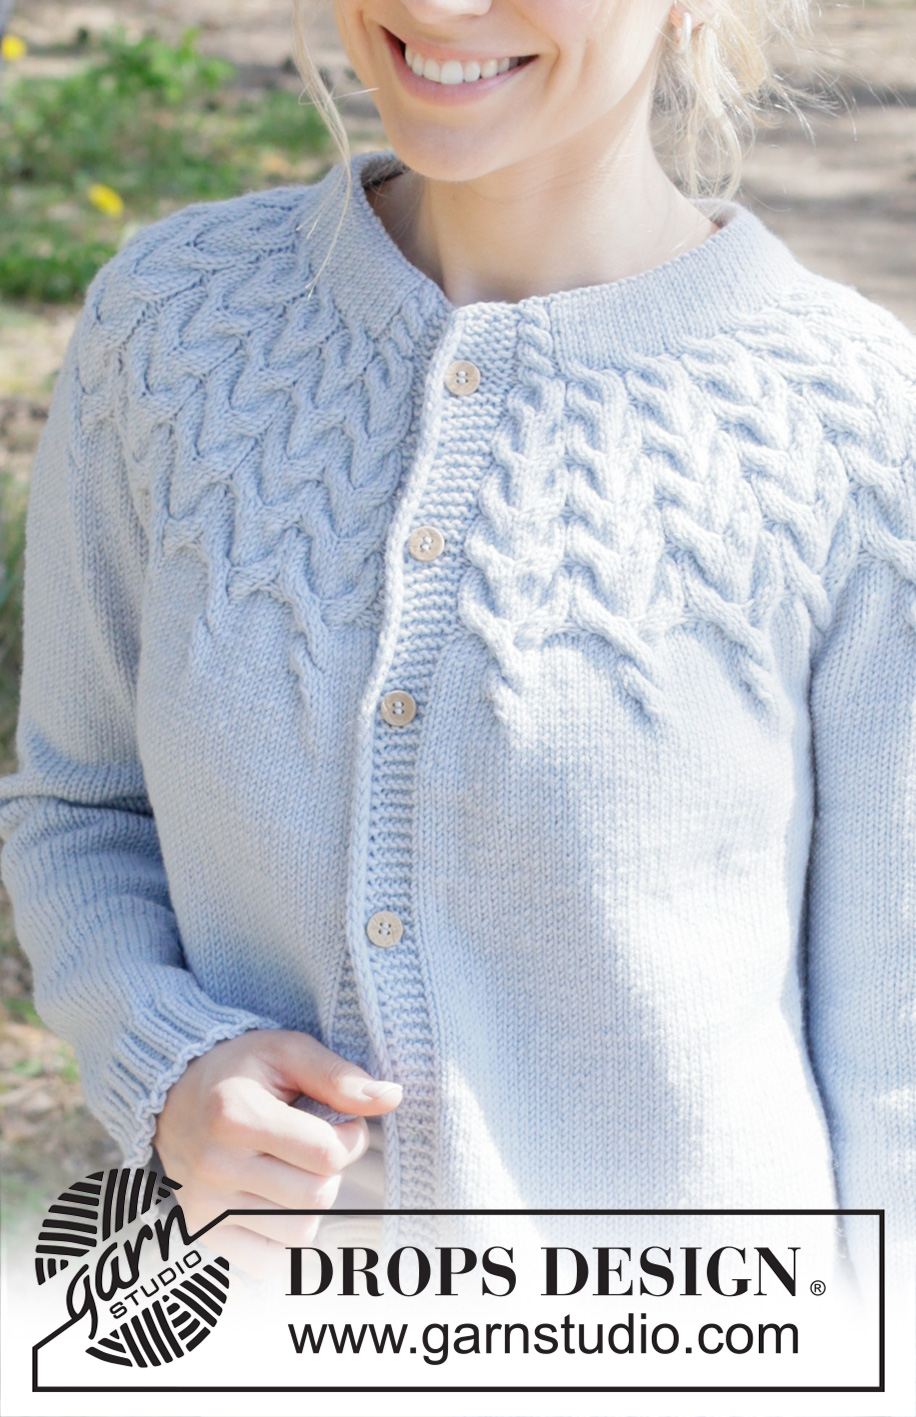
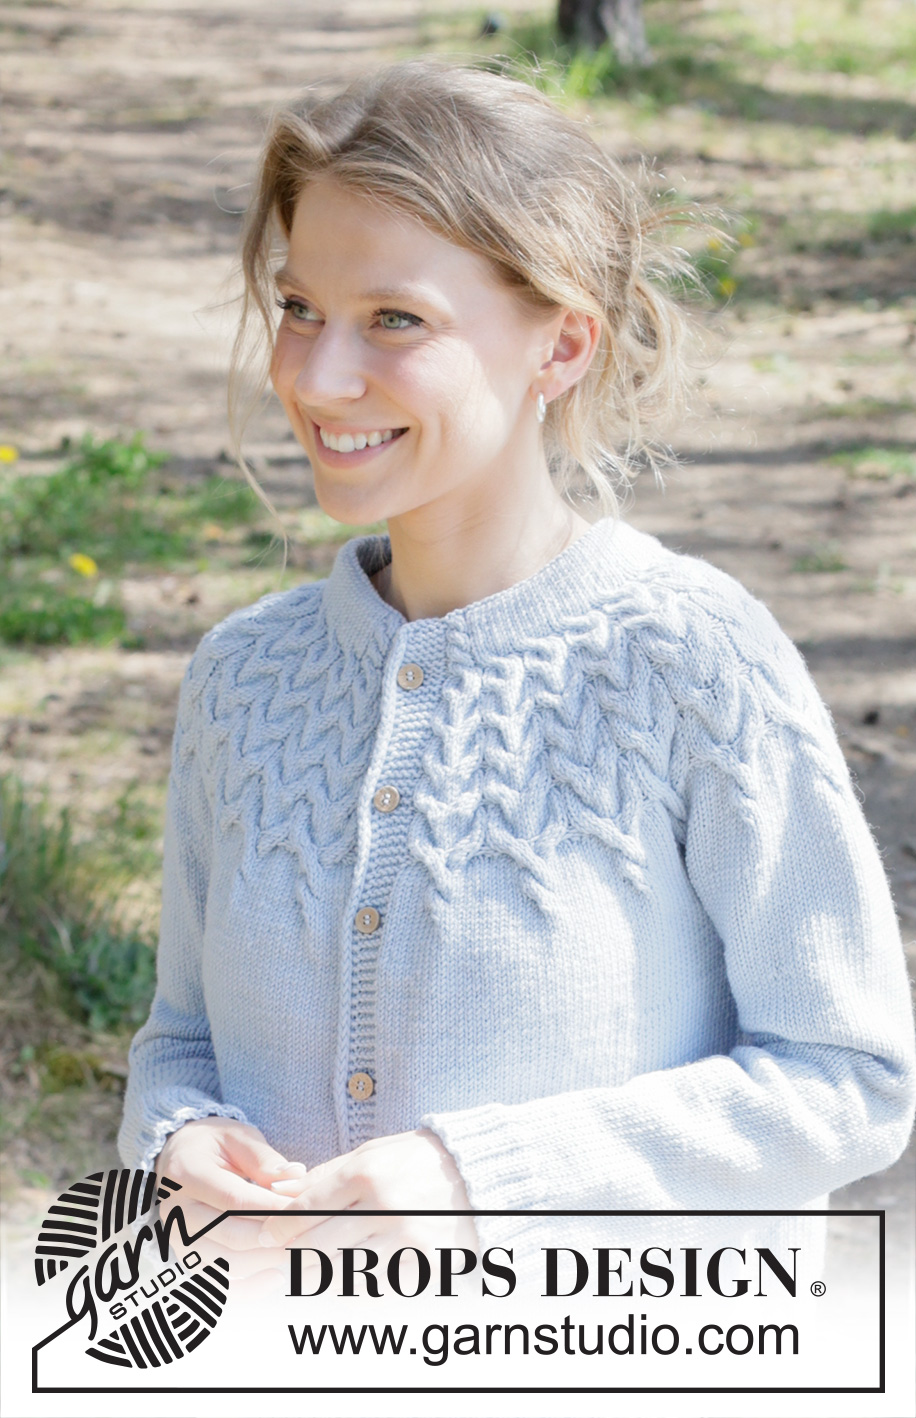
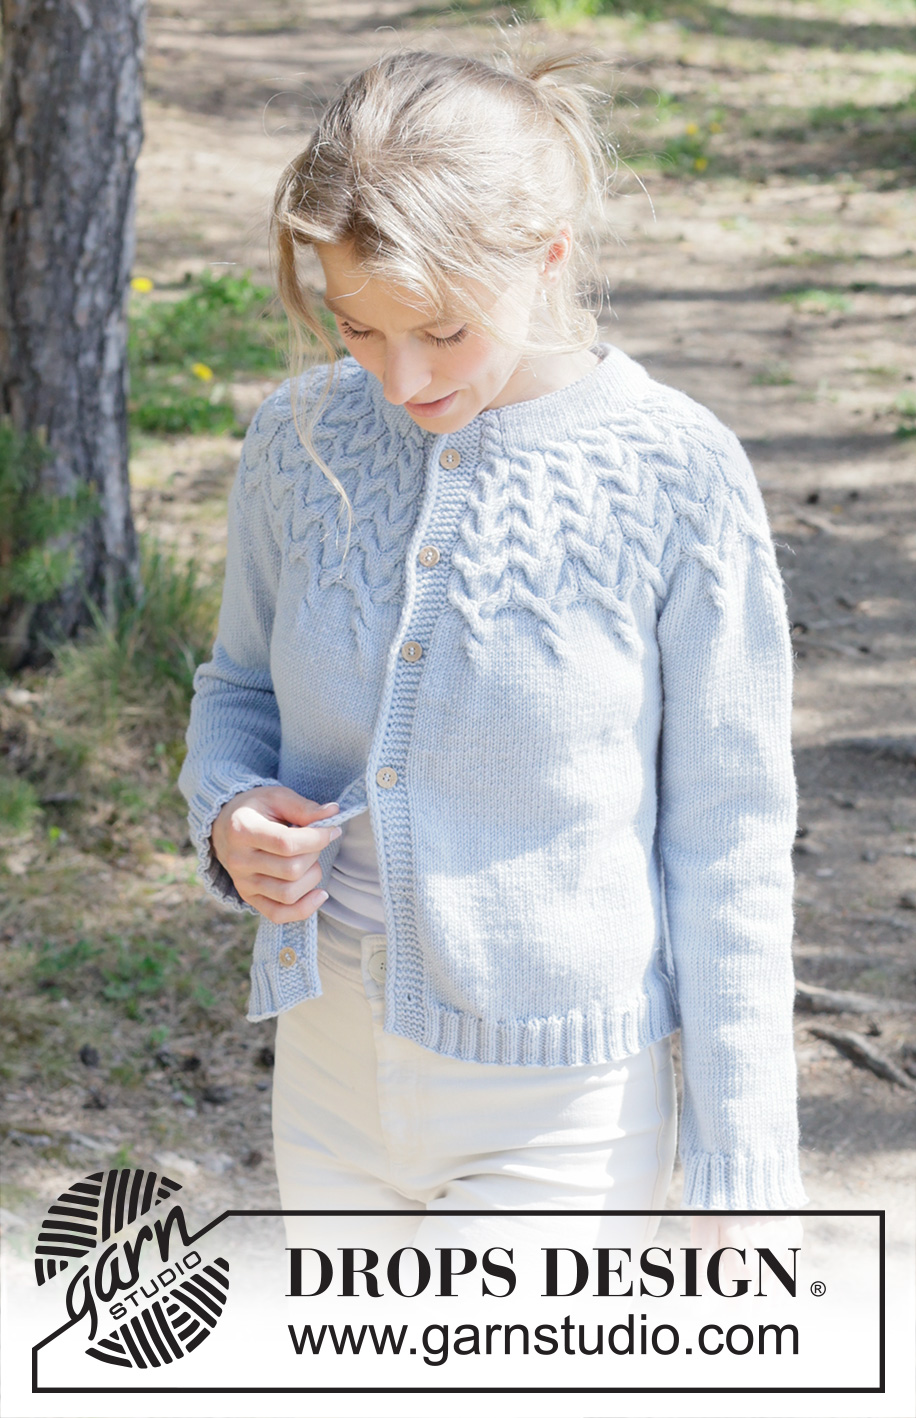
Mermaid Echo Cardigan#mermaidechocardigan |
||||||||||||||||||||||||||||||||||||||||||||||||||||||||||||||||||||||
 |
 |
|||||||||||||||||||||||||||||||||||||||||||||||||||||||||||||||||||||
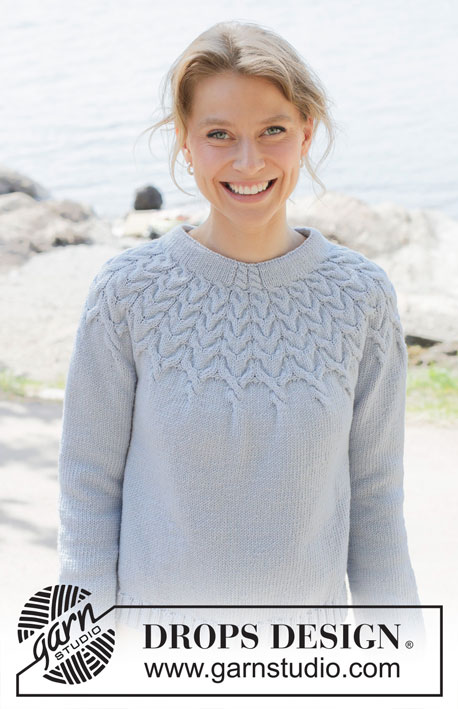
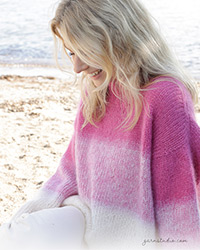
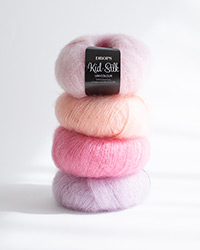
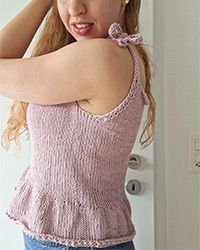
Knitted jacket in DROPS Merino Extra Fine. Piece is knitted top down with round yoke, cables, double neck edge and i-cord. Size: S - XXXL
DROPS 254-4 |
||||||||||||||||||||||||||||||||||||||||||||||||||||||||||||||||||||||
|
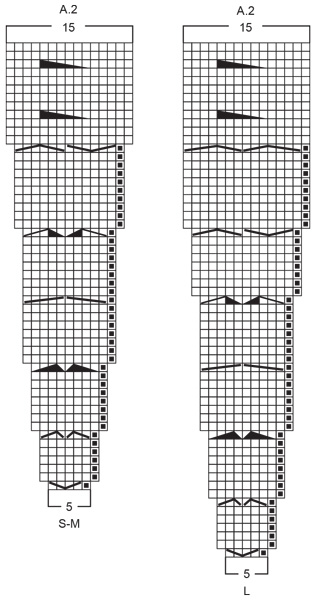
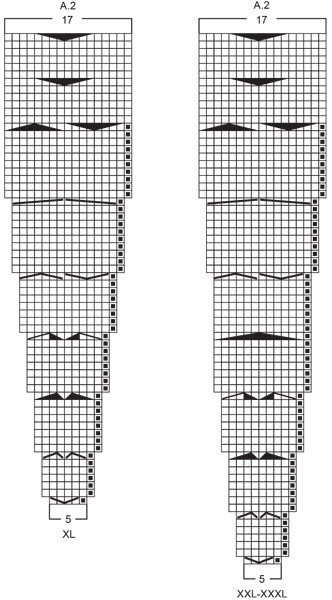
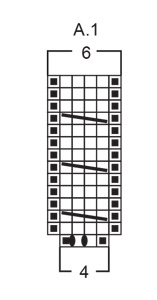
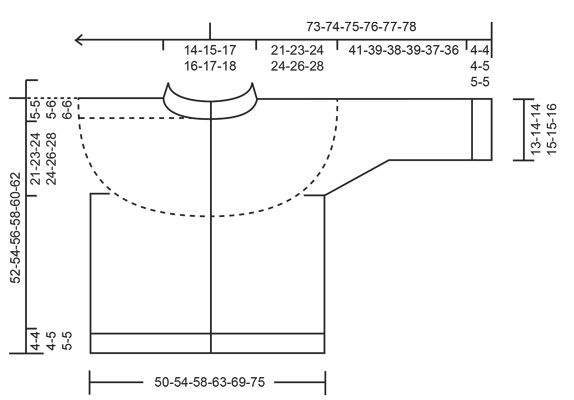
---------------------------------------------------------- EXPLANATION FOR THE PATTERN: ---------------------------------------------------------- GARTER STITCH (when working back and forth): Knit on all rows, i.e. knit from right side and knit from wrong side. 1 ridge vertically = knit 2 rows. PATTERN: See diagrams A.1 and A.2. Choose diagram for correct size. Diagrams show all rows in pattern seen from the right side. INCREASE TIP-1: Increase 1 stitch by picking up stitch from row at the below, i.e. pick up stitch that is under outermost stitch on needle and knit this stitch. INCREASE TIP-2: Increase 1 stitch by making 1 yarn over, on next row purl yarn over twisted to avoid holes. DECREASE AND INCREASE TIP (evenly): To calculate how to decrease/increase evenly, use the total number of stitches on row (e.g. 332 stitches), minus bands (e.g. 16 stitches) and divide the remaining stitches by number of decrease/increases to be done (e.g. 12) = 26.3. In this example decrease by knitting every 25th and 26th stitch together (do not decrease of bands). When increasing make 1 yarn over after approx. every 26th stitch (do not increase over bands). On next row work yarn overs twisted to avoid holes. DECREASE TIP: Decrease 1 stitch on each side of marker thread as follows: Work until 3 stitches remain before marker thread and knit 2 together, knit 2 (marker thread is in the middle of these 2 stitches), slip 1 stitch knitwise, knit 1, pass slipped stitch over stitch worked (= 2 stitches decreased). BAND WITH I-CORD: BEGINNING OF ROW: Work band as follows: Slip 1 stitch purlwise with strand in front of piece, knit 1, work 6 stitches in garter stitch. END OF ROW: Work band as follows: Work until 8 stitches remain on row, work 6 stitches in garter stitch, slip 1 stitch purlwise with strand in front of piece, knit 1. Work the same way both from right side and wrong side. BUTTONHOLES: Decrease for buttonholes on right band (when garment is worn). Decrease from right side when 6 stitches remain on row as follows: ROW 1 (= right side): Make 1 yarn over, knit 2 together, knit 2, slip 1 stitch purlwise with strand in front of piece, knit 1. ROW 2 (= wrong side): Work band as before and knit yarn over to make a buttonhole. Decrease for first buttonhole on first row from right side after neck edge has been worked. Then decrease the next 5-5-5-6-6-6 buttonholes, approx. 8½-9-9½-8-8-8½ cm apart. Place bottom buttonhole in the transition between stocking stitch and rib. ---------------------------------------------------------- START THE PIECE HERE: ---------------------------------------------------------- JACKET - SHORT OVERVIEW OF THE PIECE: In this pattern needles of different length have been used, begin with fitting length for number of stitches and switch as needed. Work neck edge and yoke back and forth on circular needle from mid front, work top down. When yoke is done, divide piece for body and sleeves. Work body downwards back and forth on circular needle while putting the sleeves aside. Then work sleeves downwards in the round on needle. Fold the neck edge double against the wrong side and fasten. NECK EDGE: Cast on 104-109-114-119-124-129 stitches on a circular needle size 4 mm with DROPS Merino Extra Fine. Switch to circular needle size 3 mm (cast on on a larger needle to get an elastic cast-on edge). Purl 1 row from wrong side. Then work in stocking stitch with 1 stitch in GARTER STITCH in each side - read explanation above. When neck edge measures 4½ cm, and next row is worked from right side, work as follows: ROW 1 (= right side): Work 1 stitch in garter stitch, work stocking stitch the rest of row, cast on 7 new stitches for band at the end of row = 111-116-121-126-131-136 stitches. ROW 2 (= wrong side): Work 8 stitches BAND WITH I-CORD - read explanation above, knit the rest of row (= folding edge), cast on 7 new stitches for band at the end of row = 118-123-128-133-138-143 stitches. ROW 3 (= right side): Work 8 stitches band with i-cord, work A.1, work in stocking stitch until 12 stitches remain on row, work A.1 and 8 stitches band with i-cord = 122-127-132-137-142-147 stitches on needle. ROW 4 (= wrong side): Work band as before, A.1, work in stocking stitch until 14 stitches remain, work A.1 and band as before. Continue back and forth like this until A.1 has been worked vertically, neck edge measures approx. 5 cm from folding edge (approx. 10-11 cm from cast-on edge). Insert a maker on the inside of band in one side of piece, measure piece from this marker. YOKE: Now work PATTERN – see explanation above and work as follows: Switch to circular needle size 4 mm and work first row from mid front as follows: Work band as before, work A.2 21-22-23-24-25-26 times in total, work first stitch in A.2 so that pattern starts and end the same in each side, work band as before – remember BUTTONHOLES - read explanation above. Remember to follow the knitting tension! When A.2 has been worked, there are 332-347-362-425-442-459 stitches on row and piece measures approx. 19-19-22-23-25-25 cm from marker. Then work in stocking stitch and band while the AT THE SAME TIME adjusting number of stitches to 320-348-372-408-432-468 on first row - read DECREASE AND INCREASE TIP. When yoke measures 21-23-24-24-26-28 cm from marker mid front divide piece for body and sleeves. DIVIDING FOR BODY AND SLEEVES: AT THE SAME TIME as next row is worked divide yoke for body and sleeves as follows: Work 55-60-63-68-73-80 stitches as before (= front piece), slip the next 58-62-68-76-78-82 stitches on a stitch holder for sleeve, cast on 10-10-12-12-14-14 new stitches on row (= in the side mid under sleeve), work 94-104-110-120-130-144 stitches as before (= back piece), slip the next 58-62-68-76-78-82 stitches on a stitch holder for sleeve, cast on 10-10-12-12-14-14 new stitches on row (= in the side mid under sleeve) and work the last 55-60-63-68-73-80 stitches as before (= front piece). Finish body and sleeves separately. BODY: = 224-244-260-280-304-332 stitches. Work in stocking stitch and band as before until piece measures 43-45-47-47-49-51 cm from marker mid front. On next row from right side begin rib while AT THE SAME TIME increasing 46-46-50-54-62-62 stitches evenly on row (do not increase over bands) = 270-290-310-334-366-394 stitches, work as follows: Switch to circular needle size 3 mm, work band as before, work rib (= knit 2/purl 2 - remember increase) until 10 stitches remain, knit 2 and band as before. When rib measures 4-4-4-5-5-5 cm cast off. Jacket measures 47-49-51-52-54-56 cm from marker mid front and approx. 52-54-56-58-60-62 cm from the top of shoulder. SLEEVES: Slip 58-62-68-76-78-82 sleeve stitches from one thread on to circular needle size 4 mm and pick in addition up 1 stitches in each of the 10-10-12-12-14-14 stitches cast on under sleeve = 68-72-80-88-92-96 stitches. Insert 1 marker thread in the middle of the 10-10-12-12-14-14 new stitches under sleeve - round begins at the marker thread. Work in stocking stitch in the round on needle - AT THE SAME TIME when sleeve measures 1 cm from division, decrease mid under sleeve – read DECREASE TIP and decrease as follows: Decrease 2 stitches 2-3-3-5-5-7 times in total on every other round, then decrease 2 stitches every 2-2-1½-1½-1½-1½ cm 5-5-8-9-9-8 times in total = 54-56-58-60-64-66 stitches. Work until sleeve measures 41-39-38-39-37-36 cm from division. Switch to double pointed needles size 3 mm and work rib (= knit 2/purl 2) while AT THE SAME TIME increasing 10-12-10-12-12-10 stitches evenly on 1st round = 64-68-68-72-76-76 stitches. When rib measures 4-4-4-5-5-5 cm cast off. Sleeve measures approx. 45-43-42-44-42-41 cm from division. ASSEMBLY: Fold the neck edge down on the inside of garment. Fasten neck edge to get a double neck edge. To avoid a tight neck edge that sticks out it is important to keep the seam elastic. Sew opening towards mid front together on bands with neat little stitches. Sew the buttons on to the left band. |
||||||||||||||||||||||||||||||||||||||||||||||||||||||||||||||||||||||
Diagram explanations |
||||||||||||||||||||||||||||||||||||||||||||||||||||||||||||||||||||||
|
||||||||||||||||||||||||||||||||||||||||||||||||||||||||||||||||||||||
|
||||||||||||||||||||||||||||||||||||||||||||||||||||||||||||||||||||||
|
||||||||||||||||||||||||||||||||||||||||||||||||||||||||||||||||||||||
|
||||||||||||||||||||||||||||||||||||||||||||||||||||||||||||||||||||||
|
||||||||||||||||||||||||||||||||||||||||||||||||||||||||||||||||||||||
Have you finished this pattern?Tag your pictures with #dropspattern #mermaidechocardigan or submit them to the #dropsfan gallery. Do you need help with this pattern?You'll find 33 tutorial videos, a Comments/Questions area and more by visiting the pattern on garnstudio.com. © 1982-2025 DROPS Design A/S. We reserve all rights. This document, including all its sub-sections, has copyrights. Read more about what you can do with our patterns at the bottom of each pattern on our site. |
||||||||||||||||||||||||||||||||||||||||||||||||||||||||||||||||||||||
With over 40 years in knitting and crochet design, DROPS Design offers one of the most extensive collections of free patterns on the internet - translated to 17 languages. As of today we count 314 catalogues and 11831 patterns translated into English (UK/cm). 11831
We work hard to bring you the best knitting and crochet have to offer, inspiration and advice as well as great quality yarns at incredible prices! Would you like to use our patterns for other than personal use? You can read what you are allowed to do in the Copyright text at the bottom of all our patterns. Happy crafting!
Post a comment to pattern DROPS 254-4
We would love to hear what you have to say about this pattern!
If you want to leave a question, please make sure you select the correct category in the form below, to speed up the answering process. Required fields are marked *.