
Popularne kategorie
Szukasz włóczki?


Komentarze / Pytania (28)
![]() Georgia napisała::
Georgia napisała::
Coming back to this pattern now which is very difficult. The pattern does not tell you what needles to change to when reducing/shaping. I have discovered there are several different ways but none of them are outlined here on this website.
07.10.2022 - 17:01Odpowiedź DROPS Design :
Dear Georgia, we only change to double-pointed needles when it's too difficult to work the stitches in a circular needle because you have too few stitches in the needle. From them, you can continue with the double pointed needles up till the end. So it may depend on each person; you can directly change to double-pointed needles as soon as you start decreasing/ shaping for the top of the hat. Happy knitting!
09.10.2022 - 19:18
![]() Georgia napisała::
Georgia napisała::
Should the 'knit 2 together' and decrease knit be also 'twist knit'? What about the slip knitting h when decreasing? Dies it mean normal knitting or trust knit? Whi h would actually be purlwise .
03.05.2022 - 08:18Odpowiedź DROPS Design :
Dear Georgia, you can replace the K2 tog with slip 1 twisted, slip 1 twisted and K2 together, and the slip 1 as if to K., K1, psso, with slip 1 twisted, knit 1 and psso; Happy knitting!
03.05.2022 - 10:30
![]() Georgia napisała::
Georgia napisała::
Turning the work: when watching the suggested videos for this, the second video gies the best finish HOWEVER, because the video is using knit only it is important to make sure that your working yarn is in the right place. I have worked out that you need to follow the video instruction making sure that where the yarn is you need to do the opposite so that the yarn is in the right position (at the back) for when you have turned and are ready to do the first stitch will be a knit.
12.04.2022 - 12:30
![]() Georgia napisała::
Georgia napisała::
Another question: how do you 'turn the work'? I have watched the videos but both methods don't explain how to turn when doing ribbing.
11.04.2022 - 20:23Odpowiedź DROPS Design :
Dear Georgia, when you fold the lower part of the hat, the wrong side will be facing outwards. So, to be sure that the rib looks the same both in the upper part on the right side and the lower part on the wrong side, you turn, so that you work on the wrong side and then knit where you would purl and purl where you would knit. Then, if you fold the lower part of the hat, the rib should look opposite to what you have worked and the same as in the upper part of the hat. Happy knitting!
11.04.2022 - 22:56
![]() Georgia napisała::
Georgia napisała::
Hello, I am a beginner and don't understand what this means: A.1 (= 26 stitches) over all stitches (= 5 times in width). When A.1 has been worked 1 time in height there are 10 stitches left.
08.04.2022 - 21:42Odpowiedź DROPS Design :
Dear Georgia, you repeat A.1 (which consists of 26 stitches) in the round. So, to work it until the end of the round, you need to repeat it 5 times (work round 1 of A.1 once, then start again the round 1 of A.1 the 2nd time...). A.1 includes decreases. In the last round of A.1, you only work 2 stitches in each repeat (so, if you had 5 repeats, you will have 10 stitches left in total). Since you are working the last round of A.1, that's what's called working A.1 1 time in height (you have worked all of the rounds of A.1). Happy knitting!
09.04.2022 - 18:44
![]() Andreas napisała::
Andreas napisała::
Jag förstår inte hur jag ska vända arbetet?! När jag stickar baklänges blir det ett hål när jag kommer tillbaka till markören. Säg att jag stickar rät/ avig när jag vänder arbetet, kommer första maskan jag ska sticka i vara avig?
29.01.2022 - 11:14
![]() Laila napisała::
Laila napisała::
Etter å ha strikket oppbrettskanten, skal en ikke strikke videre med rett/vrang, og ikke vridd rett/vrang?
28.12.2021 - 08:34Odpowiedź DROPS Design :
Hei Laila. Når oppbrettskanten er ferdig, vendes luen slik at luen strikkes rundt i motsatt retning av brettekanten. Og det skal strikkes videre med vrangbord (= 1 vridd rett / 1 vrang). mvh DROPS Design
04.01.2022 - 13:55
![]() Ulrike K napisała::
Ulrike K napisała::
Die Mütze ist zur Lieblingsmütze des Vaters geworden, der täglich Mütze trägt. Grund dafür ist sicher das Garn, es ist so leicht und hält so schön warm. Da werde ich bald noch eine stricken. Vielen Dank für die Anleitung.
28.12.2021 - 07:26
![]() Claude napisała::
Claude napisała::
Bonjour, que voulez vous dire par :Continuer maintenant le bonnet en tournant l'ouvrage sur l'endroit et tricoter en rond, dans le sens opposé, en côtes. Pourriez vous intégrer un tutoriel pour que l’on puisse visualiser
03.09.2021 - 23:15Odpowiedź DROPS Design :
Bonjour Claude, la partie que vous avez tricoté au début doit se retrouver maintenant sur l'envers et vous continuez à tricoter sur l'endroit (qui était l'envers auparavant) pour que l'endroit du revers soit à l'endroit quand on le retourne (mais il sera sur l'envers jusqu'à la fin du bonnet). En espérant que ces explications complémentaires puissent vous aider; votre demande a été transmise à notre équipe; Bon tricot!
06.09.2021 - 07:17
![]() Alva napisała::
Alva napisała::
Hej! Läses A1 diagrammet från höger till vänster eller tvärtom?
28.05.2021 - 10:36Odpowiedź DROPS Design :
Hej Alva, Ja du starter i nederste højre hjørne og strikker hver maske ifølge diagrammet, så starter du forfra igen omgangen rundt :)
28.05.2021 - 13:37
|
||||||||||||||||
Care for Nature#carefornaturehat |
||||||||||||||||
 |
 |
|||||||||||||||
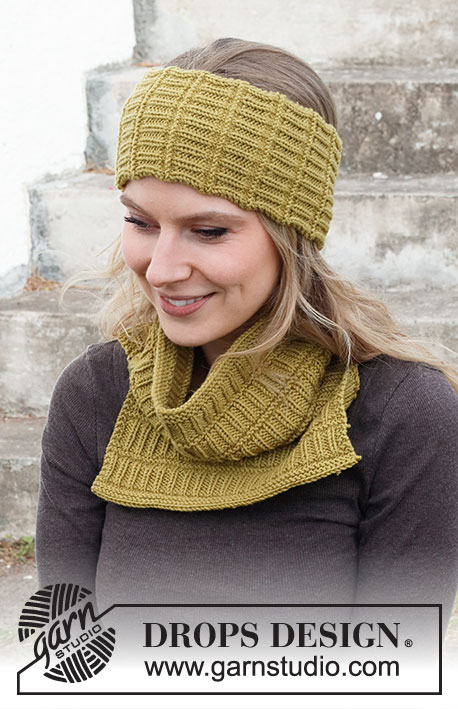
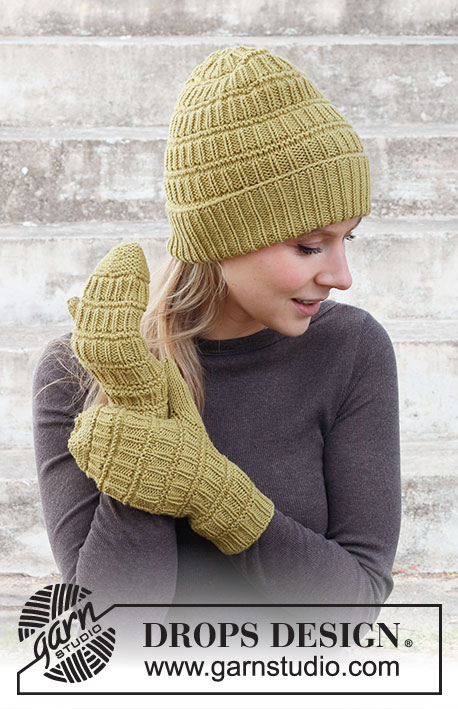
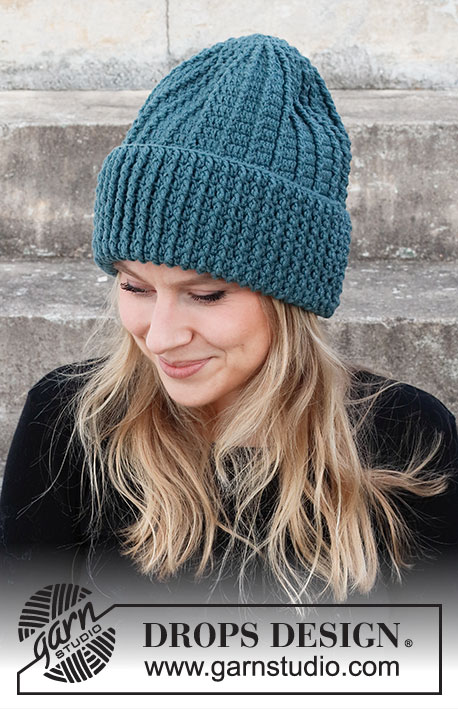
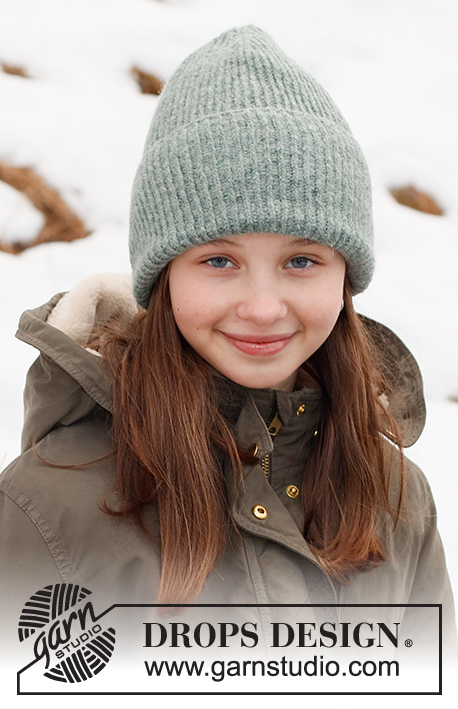
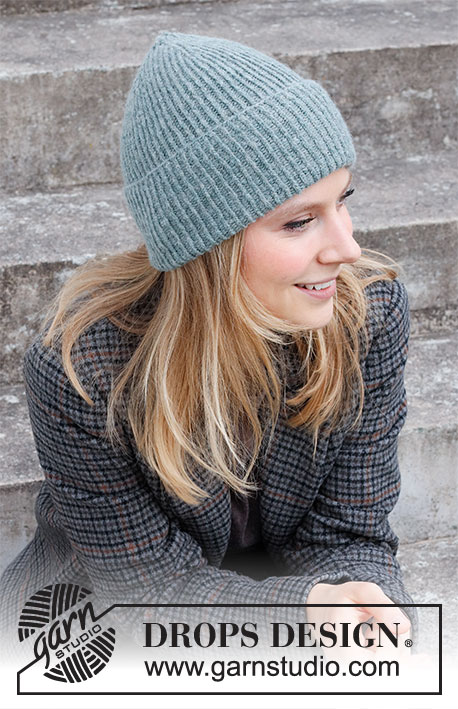
Czapka na drutach / czapka typu hipster na drutach ściągaczem, z włóczki DROPS Sky. Rozmiar uniwersalny.
DROPS 214-33 |
||||||||||||||||
|
------------------------------------------------------- WYKORZYSTYWANE TECHNIKI: ------------------------------------------------------- ŚCIEG FANTAZYJNY: Patrz schemat A.1. ------------------------------------------------------- ROBÓTKĘ ROZPOCZYNAMY TUTAJ: ------------------------------------------------------- CZAPKA – SKRÓCONY OPIS ROBÓTKI: Przerabiana od dołu do góry, na okrągło na drutach z żyłką, zacząć przerabiać na drutach pończoszniczych, gdy jest za mało oczek na druty z żyłką. Wyłożenie jest przerabiane na lewej stronie robótki, następnie obrócić robótkę i kończyć czapkę na prawej stronie robótki. CZAPKA: Najpierw wykonać wyłożenie/zakładkę na lewej stronie robótki następująco: nabrać 130 oczek włóczką Sky i przerobić 1 okrążenie na prawo. Dalej przerabiać ściągaczem (= 1 oczko przekręcone na prawo/1 oczko lewe) przez 12 cm. Wyłożenie jest przerabiane na lewej stronie robótki, aby oczka przekręcone na prawo były na prawej stronie robótki po wyłożeniu. Teraz przerabiać czapkę obracając ją na prawą stronę robótki i przerabiać na okrągło, w przeciwnym kierunku, ściągaczem (= 1 oczko przekręcone na prawo, 1 oczko lewe). ZACHOWAĆ TAKIE SAMO NAPRĘŻENIE NICI JAK W PRZYPADKU PRÓBKI! Gdy długość czapki wynosi 27 cm (w tym 12 cm wyłożenia – zostaje ok. 8 cm do końca), przerabiać schemat A.1 (= 26 oczek) ponad wszystkimi oczkami (= 5 razy na szerokość). Gdy schemat A.1 jest zakończony zostaje 10 oczek. Odciąć nitkę, przeciągnąć ją przez pozostałe oczka, zacisnąć i zakończyć. Długość czapki od rzędu nabierania oczek wynosi ok. 35 cm. Wyłożyć 12 cm na dole. |
||||||||||||||||
Objaśnienia do schematu |
||||||||||||||||
|
||||||||||||||||
 |
||||||||||||||||
Skończyłaś ten wzór?Otaguj swoje zdjęcia #dropspattern #carefornaturehat lub prześlij je do #dropsfan gallery. Potrzebujesz pomocy w związku z tym wzorem?Zobacz 13 instrukcje video, sekcję Komentarze/Pytania i jeszcze więcej, wchodząc na stronę wzoru na garnstudio.com © 1982-2026 DROPS Design A/S. Wszelkie prawa zastrzeżone. Ten dokument, w całości, jest chroniony prawem. Zobacz co możesz robić z naszymi wzorami na dole każdego wzoru na naszej stronie. |
||||||||||||||||


Posiadając 40 lat doświadczenia w projektowaniu wzorów na druty i szydełko, DROPS Design oferuje jedną z największych kolekcji bezpłatnych wzorów w internecie – przetłumaczonych na 17 języków. Obecnie jest dostępnych 324 katalogów i 12290 wzorów w języku polskim.
Dokładamy wszelkich starań, aby oferować Wam druty i szydełka, inspiracje, fachowe porady oraz doskonałej jakości włóczki w najlepszych cenach! Zamierzasz wykorzystać nasze wzory inaczej niż tylko do osobistego użytku? Przeczytaj jakie masz prawa w Copyright, który znajdziesz na końcu każdego wzoru. Miłej pracy!
Dodaj komentarz do modelu DROPS 214-33
Chcielibyśmy się dowiedzieć co masz do powiedzenia o tym wzorze!
Jeśli chcesz zadać pytanie i szybko uzyskać odpowiedź, upewnij się, że została wybrana właściwa kategoria w formularzu poniżej. Pola obowiązkowe są oznaczone *.