
Popularne kategorie
Szukasz włóczki?


Komentarze / Pytania (25)
![]() Susanna napisała::
Susanna napisała::
Åh, så fin! Den måste jag göra!
07.07.2025 - 20:12
![]() Britt-Marie Rahm napisała::
Britt-Marie Rahm napisała::
Vill gärna kunna se hur man virkar ihop remsorna till väskan My Daisy
11.06.2025 - 10:58Odpowiedź DROPS Design :
Hej Britt-Marie, klicka på Videor överst i mönsteret, så ser du att vi har gjort en video som visar hur man syr ihop remsorna :)
12.06.2025 - 10:59
![]() Marit Roseth napisała::
Marit Roseth napisała::
Takk for fin oppskrift. Jeg bare lurer på om dere kan si hvor store hver rute skal være. Lurer på om jeg må gå ned på pinnestørrelsen :-) Mvh Marit
29.04.2025 - 11:27Odpowiedź DROPS Design :
Hej Marit, nål nr 5 – eller den nålen du må bruke for å få 14 staver på 10 cm i bredden. En ruter måler 12 cm i bredden og 12 cm i høyden.
30.04.2025 - 09:54
![]() Maryse GIRAUD napisała::
Maryse GIRAUD napisała::
Bonjour, je voudrais réaliser ce sac, et commander la laine sur votre site; je voudrais savoir combien de pelotes faut il pour 100 gr ? deux ? merci de votre réponse
14.03.2025 - 14:40Odpowiedź DROPS Design :
Bonjour Mme Giraud, tout à fait, DROPS Paris se présente sous la forme de pelotes de 50 g. Bon crochet!
14.03.2025 - 16:16
![]() Guenaele napisała::
Guenaele napisała::
J ai trouvé les explications pr faire la cordelette et la fixer insuffisante sinon le reste était très bien
25.02.2025 - 17:27
![]() Marja napisała::
Marja napisała::
Hallo, hoeveel garen heb ik nodig als ik de abrikoos, roze, lichtroze en perzik vervang voor 1 kleur?
15.06.2024 - 12:49Odpowiedź DROPS Design :
Dag Marja,
Eerlijk gezegd weet ik dat niet. Je zou de hoeveelheid garen kunnen bestellen in 1 kleur en de bollen die je over houdt terug kunnen brengen naar de winkel. Vraag je winkel naar hun retourbeleid, zodat je weet wat de mogelijkheden zijn.
16.06.2024 - 19:19
![]() Wesley Perry napisała::
Wesley Perry napisała::
As long as credit for the pattern is given, is it okay to sell the finished project? Also what is the appropriate way to give credit for the pattern? I’m assuming on the tag, but would just like to know how to give credit to the designer while also making sure people understand that the person selling still handmade the item. Would “Handmade by insert name. Pattern by insert designer” be appropriate and/or what are alternative ways to do this? Thank you!
17.03.2024 - 16:05Odpowiedź DROPS Design :
Dear Wesley, for details of how can youuse these patterns for making pieces for sale, please see the framed text at the bottom of the pattern. Happy Knitting!
19.03.2024 - 00:13
![]() Susan Viljoen napisała::
Susan Viljoen napisała::
I did read your answer on the strap, but I still dont get the 'picture' is there perhaps a tutorial on how to assemble the strap
16.09.2023 - 17:06Odpowiedź DROPS Design :
Dear Susan, unfortunately, we have no tutorials for how to assemble the cord. When looking at the picture, try to follow the union of the white string (A) into the chain space (the triangular shape) and the black string (B) into the loops formed by the A string. Happy crochetting!
17.09.2023 - 21:50
![]() Rosemarie Morlet napisała::
Rosemarie Morlet napisała::
Can you give me a more in-depth explanation of how to attach the strap
31.07.2022 - 21:32Odpowiedź DROPS Design :
Dear Mrs Morlet, insert the first strap = A (in chart) as shown in A.4, then insert the 2nd strap (B) the same way on the other side of bag - now you will insert the ends of strap B into the loop of A as shown in A.4 and knot both ends of B together. repeat on the other side with the ends of A into the loops of B (reversed). Happy assembly!
01.08.2022 - 12:03
![]() Paloma napisała::
Paloma napisała::
Me encantó hacer este bolso ❤ Creo que voy a repetirlo, está vez en otro colores. Gracias!!
10.04.2022 - 21:02
|
|||||||||||||||||||||||||||||||
My Daisy#mydaisybag |
|||||||||||||||||||||||||||||||
 |
 |
||||||||||||||||||||||||||||||
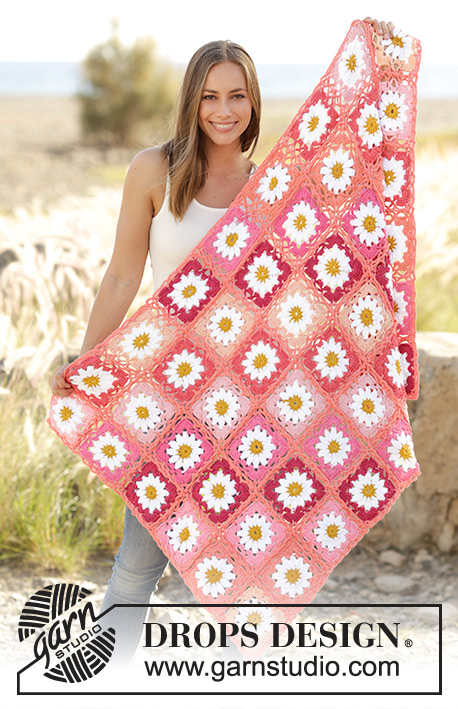
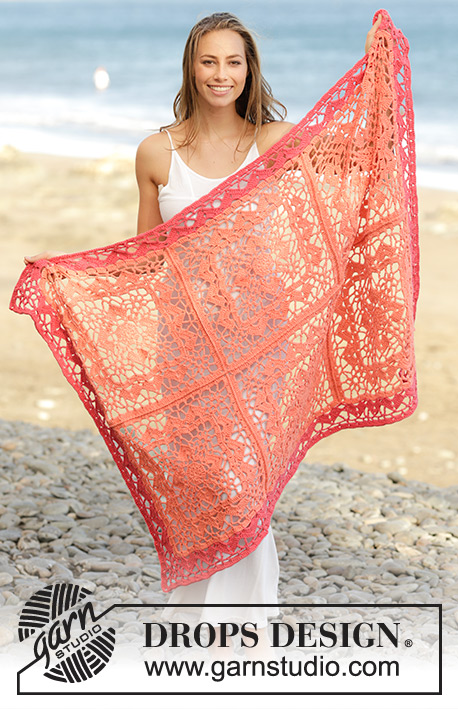
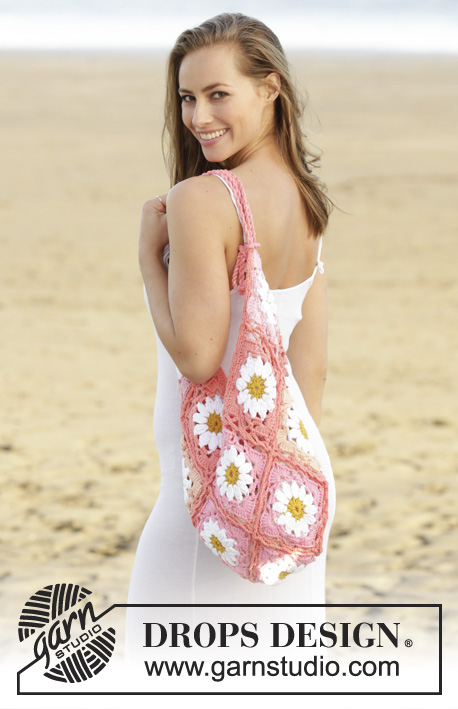
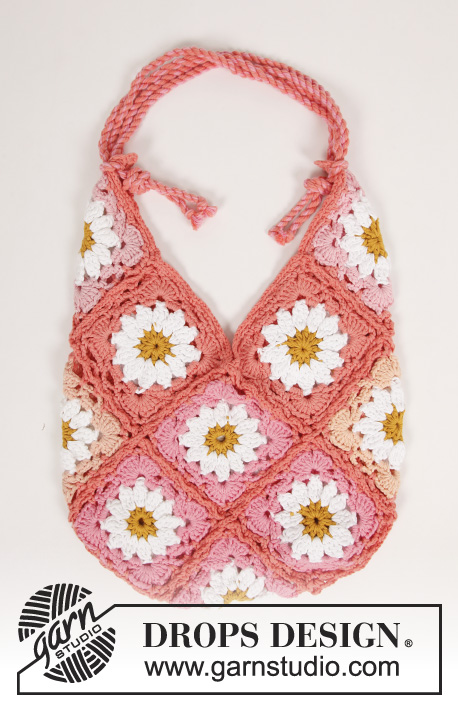
Torba na szydełku składająca się z kwadratów, z włóczki DROPS Paris.
DROPS 175-17 |
|||||||||||||||||||||||||||||||
|
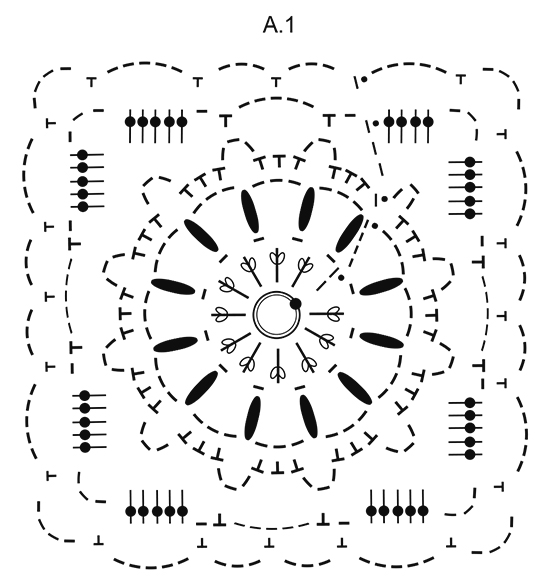
ŚCIEG FANTAZYJNY: Patrz schematy A.1-A.4. Schemat A.3 pokazuje jak wykończyć torbę. KOLORY KWADRATÓW: Początek i okrążenia 1, 2 i 5 są takie same dla wszystkich kwadratów. Okrążenia 3 i 4 są przerabiane w kolorze wskazanym dla kwadratu o odpowiednim numerze. POCZĄTEK + OKRĄŻENIE 1: musztarda OKRĄŻENIE 2: biały OKRĄŻENIE 5: morela KWADRAT 1: przerobić 7 kwadratów w kolorze średni róż. KWADRAT 2: przerobić 2 kwadraty w kolorze brzoskwinia. KWADRAT 3: przerobić 4 kwadraty w kolorze morela. KWADRAT 4: przerobić 2 kwadraty w kolorze jasny róż. WSKAZÓWKA DO ZMIANY KOLORU: Aby uzyskać estetyczne przejścia podczas zmiany koloru, przerobić ostatnie oczko zamykające w okrążeniu nowym kolorem następująco: wbić szydełko w pierwsze oczko łańcuszka na początku okrążenia, wykonać 1 narzut nowym kolorem i przeciągnąć nitkę przez oczko na szydełku. Wrabiać nitki w miarę postępu robótki. ---------------------------------------------------------- TORBA: Składa się z 15 kwadratów w 4 kombinacjach kolorystycznych – PATRZ KOLORY KWADRATÓW. KWADRAT: Na szydełku nr 5 włóczką Paris przerabiać schemat A.1 – PATRZ WSKAZÓWKA DO ZMIANY KOLORU. ZACHOWAĆ TAKIE SAMO NAPRĘŻENIE NICI JAK W PRZYPADKU PRÓBKI! WYKOŃCZENIE: Rozłożyć kwadraty jak w schemacie A.2 (przerywane linie pokazują kwadraty, które są zagięte do tyłu, pozostałe kwadraty są rozłożone w taki sam sposób). Kwadraty są łączone na szydełku w pasy, po skosie, najpierw jednym kierunku, potem w drugim. Łączyć poszczególne pasy następująco: Ułożyć 2 kwadraty naprzeciw siebie, lewą stroną do lewej i przerabiać na szydełku kolorem morela, wkłuwając szydełko przez 2 warstwy następująco - patrz schemat A.3 (schemat A.3 pokazuje rogi 4 kwadratów): 1 półsłupek wokół rogu, *4 oczka łańcuszka, 1 półsłupek wokół następnego łuku *, powtórzyć od *-* do rogu (= 5 łuków), 4 oczka łańcuszka (= przejście między 2 kolejnymi kwadratami). Dalej przerabiać tak samo, aż zostaną połączone wszystkie kwadraty. Odciąć nitkę na końcu każdego pasa. BRZEG NA SZYDEŁKU: Na koniec wykonać brzeg wokół otworu torby, kolorem morela, następująco: zaczynając od rogu na górze: *1 półsłupek wokół łuku w rogu, 4 oczka łańcuszka, 1 półsłupek wokół tego samego rogu, 4 oczka łańcuszka, (1 półsłupek wokół następnego łuku, 4 oczka łańcuszka), powtórzyć od (-) do następnego rogu torby*, powtórzyć od *-* wzdłuż 3 następnych boków, zakończyć przerabiając 1 oczko zamykające w pierwsze półsłupek na początku okrążenia. PASEK: Odciąć 4 nitki w kolorze morela + 2 nitki w kolorze średni róż, po 4 m długości. Zwinąć je razem, aż zaczną stawiać opór, złożyć sznurek na pół, puścić a zwinie się ponownie sam. Na każdym końcu zawiązać supeł. Drugi pasek wykonać tak samo. Przeciągnąć jeden pasek przez łuk w rogu na górze torby – jak w schemacie A.4 (A). Drugi pasek umieścić tak samo, ale z drugiej strony na górze torby. Następnie przeciągnąć 1-szy pasek przez 2-gi jak w schemacie A.4 (B), zawiązać końce paska, powtórzyć to samo w przypadku końca sznurka z drugiej strony torby. |
|||||||||||||||||||||||||||||||
Objaśnienia do schematu |
|||||||||||||||||||||||||||||||
|
|||||||||||||||||||||||||||||||
 |
|||||||||||||||||||||||||||||||
 |
|||||||||||||||||||||||||||||||
Skończyłaś ten wzór?Otaguj swoje zdjęcia #dropspattern #mydaisybag lub prześlij je do #dropsfan gallery. Potrzebujesz pomocy w związku z tym wzorem?Zobacz 10 instrukcje video, sekcję Komentarze/Pytania i jeszcze więcej, wchodząc na stronę wzoru na garnstudio.com © 1982-2026 DROPS Design A/S. Wszelkie prawa zastrzeżone. Ten dokument, w całości, jest chroniony prawem. Zobacz co możesz robić z naszymi wzorami na dole każdego wzoru na naszej stronie. |
|||||||||||||||||||||||||||||||


Posiadając 40 lat doświadczenia w projektowaniu wzorów na druty i szydełko, DROPS Design oferuje jedną z największych kolekcji bezpłatnych wzorów w internecie – przetłumaczonych na 17 języków. Obecnie jest dostępnych 324 katalogów i 12290 wzorów w języku polskim.
Dokładamy wszelkich starań, aby oferować Wam druty i szydełka, inspiracje, fachowe porady oraz doskonałej jakości włóczki w najlepszych cenach! Zamierzasz wykorzystać nasze wzory inaczej niż tylko do osobistego użytku? Przeczytaj jakie masz prawa w Copyright, który znajdziesz na końcu każdego wzoru. Miłej pracy!
Dodaj komentarz do modelu DROPS 175-17
Chcielibyśmy się dowiedzieć co masz do powiedzenia o tym wzorze!
Jeśli chcesz zadać pytanie i szybko uzyskać odpowiedź, upewnij się, że została wybrana właściwa kategoria w formularzu poniżej. Pola obowiązkowe są oznaczone *.