
Categorie popolari
State cercando un filato?


Commenti / Domande (78)
![]() Dominique ha scritto:
Dominique ha scritto:
On-dit. glisser attente 0 fois 0 mailles sur arrêt maille je ne comprends pas. Toute cette partie pour biais épaules est incompréhensible. "Rabattre une m au rg suivant à partir de l'encolure " on rabattre une seule fois? Merci de reformuler vos explications . Je suis en attente pour faire ce modèle. Merci
02.04.2025 - 19:31DROPS Design ha risposto:
Bonjour Dominique, s'il y a un 0 dans votre taille, vous n'êtes juste pas concernée par cette information; les m des épaules sont mises en attente en début de rg qui commence par l'emmanchure vers l'encolure (ex dos: sur l'end pour l'épaule droite / sur l'env pour l'épaule gauche); et on rabat les m de l'encolure en début de rg à partir de l'encolure vers l'emmanchure (ex dos: sur l'end pour l'épaule gauche, sur l'env pour l'épaule droite). Cette vidéo d'un autre modèle pourrait vous aider à visualiser comment faire. Bon tricot!
03.04.2025 - 08:35
![]() Sandra Schradiek ha scritto:
Sandra Schradiek ha scritto:
Wie werden am Ärmloch die Abnahmen gemacht
27.01.2025 - 18:42DROPS Design ha risposto:
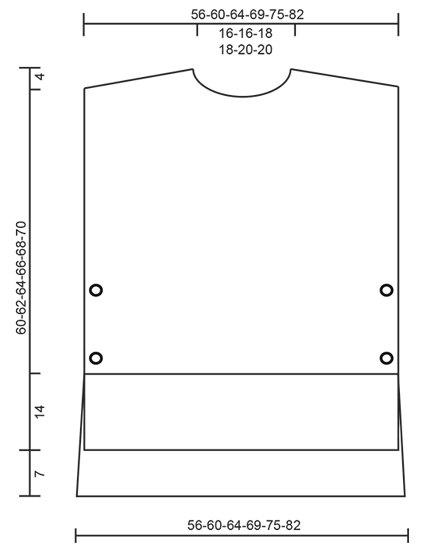
Liebe Frau Schradiek, es wird hier keine Maschen für die Armlöcher abgekettet - siehe Maßskizze. Viel Spaß beim Stricken!
28.01.2025 - 09:01
![]() Ann ha scritto:
Ann ha scritto:
Als ik 93 steken heb en voor de schouders 28 st. aan elke kant op een hulpdraad moet zetten, hoe kan het dan dat ik de middelste 18 st. moet afkanten voor de nek? Ik heb dan toch een oneven aantal steken over?
14.12.2024 - 15:38
![]() Christine DUPRE ha scritto:
Christine DUPRE ha scritto:
Pourquoi la plupart de vos modèles se tricote en aiguilles circulaires ? Pour ma part, je renonce à chaque fois pour réaliser vos modèles car je n'arrive pas à travailler en aiguille circulaire ? Il serait bien d'avoir plus de choix en aiguilles droites
04.12.2024 - 08:23DROPS Design ha risposto:
Bonjour Mme Dupre, les aiguilles circulaires en Scandinavie et en Europe du Nord sont très fréquemment utilisées, raison pour laquelle nombre de nos modèles en utilise, toutefois, vous pouvez souvent facilement adapter les explications sur aiguilles droites - cf cette leçon; pour ce modèle par ex, il suffit simplement de tricoter le devant et le dos comme indiqué (= séparément, en allers et retours), puis de coudre une seule des épaules pour relever les mailles du col, puis faire la couture de la 2ème épaule et du col. Bon tricot!
04.12.2024 - 16:03
![]() Marij ha scritto:
Marij ha scritto:
Beste mensen. Ik vind het erg moeilijk om met een rondbreinaald te werken. Hoe kan ik het patroon veranderen als ik gewoon 2 naalden gebruik??? Dat lukt mij het beste. Hopelijk kunt u mij helpen. Gr. Marij
06.11.2024 - 08:35DROPS Design ha risposto:
Dag Marij,
Om een patroon aan te passen om op rechte naalden te breien hebben we een instructie gemaakt. Deze vind je hier.
06.11.2024 - 13:44
![]() Cheryl Dillinger ha scritto:
Cheryl Dillinger ha scritto:
How many stitches and rows for the gauge?
29.10.2024 - 19:25DROPS Design ha risposto:
Dear Mrs Dillinger, you will find the tension for both needle size under header, together with needle size, sizes, amount of yarn and buttons. Happy knitting!
30.10.2024 - 08:08
![]() Ann Marie ha scritto:
Ann Marie ha scritto:
Vill ha beskrivningen till denna fina väst
24.10.2024 - 10:08
![]() Kirsten Sørensen ha scritto:
Kirsten Sørensen ha scritto:
Ønsker opskriften på den flotte vest
22.10.2024 - 15:14
![]() Paola ha scritto:
Paola ha scritto:
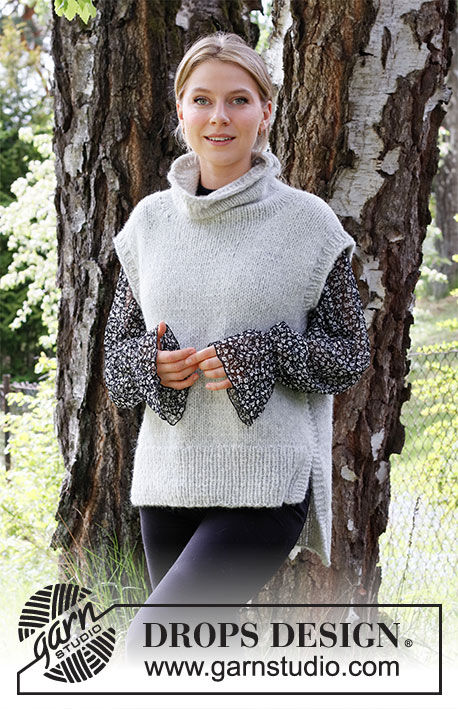
Buongiorno. Come faccio a fare questo modello con il collo alto. Grazie
13.09.2024 - 13:31DROPS Design ha risposto:
Buonasera Paola, per un aiuto così personalizzato può rivolgersi al suo rivenditore DROPS di fiducia. Buon lavoro!
13.09.2024 - 21:04
![]() Bec ha scritto:
Bec ha scritto:
Thank you so much for your recent feedback. I think I've done it correctly. The next step has me puzzled - I've just bound of my 1 stitch on the neck, my K1 row will be on the RS, not the WS, am I missing something? TIA
12.08.2024 - 04:33DROPS Design ha risposto:
Hi Bec, The knitted row after binding off the 1 stitch is from the wrong side (so work as normal from the right side before knitting from the wrong side if necessary). Regards, Drops Team.
12.08.2024 - 06:33
|
|
Winter is Coming#winteriscomingslipover |
|
 |
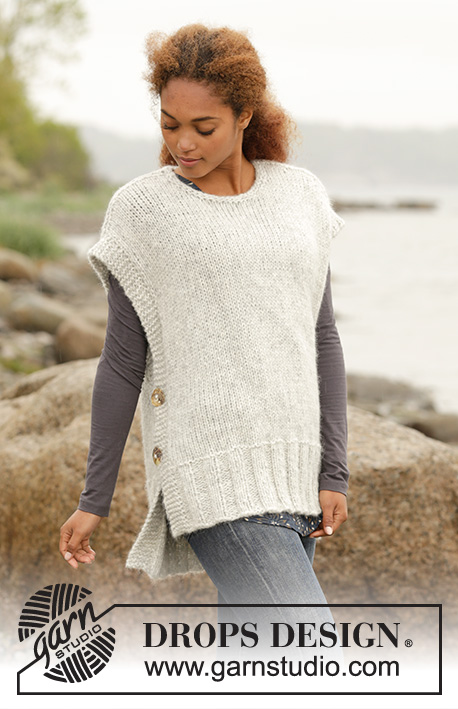 |
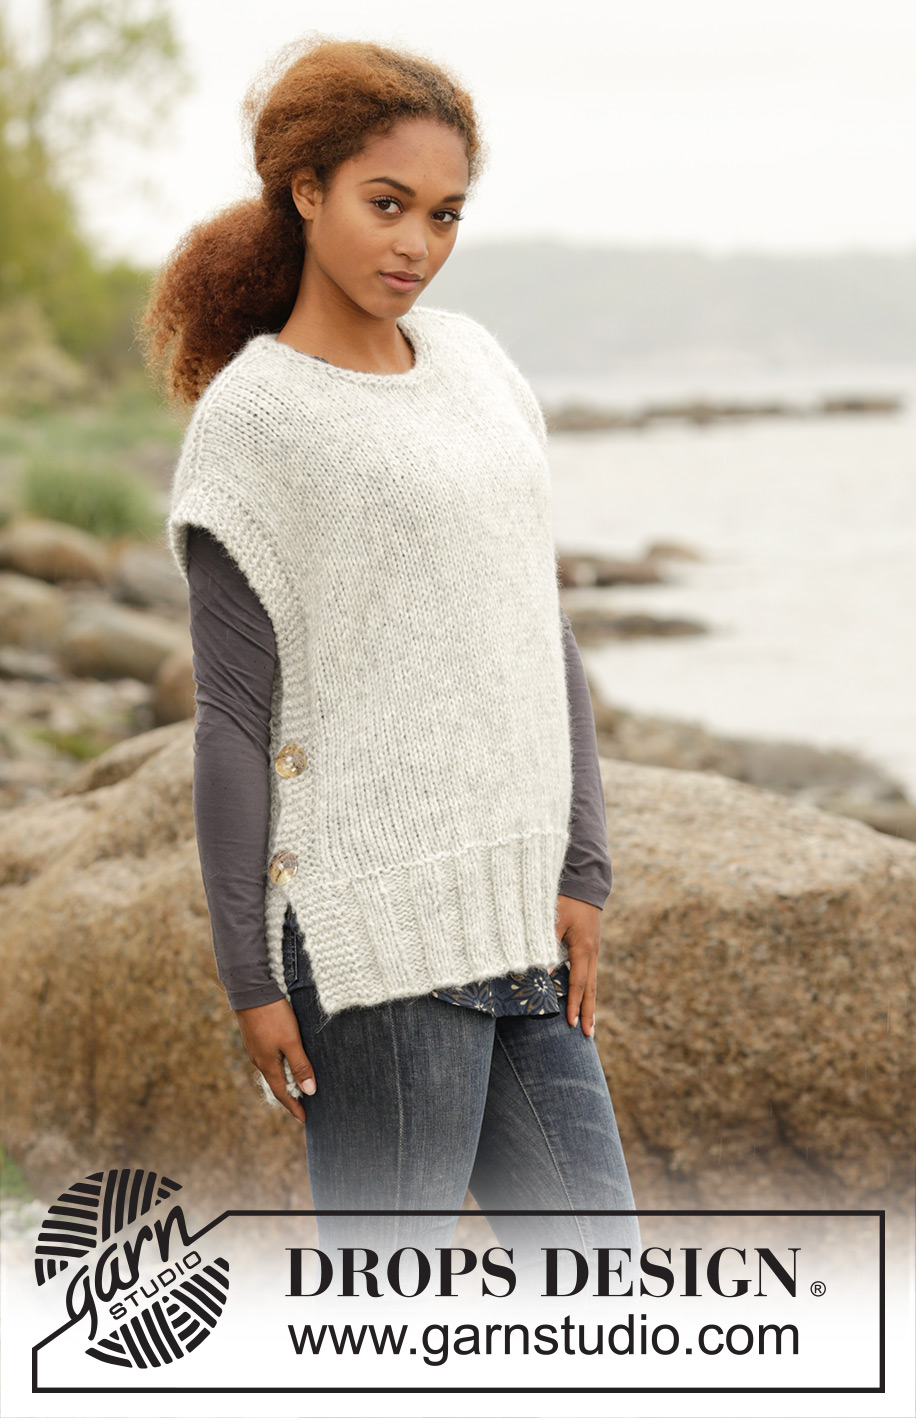
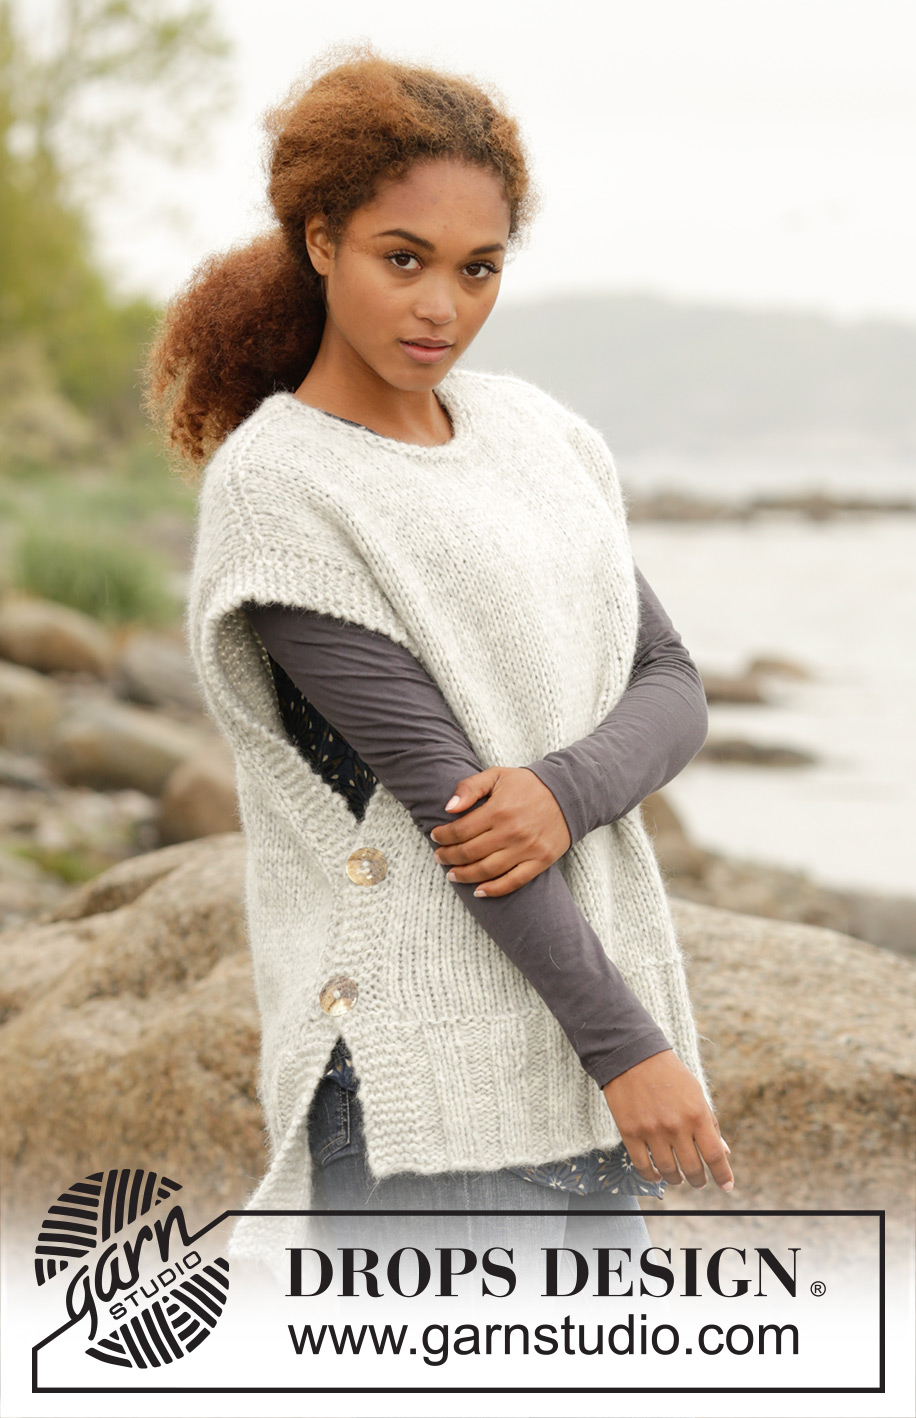
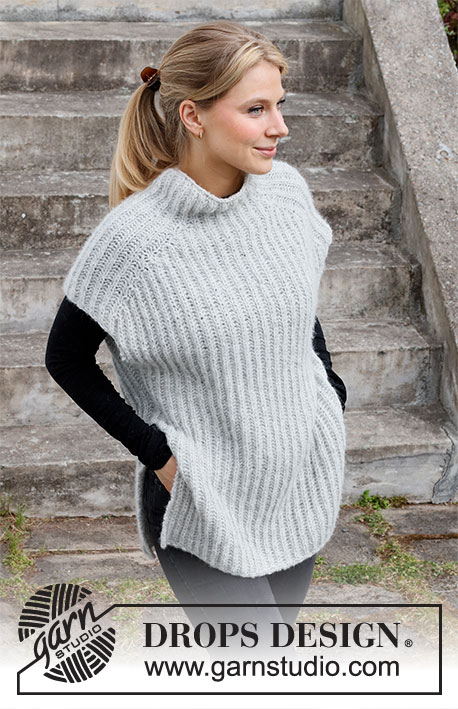
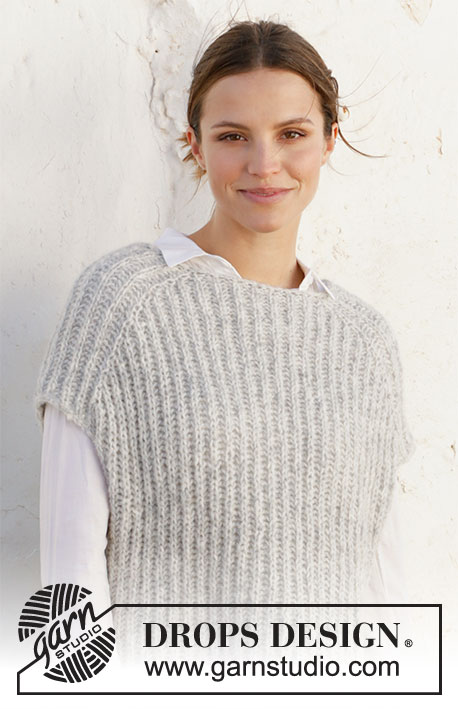
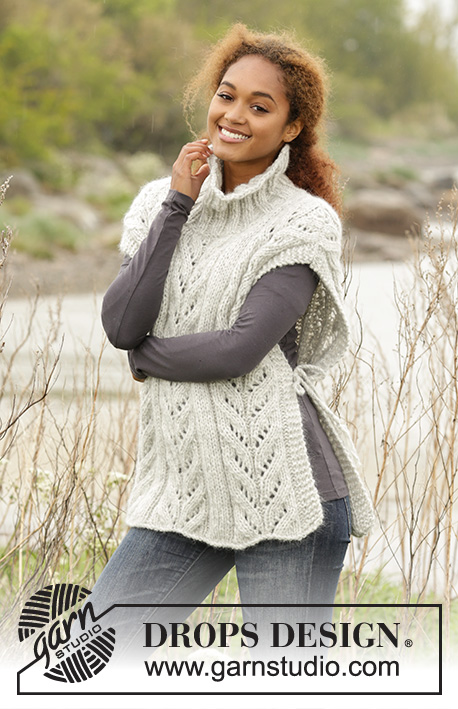
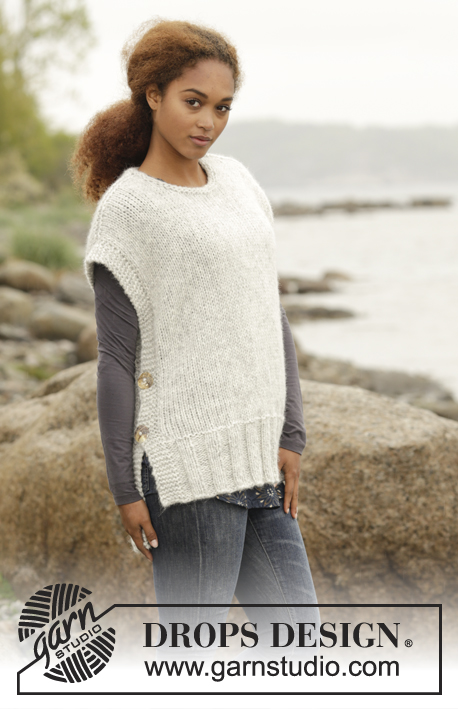
Gilet / smanicato DROPS ai ferri, con spacchi laterali e collo rotondo, con 1 capo di Cloud, 1 capo di Wish o 2 capi di Air. Taglie: Dalla S alla XXXL.
DROPS 173-47 |
|
|
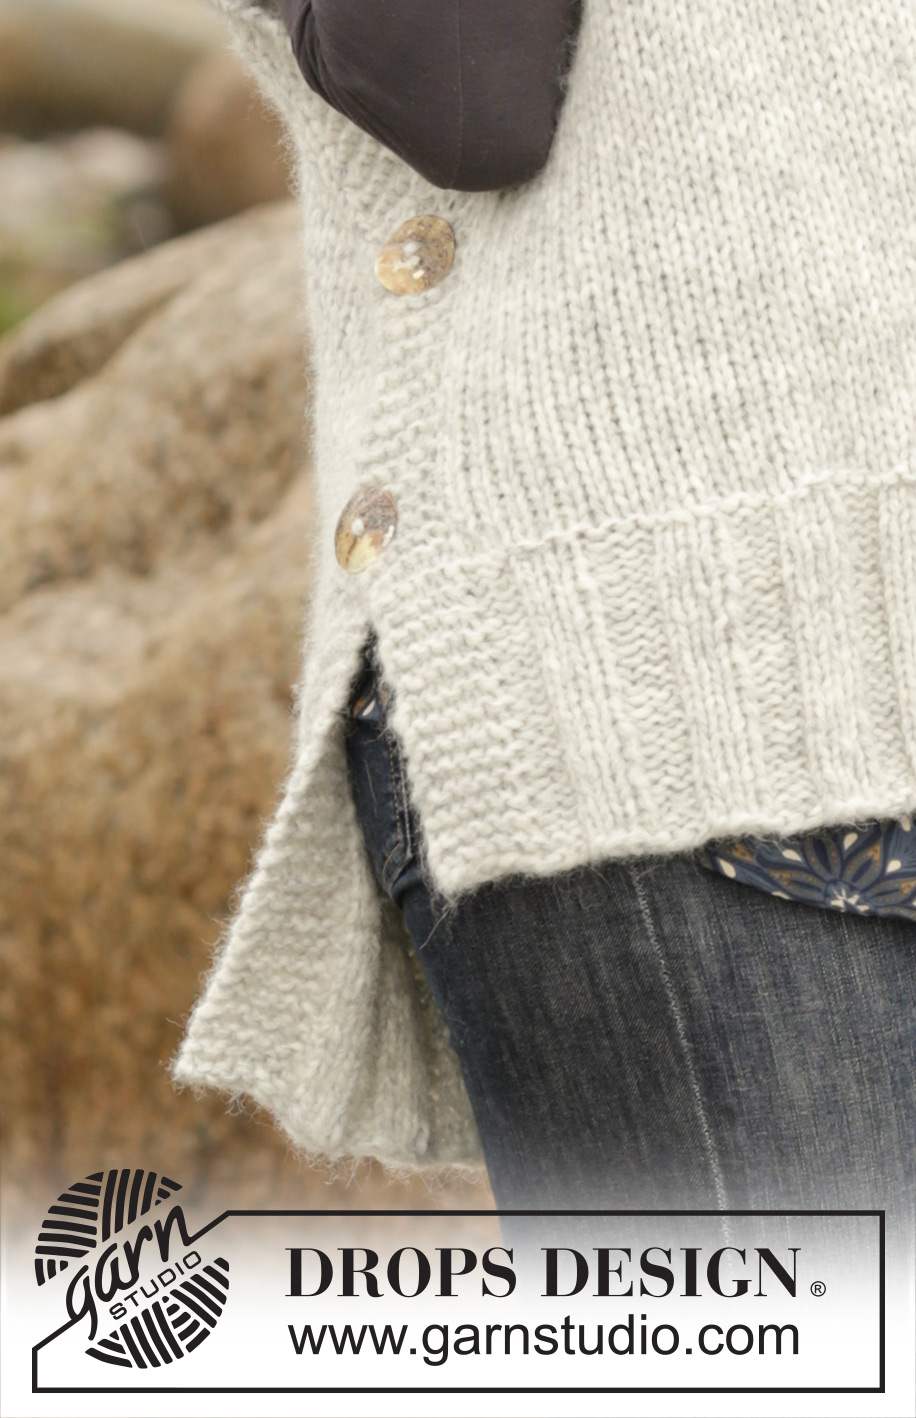
PUNTO LEGACCIO (avanti e indietro sui ferri): Lavorare tutti i ferri a dir. 1 costa a legaccio = 2 ferri a dir. SUGGERIMENTO PER LE DIMINUZIONI: Per calcolare ogni quante m diminuire, sottrarre dal numero complessivo delle m (p.es 75 m) le m dei bordi (p.es 12 m) e dividere il risultato per il numero di diminuzioni da fare (p.es 13) = 4,8. Quindi, in questo caso, bisogna lavorare insieme ogni 4a e 5a m ca (e non diminuire sulle m dei bordi). ASOLE: Intrecciare per 2 asole ai due lati del davanti. 1 asola = intrecciare la 3a e la 4a m dal bordo; al ferro successivo, avviare 2 nuove m sopra le m intrecciate. Intrecciare le m per le asole quando il lavoro misura 16 e 26 cm per tutte le taglie (o la misura voluta). ---------------------------------------------------------- GILET: Si lavora avanti e indietro sui ferri circolari in 2 parti separate cucite insieme sulle spalle. DIETRO: Avviare 75-81-87-93-99-105 m (comprese 6 m vivagno da ciascun lato) sui ferri circolari n° 7 con 1 capo di Cloud, 1 capo di Wish o 2 capi di Air. Lavorare 1 ferro a rov sul rovescio del lavoro. Lavorare il ferro successivo come segue sul diritto del lavoro: 6 m vivagno a PUNTO LEGACCIO - vedere le spiegazioni sopra - * 3 m rov, 3 m dir *, ripetere da *-* finché sui ferri non rimangono 9 m e finire con 3 m rov e 6 m vivagno a punto legaccio. Proseguire a coste in questo modo finché il lavoro non misura 21 cm. Al ferro successivo sul rovescio del lavoro, passare ai ferri circolari n° 8 mm, allo stesso tempo, diminuire 13-15-17-17-17-15 m a intervalli regolari - VEDERE IL SUGGERIMENTO PER LE DIMINUZIONI = 62-66-70-76-82-90 m. Lavorare a maglia rasata con 6 m vivagno a punto legaccio da ciascun lato. RICORDARSI DI MANTENERE LA CORRETTA TENSIONE DEL LAVORO! Quando il lavoro misura 63-65-67-69-71-73 cm, trasferire le prime m all’inizio di ogni ferro da ciascun lato su 1 ferma maglie per la pendenza della spalla, come segue (ATTENZIONE: per evitare di dover tagliare il filo, lavorare le m prima di metterle in attesa sul ferma maglie): trasferire sul ferma maglie 7-8-8-9-10-11 m 2-3-2-2-3-2 volte e 8-0-9-10-0-12 m 1-0-1-1-0-1 volta da ciascun lato. ALLO STESSO TEMPO, quando il lavoro misura 65-67-69-71-73-75 cm, intrecciare le 16-16-18-18-20-20 m centrali per lo scollo e finire ogni spalla separatamente. Al ferro successivo, intrecciare 1 m per lo scollo. Dopo aver intrecciato/messo in attesa sul ferma maglie tutte le m, per la spalla ci sono 22-24-25-28-30-34 m sul ferma maglie e il dietro misura ca.67-69-71-73-75-77 cm dalla spalla verso il basso. Riportare sui ferri circolari n° 7 le m messe in attesa sul ferma maglie. Lavorare 1 ferro a dir sul rovescio del lavoro (per evitare che si formi un buco dove le m sono state trasferite sul ferma maglie, sollevare il filo tra le 2 m sui ferri e lavorarlo insieme a dir ritorto con la m successiva sul ferro). Intrecciare ora le m senza stringere troppo il filo, lavorando a dir sul diritto del lavoro. Ripetere sull’altra spalla. DAVANTI: Avviare le m e lavorare come indicato per il dietro, ma quando le coste misurano 14 cm, diminuire a intervalli regolari come indicato per il dietro (il davanti è 7 cm più corto del dietro). Lavorare come indicato per il dietro, ma quando il lavoro misura 16 e 26 cm, intrecciare per le ASOLE ai due lati - vedere le spiegazioni sopra ! Proseguire finché il lavoro non misura 53-55-57-58-60-62 cm. Mettere ora in attesa su 1 ferma maglie le 10-10-12-12-14-14 m centrali per lo scollo e finire ogni spalla separatamente. Intrecciare ora per lo scollo all’inizio di ogni ferro dallo scollo, come segue: intrecciare 2 m 1 volta e 1 m 2 volte. ALLO STESSO TEMPO, quando il lavoro misura 56-58-60-62-64-66 cm, mettere le m in attesa su un ferma maglie per la pendenza della spalla come indicato per il dietro. Dopo aver trasferito tutte le m sul ferma maglie/intrecciato tutte le m, ci sono 22-24-25-28-30-34 m sul ferma maglie per la spalla e il davanti misura ca.60-62-64-66-68-70 cm dalla spalla verso il basso. Riportare sui ferri circolari n° 7 le m messe in attesa sul ferma maglie e lavorare 1 ferro a dir sul rovescio del lavoro come indicato per il dietro; intrecciare poi le m lavorandole a dir sul diritto del lavoro. Ripetere sull’altra spalla. CONFEZIONE: Cucire le spalle - assicurarsi che la cucitura non sia troppo stretta. Mettere il bordo a punto legaccio con le asole (davanti) sul bordo a punto legaccio del dietro e attaccare i bottoni. Ripetere sull’altro lato. COLLO: Con i ferri circolari corti n° 7 riprendere sul diritto del lavoro ca. da 46 a 58 m intorno allo scollo (comprese le maglie del davanti messe in attesa sul ferma maglie) con 1 capo di DROPS Cloud o 1 capo di DROPS Wish o 2 capi di DROPS Air. Lavorare 1 giro a rov, 1 giro a dir e 1 giro a rov; intrecciare le m in senza stringere troppo il filo e lavorando le m a dir. |
|
 |
|
Avete terminato questo modello?Allora taggate le vostre foto con #dropspattern #winteriscomingslipover o inviatele alla #dropsfan gallery. Avete bisogno di aiuto con questo modello?Troverete 21 video tutorial, una sezione per i commenti/domande e molto altro guardando il modello su www.garnstudio.com © 1982-2026 DROPS Design A/S. Ci riserviamo tutti i diritti. Questo documento, compreso tutte le sue sotto-sezioni, è protetto dalle leggi sul copyright. Potete leggere quello che potete fare con i nostri modelli alla fine di ogni modello sul nostro sito. |
|


Con oltre 40 anni di esperienza nel design di modelli di maglia e uncinetto, DROPS Design offre la più estesa collezione di modelli gratuiti su internet - tradotti in 17 lingue. Ad oggi vi possiamo fornire 324 cataloghi e 12290 modelli - 9561 dei quali sono tradotti in Italiano.
Ci stiamo impegnando molto per darvi il meglio che vi possiamo offrire in termini di maglia e uncinetto, ispirazioni e consigli così come filati di grande qualità ad un prezzo incredibile! Volete utilizzare i nostri modelli per qualcosa d'altro oltre al vostro uso personale? Potete leggere tutto ciò che è consentito nel testo sul Copyright in basso su tutte le pagine dei nostri modelli. Buon lavoro!
Lasciare un commento sul modello DROPS 173-47
Noi saremmo felici di ricevere i tuoi commenti e opinioni su questo modello!
Se vuoi fare una domanda, fai per favore attenzione a selezionare la categoria corretta nella casella qui sotto per velocizzare il processo di risposta. I campi richiesti sono indicati da *.