
Popular categories
Looking for a yarn?

































Comments / Questions (96)
 RENATA wrote:
Robię rękaw w 7 rzędzie wzoru należy dodać 16 oczek przez narzut. Czy w następnym okrążeniu przerabiam narzuty jako oczko przekręcone prawe ? W tym rzędzie tj. 8 mamy same lewe oczka i te oczko z narzutu nie wychodzi lewe. Czy tak ma być ?
24.10.2026 - 21:22DROPS Design answered:
Witaj Renato, w następnym rzędzie przerabiasz narzuty jako oczka przekręcone na lewo, czyli wbijasz drut od tyłu oczka (narzutu) od lewej do prawej strony i przerabiasz narzut na lewo. Pozdrawiamy!
28.10.2026 - 09:44
 Sissel Sunde wrote:
Hei, Stemmer garnmengden i denne oppskrifta? Ser at det er lagt inn en rettelse men garnmengden er lik.
12.10.2026 - 09:32DROPS Design answered:
Hei Sissel. Garnmengden ble rettet i str. L og XXL 18.06.2020 med en rettelselinje (i rødt) og riktig garnmende i oppskriften. Har du f.eks skrevet ut oppskriften før den datoen (før 18.06.2020), ville garnmengden ha vært ulikt i str. L og XXL enn hva det nå står på nett. mvh DROPS Design
12.10.2026 - 14:20
Bente wrote:
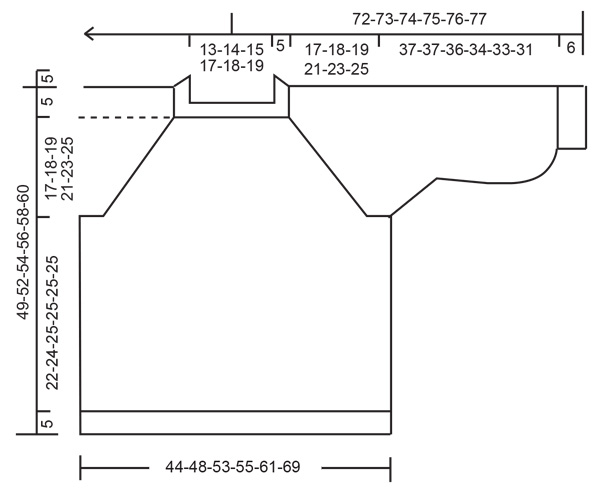
Hva er målene på størrelse xxl??
15.09.2026 - 20:53DROPS Design answered:
Hei Bente, Du finner en målskisse på bunnen av oppskriften, med alle mål til de forskjellige størrelsene. Hilsen Drops Team.
16.09.2026 - 07:19
RENATA wrote:
Robię rozmiar S. Czy robiąc reglan dodaję oczka następująco co 2 rzędy. Pierwsze okrąźenie dodaję 1 oczko po kaźdej ze stron markera w sumie 8 oczek. W następnym okrąźenie nie dodaję oczek przerabiają jersejem. W następnym 3 okrąźeniu dodaję 8 oczek na reglan. W 4 okrąźenie przerabiam oczka bez dodawania oczek na reglan. I tak w sumie 18 razy.
22.08.2026 - 18:43DROPS Design answered:
Witaj Renato, dokładnie jest tak jak piszesz; Powodzenia!
24.08.2026 - 09:42
Konstanse wrote:
På ærmet så står det at man skal strikke glattstrikk til det måler 10cnm fra delingen, hva er delingen? Er det der jeg startet ermet, der jeg startet med felling eller der jeg sluttet med felling?
29.06.2026 - 11:21DROPS Design answered:
Hei Konstanse. Delingen er der man deler bærestykket til bol og ermer. Man setter ermmaskene på 1 tråd og fortsetter bærestykket, som nå blir kalt bol. mvh DROPS Design
30.06.2026 - 10:31
Hege wrote:
For å få genseren litt tettere, vil Jeg gjerne strikke den med en halv eller hel pinnestørrelese mindre. Jeg er vanligvis str. Xs/s. Hvor vid er genseren i str.? Hvilken størrelse bør jeg strikke?
03.06.2026 - 07:30DROPS Design answered:
Hei, Hege, du ser målene på plagget med oppgitt strikkefasthet i de ulike størrelsene i diagrammet under oppskriften. God strikking!
03.06.2026 - 09:59
 George Céline wrote:
Je ne comprends pas, au niveau de l'empiècement après le colis vous dites de "sauter" les mailles entre les marqueurs au lieu de les tricoter ? Ce n'est pas clair merci pour votre aide
01.05.2026 - 09:41DROPS Design answered:
Bonjour Mme George, juste au début du paragraphe EMPIÈCEMENT on va placer des marqueurs, sans tricoter, comptez simplement les mailles pour votre taille, lorsque vous devez sauter 16 ou 18 mailles, comptez simplement ces 16 ou 18 mailles et placez un autre fil marqueur là, tricotez ensuite en rond, en jersey et commencez à augmenter pour le raglan. Bon tricot!
04.05.2026 - 08:07
Celine George wrote:
Bonjour, je suis arrivée à l'empiècement et j'ai un doute, Est ce qu'il faut mettre en attente sur une épingle ramasse maille de chaque côté 16mailles pour les manches et tricoter ensemble en rond le devant et le dos (soit 19, puis 38, puis 19 pour une tailleM)? Cela me semble bien petit pour les manches 16mailles, merci pour votre aide 😄
28.04.2026 - 22:15DROPS Design answered:
Bonjour Mme George, au début de l'empiècement, on place des fils marqueurs (ou bien des marqueurs, au choix) pour délimiter les différentes parties: fin du dos jusqu'à la manche après 19 m, puis 16 m de manche, puis 38 m de devant, 16 m de manche et 19 m pour la 2ème partie du dos (les tours commencent au milieu dos). On va ensuite augmenter pour le raglan de chaque côté des fils marqueurs (cf RAGLAN): soit 2 m en plus pour chaque manche, le devant et le dos (8 m en plus par tour d'augmentations). Bon tricot!
29.04.2026 - 08:58
Eva wrote:
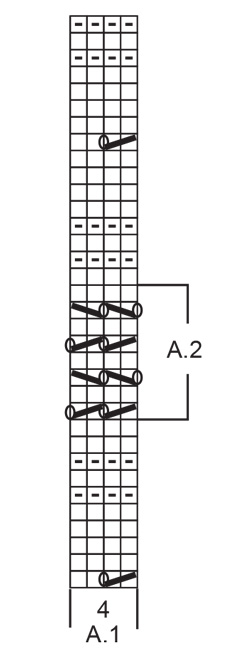
Skjønner ikke helt diagrammet A1 . Tegnet 0 betyr ett kast. Skal det alltid være mellom 2 masker, eller kommer det rett etter 2 rette sammen? Refererer til det første tegnet i diagram A1.
13.03.2026 - 10:48DROPS Design answered:
Hei Eva. I denne oppskriften betyr 0 et kast, og den strikkes mellom 2 masker. Det første ikonet i A.1 viser at 2 masker strikkes sammen (=1 maske), så lages det et kast, deretter 2 masker rett. Kastet lages mellom 2 masker (selv om det på den ene siden av kastet er 2 masker som er blitt til 1 maske). mvh DROPS Design
16.03.2026 - 11:49
Karin wrote:
Hvilken omkrets er det på genseren, oppskrift 212-13 i str XL ?
20.02.2026 - 14:11DROPS Design answered:
Hei Karin. Om du scroller deg helt nederst på oppskriften vil du se genserens målskisse med alle mål (61 cm x 2). mvh DROPS Design
23.02.2026 - 08:00
|
||||||||||||||||
Cloud's Hug#cloudshugsweater |
||||||||||||||||
 |
 |
|||||||||||||||
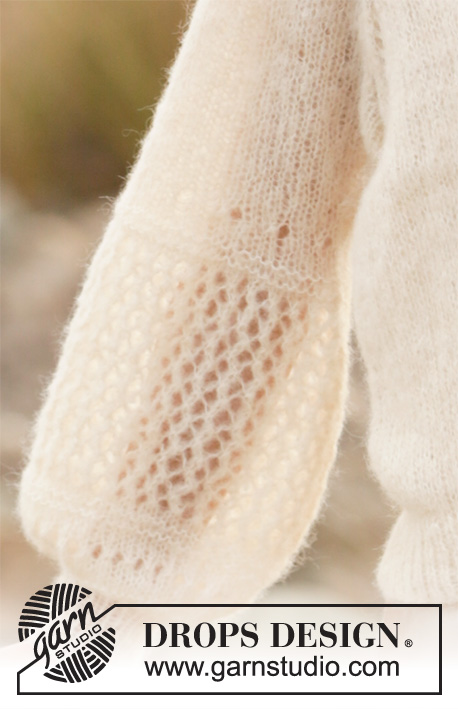
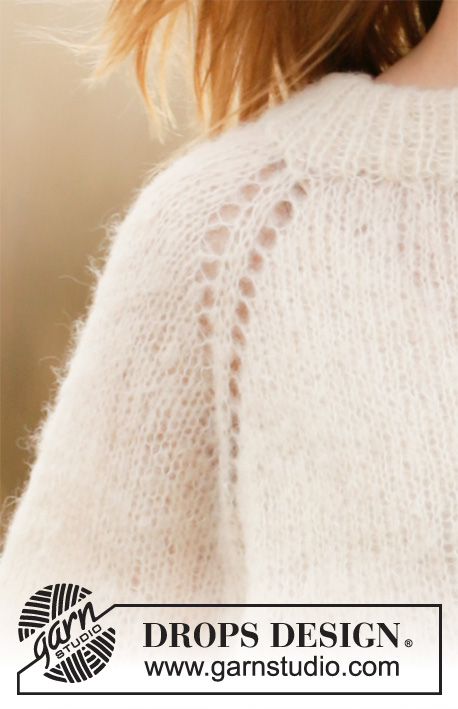
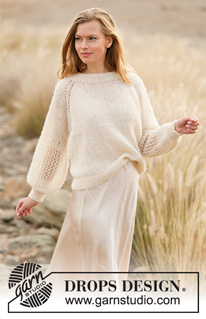
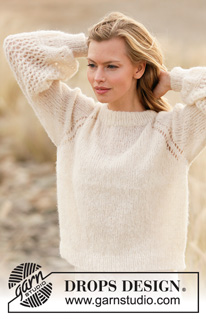
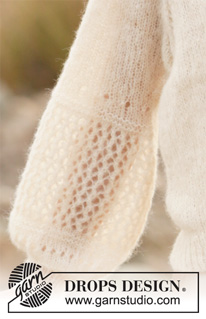
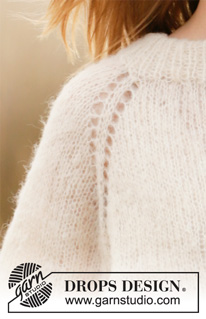
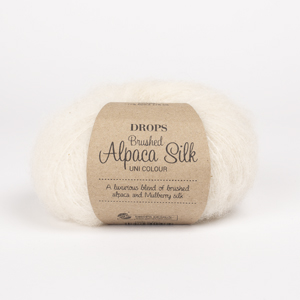
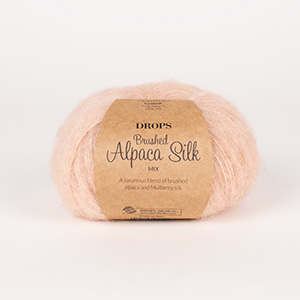
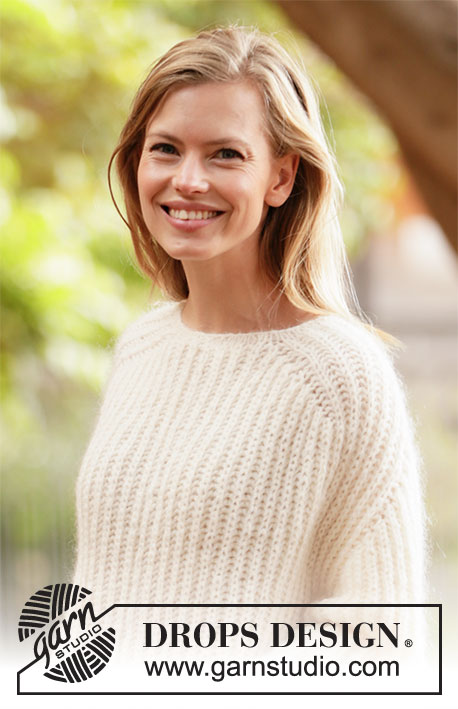
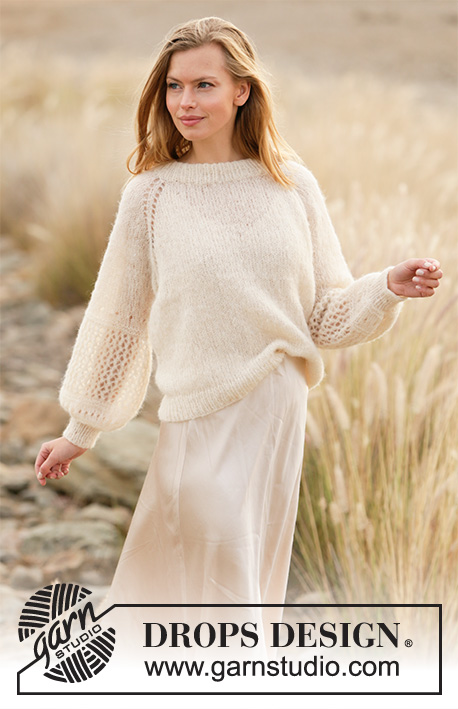
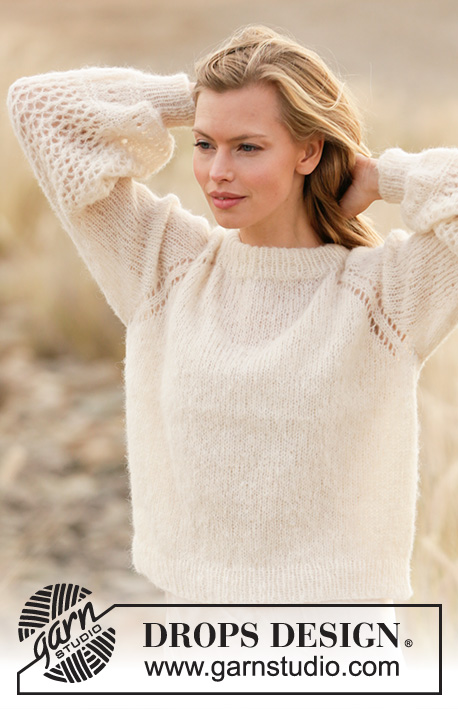
Knitted jumper with raglan in DROPS Brushed Alpaca Silk. Piece is knitted top down with lace pattern and balloon sleeves. Size XS – XXL.
DROPS 212-13 |
||||||||||||||||
|
---------------------------------------------------------- EXPLANATION FOR THE PATTERN: ---------------------------------------------------------- PATTERN: See diagrams A.1 and A.2. INCREASE/DECREASE TIP (evenly): To calculate how to increase/decrease evenly, use the total number of stitches on row (e.g. 74 stitches) , and divide stitches by number of increases/decreases to be done (e.g. 22) = 3.3. In this example increase by making 1 yarn over after alternately approx. every 3rd and 4th stitch. On next round knit yarn overs twisted to avoid holes. If decreasing knit in this example alternately approx. every 2nd and 3rd stitch and every 3rd and 4th stitch together. RAGLAN: Increase 1 stitch on each side of marker thread in every transition between sleeves and body as follows: Work until 1 stitch remains before marker thread, make 1 yarn over, knit 2 (marker thread is between these stitches), make 1 yarn over. Repeat at the remaining marker threads (= 8 stitches increased on round). On next round knit the yarn overs to make holes. Then work the new stitches in stocking stitch. DECREASE TIP (applies to sleeves): Decrease 1 stitch on each side of marker thread as follows: Work until 3 stitches remain before marker thread and knit 2 together, knit 2 (marker thread is between these stitches), slip 1 stitch knitwise, knit 1, pass slipped stitch over stitch worked. CAST-OFF TIP: To avoid a tight cast-off edge you may use a larger needle. If this also is too tight, make 1 yarn over after approx. every 4th stitch and cast off these as regular stitches. ---------------------------------------------------------- START THE PIECE HERE: ---------------------------------------------------------- JUMPER - SHORT OVERVIEW OF THE PIECE: Work neck edge and yoke in the round on circular needle from mid back, top down. Now divide yoke for body and sleeves. Body is worked in the round on circular needle, top down. Work sleeves in the round on double pointed needles/short circular needle, top down. NECK EDGE: Loosely cast on 74-76-80-84-88-92 stitches on circular needle size 5.5 mm with Brushed Alpaca Silk. Knit 1 round. Switch to circular needle size 4 mm. Work rib (= knit 1/purl 1) in the round until piece measures 10 cm. Knit 1 round while increasing 22-24-28-28-32-44 stitches evenly - read INCREASE/DECREASE TIP = 96-100-108-112-120-136 stitches. Switch to circular needle size 5.5 mm. Insert 1 marker at the beginning of round (= approx. mid back), measure yoke from this marker! YOKE: Now insert 4 marker threads in the piece as follows. Insert a marker thread after 16-17-19-19-21-25 stitches (= in transition between back piece and right sleeve), skip the next 16-16-16-18-18-18 stitches, insert a marker thread here (= in transition between right sleeve and front piece), skip the next 32-34-38-38-42-50 stitches, insert a marker thread here (= in transition between front piece and left sleeve), skip the next 16-16-16-18-18-18 stitches, insert a marker thread here (= in transition between left sleeve and back piece), 16-17-19-19-21-25 stitches remain on round after last marker thread. REMEMBER THE KNITTING TENSION! Work in stocking stitch in the round, AT THE SAME TIME on first round begin increase for RAGLAN – read explanation above. Increase like this every other round 16-18-19-21-23-25 times in total = 224-244-260-280-304-336 stitches. Then continue in stocking stitch until piece measures 17-18-19-21-23-25 cm from marker. Now divide piece for body and sleeves. Work next round as follows: Work 32-35-38-40-44-50 stitches (= half back piece), slip the next 48-52-54-60-64-68 stitches on a stitch holder for sleeve, cast on 6-6-8-8-10-10 new stitches on needle (= in the side under sleeve), work the next 64-70-76-80-88-100 stitches (= front piece), slip the next 48-52-54-60-64-68 stitches on a stitch holder for sleeve, cast on 6-6-8-8-10-10 new stitches on needle (= in the side under sleeve), work the last 32-35-38-40-44-50 stitches (= half back piece). Then finish body and sleeves separately. NOW MEASURE THE PIECE FROM HERE! BODY: = 140-152-168-176-196-220 stitches. Work in stocking stitch in the round. When piece measures 22-24-25-25-25-25 cm, increase 10-12-12-12-14-16 stitches evenly = 150-164-180-188-210-236 stitches. Switch to circular needle size 4 mm. Work rib (knit 1/purl 1) in the round for 5 cm. Cast off with knit over knit and purl over purl - read CAST-OFF TIP. Jumper measures approx. 49-52-54-56-58-60 cm from shoulder and down. SLEEVES: Slip the 48-52-54-60-64-68 stitches from stitch holder in one side of piece back on a short circular needle/double pointed needles size 5.5 mm , and pick in addition up 1 stitch in each of the 6-6-8-8-10-10 new stitches under sleeve = 54-58-62-68-74-78 stitches. Insert a marker thread in the middle of the new stitches under the sleeve. Move the marker thread upwards when working. Use marker later when decreasing under sleeve. Work the different sizes as follows: Size XS, S and M: Work in stocking stitch in the round. When piece measures 2 cm, decrease 1 stitch on each side of marker thread - read DECREASE TIP. Decrease like this every 4th-4th-2nd round 5-5-7 times in total = 44-48-48 stitches. Size L, XL and XXL: Work in stocking stitch in the round. On 2nd round begin decrease under sleeve - read DECREASE TIP. Decrease like this on every round 4-5-7 times in total, then on every other round 4-4-2 times in total = 52-56-60 stitches. All sizes: Continue in stocking stitch until sleeve measures 11-11-10-8-7-5 cm from division. Now work pattern A.1 in the round on round (= 11-12-12-13-14-15 repetitions of 4 stitches). On 7th round increase 16-16-16-16-12-12 stitches evenly = 60-64-64-68-68-72 stitches. When you have worked up to A.2 in diagram, repeat A.2 vertically until 16 cm have been worked with A.2 in all sizes (sleeve measures approx. 31-31-30-28-27-25 cm and approx. 6 cm remain with pattern + 6 cm rib on sleeve). Then work the remaining rounds in diagram. Knit 1 round while decreasing 11-13-13-13-13-14 stitches evenly = 49-51-51-55-55-58 stitches. Knit 1 round while decreasing 17-17-15-15-13-14 stitches evenly = 32-34-36-40-42-44 stitches. Switch to double pointed needles size 4 mm. Work rib (knit 1/purl 1) in the round for 6 cm. Cast off with knit over knit and purl over purl - read CAST-OFF TIP. Work the other sleeve the same way. ASSEMBLY: Fold down neck edge on wrong side to that it is double and fasten it with small stitches - make sure avoid a tight seam! |
||||||||||||||||
Diagram explanations |
||||||||||||||||
|
||||||||||||||||
 |
||||||||||||||||
 |
||||||||||||||||
Have you finished this pattern?Tag your pictures with #dropspattern #cloudshugsweater or submit them to the #dropsfan gallery. Do you need help with this pattern?You'll find 19 tutorial videos, a Comments/Questions area and more by visiting the pattern on garnstudio.com. © 1982-2026 DROPS Design A/S. We reserve all rights. This document, including all its sub-sections, has copyrights. Read more about what you can do with our patterns at the bottom of each pattern on our site. |
||||||||||||||||






With over 40 years in knitting and crochet design, DROPS Design offers one of the most extensive collections of free patterns on the internet - translated to 17 languages. As of today we count 333 catalogues and 12525 patterns translated into English (UK/cm). 12525
We work hard to bring you the best knitting and crochet have to offer, inspiration and advice as well as great quality yarns at incredible prices! Would you like to use our patterns for other than personal use? You can read what you are allowed to do in the Copyright text at the bottom of all our patterns. Happy crafting!
Post a comment to pattern DROPS 212-13
We would love to hear what you have to say about this pattern!
If you want to leave a question, please make sure you select the correct category in the form below, to speed up the answering process. Required fields are marked *.