
Popular categories
Looking for a yarn?


Comments / Questions (32)
![]() Renie wrote:
Renie wrote:
3. At the beginning it should also say that the back piece is only knitted in stocking stitch (that's why there are less stitches than for the front piece with the special). 4. At the beginning of "Front Piece" please say that the cable stitch pattern A.2 requires more stitches (so you prevent another possible confusion). 5. The description of the first round re.: the front piece (when A.2 cable pattern begins) should be directly placed under "Front Piece", it only belongs there.
16.12.2018 - 09:07
![]() Renie wrote:
Renie wrote:
2. I understand why those quite simple ribs are being made an extra pattern "A.1". But by placing it directly under the main pattern A.2 without a certain note right by the pattern (NOT only in the text, the description) that A.1 is only to be knitted for 6 cm whereas A.2 is to be repeated until the respective piece ends (at the shoulders), this seems to confuse, obviously. Additionally, what about a small space between A.1 and A.2 for better optics? -> 3.
16.12.2018 - 08:43
![]() Renie wrote:
Renie wrote:
Hi Drops-Team, this is such an easy pattern, but you are complicating it. 1. At the beginning, it says "Knit up stitches around the armhole for sleeves and continue working IN THE ROUND with double pointed needles down the sleeve." Later, and in your answers, you say "The sleeve are worked BACK AND FORTH, top down." (By the way, it must say "sleeveS" - plural). -> 2.
16.12.2018 - 08:33
![]() Boize wrote:
Boize wrote:
I have the same problem, it seems that 34 sts makes a sleeve too narrow
09.12.2018 - 18:13DROPS Design answered:
Dear Mrs Boize, if your tension is right (9 sts = 10 cm in width), the 34 sts should measure 38 cm = 19 cm when folded double as shown in measurement chart. Happy knitting!
10.12.2018 - 10:42Marcia Miller wrote:
I am confused about the sleeve. It seems that 35 stitches for size small is not nearly big enough for the armhole. Are we picking up the stitches from the body of the sweater or knitting the sleeve separately and then setting it into the armhole?
07.12.2018 - 21:45DROPS Design answered:
Hi Marcia! The sleeves are worked back and forth, top down. If knitting tension is right, 36 stitches is 40 cm. Should be enough for armhole. You can always pick a few more. Happy knitting!
09.12.2018 - 19:20
![]() Emmanouela Evanggelatou wrote:
Emmanouela Evanggelatou wrote:
THAT I WANT TO UNDERSTAND.. BEFORE I WAS WORKING in A.2 AND AT THE BEGGINING THE RIB IN A.1. SO YOU ARE TELLING ME TO CHANGE AND WORK THE SHOULDERS IN A.1 (KNIT 2 PURL 2 ..) AS THE RIB. IS THAT CORRECT?
08.11.2018 - 15:10DROPS Design answered:
Dear Mrs Evanggelatou, there might have been a typo in the previous answer - you will work the sts on each shoulder as before : on back piece: all sts will be worked in stocking stitch, and on front piece: either P or K as before in A.2 - there might be a typo in the pattern, our Design team will check this. Happy knitting!
08.11.2018 - 15:49Emmanouela Evanggelatou wrote:
Hello again , i can't understand that.." Each shoulder is now finished separately. Continue with ...... in the same way." That paragraphe concernes the shoulders? and I knit them also in A1 as the rib? please explain me this paragr. for the front piece. Thank you!
07.11.2018 - 20:59DROPS Design answered:
Hi Emmanouela, After you have placed the middle stitches on a thread for the neck, you continue working one shoulder only, with knit and purl over the remaining stitches in A.1 as before. Decrease for the neck as described and continue working until this shoulder is finished. Then work the other shoulder in the same way. Happy knitting!
08.11.2018 - 08:24Emmanouela Evanggelatou wrote:
Hello , i would like some help conserning the armholes...."Cast off the first 2-2-2-2-2-3 stitches on the round, work the next 49-53-57-61-65-69 stitches as before (= front piece), cast off the next 4-4-4-4-4-6 stitches, work until there are 2-2-2-2-2-3 stitches left, cast off these stitches. Cut the strand. ".... Please explain me this paragraphe. I cast off 2 stitches for each armhole or 1 stitche for each? and how i continue to cast off ?
04.11.2018 - 01:16DROPS Design answered:
Dear Mrs Evanggelatou, on this round in the first 5 sts you start casting off 2 sts at the beg of round, work the next 49-53-57-61-65 sts as before, cast off the next 4 sts for armhole, work the next sts as before until 2 sts remain before end of round (= before the first 2 sts cast off at the beg of the round) and cast off these last 2 sts, cut the yarn = there are now 4 sts cast off for each armhole on each side. You finish now each part separately joining the yarn at the beg of back piece first. Happy knitting!
05.11.2018 - 09:22
![]() Geke wrote:
Geke wrote:
Kunt u me uitleggen hoe ik 0-0-0-0-1 steek tricotsteek moet breien? Ik begrijp het niet.
04.10.2018 - 06:45
![]() Geke wrote:
Geke wrote:
Ik begrijp niet wat 0-0-0-0-0-1 steek tricot betekent. Kunt u me dat uitleggen?
02.10.2018 - 19:57DROPS Design answered:
Dag Geke, In maat S brei je 0 steken in tricot, in maat M 0 steken enz. De getallen staan in volgorde van de maten en je hoeft dus alleen maar in de grootste maat een steek in tricotsteek te breien.
04.10.2018 - 11:59
|
|||||||||||||
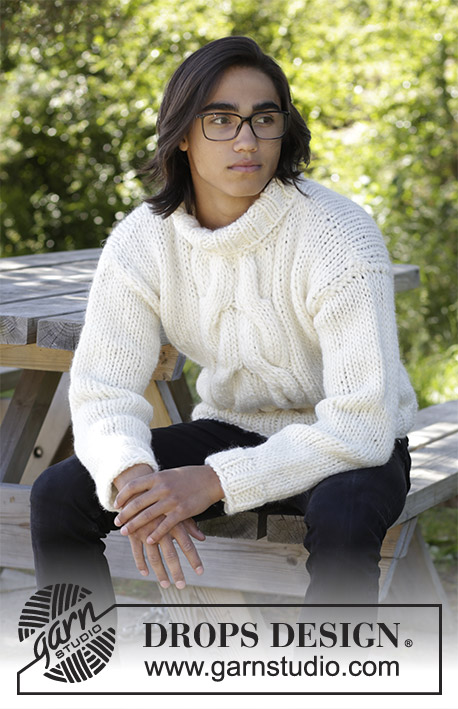
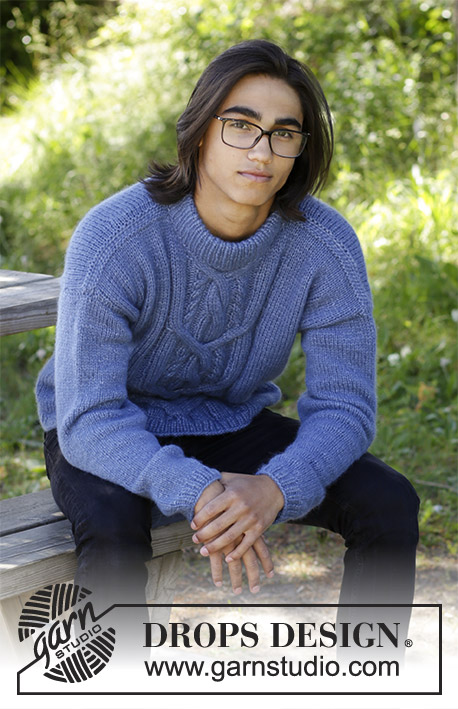
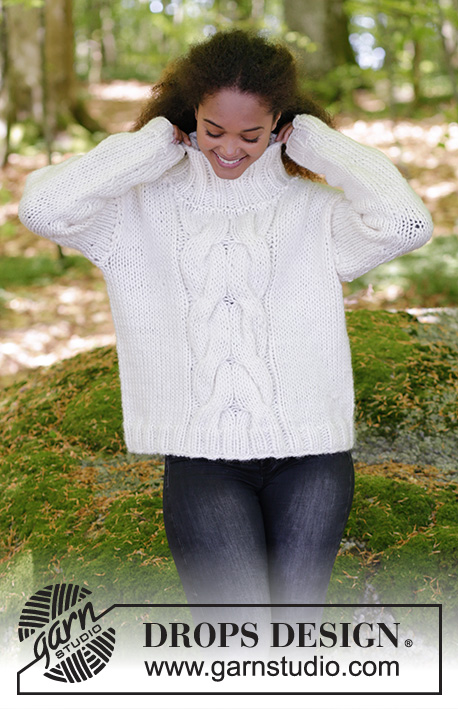
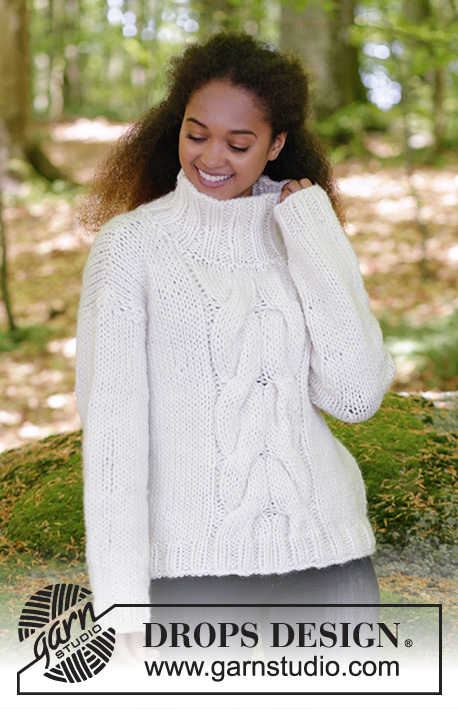
Cozy Weekend#cozyweekendsweater |
|||||||||||||
 |
 |
||||||||||||
Knitted jumper with cables and high collar. Sizes S - XXXL. The piece is worked in DROPS Snow.
DROPS 181-13 |
|||||||||||||
|
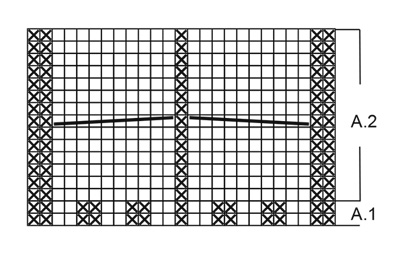
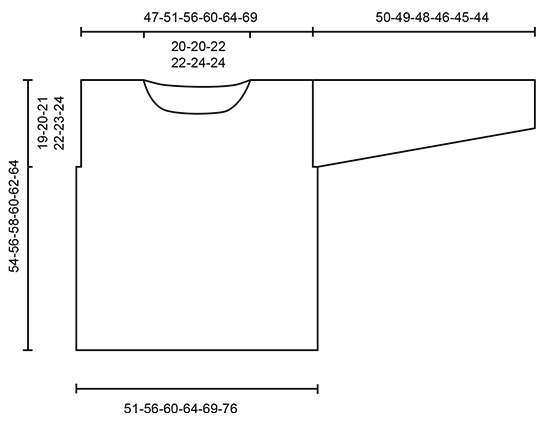
INFORMATION FOR THE PATTERN: PATTERN: See diagrams A.1 and A.2. The diagram shows all the rows in the pattern seen from the right side. ---------------------------------------------------------- JUMPER: The jumper is worked in the round with circular needle, bottom up. The piece is divided when you decrease for the armhole and the back and front piece are finished back and forth separately. Knit up stitches around the armhole for sleeves and continue working back and forth down the sleeve. The collar is worked with short circular needle to finish. BODY: Cast on 99-107-115-123-131-143 stitches with circular needle size 9 mm and Snow. Knit 1 round, then work rib in the different sizes as follows: S-L- XXL-XXXL: * Knit 2, purl 2 *, work from *-* over the first 12-16-20-24 stitches, knit 2, work A.1 (= 25 stitches), * knit 2, purl 2 * over the remaining 60-72-84-92 stitches. M-XL: * Purl 2, knit 2 *, work from *-* over the first 16-20 stitches, work A.1 (= 25 stitches), * knit 2, purl 2 *, work from *-* over the next 64-76 stitches and finish with knit 2 stitches. ALL SIZES: Continue rib in this way until the piece measures 6 cm. Change to circular needle size 10 mm. Work 0-0-0-0-0-1 stitch stocking stitch, the round now begins here, insert 1 marker thread (the round is now displaced 0-0-0-0-0-1 stitch). The next round is worked as follows: Work stocking stitch over the first 14-16-18-20-22-25 stitches, A.2 (= 25 stitches) over A.1, stocking stitch over the next 14-16-18-20-22-25 stitches, insert 1 marker thread (= front piece), work stocking stitch over the last 46-50-54-58-62-68 stitches. Continue the pattern upwards. REMEMBER THE KNITTING TENSION! When the piece measures 35-36-37-38-39-40 cm cast off stitches for armhole on the next round as follows (adjust so that the next round is 1st-3rd-5th-7th-9th-11th or 13th round in A.2): Cast off the first 2-2-2-2-2-3 stitches on the round, work the next 49-53-57-61-65-69 stitches as before (= front piece), cast off the next 4-4-4-4-4-6 stitches, work until there are 2-2-2-2-2-3 stitches left, cast off these stitches. Cut the strand. Each part is now finished separately. BACK PIECE: = 42-46-50-54-58-62 stitches. Continue with stocking stitch over all stitches (the first row is worked from the wrong side). When the piece measures 17-18-19-20-21-22 cm from where you cast off stitches for armhole (the piece measures a total of 52-54-56-58-60-62 cm) cast off the middle 16-16-18-18-20-20 stitches for the neck and each shoulder is finished separately = 13-15-16-18-19-21 stitches on the shoulder. Continue with stocking stitch and decrease 1 stitch on the next row from the neck = 12-14-15-17-18-20 stitches left on the shoulder. Continue working until the piece measures 19-20-21-22-23-24 cm from where you cast off stitches for armhole (the piece measures a total of 54-56-58-60-62-64 cm). Cast off. Work the other shoulder in the same way. FRONT PIECE: = 49-53-57-61-65-69 stitches. Continue working until the piece measures 48-50-50-52-52-54 cm (the first row is worked from the wrong side). Now place stitches on 1 thread for the neck as follows: Work 16-18-19-21-22-24 stitches as before, work the next 17-17-19-19-21-21 stitches as before but decrease 7 stitches evenly over these stitches, then place them on a thread (= 10-10-12-12-14-14 stitches on the thread), work the remaining 16-18-19-21-22-24 stitches as before. Each shoulder is now finished separately. Continue with knit and purl as before over the remaining stitches in A.2 and cast off for the neck at the beginning of each row from the neck as follows: Cast off 2 stitches 1 time and 1 stitch 2 times = 12-14-15-17-18-20 stitches left on the shoulder. Continue working until the piece measures 54-56-58-60-62-64 cm, match with the back piece. Cast off. Work the other shoulder in the same way. ASSEMBLY: Sew shoulder seams with grafting stitches. SLEEVE: The sleeve are worked back and forth, top down. Knit up 34-36-38-40-42-44 stitches along the armhole in the outermost stitch/row with circular needles size 10 mm and Snow. Work stocking stitch. When the piece measures 4 cm decrease 1 stitch on each side of the piece (= 2 stitches decreased) Decrease in this way every 9-7-5-6-5-4 cm a total of 5-6-7-6-7-8 times = 24-24-24-28-28-28 stitches. When the piece measures 45-44-43-41-40-39 cm, change to circular needles size 9 mm and work rib (= knit 2/ purl 2). When the sleeve measures 50-49-48-46-45-44 cm, change to double pointed needles size 10 mm and cast off with knit over all stitches. NECK: The piece is worked in the round. Knit up 56-56-60-60-64-64 stitches around the neck (including the stitches on the thread) on short circular needle size 9 mm and Snow. Purl 1 round and knit 1 round, then work rib (= knit 2/ purl 2) for 12 cm. Cast off LOOSELY with knit over knit and purl over purl. ASSEMBLY: Sew the sleeves, sewing in the outmost loop of outermost stitch. |
|||||||||||||
Diagram explanations |
|||||||||||||
|
|||||||||||||
 |
|||||||||||||
 |
|||||||||||||
Have you finished this pattern?Tag your pictures with #dropspattern #cozyweekendsweater or submit them to the #dropsfan gallery. Do you need help with this pattern?You'll find 22 tutorial videos, a Comments/Questions area and more by visiting the pattern on garnstudio.com. © 1982-2026 DROPS Design A/S. We reserve all rights. This document, including all its sub-sections, has copyrights. Read more about what you can do with our patterns at the bottom of each pattern on our site. |
|||||||||||||


With over 40 years in knitting and crochet design, DROPS Design offers one of the most extensive collections of free patterns on the internet - translated to 17 languages. As of today we count 324 catalogues and 12290 patterns translated into English (UK/cm). 12290
We work hard to bring you the best knitting and crochet have to offer, inspiration and advice as well as great quality yarns at incredible prices! Would you like to use our patterns for other than personal use? You can read what you are allowed to do in the Copyright text at the bottom of all our patterns. Happy crafting!
Post a comment to pattern DROPS 181-13
We would love to hear what you have to say about this pattern!
If you want to leave a question, please make sure you select the correct category in the form below, to speed up the answering process. Required fields are marked *.