
Popular categories
Looking for a yarn?


Comments / Questions (51)
![]() Maria Caballe wrote:
Maria Caballe wrote:
Buenas tardes, Mi duda es la siguiente: despues de oner los marcadores y realizar los primeros 10 aumentos, no entiendo cuantas hileras y cuantos aumentos por hilera hay que hacer hasta llegar a los 20 cms de la talla mediana i a los 353 puntos. muchas gracias
16.07.2017 - 22:12DROPS Design answered:
Hola Maria. después de insertar los marcapuntos aumentamos de la siguiente manera: aumentar de modo alterno a cada lado del marcapuntos ( es decir, una fila todos los aumentos se trabajan antes de los marcapuntos, otra fila - después de los marcapuntos - , de este modo siempre aumentamos 10 puntos en la fila) primero cada 2ª fila 0-2-0-3-7-7 veces (el número de veces depende de la talla), después cada 4ª fila 10-10-9-9-8-8 veces y al final cada 6ª fila 5-5-7-7-7-8 veces.
27.07.2017 - 12:32
![]() Silvana wrote:
Silvana wrote:
Buonasera. Sono arrivata ai primi aumenti dx/sx dei segna punti. Sono sul dritto del lavoro e aumento a dx. Il ferro successivo sono sul rovescio e NON aumento a sx giusto? In pratica gli aumenti sono sempre sul dritto del lavoro.? Quindi ogni 4 ferri è su ogni dritto del lavoro? Grazie attendo risposta
26.06.2016 - 16:39DROPS Design answered:
Buongiorno Silvana. Aumenta sempre sul diritto del lavoro. Dopo aver aumentato alla destra dei segni, lavora 3 ferri senza aumentare (1 ferro sul rov, 1 sul dritto, 1 sul rov). Al quarto ferro (diritto del lavoro) aumenta alla sinistra dei segni. Lavora 3 ferri senza aumentare e al ferro successivo aumenta a destra e così via. Buon lavoro!
26.06.2016 - 17:13
![]() Silvana wrote:
Silvana wrote:
Scusa non so se ho scritto bene, nell'incertezza riprovo. Chiedevo ogni 4 ferri la coppia dx/sx oppure , ogni 4 ferri aumento a dx, altri 4 ferri e aumento a sx...e così via grazie
26.06.2016 - 16:24DROPS Design answered:
Buongiorno Silvana. Aumenta sempre sul diritto del lavoro. Dopo aver aumentato alla destra dei segni, lavora 3 ferri senza aumentare. Al quarto ferro (diritto del lavoro) aumenta alla sinistra dei segni. Lavora 3 ferri senza aumentare e al ferro successivo aumenta a destra e così via. Buon lavoro!
26.06.2016 - 17:12
![]() Silvana wrote:
Silvana wrote:
Altro dubbio!😭 Ma gli aumenti prima a dx e poi a sx, non devono essere distanziati da 4 ferri tra di loro? Ogni 4 ferri è la coppia dx/sx?. Grazie mille ancora
26.06.2016 - 16:03DROPS Design answered:
Buongiorno Silvana. Gli aumenti sono sempre sul diritto del lavoro. Aumentare ogni 4 ferri, vuol dire aumentare su un ferro lavorato sul diritto del lavoro, lavora 3 ferri senza aumentare (un ferro sul rovescio, un ferro sul diritto, un ferro sul rovescio). Aumenta al ferro successivo sul diritto del lavoro, aumentando questa volta sempre alla sinistra dei segni. Buon lavoro!
26.06.2016 - 17:10
![]() Silvana wrote:
Silvana wrote:
Meravigliosa tempestività!😃 Scusa avevo scritto di nuovo perché non avevo visto la risposta . Mille grazie e complimenti per il lavoro che fate.
26.06.2016 - 15:44
![]() Silvana wrote:
Silvana wrote:
Continuo la domanda posta poco fa: oppure i 4 ferri li conto dopo avete fatto Una volta dx , 1 volta sx , 4 ferri senza aumenti e ricomincio? Con gli aumenti fatti sul dritto del lavoro..... Grazie mille
26.06.2016 - 15:40DROPS Design answered:
Buongiorno Silvana. Può vedere la risposta che le abbiamo dato sotto. Buon lavoro!
26.06.2016 - 17:09
![]() Silvana wrote:
Silvana wrote:
Continuo la domanda posta poco fa: oppure i 4 ferri li conto dopo avete fatto Una volta dx , 1 volta sx , 4 ferri senza aumenti e ricomincio? Con gli aumenti fatti sul dritto del lavoro..... Grazie mille
26.06.2016 - 15:40DROPS Design answered:
Buongiorno Silvana. Gli aumenti sono sempre sul diritto del lavoro. Aumentare ogni 4 ferri, vuol dire aumentare su un ferro lavorato sul diritto del lavoro, lavora 3 ferri senza aumentare (un ferro sul rovescio, un ferro sul diritto, un ferro sul rovescio). Aumenta al ferro successivo sul diritto del lavoro. Buon lavoro!
26.06.2016 - 17:08
![]() Silvana wrote:
Silvana wrote:
Buonasera. Sono arrivata ai primi aumenti dx/sx dei segna punti. Sono sul dritto del lavoro e aumento a dx. Il ferro successivo sono sul rovescio e NON aumento a sx giusto? In pratica gli aumenti sono sempre sul dritto del lavoro.? Quindi ogni 4 ferri è su ogni dritto del lavoro? Grazie attendo risposta
26.06.2016 - 14:41DROPS Design answered:
Buongiorno Silvana. Gli aumenti sono sempre sul diritto del lavoro. Aumentare ogni 4 ferri, vuol dire aumentare su un ferro lavorato sul diritto del lavoro, lavora 3 ferri senza aumentare (un ferro sul rovescio, un ferro sul diritto, un ferro sul rovescio). Aumenta al ferro successivo sul diritto del lavoro. Buon lavoro!
26.06.2016 - 15:11
![]() Jet wrote:
Jet wrote:
Hallo, voor het eerst brei ik van boven naar beneden en aan één stuk: het prachtige patroon modelnr. bs-082. In het breien, vooral het meerderen, van de pas loop ik hier vast; meerder om de naald x keer, elke 4e nld x keer en elke 6e naald x keer. Wanneer en hoe vaak en hoe verdeeld ik dan moet meerderen begrijp ik niet. Want elke vierde is ook elke tweede evenals elke zesde. Toch? Ik hoop op jullie hulp want ik heb echt geen idee hoe ik verder moet.... Alvast Dank, Jet
04.05.2016 - 13:17DROPS Design answered:
Hoi Jet. Je meerdert in de aangegeven naald in het patroon. Bijvoorbeeld maat S heb je 133 st en moet 18 st gelijkmatig verdeeld meerderen = 133/18 = 7,3, dus je meerdert ongeveer om de 7 st = 151 st op de nld, en in nld 11 meerder je 15 st gelijkmatig verdeeld = 151/15 = 10,06, dus circa om de 9-10 st meerderen enzovoort.
10.05.2016 - 15:55
![]() Jytte Christensen wrote:
Jytte Christensen wrote:
Hej. Jeg er ved at lave cardigan sættet. Opskriften jeg har er fra Hjemmet uge 35 2015, svarende til denne cardigan. På størrelserne mangler jeg nogle centimeter mål, evt som bryst mål. Jeg har lavet en strikkeprøve og udfra den skulle jeg være en Small. Det passer dog ikke med alle de andre opskrifter jeg plejer at lave. Mvh Jytte Christensen
12.03.2016 - 18:52DROPS Design answered:
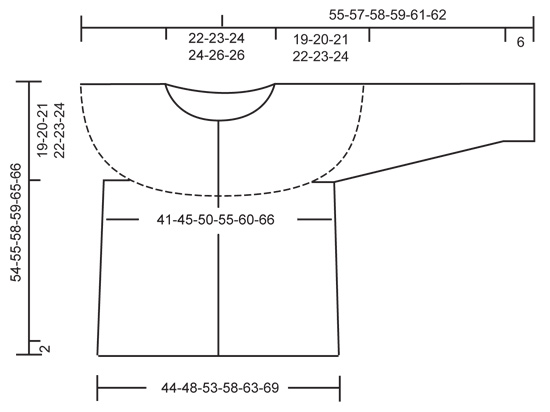
Hej Jytte, Jo nederst i opskriften finder du målene på trøjen. De 41-45-50-55-60-66 som står over brystet er bredden og skal ganges med 2 for at få omkredsen af brystmålet. God fornøjelse!
14.03.2016 - 09:06
|
|||||||||||||||||||
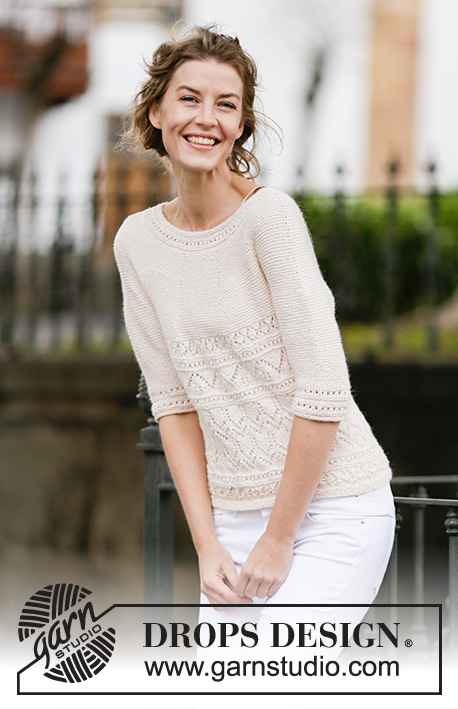
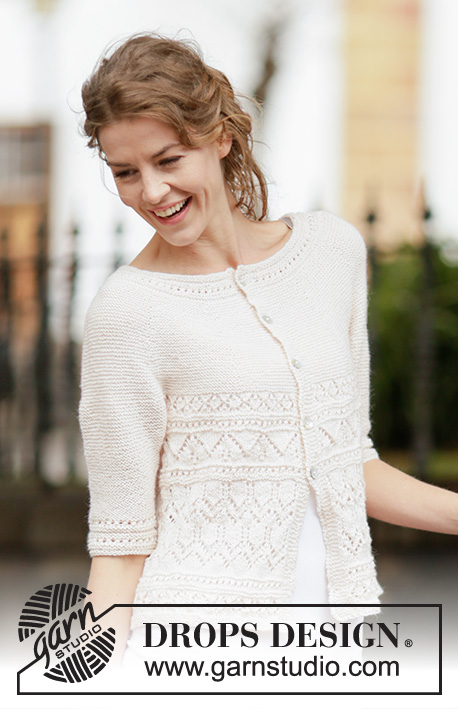
Timeless Beauty Cardigan#timelessbeautycardigan |
|||||||||||||||||||
 |
 |
||||||||||||||||||
Knitted DROPS jacket in garter st with lace pattern and round yoke, worked top down in ”BabyAlpaca Silk”. Size: S - XXXL.
DROPS 160-8 |
|||||||||||||||||||
|
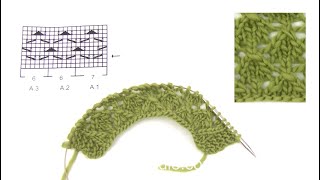
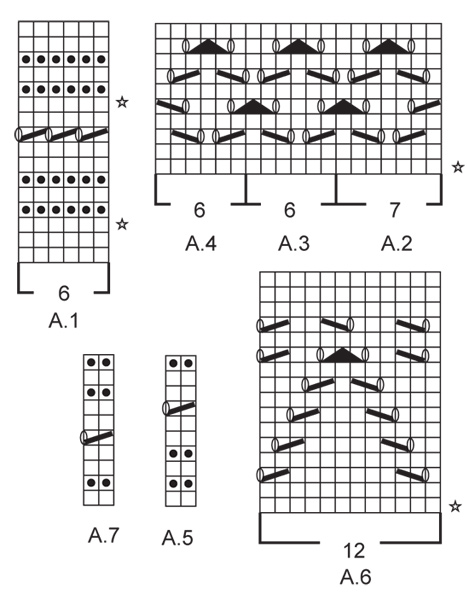
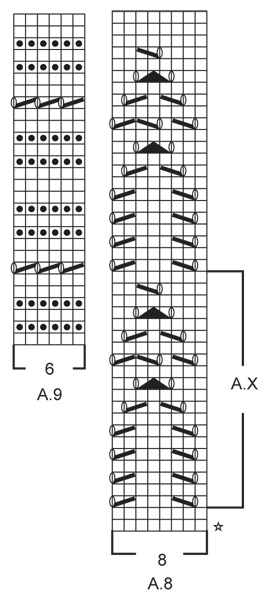
GARTER ST (back and forth): K all rows. 1 ridge = 2 rows K. PATTERN: See diagrams A.1 to A.9. The diagrams show all rows in pattern seen from RS. INCREASE TIP: Inc 1 st by making 1 YO, on next row K YO twisted (i.e. work in the back loop of st instead front) to avoid holes. BUTTONHOLES: Dec for buttonholes on right band, i.e. in right side of piece seen from RS (i.e. seen from knitting direction). 1 buttonhole = K tog third and fourth st from edge and make 1 YO. Dec for buttonholes when piece measures: SIZE S: 2, 9, 16, 23 and 30 cm SIZE M: 2, 9, 16, 23 and 30 cm SIZE L: 2, 10, 18, 26 and 34 cm SIZE XL: 2, 10, 18, 26 and 34 cm SIZE XXL: 2, 9, 16, 23, 30 and 37 cm. SIZE XXXL: 2, 9, 16, 23, 30 and 37 cm. ---------------------------------------------------------- JACKET: Worked top down, back and forth on circular needle. YOKE: Cast on 133-141-157-161-161-177 sts (incl 6 band sts in each side) on circular needle size 2,5 mm with BabyAlpaca Silk. K 1 row from WS. Work 2 ridges in GARTER ST back and forth - see explanation above! Remember BUTTONHOLES on right band - see explanation above. Now work PATTERN A.1 with 6 band sts in garter st in each side (on 9th row K last st before band), AT THE SAME TIME on 3rd row in diagram inc 18-20-30-32-32-34 sts evenly - READ INCREASE TIP, and on 11th row inc 15-19-29-29-29-33 sts evenly = 166-180-216-222-222-244 sts. REMEMBER THE KNITTING TENSION When A.1 has been worked vertically, continue in garter st and insert 10 markers in the piece as follows: Work the first 16-18-18-21-21-23 sts, insert a marker, then insert a marker 15-16-20-20-20-22 sts apart, after last marker there are 15-18-18-21-21-23 sts. On next row from RS beg inc. Inc alternately on right and left side of markers (= 10 inc). Inc every other row 0-2-0-3-7-7 times, every 4th row 10-10-9-9-8-8 times and every 6th row 5-5-7-7-7-8 times = 316-350-376-412-442-474 sts. On next row from RS, inc 7-3-9-1-3-9 sts evenly = 323-353-385-413-445-483 sts. Piece measures approx. 19-20-21-22-23-24 cm. On next row (= from WS) work as follows: K the first 51-55-61-66-72-80 (= front piece), slip the next 66-72-76-80-84-88 sts on a stitch holder (= sleeve), cast on 10-10-10-12-12-12 sts under sleeve, work the next 89-99-111-121-133-147 sts (= back piece), slip the next 66-72-76-80-84-88 sts on a stitch holder (= sleeve), cast on 10-10-10-12-12-12 sts under sleeve, work the remaining 51-55-61-66-72-80 sts (= front piece). BODY: There are now 211-229-253-277-301-331 sts for body. Now switch to circular needle size 3 mm. Then Work as follows: 6 band sts in garter st, A.2, repeat A.3 until 12 sts remain, A.4, 6 band sts in garter st. NOTE: Work the 6 band sts in each side in garter st until finished measurements. When A.2-A.4 have been worked vertically, continue with A.5 (on 7th row K the last st before band). Then work A.6, inc 6-0-0-0-0-6 sts evenly on 1st row (K last st before band) = 217-229-253-277-301-337 sts. When A.6 has been worked vertically, continue with A.7 1 time vertically (on 5th row K the last st before band). Then work A.8, inc 4-8-8-8-8-4 sts evenly on 1st row (K last st before band) = 221-237-261-285-309-341 sts. When A.X has been worked 1 time vertically, repeat A.X 0-0-0-0-1-1 more time before continuing with the rest of diagram. Now continue with A.7 (K last st before band). Then work as follows: A.2, A.3 until 6 sts remain before band, AT THE SAME TIME inc 2-4-4-4-4-2 sts evenly on 1st row in A.3, A.4 = 223-241-265-289-313-343 sts. Finish with A.7 0-0-1-1-0-0 times vertically (on 5th row K last st before band). When entire diagram has been worked vertically, work 2 row in stocking st inside band sts while AT THE SAME TIME on row from RS inc 17-20-23-25-27-27 sts evenly = 240-261-288-314-340-370 sts. Switch to circular needle size 2.5 mm and work in garter st back and forth for 2 cm. Cast off alternately with K 1 and P 1. Piece measures approx. 54-55-58-59-65-66 cm. SLEEVE: Worked in garter st back and forth on circular needle. There are 66-72-76-80-84-88 sts for each sleeve. NOW MEASURE THE PIECE FROM HERE. Slip sts from stitch holder back on circular needle size 2.5 mm and cast on 6-6-6-7-7-7 new sts at the end of the next 2 rows = 78-84-88-94-98-102 sts. When sleeve measures 4 cm, dec 1 st inside 1 edge st in each side of piece by K 2 tog. Repeat dec every 1½-2-2½-3-3½-3½ cm 7-6-5-4-3-3 more times = 62-70-76-84-90-94 sts. When piece measures 19 cm in all sizes, work as follows: 1 edge st in garter st, A.9 until 1 st remains, 1 edge st in garter st. When entire A.9 have been worked vertically, work 1 ridge. Loosely cast off. Knit another sleeve the same way. ASSEMBLY: Sew underarm seams in outer loops of edge sts. Sew the openings under the sleeves. Sew the buttons on to the left band. |
|||||||||||||||||||
Diagram explanations |
|||||||||||||||||||
|
|||||||||||||||||||
 |
|||||||||||||||||||
 |
|||||||||||||||||||
 |
|||||||||||||||||||
Have you finished this pattern?Tag your pictures with #dropspattern #timelessbeautycardigan or submit them to the #dropsfan gallery. Do you need help with this pattern?You'll find 24 tutorial videos, a Comments/Questions area and more by visiting the pattern on garnstudio.com. © 1982-2026 DROPS Design A/S. We reserve all rights. This document, including all its sub-sections, has copyrights. Read more about what you can do with our patterns at the bottom of each pattern on our site. |
|||||||||||||||||||


With over 40 years in knitting and crochet design, DROPS Design offers one of the most extensive collections of free patterns on the internet - translated to 17 languages. As of today we count 324 catalogues and 12290 patterns translated into English (UK/cm). 12290
We work hard to bring you the best knitting and crochet have to offer, inspiration and advice as well as great quality yarns at incredible prices! Would you like to use our patterns for other than personal use? You can read what you are allowed to do in the Copyright text at the bottom of all our patterns. Happy crafting!
Post a comment to pattern DROPS 160-8
We would love to hear what you have to say about this pattern!
If you want to leave a question, please make sure you select the correct category in the form below, to speed up the answering process. Required fields are marked *.