
Popular categories
Looking for a yarn?


Comments / Questions (36)
![]() Elisabeth wrote:
Elisabeth wrote:
Bonjour, je ne comprends pas comment faire les coins des carrés au 4 ème tour pour avoir 40 ms, puisque 2x 5 ml: =10ms+ 4x4 ml=16 ms+3×3ml=9ms Soit 35 ms sans les 4 angles Merci pour votre aide
03.04.2026 - 23:09DROPS Design answered:
Bonjour Elisabeth, vous obtenez les 40 ms ainsi: 4 ms pour chaque arceau de 4 ml = 16 ms, 5 ms pour chaque arceau de 5 ml = 10 ms, 3 ms pour chaque arceau de 3 ml = 6 ms (il n'y a que 2 arceaux de 3 ml) et enfin 2 ms dans chaque coin = 8 ms soit 16+10+6+8=40 ms au 4ème tour. Bon crochet!
08.04.2026 - 08:56
![]() LOYAU wrote:
LOYAU wrote:
Bonjour, pourriez-vous m'indiquer comment traduire les commentaires,afin de bénéficier de l'expérience des autres membres? Merci
08.11.2025 - 18:37DROPS Design answered:
Bonjour Mme Loyau, vous pouvez essayer avec un traducteur en ligne pour chaque langue, ou bien si vous avez une question, vous pouvez aussi simplement la poser ici. Bon crochet!
10.11.2025 - 07:27
![]() Catherine Gautier wrote:
Catherine Gautier wrote:
Bonjour, j'aimerais avoir le schéma des carrés. A t il été établi par une crocheteuse? Merci. Catherine
12.05.2025 - 20:02
![]() Cheryl Ellwood wrote:
Cheryl Ellwood wrote:
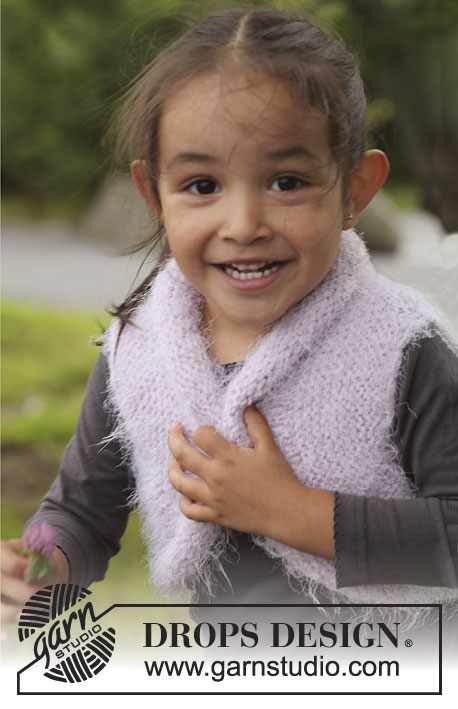
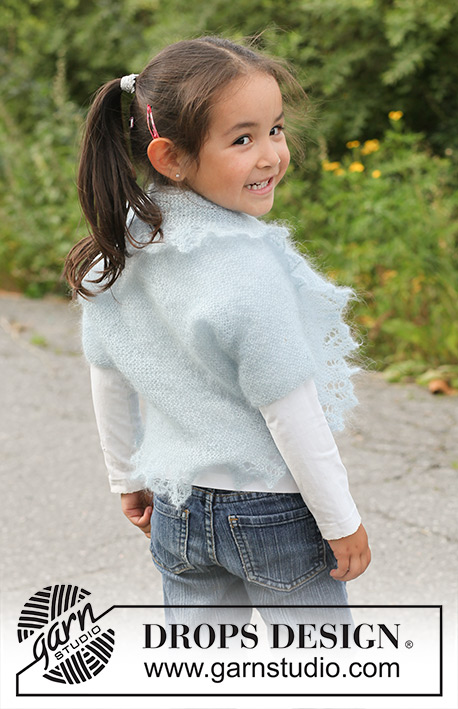
I have made many patterns and love them. Thank you. Two comments: - the Q&A is helpful. But I only speak English, French and Italian, so can't access answers to many questions. It would be useful to be able to choose the language of each Q&A. I'm sure many of the questions are about things I have puzzled over. On this particular pattern (Tilda) the photos of the finished bolero weren't very helpful - all the yarn colours obscure the detail. Front and back pics are helpful. Thank you.
01.01.2025 - 18:53
![]() Lena Chan wrote:
Lena Chan wrote:
Hi! For the second round of the Edge Piece, it says “.. and in every ch-loop work (37) tr...”. I know it doesn’t mean every chain on the armhole because that would be (44). What is the ch-loop? Thanks!
30.03.2020 - 17:46DROPS Design answered:
Dear Mrs Chan, with "ch-loop" we mean here the 44 chains you crocheted before for armholes, you will have to crochet a total of 37 trebles evenly spaced in the 44 chains for the armholes, skipping evenly some chain stitches (so that the armholes are not too tight). Happy crocheting!
31.03.2020 - 08:24
![]() Joyce Sierhuis wrote:
Joyce Sierhuis wrote:
Hi, als ik de vierkantjes naai zoals beschreven, is het dan zo dat bij de hals-omslag de achterkant van de vierkantjes als het ware de voorkant worden, ik zie nl duidelijk het verschil tussen voor en achterkant gehaakte vierkant zo ja dan moet ik denk ik vanaf een bepaald punt de vierkantjes andersom tegen elkaar naaien....?????
13.10.2018 - 18:22DROPS Design answered:
Dag Joyce, Er ontstaat inderdaad een omslag achterin de hals bij het dragen en het is inderdaad een idee om op die plek de vierkantjes er andersom in te zetten, maar dat hoeft niet perse. Maar net wat je mooi vindt.
15.10.2018 - 21:49
![]() Joyce Sierhujis wrote:
Joyce Sierhujis wrote:
Wat wordt met breen bedoeld bij vierkantjes? dank voor uw reactie
29.09.2018 - 19:47DROPS Design answered:
Dag Joyce, Oeps... er stond een typefout in. Het moet zijn '...hebben dezelfde breedte.' Het is nu aangepast! Hopelijk kom je er nu uit. Veel haakplezier!
30.09.2018 - 21:03
![]() Marian Van Bochove wrote:
Marian Van Bochove wrote:
Ik ben met de rand bezig er moeten 204 stokjes gehaakt worden in mijn geval dat snap ik ook 2x 65 en 2x 37. Nu las ik hier dat de stokjes van de armsgaten om de lossenlus heen gehaakt moeten worden. Dit heb ik gedaan maar ik hou een stukje van de losselijn over.
27.10.2016 - 21:48DROPS Design answered:
Hoi Marian. Je haakt om de lus heen, dus heb je ruimte over, schuif een beetje met de stk zodat ze netjes passen over de lus.
28.10.2016 - 18:01Sarietha wrote:
Can you please help. I am now at round 2 of edge piece. I do not understand how to increase. 16 evenly??
17.09.2016 - 18:33DROPS Design answered:
Dear Sarietha, read more here on how to increase evenly. Happy crocheting!
18.09.2016 - 23:24Sarietha wrote:
Can you please help. I am now at round 2 of edge piece. I do not understand how to increase. 16 evenly??
17.09.2016 - 16:27DROPS Design answered:
Dear Sarietha, read more here on how to increase evenly. Happy crocheting!
18.09.2016 - 23:23
|
|
Tilda#tildavest |
|
 |
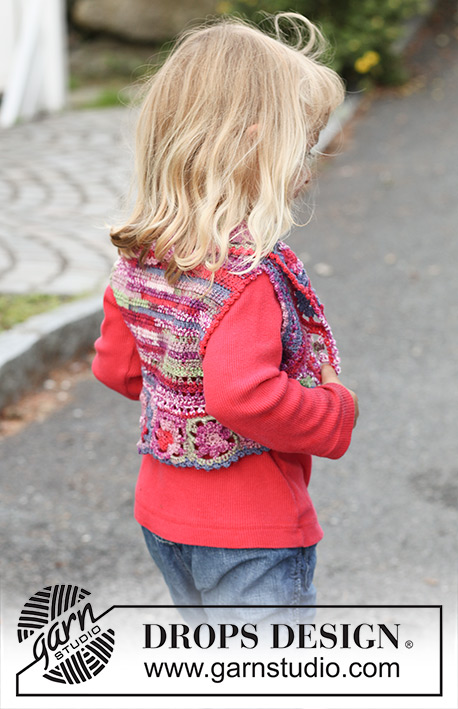 |
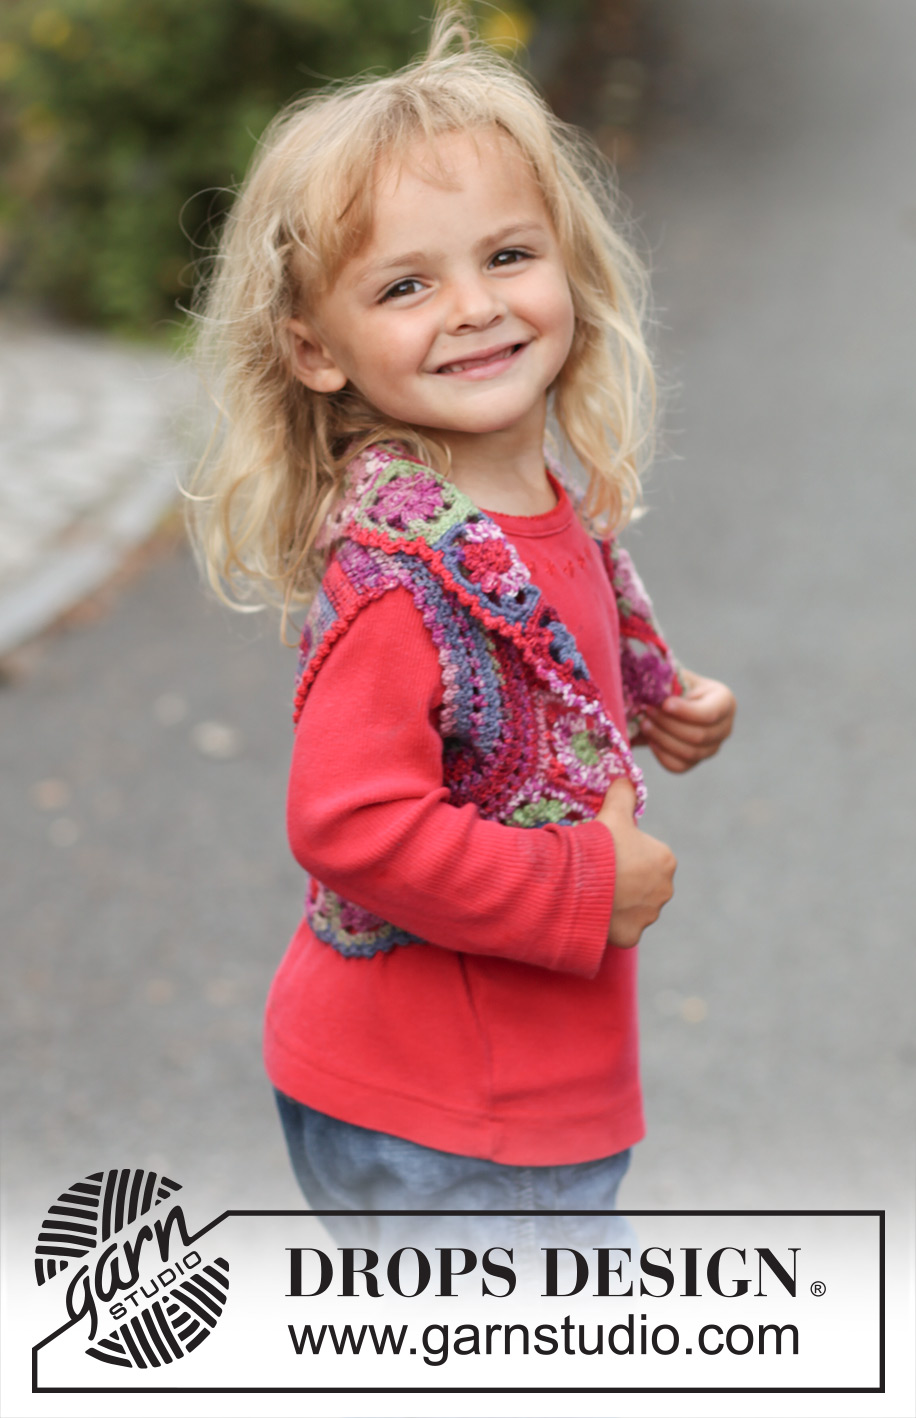
Crochet DROPS bolero in "Fabel". Size 3 - 12 years.
DROPS Children 22-29 |
|
|
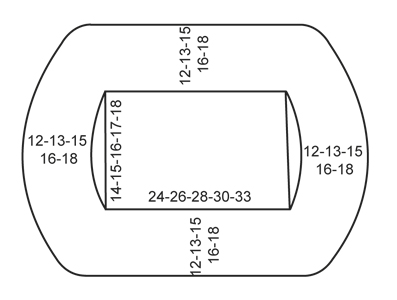
CROCHET INFO: Replace first tr on every row/round with 3 ch. Finish every round with 1 sl st in 3rd ch from beg of round. INCREASE TIP: Inc by working 2 tr in 1 st. --------------------------------------------------------- BACK PIECE: Worked back and forth - SEE CROCHET INFO! Work 67-73-79-85-91 loose ch on hook size 3 mm with Fabel. Work 1 tr in 4th ch from hook, 1 tr in each of the next 3 ch, * skip 1 ch, 1 tr in each of the next 5 ch *, repeat from *-* the rest of the row = 55-60-65-70-75 tr. Then work 1 tr in every tr back and forth until piece measures 14-15-16-17-18 cm. EDGE PIECE: Work 1 tr in each of the 55-60-65-70-75 tr at the top along back piece, then work 39-42-44-46-49 ch (= armhole), 1 tr in each of the 55-60-65-70-75 tr at the bottom along back piece and then 39-42-44-46-49 ch (= armhole), finish with 1 sl st in first tr on round. On next round work 1 tr in every tr at the top and at the bottom of back and in every ch-loop work 33-35-37-39-41 tr = 176-190-204-218-232 tr in total. Continue in the round as follows: ROUND 1: 1 tr in first tr (replaced with 3 ch), * 1 ch, skip 1 tr, 1 tr in next tr *, repeat from *-* and finish with 1 ch, skip 1 tr and 1 sl st in 3rd ch from beg of round. ROUND 2: 1 tr in every tr and 1 tr in every ch. Repeat these 2 rounds upwards - AT THE SAME TIME when edge measures approx. 3-3-3-4-4 cm (adjust so that next round is a round with tr only), inc 16-20-24-29-34 tr evenly - READ INCREASE TIP - repeat inc when piece measures approx. 5-6-7-7-8 cm = 208-230-252-276-300 tr. Work until edge measures approx. 7-8-10-11-13 cm. Put piece aside. CROCHET SQUARE: Work 4 ch on hook size 3 mm with Fabel, form a ring with 1 sl st in first ch. ROUND 1: 8 dc in ch-ring, finish with 1 sl st in first dc from beg of round. ROUND 2: 1 sl st in first dc, * 3 ch, in same dc as sl st work 2 tr but wait with last pull through on each tr until both have been worked, make 1 YO and pull thread through all 3 loops on hook, 3 ch, 1 sl st in same dc as both tr were worked, 1 sl st in next dc *, repeat from *-* until 1 dc remains, work as follows in this dc: 1 sl st, 3 ch, then 3 tr but wait with last pull through on each tr until all 3 have been worked, make 1 YO and pull thread through all 4 loops on hook (= 8 leaves). ROUND 3: * 4 ch, at the top of next leaf work 1 tr + 2 ch + 1 tr (= corner), 5 ch, 1 dc at the top of next leaf, 5 ch, at the top of next leaf work 1 tr + 2 ch + 1 tr (= corner), 4 ch, 1 dc at the top of next leaf, 4 ch, at the top of next leaf work 1 tr + 2 ch + 1 tr (= corner), 3 ch, 1 dc at the top of next leaf, 3 ch, at the top of next leaf work 1 tr + 2 ch + 1 tr (= corner), 4 ch, 1 sl st in first ch from beg of round. ROUND 4: In the 4-ch-loops work 4 dc, in the 5-ch-loops work 5 dc, in the 3-ch-loops work 3 dc and in the 2-ch-loops in every corner work 1 dc, 3 ch, 1 dc = a total of 40 dc around the square, finish with 1 sl st in first dc, cut the thread. Two of the sides are the same width - approx. 5 cm, 1 side is narrower - approx. 4½ cm and 1 side is wider - approx. 5½ cm. Work 20-22-24-26-30 squares. Sew the squares tog in one long strip – sew edge to edge – make sure that the shorter sides are placed against the same side and that the longer sides are placed against the opposite side so that the strip is curved. Begin by fastening the 2 middle squares on the strip mid back at the top of edge piece – sew edge to edge along the shortest side on the squares. Continue to sew down the one side and until mid back at the bottom of edge piece, then sew the other side of the strip on – make sure not sew too tightly when sewing on the strip. If more or less squares are needed this must be adjusted before the last 2 squares are sewn tog mid back. PICOT BORDER: Work on hook size 3 mm with Fabel at the edge around the entire strip of crochet squares. Beg in the first square that was sewn on at the back of neck and work as follows: 1 dc in the second st on square, * 1 picot (= 3 ch, 1 dc in first ch), skip 1 dc, 1 dc in next dc *, repeat from *-* (there should be approx. 5 picots along every square + 1 in the transition to next square), finish with 1 sl st in first dc from beg of round. Work picot border the same way around the armholes. |
|
 |
|
Have you finished this pattern?Tag your pictures with #dropspattern #tildavest or submit them to the #dropsfan gallery. Do you need help with this pattern?You'll find 7 tutorial videos, a Comments/Questions area and more by visiting the pattern on garnstudio.com. © 1982-2026 DROPS Design A/S. We reserve all rights. This document, including all its sub-sections, has copyrights. Read more about what you can do with our patterns at the bottom of each pattern on our site. |
|


With over 40 years in knitting and crochet design, DROPS Design offers one of the most extensive collections of free patterns on the internet - translated to 17 languages. As of today we count 324 catalogues and 12290 patterns translated into English (UK/cm). 12290
We work hard to bring you the best knitting and crochet have to offer, inspiration and advice as well as great quality yarns at incredible prices! Would you like to use our patterns for other than personal use? You can read what you are allowed to do in the Copyright text at the bottom of all our patterns. Happy crafting!
Post a comment to pattern DROPS Children 22-29
We would love to hear what you have to say about this pattern!
If you want to leave a question, please make sure you select the correct category in the form below, to speed up the answering process. Required fields are marked *.