Comments / Questions (59)
![]() Regine wrote:
Regine wrote:
Smådrops 22-18 Dette er en uforståelig oppskrift. Jeg er vant med å lese og følge strikkeoppskrifter, men denne er ikke skrevet for at andre personer skal kunne strikke dette. Dere bør skrive oppskriften på nytt slik at det er forståelig!
26.11.2015 - 17:31
![]() Chantal Galarneau wrote:
Chantal Galarneau wrote:
Serait-il possible de savoir, maille par maille, rang par rang comment tricoter ce patron. Le fait d'expliquer les rangs raccourcit indépendamment du motif rend la chose très compliquer pour moi. J'ai lu et relu les explications et les commentaires, j'ai une vague idée, mais ne comprend toujours pas comment comment sur le 1er rang l'on doit rabattre 10 M et sur le second rand, en dessous de ces même mailles, faire une jeté entre des M maintenant inexistante... Merci de votre aide
19.04.2015 - 18:39DROPS Design answered:
Bonjour Mme Galarneau, pour les rangs raccourcis, on tricote *2 rangs sur les m jusqu'au marqueur, 1 rang sur toutes les m, 2 rangs sur les mailles jusqu'au marqueur (de l'autre côté), puis 5 rangs sur toutes les mailes* (=2 rangs en plus sur les m de chaque côté). M.1 se lit en commençant en bas à droite vers la gauche sur l'endroit, les m sont rabattues au début des rangs 10 et 20. Bon tricot!
20.04.2015 - 10:07
![]() Mona wrote:
Mona wrote:
Går det an å få en "enklere" mønsterforklaring" på denne oppskriften. Dette var det ikke lett å finne ut av.
07.03.2015 - 11:59Hazel wrote:
Hi Thank you again for a quick and prompt reply. The problem is, you did not confirm my issue. I understand I do a short row after the 6th row.... I also understand that I must follow the M1 pattern. I then do another short row after row after the following 5th row..... BUT do I do any more short rows? Or is it just twice??? Thank you for your patience.
05.12.2014 - 02:27DROPS Design answered:
Dear Hazel, you have to repeat the section from *-* under "SHORT ROWS" at the beg of the pattern (with M1 each side), from where you cast on new sts each side after sleeve, until you bind off these sts each side for 2nd sleeve (= 3 ridges over middle sts and 4 ridges over sts in each side every time you repeat the section from *-*). This will create the extra width in each side. Happy knitting!
05.12.2014 - 09:12Hazel wrote:
Thank you for your reply..... I sort of worked it out. Now another question ?? Do I do the short rows only twice, or every sixth row till I reach the desired length. Thank you.
04.12.2014 - 05:46DROPS Design answered:
Dear Mrs Hazel, short rows are worked at the same time as you work diagram M1 each side, ie first work 6 rows over all sts then start short rows: *1 row to marker in one side, turn and work row back, 1 row over all sts, turn and work row back, 1 row to marker in the other side, turn and work row bac, 5 rows over all sts* - when you work sts from beg/end of row each side, work in pattern M1 as explained (1st row in diagram at the end of 1st row from RS and at the end of 2nd row from WS). Happy knitting!
04.12.2014 - 11:18Hazel wrote:
I don't understand this pattern at all. The pattern M1 gives me no clue to what are rows and what are stitches..... do I read it sideways or from top to bottom. Do I read from left to right and right to left on the next row? The diagram gives loads of numbers, but I have no clue to what they relate to!!! using a fluffy yarn, I do NOT want to knit and undo all the time. I am at a loss how to do the short rows also. Do I stop doing the pattern when doing short rows? HELP
02.12.2014 - 02:25DROPS Design answered:
Dear Mrs Hazel, start reading diagram from bottom corner on the right side towards the left - work 1st row at the end of 1st row from RS and at the end of 2nd row from WS (ie row with holes will be worked at the end of row) - 1 square = 1 st x 1 row. You have to work short rows at the same time as pattern to get the extra width on each side of piece. Happy knitting!
02.12.2014 - 09:22
![]() Jose wrote:
Jose wrote:
Hoi, hier ben ik weer. Het lijkt wel of nog nooit gebreid heb, maar het tegendeel is waar. Maar ik krijg het niet voor elkaar. Ik begin met het werk dubbel te vouwen dan heb je een T. Als ik dan de zijnaden vast maak houd ik dus een dichtgenaaide T over. Als ik eerst de voorpanden tegen elkaar leg heb ik de mouwen aan de boven en onderkant zitten. Ik kom hier echt niet uit. Heb je misschien een telefoon nummer dat we elkaar kunnen spreken? Groetjes
02.07.2014 - 13:24DROPS Design answered:
Hoi José. Dit heeft eigenlijk niet zo veel met breien te doen ;-) Het is correct, dat je na het vouwen een soort T hebt. Maar je moet niet de onderkant dichtnaaien. Alleen de twee zijkanten (de stipjes). De twee armsgaten en de hele onderrand (= de golfjes onderaan de "T") blijven open. Ga eventueel langs jouw winkel of breigroep. Ik ben voor niet telefonisch bereikbaar.
02.07.2014 - 15:45
![]() José wrote:
José wrote:
Ja, Hier ben ik weer. Als ik het werk dubbelvouw is het aan de bovenkant dicht. Hoe gaat het hoofd erdoor? Nogmaals heb het op 2 pennen gebreid Groetjes José Groetjes
30.06.2014 - 13:45DROPS Design answered:
Hoi José. Nee, je naait alleen de zijkanten aan elkaar zoals te zien is op de tekeningen onderaan (de stippellijn). De golfjeslijn onderaan op de tekening zijn de voorkanten/randen.
01.07.2014 - 14:16
![]() José wrote:
José wrote:
Hallo, Waarom krijg ik geen antwoord op mijn vraag van 20-06-2014 Groetje jOSÉ
25.06.2014 - 14:50DROPS Design answered:
Hoi José. Je hebt je vraag gestuurd als een opmerking, dan zie ik het niet onder de vragen. Ik heb de vraag nu teruggevonden op het patroon. Maar kijk onderaan het patroon op de tekening. Hier zie je hoe het werk uitziet naar het dubbelvouwen. De gestipte lijnen zijn de naden (waar je moet dichtnaaien).
25.06.2014 - 17:02
![]() Verboven wrote:
Verboven wrote:
Hoede vond, Heb ede bolero op twee pennen gebreid, maar weet niet hoe ik het in elkaar moet zetten zodat het een bolero wordt Prettige avond. Groetjes Jose
20.06.2014 - 19:44
Fairy Wings#fairywingsbolero |
|||||||||||||||||||
 |
 |
||||||||||||||||||
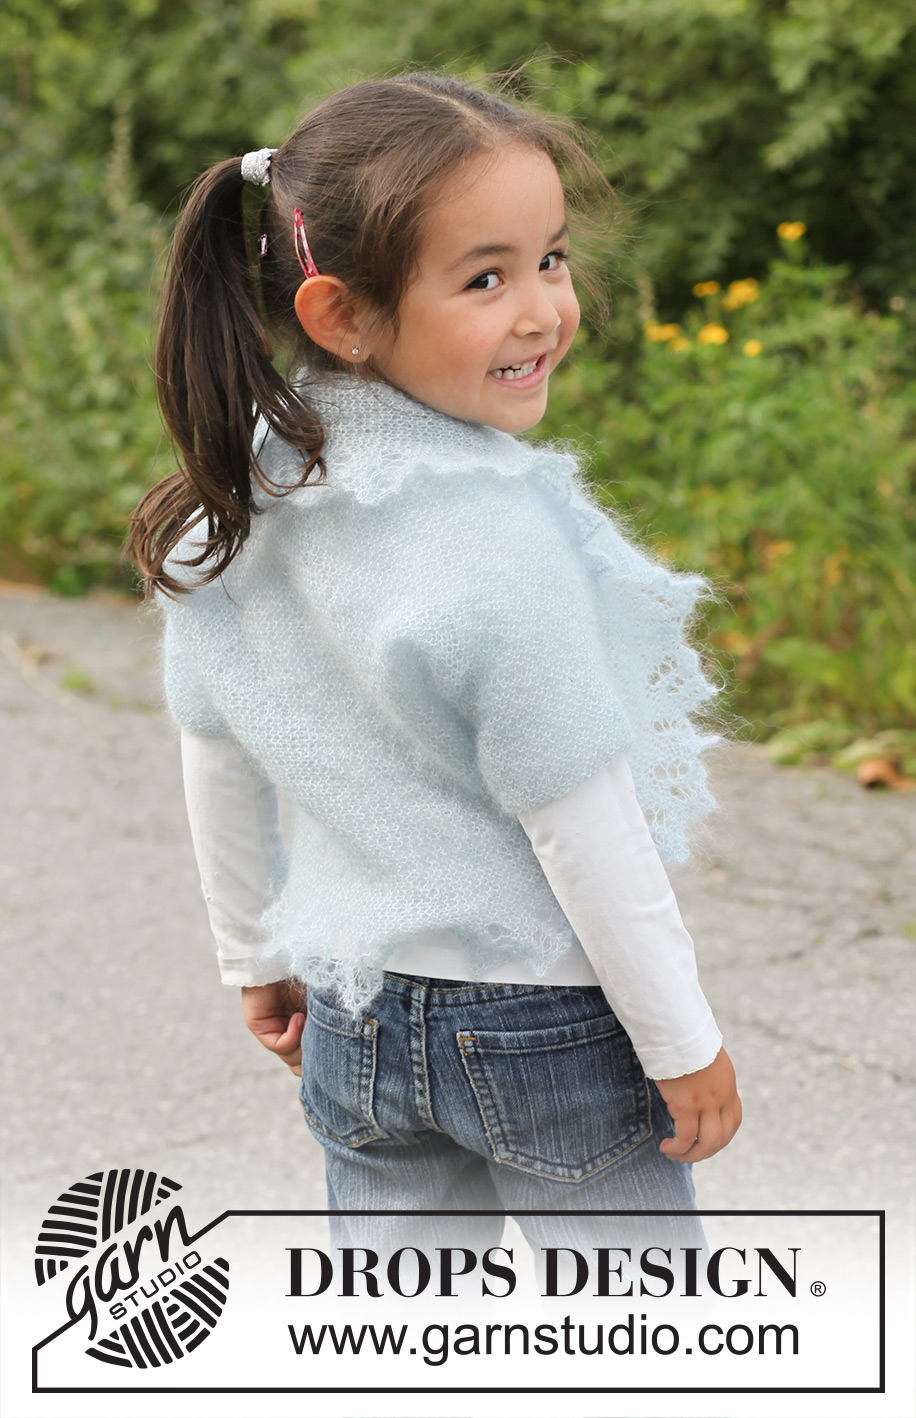
Knitted DROPS bolero in garter st with lace edge in ”Kid-Silk”. Size 3 to 12 years.
DROPS Children 22-18 |
|||||||||||||||||||
|
GARTER ST (back and forth on needle): K all rows. PATTERN: See diagram M.1. To make the pattern the same in each side, work first row in diagram at the end of first row from RS and at the end of the second row from WS. I.e. all rows where YOs and sts-tog are worked, must be worked at the end of row. No of sts in diagram will vary from 7 to 17. SHORT ROWS: Work 6 rows over all sts, * work until marker in one side, turn, tighten thread and work back. Work 1 row over all sts, turn, work until marker in the other side, turn, tighten thread and work back. Work 5 rows over all sts *, repeat from *-*. I.e. work 6 rows (= 3 ridges) over the middle 70-76-78-86-92 sts and 8 rows (4 ridges) over sts in each side in every repetition. -------------------------------------------------------- BOLERO: Work sideways back and forth on circular needle from sleeve to sleeve. Then fold double and sew sleeve and side seams. Cast on 52-58-62-66-70 sts with 2 threads Kid-Silk on circular needle size 3.5 mm. Remove 1 thread and work in GARTER ST - see explanation above! REMEMBER THE KNITTING TENSION! When piece measures 8 cm (= sleeve), loosely cast on 27-29-30-34-37 new sts in each side (cast on at the end of the next 2 rows) = 106-116-122-134-144 sts. Insert 2 markers in the piece, after 18-20-22-24-26 sts in from each side (= 70-76-78-86-92 sts between markers). Continue in garter st and PATTERN over the outermost sts in each side – see explanation above – AT THE SAME TIME work SHORT ROWS – see explanation above! When piece measures approx. 44-49-54-59-64 cm (incl sleeve), loosely cast off 27-29-30-34-37 sts in each side (cast off at the beg of the next 2 rows) – NOTE: Adjust to cast off after 1 whole repetition of diagram M.1. Continue in garter st over the remaining 52-58-62-66-70 sts (= sleeve). When sleeve measures 8 cm, loosely cast off with 2 threads. ASSEMBLY: Fold the bolero double – chart shows piece when it is folded. Sew sleeve and side seams in front loop of outermost st, make sure the seam is not too tight – the dotted line on chart shows where seams should be. |
|||||||||||||||||||
Diagram explanations |
|||||||||||||||||||
|
|||||||||||||||||||
 |
|||||||||||||||||||
 |
|||||||||||||||||||
Have you finished this pattern?Tag your pictures with #dropspattern #fairywingsbolero or submit them to the #dropsfan gallery. Do you need help with this pattern?You'll find 14 tutorial videos, a Comments/Questions area and more by visiting the pattern on garnstudio.com. © 1982-2026 DROPS Design A/S. We reserve all rights. This document, including all its sub-sections, has copyrights. Read more about what you can do with our patterns at the bottom of each pattern on our site. |
|||||||||||||||||||


Post a comment to pattern DROPS Children 22-18
We would love to hear what you have to say about this pattern!
If you want to leave a question, please make sure you select the correct category in the form below, to speed up the answering process. Required fields are marked *.