
Popular categories
Looking for a yarn?































Comments / Questions (124)
 Tina Engberg Petersen wrote:
Skal mønster på bærestykket, kun strikkes på ret-pinden, eller også på vrang-pinden ?
27.10.2026 - 08:22DROPS Design answered:
Hej Tina, Du starter nederst i diagrammet, strikker første pind i diagrammet fra retsiden(fra højre mod venstre), næste pind strikker du vrang fra vrangen (fra venstre omd højre) ifølge mønsteret i diagrammet :)
27.10.2026 - 11:48
 RODIER Evelyne wrote:
Bonjour même problème pour dos devant et manches - après les côtes et les diminutions - il est indiqué "continuez en suivant M.1" - M.1 est un diagramme , or jusqu'aux emmanchures et aux manches il n'y a pas de motifs sur la photo - je suis perdue- que faire - merci de votre réponse
25.09.2026 - 20:25DROPS Design answered:
Bonjour Mme Rodier, il y a bien un motif sur les photos, notez juste que les couleurs sont un peu semblables ce qui rend le motif moins visible, mais on doit bien tricoter le diagramme M.1 juste après les côtes. Bon tricot!
28.09.2026 - 08:02
 Beate wrote:
Hallo, kann ich die Jacke auch mit einer Kapuze arbeiten? Stricke ich dann einfach statt des Hals-Bündchens ein Rechteck weiter hoch (wie hoch?) und nähe dann die ogere Kante zusammen? Oder gibt es eine bessere Anleitung dafür? Danke!
25.09.2026 - 18:33DROPS Design answered:
Liebe Beate, ja wahrscheinlich können Sie eine Kapuze dazu stricken, am besten lassen Sie sich von einer Modellen mit Kapuze inspirieren, um die Anleitung anzupassen. Viel Spaß beim Stricken!
28.09.2026 - 08:00
 Ghislaine Ethier wrote:
Bonjour j’aimerais avoir l’explication ?\\r\\nAprès avoir fait M2A et M2B\\r\\nIl me reste 77 mailles plus 4 mailles de chaque côté en bordure \\r\\nDonc vous vous dites 81 mailles \\r\\nJ’aimerais savoir où j’ai fait mon erreur \\r\\nTout mes motifs sont correct !! \\r\\nJ’attends de vos nouvelles !!!
12.09.2026 - 16:12DROPS Design answered:
Bonjour Mme Ethier, lorsque le diagramme M.2 est terminé, vous devez avoir ceci: 4 m point mousse, 18 motifs de M.2A de 4 m chacun, 1 m pour M.2B et 4 m point mousse soit 4+(18x4)+1+4=81 mailles pour la 1ère taille. Bon tricot!
14.09.2026 - 08:08
 Lena wrote:
Hur ska man göra med kragen? Ska den vikas inåt och fästas mot halsen eller ska den vara enkel och därmed hög?
25.08.2026 - 16:08DROPS Design answered:
Hei Lena. I beskrivelsen står det at halsen er høy (= Fortsätt sedan med 1 rm/1 am till hög krage (framkanterna stickas som tidigare). Om du ønsker en lavere hals kan du brette halsen dobbelt mot innsiden og feste den med små sting, men da får du en tykkere halskant. mvh DROPS Design
28.08.2026 - 13:44
Lena wrote:
Hi, I would like to knit this project using mohair. Can I just take 1 ply Merino extra fine and 1 ply of Kid silk, otherwise would you recommend an optimal combination which would not impact the gauge? I usually have to take thinner needles to keep in the gauge.
03.08.2026 - 14:22DROPS Design answered:
Dear Lena, if you use Merino Extra Fine and Kid-Silk, your tension will be different, you might have to choose another pattern matching the new tension to avoid recalculating the whole pattern. Happy knitting!
10.08.2026 - 16:00
Ann-Sofie wrote:
Hej, jag skulle vilja veta hur många maskor jag totalt ska ha kvar efter 1:a varvet av M.2A? Tack 🙏
21.07.2026 - 10:34DROPS Design answered:
Hei Ann-Sofie. Det kommer an på hvilken størrelse du strikker. M.2A består av 8 masker og man strikker M.2A over 144-160-184 -200-224 masker = 18-20-23-25-28 ganger. Man feller 1 maske pr gang man strikker M.2A = 18-20-23-25-28 felte masker på 1. pinne. mvh DROPS Design
05.08.2026 - 08:31
Bitten wrote:
Hvis jeg strikker uden mønster skal jeg så tage ind til raglan på hver anden pind ,jeg forstår ikke rigtig mønster forklaring så derfor strikker jeg bare en ens farvet trøje mvh Bitten
10.05.2026 - 18:35DROPS Design answered:
Hei Bitten. Vanligvis felles det til raglan på hver 2. pinne, men det kan også være at man felles litt ulikt i begynnelsen og mot slutten kan det felles på hver 1. pinne. Men det kommer helt ann på hva som er skrevet og hvordan plagget ser ut. Du kan evnt følge denne oppskriften, strikke ensfarget og felle der det felles (strikk 2 masker sammen) i diagrammet. mvh DROPS Design
11.05.2026 - 11:53
 Ainsley wrote:
Hi, The neckband ribbing as written is really not great! I suggest a rewrite of this portion please. I've done my own modifications but the pattern would be better with a reconsider of this section
30.04.2026 - 06:43
 Barbara wrote:
Guten Tag, vielen herzlichen Dank für Ihre rasche Rückmeldung und entschuldigen Sie bitte den Irrtum. Ja, klar, die Jacke wird von unten nach oben gestrickt. Das werde ich genau so machen und dann kann ich wohl einfach das Bündchen kürzer stricken, sobald alle li Maschen auf 1 li Masche reduziert sind, wie das in der Anleitung angegeben ist (also ca. 2.5 bis 3 cm). Vielen herzlichen Dank für Ihre Hilfe und nochmals Entschuldigung für das Versehen. Liebe Grüsse!
27.04.2026 - 12:18
|
||||||||||||||||
First Snow#firstsnowset |
||||||||||||||||
 |
 |
|||||||||||||||
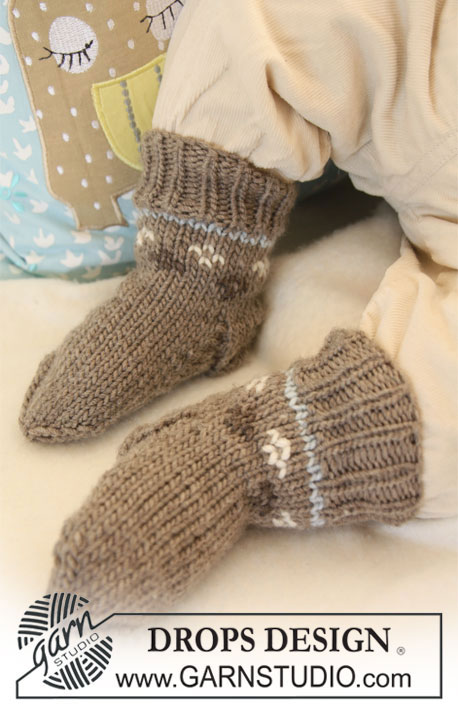
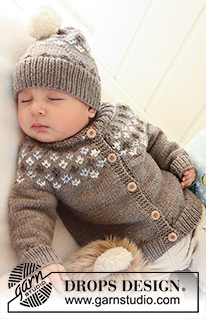
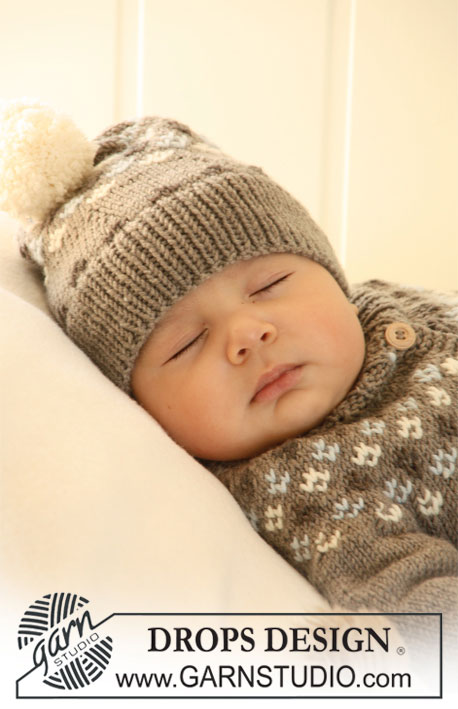
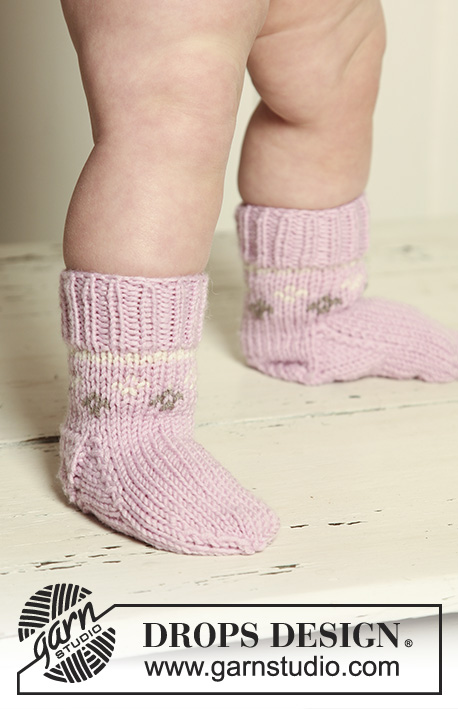
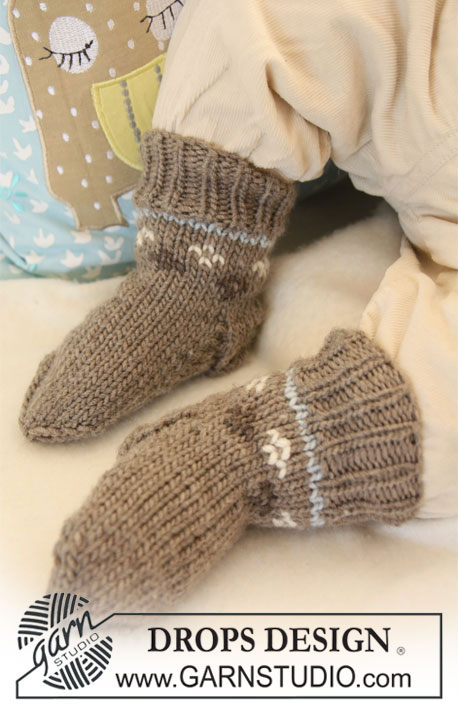
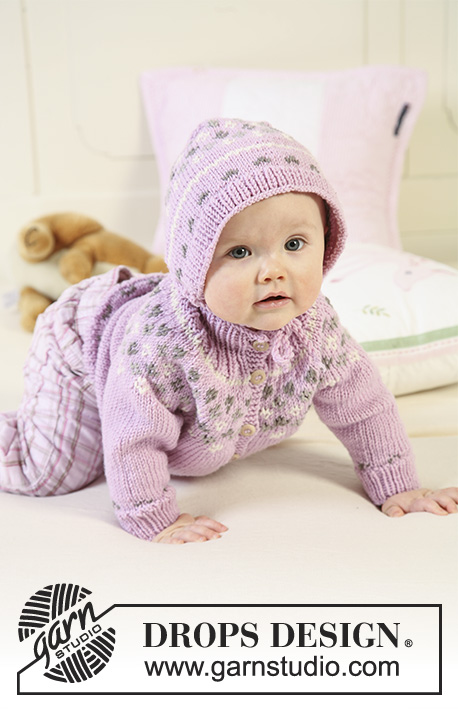
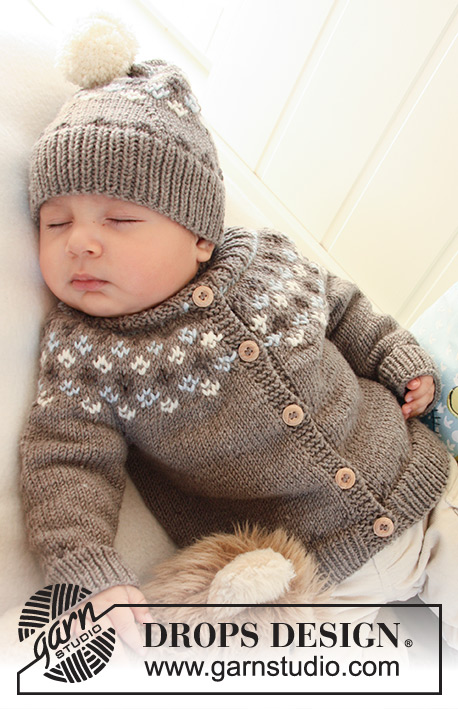
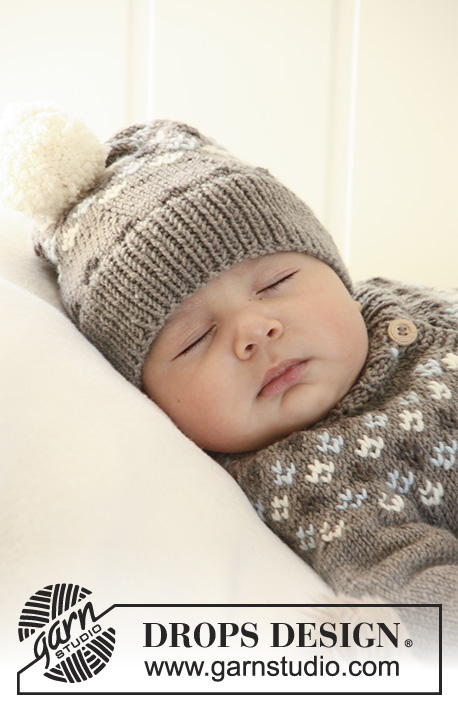
Set of knitted jacket with raglan sleeves and turtle neck, hat and socks with Nordic pattern for baby and children in DROPS Merino Extra Fine
DROPS Baby 19-2 |
||||||||||||||||
|
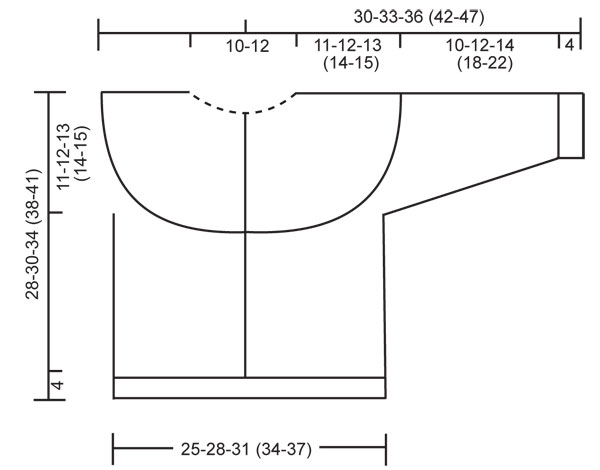
JACKET: GARTER ST (back and forth on needle): K all rows. PATTERN: See diagrams M.1 and M.2. Pattern is worked in stocking st. BUTTONHOLES: Make buttonholes on right front band. 1 BUTTONHOLE = K tog 2nd and 3rd st from mid front and make 1 YO. Make buttonholes when piece measures: SIZE 1/3 months: 2, 8, 14, 20 and 26 cm SIZE 6/9 months: 2, 8, 15, 21 and 28 cm SIZE 12/18 months: 2, 8, 14, 20, 26 and 32 cm SIZE 2 years: 2, 9, 16, 23, 30 and 36 cm SIZE 3/4 years: 2, 10, 17, 25, 32 and 39 cm The last buttonhole is made on neckline. --------------------------------------------------------- --------------------------------------------------------- BODY PIECE: Worked back and forth on circular needle from mid front. Cast on 119-133-145 (159-171) sts (includes 4 front band sts each side towards mid front) on circular needle size 3.5 mm with light brown mix. P 1 row from WS with 4 GARTER STS – see above – each side (front bands). Continue in rib as follows from RS: 4 front band sts in garter st, * K1/P1 *, repeat from *-* and finish with K1 and 4 front band sts in garter st – remember BUTTONHOLES on right front band. When rib measures 4 cm change to circular needle size 4.5 mm. Work 1 row stocking st (with front bands in garter st as before), AT THE SAME TIME dec 12-14-14 (16-16) sts evenly (do not dec on front bands) = 107-119-131 (143-155) sts. Now continue in M.1 with 4 front band sts in garter st each side. After M.1 continue in stocking st and light brown mix with front bands in garter st as before. REMEMBER THE KNITTING TENSION! When piece measures 17-18-21 (24-26) cm - adjust so that next row is from RS - work next row as follows: 26-29-32 (35-38) sts (= front piece), cast off 6 sts for armhole, 43-49-55 (61-67) sts (= back piece), cast off 6 sts for armhole, 26-29-32 (35-38) sts (= front piece). Put piece aside and knit the sleeves. SLEEVE: Worked in the round on double pointed needles. Cast on 34-36-38 (38-38) sts on double pointed needles size 3.5 mm with light brown mix. K 1 round and continue in rib, K1/P1. When rib measures 4 cm change to double pointed needles size 4.5 mm. K 1 round, AT THE SAME TIME dec 4-6-2 (2-2) sts evenly = 30-30-36 (36-36) sts. Now work M.1. After M.1 continue in stocking st and light brown mix. AT THE SAME TIME when piece measures 5 cm inc 2 sts mid under sleeve. Repeat the inc on every 4-4-6 (6-6) round a total of 5-7-6 (8-10) times = 40-44-48 (52-56) sts. When piece measures 14-16-18 (22-26) cm (inc are now complete) cast off 6 sts mid under sleeve = 34-38-42 (46-50) sts left on needle. Put piece aside and knit the other sleeve. YOKE: Slip sleeves on the same circular needle as body piece where cast off for armholes = 163-183-203 (223-243) sts. Continue back and forth on needle as follows: P 1 row from WS, AT THE SAME TIME dec 7-11-7 (11-7) sts evenly (do not dec on front bands) = 156-172-196 (212-236) sts. Work 0-1-2 (3-4) cm stocking st with light brown mix and work next row as follows from RS: 4 front band sts in garter st, M.2A on the next 144-160-184 (200-224) sts, M.2B (= 4 sts) and finish with 4 front band sts in garter st. Continue in pattern like this, AT THE SAME TIME dec sts in M.2 as per pattern diagram. After M.2 there are 81-89-101 (109-121) sts left on needle. P 1 row from WS with front band sts as before. Change to circular needle size 3.5 mm/ US 4 and work next row as follows from RS: 4 front band sts, * K1/P3 *, repeat from *-* and finish with K1 and 4 front band sts. When rib measures 1 cm dec all P3 to P2 and when rib measures 2 cm dec all P2 to P1 = 45-49-55 (59-65) sts on needle. Jacket now measures 28-30-34 (38-41) cm from cast on row to shoulder. Continue in rib K1/P1 for turtle neck (front bands as before). When rib measures 5-6-6 (7-7) cm from beg of rib make 1 buttonhole in line with the others on front band. When rib measures 6-7-7 (8-8) cm cast off with K over K and P over P. ASSEMBLY: Sew openings under sleeves. Sew on buttons. _________________________________________________________ HAT: PATTERN: See diagram M.3. Pattern is worked in stocking st. --------------------------------------------------------- --------------------------------------------------------- HAT: Worked in the round on needle from bottom up. Cast on 88-94-98 (104-106) sts on circular needle size 3.5 mm with light brown mix. Work rib, K1/P1, until piece measures 4-5-5 (6-6) cm. K 1 round, AT THE SAME TIME dec 10-10-14 (14-16) sts evenly = 78-84-84 (90-90) sts. Change to circular needle size 4.5 mm. Insert 6 markers in piece with 13-14-14 (15-15) sts between each marker. Work M.3A and then continue in stocking st and light brown mix - AT THE SAME TIME dec 1 st to the right of all markers by K2 tog (= 6 dec sts per round). Repeat the dec (with 1 less st between each dec each time) on every other round another 3 times = 54-60-60 (66-66) sts. After the last round with dec work M.3B and then continue in stocking st and light brown mix, AT THE SAME TIME dec 1 st to the right of all markers (= 6 dec sts). K 1 round and work another round with dec as before = 42-48-48 (54-54) sts. Work M.3C and then continue in stocking st and light brown mix until finished measurements, AT THE SAME TIME dec 1 st to the right off all markers as before. Repeat the dec on every other round a total of 3-3-4 (4-5) times = 24-30-24 (30-24) sts on needle. K2 tog all the way round, cut the thread, pull it through remaining sts, tighten and fasten. POMPOM: Make 1 pompom in off-white with a diameter of approx 4 cm. Attach it to the top of hat. ____________________________________________________________________ SOCK: PATTERN: See diagram M.4. The pattern is worked in stocking st. HEEL DECREASES: ROW 1 (= RS): work row until 5-5-5 (6-6) sts remain, slip next st as if to K, K1, psso, turn piece. ROW 2 (= WS): work row until 5-5-5 (6-6) sts remain, slip next st as if to P, P1, psso, turn piece. ROW 3 (= RS): work until 4-4-4 (5-5) sts remain, slip next st as if to K, K1, psso, turn piece. ROW 4 (= WS): work row until 4-4-4 (5-5) sts remain, slip next st as if to P, P1, psso, turn piece. Continue dec like this with 1 less st between each dec until there are 7-9-9 (9-9) sts on needle. DECREASING TIP: Dec as follows before marker: K2 tog. Dec as follows after marker: slip 1 st as if to K, K1, psso. --------------------------------------------------------- --------------------------------------------------------- SOCK: Worked in the round on double pointed needles from top down. Cast on 34-34-40 (40-40) sts on double pointed needles size 3 mm with light brown mix. Work rib, K1/P1, for 4-4-5 (5-6) cm. K 1 round, AT THE SAME TIME dec 4 sts evenly = 30-30-36 (36-36) sts. Continue in M.4. After M.4 work 4 rounds stocking st with light brown mix, AT THE SAME TIME on first round (after M.4) dec 2-0-4 (2-0) sts evenly = 28-30-32 (34-36) sts. After the 4 rounds stocking st keep the first 15-17-17 (19-19) sts on needle for heel, and slip the remaining 13-13-15 (15-17) sts on a stitch holder (= mid upper foot). Work stocking st back and forth on heel sts for 3-3.5-4 (4-4.5) cm – insert a marker. Now work HEEL DECREASES – SEE ABOVE! After heel dec pick up 7-8-9 (9-10) new sts each side of heel and slip sts from stitch holder back on needle = 34-38-42 (42-46) sts. Continue in stocking st in the round on all sts with light brown mix, AT THE SAME TIME on first round dec as follows: K2 tog into back of loop before the 13-13-15 (15-17) sts mid upper foot and K2 tog after the 13-13-15 (15-17) sts mid upper foot. Repeat the dec on every other round a total of 4-6-6 (6-6) times = 26-26-30 (30-34) sts. When piece measures approx 8-9-9.5 (11.5-12.5) cm from marker on heel (approx 2-2-2.5 (2.5-3.5) cm remain) insert a new marker each side with 13-13-15 (15-17) sts on upper foot and under foot. Now dec for toes on each side of both markers – SEE DECREASING TIP – on every other round 2-2-3 (3-5) times and then on every round 3-3-3 (3-2) times = 6 sts left on needle. Cut the thread, pull it through remaining sts, tighten and fasten. Foot measures approx 10-11-12 (14-16) cm. |
||||||||||||||||
Diagram explanations |
||||||||||||||||
|
||||||||||||||||
 |
||||||||||||||||
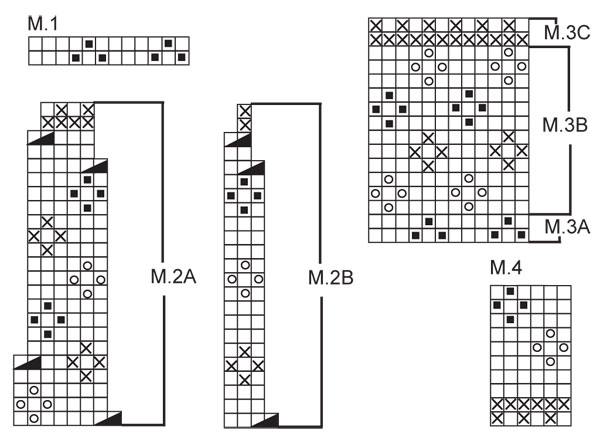 |
||||||||||||||||
Have you finished this pattern?Tag your pictures with #dropspattern #firstsnowset or submit them to the #dropsfan gallery. Do you need help with this pattern?You'll find 20 tutorial videos, a Comments/Questions area and more by visiting the pattern on garnstudio.com. © 1982-2026 DROPS Design A/S. We reserve all rights. This document, including all its sub-sections, has copyrights. Read more about what you can do with our patterns at the bottom of each pattern on our site. |
||||||||||||||||






With over 40 years in knitting and crochet design, DROPS Design offers one of the most extensive collections of free patterns on the internet - translated to 17 languages. As of today we count 333 catalogues and 12532 patterns translated into English (UK/cm). 12532
We work hard to bring you the best knitting and crochet have to offer, inspiration and advice as well as great quality yarns at incredible prices! Would you like to use our patterns for other than personal use? You can read what you are allowed to do in the Copyright text at the bottom of all our patterns. Happy crafting!
Post a comment to pattern DROPS Baby 19-2
We would love to hear what you have to say about this pattern!
If you want to leave a question, please make sure you select the correct category in the form below, to speed up the answering process. Required fields are marked *.