
Popular categories
Looking for a yarn?


Comments / Questions (54)
![]() Maysa wrote:
Maysa wrote:
Bonjour, J'ai l', impression qu'il y a une erreur dans la veste taille 6-9 mois. Nous avons 120 mailles. Au moment de creuser mes emmanchures, les calculs sont faits comme si on avait 123 mailles. Cdt
20.01.2026 - 20:05DROPS Design answered:
Bonjour Maysa, il y a bien une erreur mais dans le nombre de mailles en 6/9 mois, vous aviez 157 m et vous diminuez 35 m, il reste 122 mailles, pas 120, et vous avez ainsi: 29 m pour le devant droit, 8 m pour l'emmanchure, 48 m pour le dos, 8 m pour l'emmanchure et 29 m pour le devant gauche = 122 m. La correction va être faite, merci pour votre retour. Bon tricot!
23.01.2026 - 08:32
![]() Karrie wrote:
Karrie wrote:
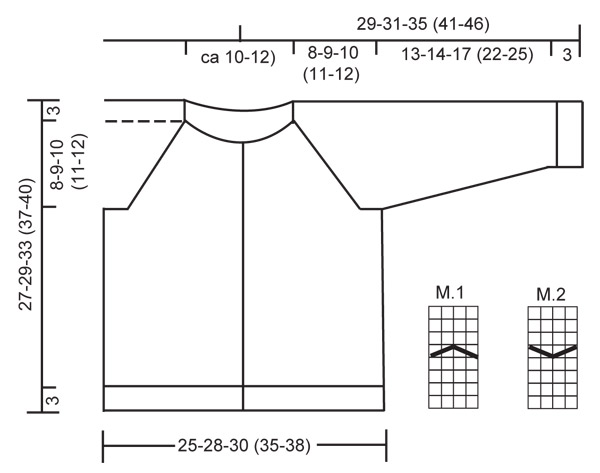
This pattern shows in the picture a cable pattern; however, I do not see that in the written pattern?
07.11.2025 - 17:37DROPS Design answered:
Hi Karrie, Diagrams M.1 and M.2 are worked on the sleeves and include cables. The diagrams are at the bottom of the pattern. Regards, Drops Team.
12.11.2025 - 07:09
![]() Tina wrote:
Tina wrote:
Tak for alle jeres fine opskrifter. Jeg har nu strikket ærmerne efter diagram M1 og M2 med 4 rækker mellem hver "bølge", nu er jeg i gang med bærestykket og der går det ikke med 4 rækker men kun med 3 rækker så en "bølge" !!. Vil være fint hvis diagrammet blev rettet så der er 3 rækker forneden også.
12.09.2025 - 23:48DROPS Design answered:
Hei Tina. Litt usikker på hva du mener med "bølge". Mener du flettepinnen, der du i M.1 setter 2 m på hj.p foran arb, 2 rett, 2 rett fra hj.p OG i M.2 sett 2 m på hj.p foran arb, 2 rett, 2 rett fra hj.p ? Om det er det, skal det strikkes 7 pinner/ rekker før neste flette (bølge), bortsett fra 1 gang diagrammene strikkes. Da er det 4 pinner. mvh DROPS Design
22.09.2025 - 14:08
![]() Lilian Persson wrote:
Lilian Persson wrote:
Hej väntar fortfarande (2dgr) på svar om avmaskning. Snälla, svara mig, kommer inte längre😞
15.04.2025 - 18:47DROPS Design answered:
Hei Lilian. Usikker på hva du mener med fråga 47 og 49. Ser at du har fått svar både den 21/3 + 28/3 + 4/4 + 25/4. mvh DROPS Design
28.04.2025 - 10:50
![]() Lilian wrote:
Lilian wrote:
Mycket svårt att följa och förstå beskrivningen. Har ställt fråga 49 och väntar på svar.
14.04.2025 - 15:11
![]() Lilian Persson wrote:
Lilian Persson wrote:
Skall avmaska för halsringning. Jag tyder det som att avmaskningen skall göras på framstycken, men då avmaskas kant maskorna, eller skall avmaskningen göras på bakstycket? Hittar ingen video tyvärr. Mycket svårt mönster att förstå.
13.04.2025 - 19:18DROPS Design answered:
Hej Lillan. Du gör avmaskning för halsringningen på framstyckena, vilket innebär att kantmaskorna avmaskas. Senare stickar du en halskant runt hela halsen. Mvh DROPS Design
25.04.2025 - 11:46
![]() Lilian Persson wrote:
Lilian Persson wrote:
Vänligen svara på fråga 47. Väntar ivrigt på svar från ER
03.04.2025 - 20:58
![]() Lilian Persson wrote:
Lilian Persson wrote:
Jag har stickat ärmarna m vanliga stickor, men hyr maskar jag av för ärmhålan? Skall passa in för avmaskningen m fram-bakstycke. Får inte rätt på det. Skall det avmaskas från rät eller avigsidan. Damen som sålde garnet o blev till frågad är inte bra att förklara.
02.04.2025 - 15:57DROPS Design answered:
Hej Lillan. Om du har stickat ärmarna fram och tillbaka så får du maska av 4 maskor på varje sida av arbetet. Du maskar av från rätsidan. Sedan syr du ihop ärmen och sätter sedan in ärmarna på samma rundsticka som fram och bakstycket där det avmaskades för ärmhål och fortsätter enligt beskrivningen. Mvh DROPS Design
04.04.2025 - 07:30
![]() Lilian PERSSON wrote:
Lilian PERSSON wrote:
Måste jag sticka ärmarna på strumpstickor? Jag har stickat på vanliga stickor (skall sy ihop örnarna) men har svårt med alla maskorna på rundstickan. Gör jag fel som inte stickar ärmarna på strumpstickor?
27.03.2025 - 19:32DROPS Design answered:
Hej Lilian. Du kan sticka ärmarna på vanliga stickor och sy ihop de, men när du kommer till oket måste du sätta ihop delarna för att kunna sticka resten av koftan. Mvh DROPS Design
28.03.2025 - 06:47
![]() Lilian Persson wrote:
Lilian Persson wrote:
Stickar denna kofta utan mönster stickning. När det gäller ärmarna, vad menas med avm 8 maskor mitt under ärmen? Är det 8 m på mitten av ärmen?
18.03.2025 - 19:30DROPS Design answered:
Hej Lillian. Ja då maskar du av 8 maskor mitt under ärmen, detta blir då en del av ärmhålet. Mvh DROPS Design
21.03.2025 - 13:37
|
||||||||||
Vanilla Sprite#vanillaspritejacket |
||||||||||
|
|
||||||||||
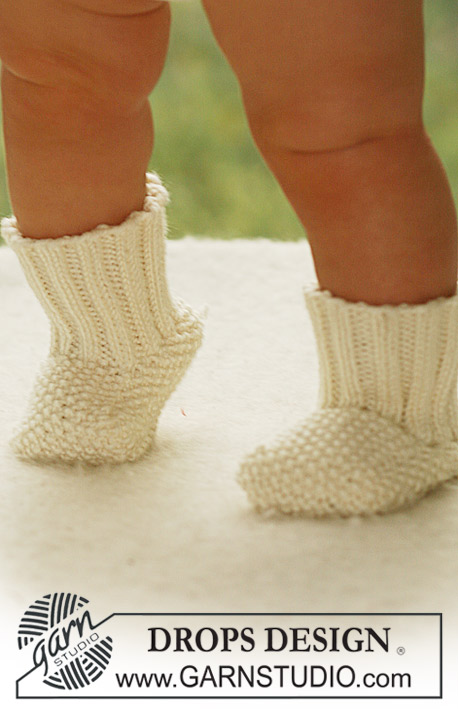
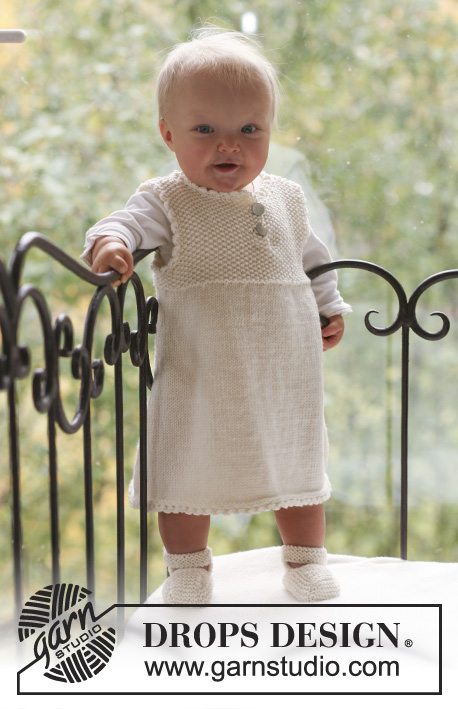
Set of knitted cable jacket with raglan sleeve and pants for baby and children in DROPS Merino Extra Fine
DROPS Baby 18-4 |
||||||||||
|
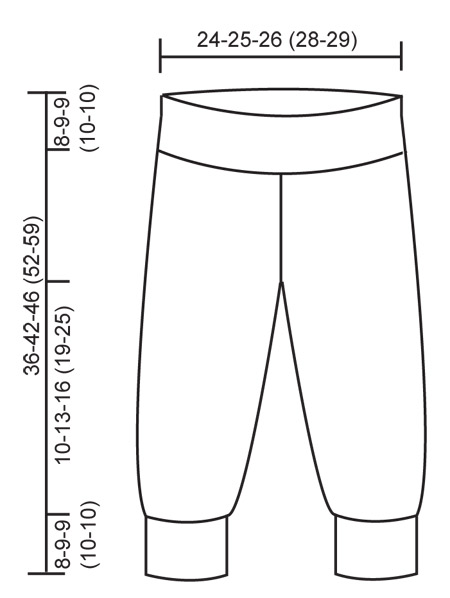
JACKET: GARTER ST (back and forth on needle): K all rows. DECREASING TIP: Make all dec from RS. Dec as follows before marker: K2 tog. Dec as follows after marker: Slip 1 st as if to K, K1, psso. BUTTONHOLES: Make buttonholes on right front band by K tog 2nd and 3rd st from mid front and make 1 YO. Make buttonholes when piece measures: SIZE 1/3 months: 2, 8, 13 and 18 cm SIZE 6/9 months: 2, 8, 14 and 20 cm SIZE 12/18 months: 2, 8, 13, 18 and 23 cm SIZE 2 years: 2, 8, 14, 20 and 26 cm SIZE 3/4 years: 2, 9, 16, 23 and 29 cm NOTE: The last buttonhole is made on neckline. ------------------------------------------------------------ JACKET BODY PIECE: Worked back and forth on circular needle from mid front. Cast on 139-157-169 (187-199) sts (includes 5 front band sts each side towards mid front) on circular needle size 3.5 mm with Merino Extra Fine. P 1 row from WS and continue as follows from RS: 5 front band sts in garter sts – SEE ABOVE, * K3, P3 *, repeat from *-* and finish with K3 and 5 front band sts in garter st. Continue like this, AT THE SAME TIME when piece measures 2 cm make buttonhole on right front band – SEE ABOVE. When piece measures approx 3 cm K 1 row from RS, AT THE SAME TIME dec 29-35-35 (41-41) sts evenly (do not dec on front bands) = 110-122-134 (146-158) sts. Change to circular needle size 4.5 mm, K 3 rows and continue in stocking st with 5 garter sts each side. When piece measures 16-17-20 (23-25) cm work next row as follows from RS: 26-29-32 (35-38) sts = right front piece, cast off 8 sts for armhole, 42-48-54 (60-66) sts = back piece, cast off 8 sts for armhole, 26-29-32 (35-38) sts = left front piece. Put piece aside and knit the sleeves. SLEEVE: Worked in the round on double poited needles. Cast on 36-42-42 (48-48) sts on double pointed needles size 3.5 mm with Merino Extra Fine. K 1 row and continue in rib, K3/P3, When piece measures approx 3 cm K 1 round, AT THE SAME TIME dec 6-10-8 (12-10) sts evenly = 30-32-34 (36-38) sts. Change to needle size 4.5 mm, P 1 round, K 1 round and P 1 round. Insert a marker at beg of round = mid under arm. Continue as follows: K 11-12-13 (14-15), P2, M.1 (= 4 sts), P2 and K 11-12-13 (14-15). AT THE SAME TIME when piece measures 5 cm inc 1 st on each side of marker, and repeat the inc on every 5-5-6 (6-6) round a total of 6-6-7 (8-9) times = 42-44-48 (52-56) sts. When piece measures 17-18-21 (24-28) cm cast off 8 sts mid under arm = 34-36-40 (44-48) sts. Put piece aside and knit the other sleeve. NOTE! On the other sleeve work M.2 instead of M.1. YOKE: Slip sleeves on the same circular needle as body piece where cast off for armholes = 162-178-198 (218-238) sts. Insert a marker in all transitions between body piece and sleeves = 4 markers. Continue as before back and forth on needle, AT THE SAME on 3rd row dec 1 st on each side of all markers for raglan – SEE DECREASING TIP, and repeat the dec on every other row a total of 10-11-12 (13-15) times. NECKLINE: At the same time when piece measures 23-25-28 (32-35) cm cast off to shape the neckline each side at the beg of every row from mid front: 10-11-13 (14-15) sts 1 time and 1 st 2 times. After all dec for raglan and neckline there are 58-64-72 (82-84) sts left on row and piece measures approx 27-29-33 (37-40) cm. NECKLINE: Slip sts from body piece on circular needle size 3.5 mm and pick up 12 to 18 sts on neckline each side at the front = approx 82 to 120 sts. K 1 row from WS, AT THE SAME TIME K tog the 4 sts on M.1 and M.2, 2 by 2. K 1 row from RS, AT THE SAME TIME adjust no of sts evenly to 73-73-79 (79-85) – do not dec on front bands. Continue in rib, K3/P3, with K3 (as seen from WS) and 5 garter sts each side towards mid front. AT THE SAME TIME after 1 cm make 1 buttonhole in line with the others on front band. Cast off when neck measures 2 cm. POCKET: Cast on 12-16-16 (20-20) sts on double pointed needle size 3.5 mm and work garter st back and forth on needles for 4-5-5 (6-7) cm, AT THE SAME TIME on last row inc 4 sts evenly = 16-20-20 (24-24) sts. Work next row as follows from RS: 3 garter sts, * K2, P2 *, repeat from *-*, and finish with K2 and 3 garter st. Continue in rib until pocket measures 6-7-7 (8-9) cm, cast off. ASSEMBLY: Sew openings under arms. Sew on buttons. Sew on pocket, place it mid between side seam and front band, approx 6-6-7 (7-8) cm from bottom edge. ------------------------------------------------------------ PANTS: DECREASING TIP: Dec as follows before marker: K2 tog. Dec as follows after marker: Slip 1 st as if to K, K1, psso. PANTS: Worked in the round on circular needle from waist down. Cast on 120-126-132 (138-144) sts on circular needle size 3.5 mm with Merino Extra Fine. Work rib, K3/P3, for 8-9-9 (10-10) cm. Change to needle size 4.5 mm and K 1 round, AT THE SAME TIME dec 24-26-28 (26-28) sts evenly = 96-100-104 (112-116) sts. Insert 1 marker mid front and 1 marker mid back (= 48-50-52 (56-58) sts between markers). Continue in stocking st. REMEMBER THE KNITTING TENSION! When piece measures 12-14-15 (16-17) cm inc 1 st on each side of the 4 middle sts at front – inc by picking up st from previous round and K this. Repeat the inc on every other round a total of 9-9-9 (10-10) times = 114-118-122 (132-136) sts. On next round dec 4 sts mid front and mid back (= 2 sts on each side of markers), and now complete the legs separately. Piece measures approx 18-20-21 (23-24) cm. Slip sts from one leg on a stitch holder and slip sts from the other leg on double pointed needles size 4.5 mm. LEG: = 53-55-57 (62-64) sts. Continue in stocking st. Insert a marker at beg of round = inside of leg. When leg measures 3 cm dec 1 st on each side of marker – SEE DECREASING TIP, and repeat the dec on every 2-3-4 (5-6) cm a total of 4 times = 45-47-49 (54-56) sts. When leg measures 10-13-16 (19-25) cm change to double pointed needles size 3.5 mm and K 1 round, AT THE SAME TIME inc 9-7-11 (6-10) sts evenly = 54-54-60 (60-66) sts. P 1 round, K 1 round, P 1 round and now continue in rib, K3/P3, until ;eg measures 18-22-25 (29-35) cm , Cast off loosely in rib. Work the other leg in the same way. Pants measures approx 36-42-46 (52-59) cm. ASSEMBLY: Sew opening between legs. |
||||||||||
Diagram explanations |
||||||||||
|
||||||||||
 |
||||||||||
 |
||||||||||
Have you finished this pattern?Tag your pictures with #dropspattern #vanillaspritejacket or submit them to the #dropsfan gallery. Do you need help with this pattern?You'll find 16 tutorial videos, a Comments/Questions area and more by visiting the pattern on garnstudio.com. © 1982-2026 DROPS Design A/S. We reserve all rights. This document, including all its sub-sections, has copyrights. Read more about what you can do with our patterns at the bottom of each pattern on our site. |
||||||||||


With over 40 years in knitting and crochet design, DROPS Design offers one of the most extensive collections of free patterns on the internet - translated to 17 languages. As of today we count 324 catalogues and 12290 patterns translated into English (UK/cm). 12290
We work hard to bring you the best knitting and crochet have to offer, inspiration and advice as well as great quality yarns at incredible prices! Would you like to use our patterns for other than personal use? You can read what you are allowed to do in the Copyright text at the bottom of all our patterns. Happy crafting!
Post a comment to pattern DROPS Baby 18-4
We would love to hear what you have to say about this pattern!
If you want to leave a question, please make sure you select the correct category in the form below, to speed up the answering process. Required fields are marked *.