
Popular categories
Looking for a yarn?


Comments / Questions (33)
![]() Renu wrote:
Renu wrote:
I am unable to understand how to decrease for armhole . According to pattern the total decreases work out to 14 stitches and not 18 as needed . Please help
27.03.2025 - 10:30DROPS Design answered:
Dear Mrs Renu, could you please tell us which size you are working? Thanks for your comprehension.
27.03.2025 - 13:15
![]() Nathalie Monka wrote:
Nathalie Monka wrote:
Bonjour pour le devant, à 55 cm je lis faire 5 diminutions mais dans A2 ,les diminutions se font donc sur les 19 mailles du centre uniquement ? Et je lis que le rang doit être tricoté sur l’endroit ,puis au rang suivant sur l’endroit ,... Cela veut il dire que l’on fait 2 rangs à l’endroit, ou bien un rang à l’endroit et ensuite au prochain rang tricoté à l’endroit ( donc 2 rangs après)? Merci d’avance.
27.03.2025 - 01:42DROPS Design answered:
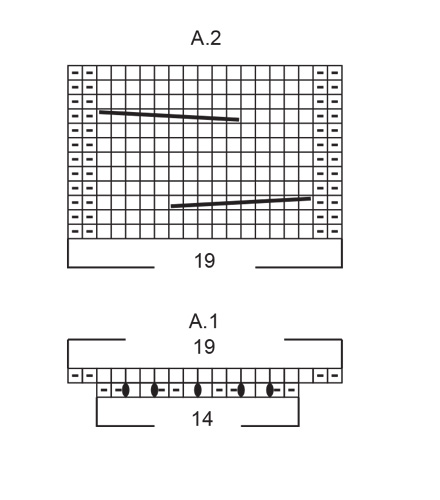
Bonjour Mme Monka, vous devez effectivement diminuer dans les mailles centrales = celles de A.2, ainsi, l'encolure ne sera pas trop large (car il faut plus de mailles pour une torsade que pour du jersey). Vous diminuez ces 5 mailles sur l'endroit, puis tricotez le rang retour sur l'envers (mailles endroit à l'endroit et mailles envers à l'envers), et, au rang suivant sur l'endroit, vous rabattez les 20 mailles centrales pour l'encolure et terminez chaque épaule séparément. Bon tricot!
27.03.2025 - 08:58
![]() Leroux wrote:
Leroux wrote:
Bonjour, Je viens de commencer l'ouvrage mais le tricot est beaucoup trop large. Pourtant mon échantillon fait bien 17 Mailles et 22 rangs. J,'ai monté 104 mailles et j'ai plus de 60 cm de large ? Mais 17*5,4 donnent 92 mailles ? Je ne comprends pas. Merci de votre réponse
20.03.2025 - 19:36DROPS Design answered:
Bonjour Mme Leroux, notez que lorsque l'on tricote des côtes, on a besoin de davantage de mailles car les côtes resserrent l'ouvrage, et, dans ce cas, on ne veut pas que les côtes resserrent le bas du pull, on va ainsi monter davantage de mailles (encore plus car on tricote les côtes avec les aiguilles 4), puis, on va diminuer les mailles jersey (et augmenter pour la torsade qui elle aussi a besoin de davantage de mailles pour ne pas contracter l'ouvrage), et vous aurez 97 mailles après les côtes. Si votre tension jersey avec les aiguilles 5 est juste, et que vous tricotez avec la même tension, vos mesures finales correspondront à celles du schéma. Bon tricot!
21.03.2025 - 08:29
![]() Gediz LEKESIZ wrote:
Gediz LEKESIZ wrote:
Hello! From the description I understood that for the neck we take the stitches on 4 mm needle, then we switch over 5 mm needle. But when I read I-CORD CAST OFF part, I couldn't understand how many rows should be knitted for neck description. I will be glad if you can help me. Thank you.
12.02.2025 - 03:21DROPS Design answered:
Hi Gediz, The I-cord cast off is worked with needle size 5 mm to avoid the cast-off edge being tight. It is just a cast-off edge, so you knit up the stitches around the neckline, then cast them off on the next round. Happy knitting!
12.02.2025 - 06:09
![]() Lindy wrote:
Lindy wrote:
Thank you!
25.01.2025 - 19:41
![]() Lindy wrote:
Lindy wrote:
Could I please have help with how to decrease on the neck edge of the vest. Thank you!
24.01.2025 - 21:37DROPS Design answered:
Dear Lindy, please see our answers below. Happy knitting!
25.01.2025 - 18:56
![]() Hilke Flege wrote:
Hilke Flege wrote:
Vielen Dank
24.01.2025 - 09:26
![]() Lindy wrote:
Lindy wrote:
I am looking at the photo of the Vest and the neck looks round, not V neck?
23.01.2025 - 16:02DROPS Design answered:
Dear Lindy, that is correct, it's a round neck. You can see this in the tags under the materials section; the neck is tagged as a "round neck". There seems to be a typo in the US version that indicated that it's a V-neck; we will correct it as soon as possible. Happy knitting!
25.01.2025 - 18:55
![]() Lindy wrote:
Lindy wrote:
I am on the right shoulder, decreasing for the V-neck at the beginning of the row. How do I do the decrease as there are no band stitches on the V-neck. Am I missing an instructions please?
22.01.2025 - 23:09DROPS Design answered:
Dear Lindy, this is a round neck; the decreases are worked in the edge stitch by the neck. Happy knitting!
25.01.2025 - 18:55
![]() Sylvie wrote:
Sylvie wrote:
Bonjour, La légende A1 : 14 mailles 2 mailles envers sur endroit faire 1 jeté entre 2 mailles je comprends pas . Est ce que je les tricote si je rajoute 1 jeté je rajoute 1 maille. Désolé je reprends le tricot. Merci pour vos explications
21.01.2025 - 12:18DROPS Design answered:
Bonjour Sylvie, tricotez le 1er rang de A.1 ainsi sur 14 mailles en augmentant en même temps 5 mailles (= jetés); 2 m env, 1 jeté, 2 m end, 1 jeté, 2 m env, 1 m end, 1 jeté, 1 m end, 2 m env, 1 jeté, 2 m end, 1 jeté, 2 m env. Au rang suivant = sur l'envers, tricotez: 2 m end, 15 m envers (tricotez les jetés torse pour éviter des trous), 2 m end. Bon tricot!
21.01.2025 - 16:49
|
||||||||||||||||
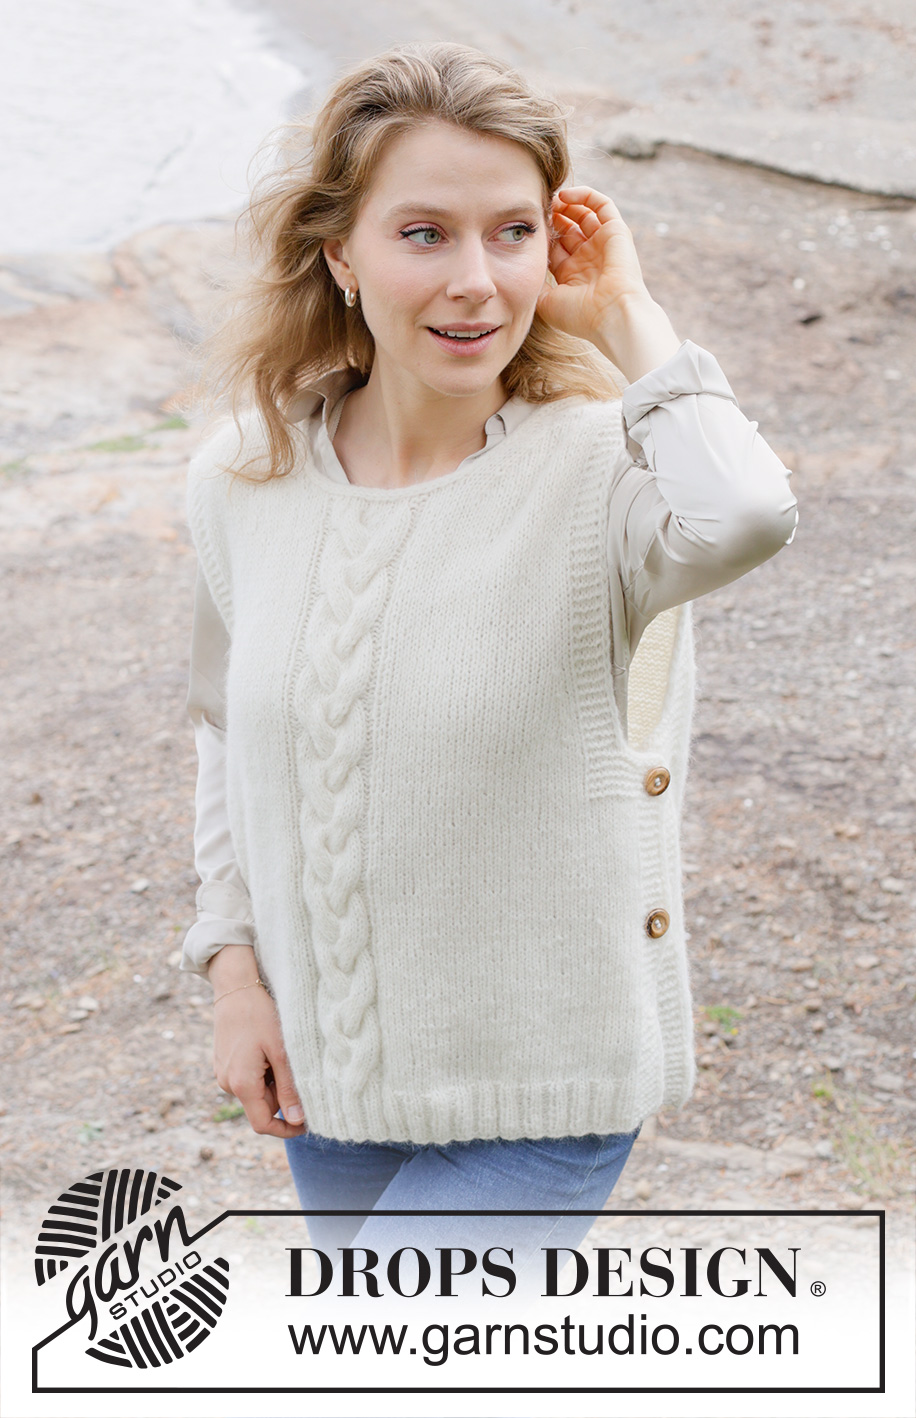
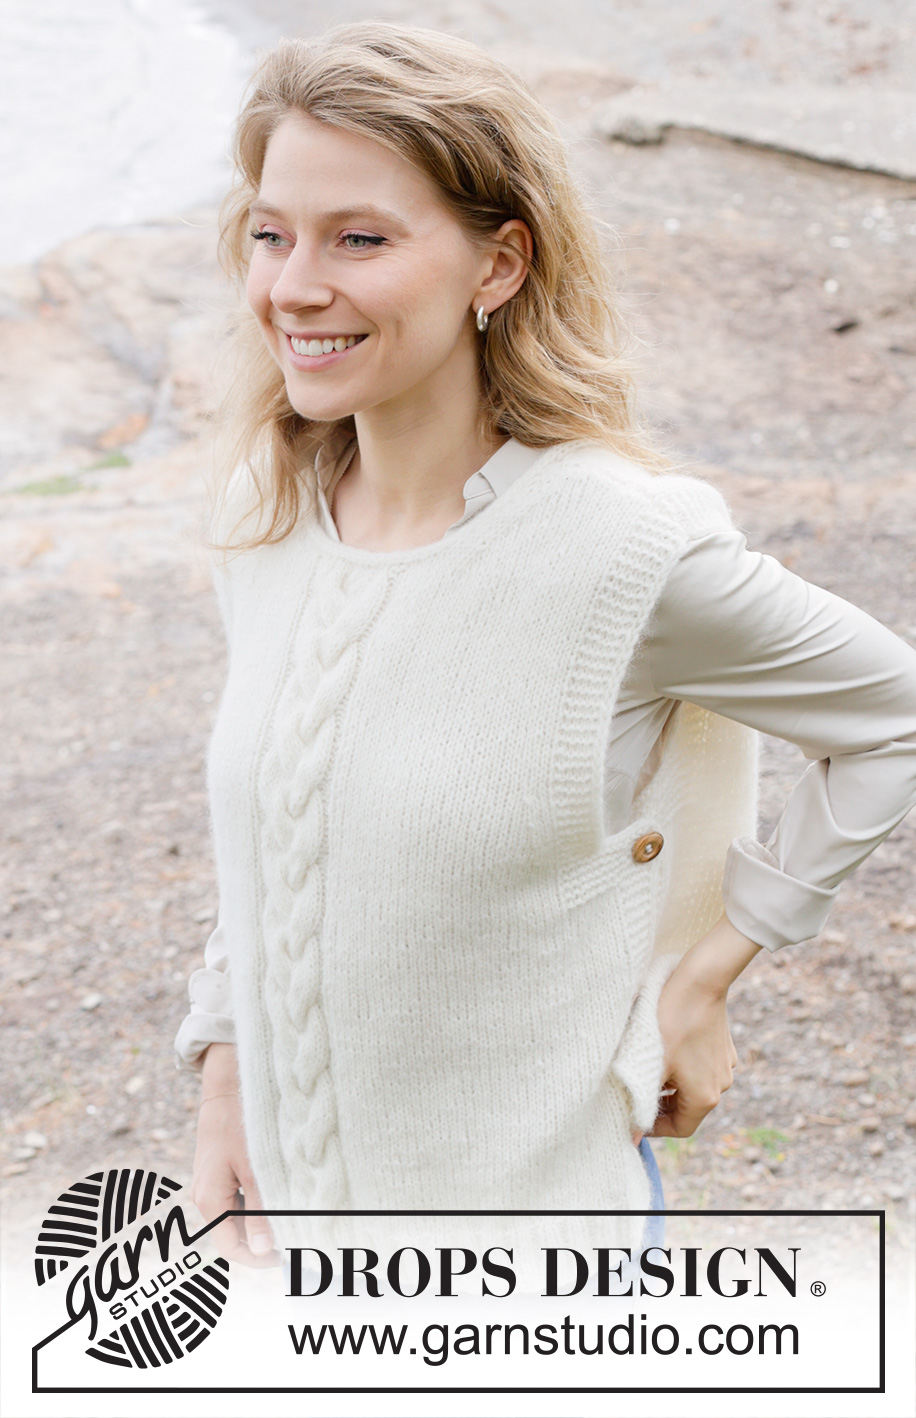
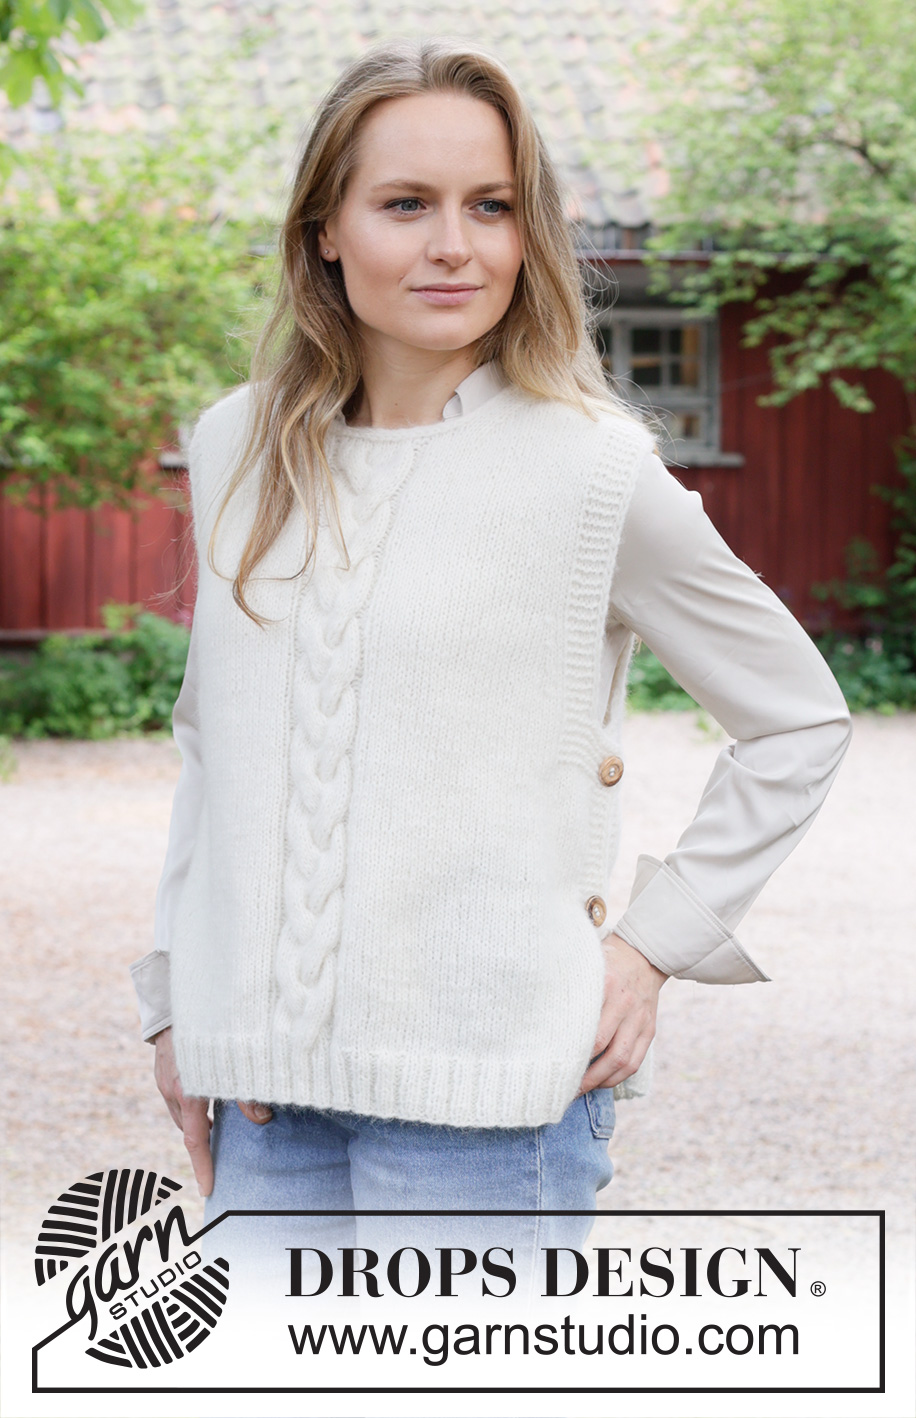
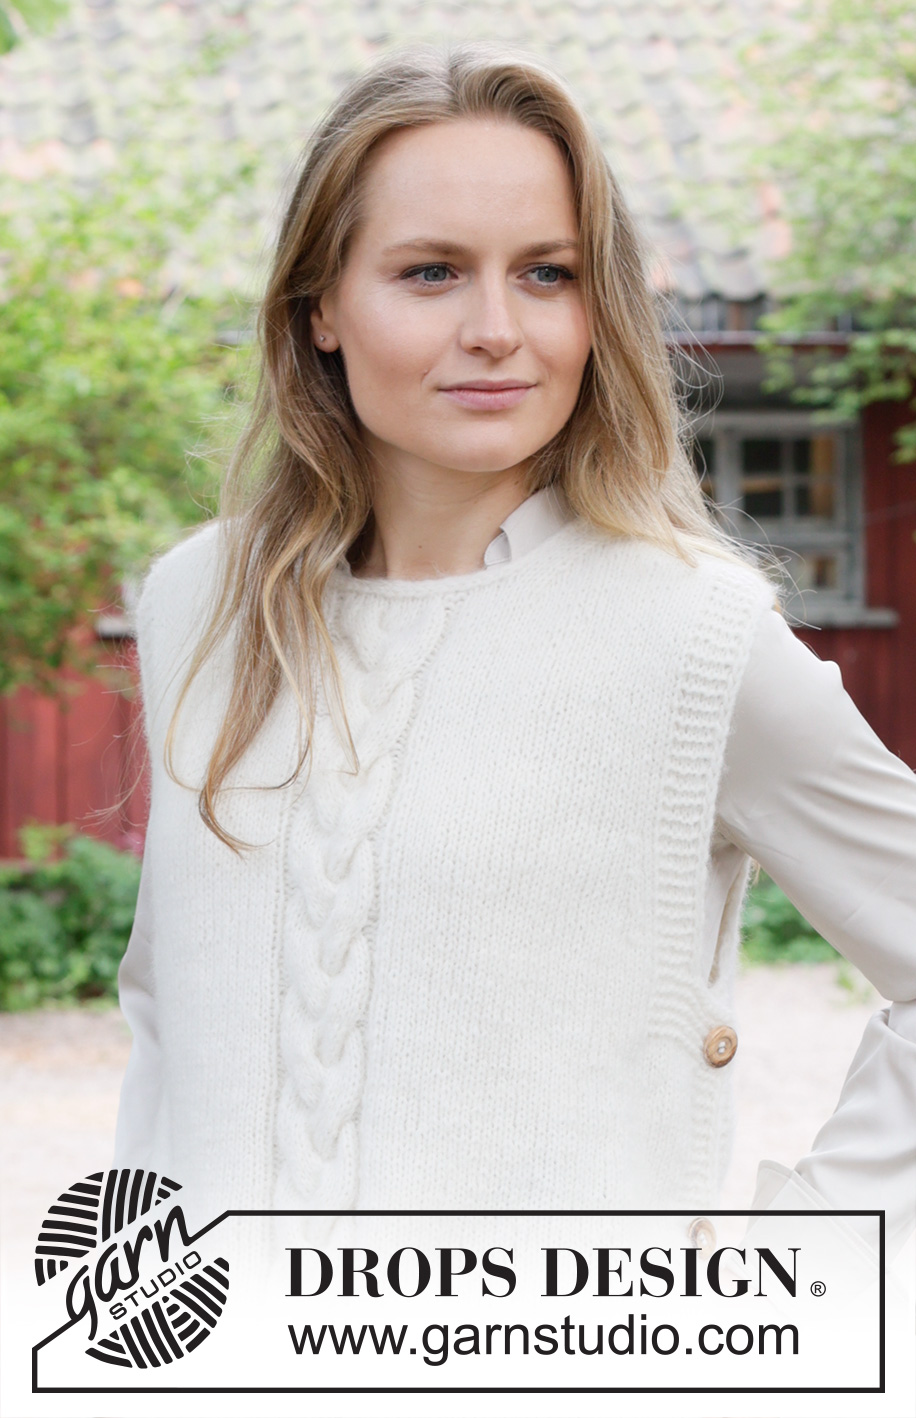
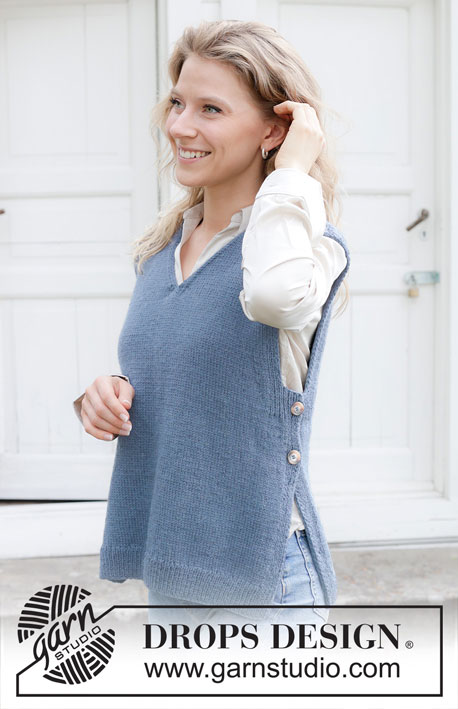
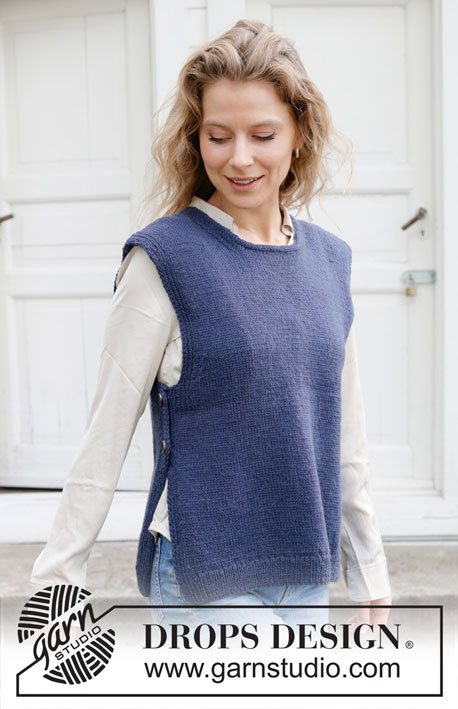
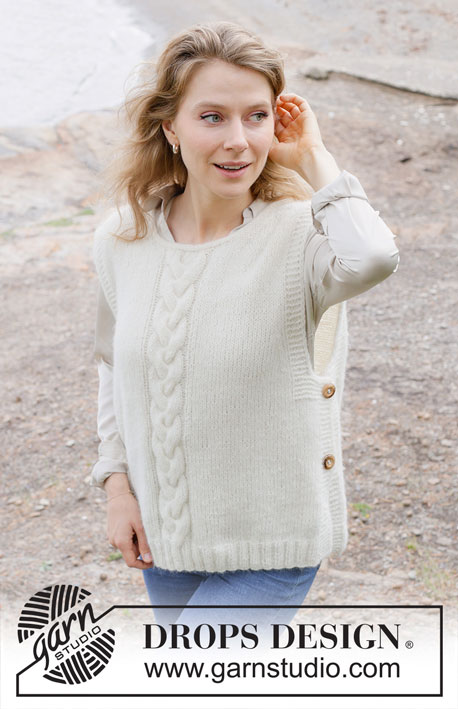
Snowfall Vest#snowfallvest |
||||||||||||||||
 |
 |
|||||||||||||||
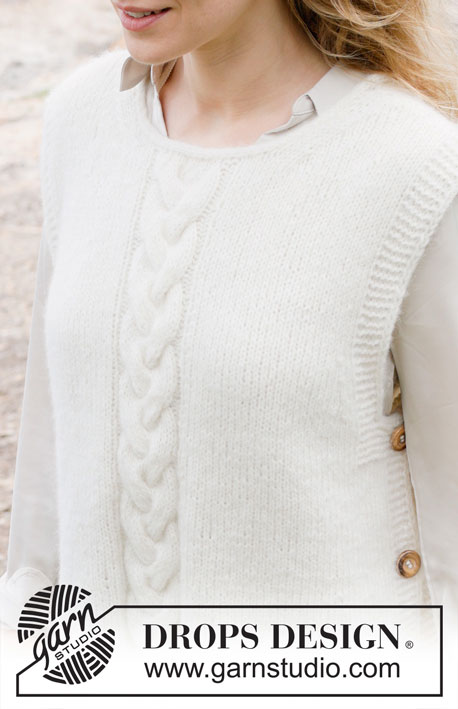
Knitted vest in DROPS Air. The piece is worked bottom up with cables, diagonal shoulders and split in sides. Sizes XS - XXL.
DROPS 252-31 |
||||||||||||||||
|
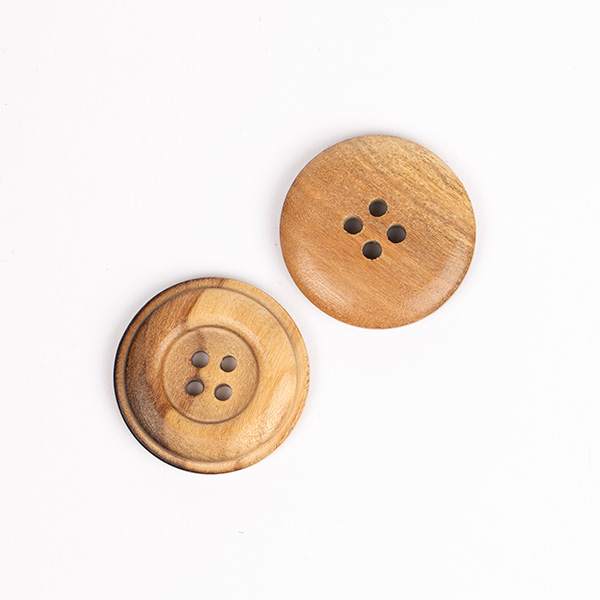
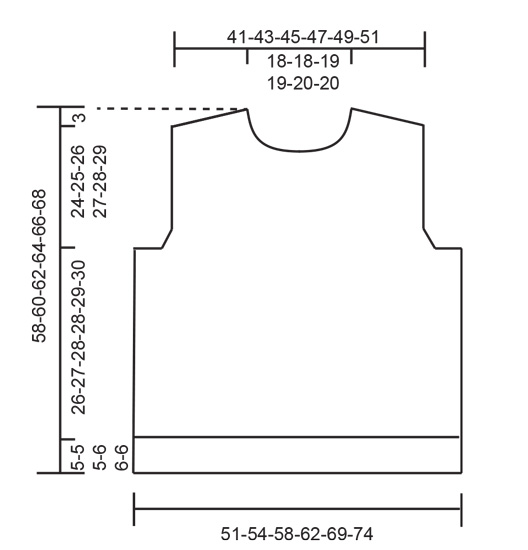
------------------------------------------------------- EXPLANATIONS FOR THE PATTERN: ------------------------------------------------------- GARTER STITCH (worked back and forth): Knit all rows, from both the right and wrong side. 1 ridge in height = knit 2 rows. BANDS WITH I-CORD: START OF ROW: Work the band as follows: Slip 1 stitch purl-wise, with yarn in front, knit 1, work 5 garter stitches. END OF ROW: Work the band as follows: Work until there are 7 stitches left on the row, work 5 garter stitches, slip 1 stitch purl-wise with yarn in front, knit 1. Work like this from both the right and wrong side. DECREASE TIP (for armholes and neckline): All decreases are worked from the right side! START OF ROW: Work the first 9 stitches as before, slip 1 stitch knit-wise, knit 1 and pass the slipped stitch over the knitted stitch (= 1 stitch decreased). END OF ROW: Work until there are 11 stitches left on the row, knit 2 together (= 1 stitch decreased), work to end of row as before. I-CORD CAST OFF: At the end of the round when the last stitch has been knitted up: Cast on 3 stitches from the right side. Slip these 3 cast-on stitches back onto the left needle with the working strand 3 stitches in on the left needle (when worked, the strand tightens to form a small tube). ROW 1 (right side): Knit 2, knit 2 twisted together. Slip the 3 stitches on the right needle back onto the left needle. Do not turn. Repeat ROW 1 until there are 3 stitches left on the right needle. Slip these 3 stitches back onto the left needle. Cast off. Sew a small stitch to join the beginning and end of the I-cord together. ------------------------------------------------------- START THE PIECE HERE: ------------------------------------------------------- VEST - SHORT OVERVIEW OF THE PIECE: The piece is worked back and forth with circular needle, bottom up. The front and back pieces are worked separately, sewn together at the shoulders and decorative buttons are sewn onto each side. FRONT PIECE: Cast on 96-104-112-120-136-144 stitches with circular needle size 4 mm and DROPS Air. Work rib from the wrong side as follows: 7 stitches according to BANDS WITH I-CORD, work rib (purl 2, knit 2) until there are 9 stitches left, purl 2 and 7 stitches according to BANDS WITH I-CORD. Work this rib back and forth for 5-5-5-6-6-6 cm. Change to circular needle size 5 mm. Work 1 row of stocking stitch with 7 band-stitches on each side. AT THE SAME TIME decrease 5-6-7-7-9-9 stitches evenly over the next 34-38-42-46-54-58 stitches, work diagram A.1 across the next 14 stitches (5 stitches increased in A.1), work stocking stitch and decrease 5-6-7-7-9-9 stitches evenly across the next 34-38-42-46-54-58 stitches, 7 band-stitches as before = 91-97-103-111-123-131 stitches. Work back from the wrong side with stocking stitch, band stitches and A.1 across the middle 19 stitches. Continue the pattern but now with A.2 across the middle 19 stitches to finished length. Remember to maintain the knitting tension. When the piece measures 28-29-30-31-32-33 cm, work an extra 7-7-8-8-9-9 garter stitches on each side (the bands now consist of the outermost 14-14-15-15-16-16 stitches on each side). When the piece measures 31-32-33-34-35-36 cm, start to decrease for the armholes as follows. Cast off 7-7-8-8-9-9 stitches on each side, then continue the bands across the outermost 7 stitches on each side and decrease for the armholes – read DECREASE TIP, every 4th-4th-4th-2nd-2nd-2nd row as follows: 1 stitch 1-2-3-5-8-11 times on each side = 75-79-81-85-89-91 stitches. Work until the piece measures 49-51-52-54-55-57 cm, after at least 3 rows without cabling in A.2 and with the next row from the right side. Work stocking stitch (bands as before) and decrease 5 stitches evenly over the stitches in A.2 =70-74-76-80-84-86 stitches. On the next row from the right side cast off the middle 16-16-18-18-20-20 stitches for the neckline and finish each shoulder separately. RIGHT SHOULDER: = 27-29-29-31-32-33 stitches. Continue with stocking stitch and the band-stitches as before. AT THE SAME TIME decrease for the neck – remember DECREASE TIP, every 2nd row 7 times = 20-22-22-24-25-26 stitches. When the piece measures 55-57-59-61-63-65 cm (approx. 3 cm left to finished length) cast off for the diagonal shoulders at the beginning of each row from the wrong side: 5-5-5-6-6-6 stitches 3 times, then cast off the remaining 5-7-7-6-7-8 stitches. The piece measures approx. 58-60-62-64-66-68 cm. LEFT SHOULDER: = 27-29-29-31-32-33 stitches. Continue with stocking stitch and the band-stitches as before. AT THE SAME TIME decrease for the neck, every 2nd row 7 times = 20-22-22-24-25-26 stitches. When the piece measures 55-57-59-61-63-65 cm (approx. 3 cm left to finished length) cast off for the diagonal shoulders at the beginning of each row from the right side: 5-5-5-6-6-6 stitches 3 times, then cast off the remaining 5-7-7-6-7-8 stitches. The piece measures approx. 58-60-62-64-66-68 cm. BACK PIECE: Cast on 96-104-112-120-136-144 stitches with circular needle size 4 mm and DROPS Air. Work rib from the wrong side as follows: 7 stitches according to bands with I-cord, work rib (purl 2, knit 2) until there are 9 stitches left, purl 2 and 7 stitches according to bands with I-cord. Work this rib back and forth for 5-5-5-6-6-6 cm. Change to circular needle size 5 mm. Work 1 row of stocking stitch with 7 band-stitches on each side. AT THE SAME TIME decrease 10-12-14-14-18-18 stitches evenly across the stocking stitches on the first row = 86-92-98-106-116-126 stitches. Continue with stocking stitch and band-stitches. When the piece measures 28-29-30-31-32-33 cm, work an extra 7-7-8-8-9-9 garter stitches on each side (the bands now consist of the outermost 14-14-15-15-16-16 stitches on each side). When the piece measures 31-32-33-34-35-36 cm, work as follows. Cast off 7-7-8-8-9-9 stitches on each side. Then continue the bands across the outermost 7 stitches on each side and decrease for the armholes every 4th-4th-4th-2nd-2nd-2nd row as follows: 1 stitch 1-2-3-5-8-11 times on each side = 70-74-76-80-84-86 stitches. When the piece measures 54-56-58-60-62-64 cm, cast off the middle 28-28-30-30-32-32 stitches for the neckline and finish each shoulder separately. DIAGONAL SHOULDERS: = 21-23-23-25-26-27 stitches. On the next row from the neck, cast off 1 stitch for the neckline = 20-22-22-24-25-26 stitches. When the piece measures 55-57-59-61-63-65 cm, cast off for the shoulders: 5-5-5-6-6-6 stitches on each row from the armhole 3 times, then cast off the remaining 5-7-7-6-7-8 stitches. The piece measures approx. 58-60-62-64-66-68 cm. ASSEMBLY: Sew the shoulder seams. Sew 2 decorative buttons onto each side of the vest; lay the band on the front piece over the band on the back piece and sew on the buttons through both layers. The top button is positioned 1 cm below the armhole, the second button 9-10 cm below the first. NECK: From the right side using circular needle size 4 mm. Start on one shoulder-seam and knit up 84 to 94 around the neckline. Change to circular needle size 5 mm and work I-CORD CAST OFF – read description above. |
||||||||||||||||
Diagram explanations |
||||||||||||||||
|
||||||||||||||||
 |
||||||||||||||||
 |
||||||||||||||||
Have you finished this pattern?Tag your pictures with #dropspattern #snowfallvest or submit them to the #dropsfan gallery. Do you need help with this pattern?You'll find 21 tutorial videos, a Comments/Questions area and more by visiting the pattern on garnstudio.com. © 1982-2026 DROPS Design A/S. We reserve all rights. This document, including all its sub-sections, has copyrights. Read more about what you can do with our patterns at the bottom of each pattern on our site. |
||||||||||||||||


With over 40 years in knitting and crochet design, DROPS Design offers one of the most extensive collections of free patterns on the internet - translated to 17 languages. As of today we count 324 catalogues and 12290 patterns translated into English (UK/cm). 12290
We work hard to bring you the best knitting and crochet have to offer, inspiration and advice as well as great quality yarns at incredible prices! Would you like to use our patterns for other than personal use? You can read what you are allowed to do in the Copyright text at the bottom of all our patterns. Happy crafting!
Post a comment to pattern DROPS 252-31
We would love to hear what you have to say about this pattern!
If you want to leave a question, please make sure you select the correct category in the form below, to speed up the answering process. Required fields are marked *.