
Popular categories
Looking for a yarn?


Comments / Questions (29)
![]() Rhianne wrote:
Rhianne wrote:
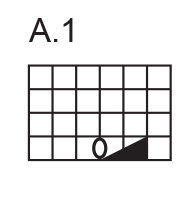
Chart A.1 is worked over 6 stitches. But the instructions for the body say to work PATTERN A.1 over the first 35 stitches for my size and that doesn't divide evenly. Is that an error or is it expected that there won't be a full chart repeat for every size? Also, the chart in English still has an incorrect definition for the yarn over symbol.
09.04.2026 - 19:22DROPS Design answered:
Dear Rhianne, to work A.1 over 35 sts repeat the 6 sts a total of 5 times (30 sts) then work the first 5 sts - 35 sts in A.1 => 30+5=35 sts A.1; to work A.1 over 71 sts, repeat the 6 sts a total of 11 times (66 sts) then work the first 4 sts => 66+4=71 sts A.1. Thanks for noticing the diagram text will be fixed asap. Happy knitting!
10.04.2026 - 07:30
![]() Anne Claire Bucciali wrote:
Anne Claire Bucciali wrote:
Bonjour, ce joli modèle peut-il être tricoté avec brushed alpaca Silk?ou Kid Silk + brushed alpaca Silk ?et dans ce cas avec combien de fils? Merci pour votre réponse!
15.02.2026 - 13:24DROPS Design answered:
Bonjour Mme Bucciali, vous pouvez effectivement remplacer 2 fils Kid-Silk par 1 fil Brushed Alpaca Silk, dans ce cas, vous pourrez tricoter avec 1 fil Brushed Alpaca Silk + 1 fil Kid-Silk - calculez ici la nouvelle quantité nécessaire - et pensez bien, comme d'habitude, à vérifier votre tension. Bon tricot!
17.02.2026 - 14:37
![]() Sabine wrote:
Sabine wrote:
Hallo, ich möchte gerne diese Jacke in Größe S mit 1 Faden Sky und 1 Faden Kid Silk stricken. Wie viel Gramm benötige ich pro Garn? Dankeschön!
12.02.2026 - 13:25DROPS Design answered:
Liebe Sabine, entschuldigen Sie die späte Rückmeldung. Wenn Sie mit 1 Faden Sky und 1 Faden Kid-Silk stricken möchten, benötigen Sie 4 Knäuel Sky (das ist aber knapp gerechnet, planen Sie lieber 5 Knäuel ein) und 4 Knäuel Kid-Silk. Viel Spaß beim Stricken!
24.02.2026 - 10:18
![]() Maria wrote:
Maria wrote:
In meiner Maschenprobe hatte ich 20 Maschen auf 10 cm mit Nadelstärke 5. Ich habe die Maschenanzahl neu berechnet, aber das Strickstück wurde zu weit. Danach habe ich die Maschenanzahl aus eurer Anleitung für Größe M übernommen, doch der Umfang ist immer noch ca. 124 cm. Es wäre hilfreich, wenn in der Anleitung auch der Umfang in cm angegeben wäre.
23.08.2025 - 20:59
![]() Eedisy wrote:
Eedisy wrote:
What size is used in the photo? Size M or L?
21.08.2025 - 07:05DROPS Design answered:
Dear Eedisy, our models usually wear an M size. Happy knitting!
24.08.2025 - 23:59
![]() Anika wrote:
Anika wrote:
If I use Alpaca yarn, how many yarns together? one, two or three
24.07.2025 - 19:19DROPS Design answered:
Hi Anika, you will have to use 3 strands od Alpaca yarn for this pattern. Don't forget to make a swatch before knitting. Happy knitting!
25.07.2025 - 10:22
![]() Cassie wrote:
Cassie wrote:
When decreasing after rib Im on wrong side. do I decrease with 2 stitches purp together and does whole row as purl?
15.07.2025 - 23:37
![]() Franziska wrote:
Franziska wrote:
Hallo. Warum wird beim Rumpfteil unter dem Arm kein Lochmuster gestrickt (für Größe L: 12+4 glatt rechte Maschen)? Danke!
09.06.2025 - 20:26DROPS Design answered:
Liebe Franziska, es gibt für L nur 8 Lochmuster für die Ärmel, dh nur am oberen Teil vom Ärmel. Viel Spaß beim Stricken!
10.06.2025 - 09:18
![]() Salenah wrote:
Salenah wrote:
Hello, quick question -when you change needle size, is the gauge meant to stay the same?
24.05.2025 - 18:00DROPS Design answered:
Dear Salenah, no, each needle size and pattern has its own gauge. Generally, we only indicate a standard gauge (using stocking stitch) or worked in the main pattern, since that one will be the most relevant and important to get the right shape and size of the garment. In this pattern we have the standard gauge and the lace pattern gauge, which will be more exact for this pattern, and both are worked with the 5mm needles, so they are very similar. However, with the smaller needles you will be working the rib edges. This is to ensure that the rib pattern, which will normally be looser than stocking stitch with the same needle, is slightly tighter (but not the same gauge). Happy knitting!
25.05.2025 - 13:32
![]() Evelyne Galand wrote:
Evelyne Galand wrote:
Pourquoi dite vous qu'il faut commencer le point fantaisie après les 36 premières mailles ? Taille M Je pensais qu'il fallait le débuté après les 7 mailles de la bordure ?
13.05.2025 - 18:24DROPS Design answered:
Bonjour Mme Galand, après les côtes, tricotez vos 183 mailles ainsi: Les 7 mailles de bordure comme avant, puis les 36 mailles suivantes en point fantaisie du diagramme A.1, placez un marqueur, tricotez ensuite 12 mailles endroit, placez 1 fil marqueur, 1 maille endroit, tricotez 72 mailles en point fantaisie A.1, placez 1 fil marqueur, tricotez 12 mailles endroit, placez 1 fil marqueur, tricotez 1 maille endroit, 35 mailles du point fantaisie A.1 et terminez par les 7 mailles de bordure devant=7+36+12+1+72+12+1+35+7=183. Bon tricot!
13.05.2025 - 21:21
|
|||||||||||||
Sunshine Trail Cardigan#sunshinetrailcardigan |
|||||||||||||
 |
 |
||||||||||||
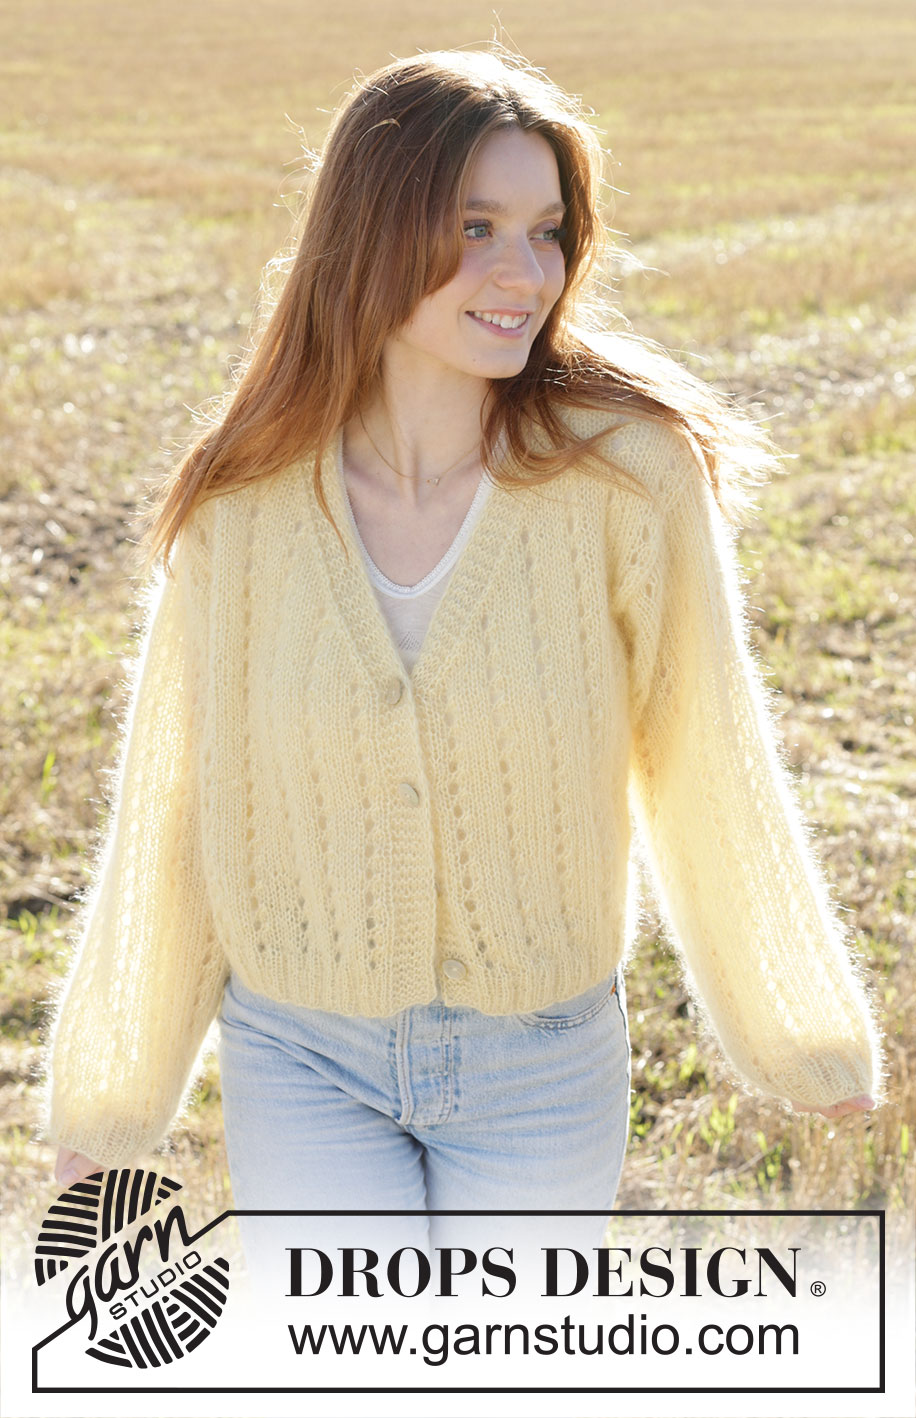
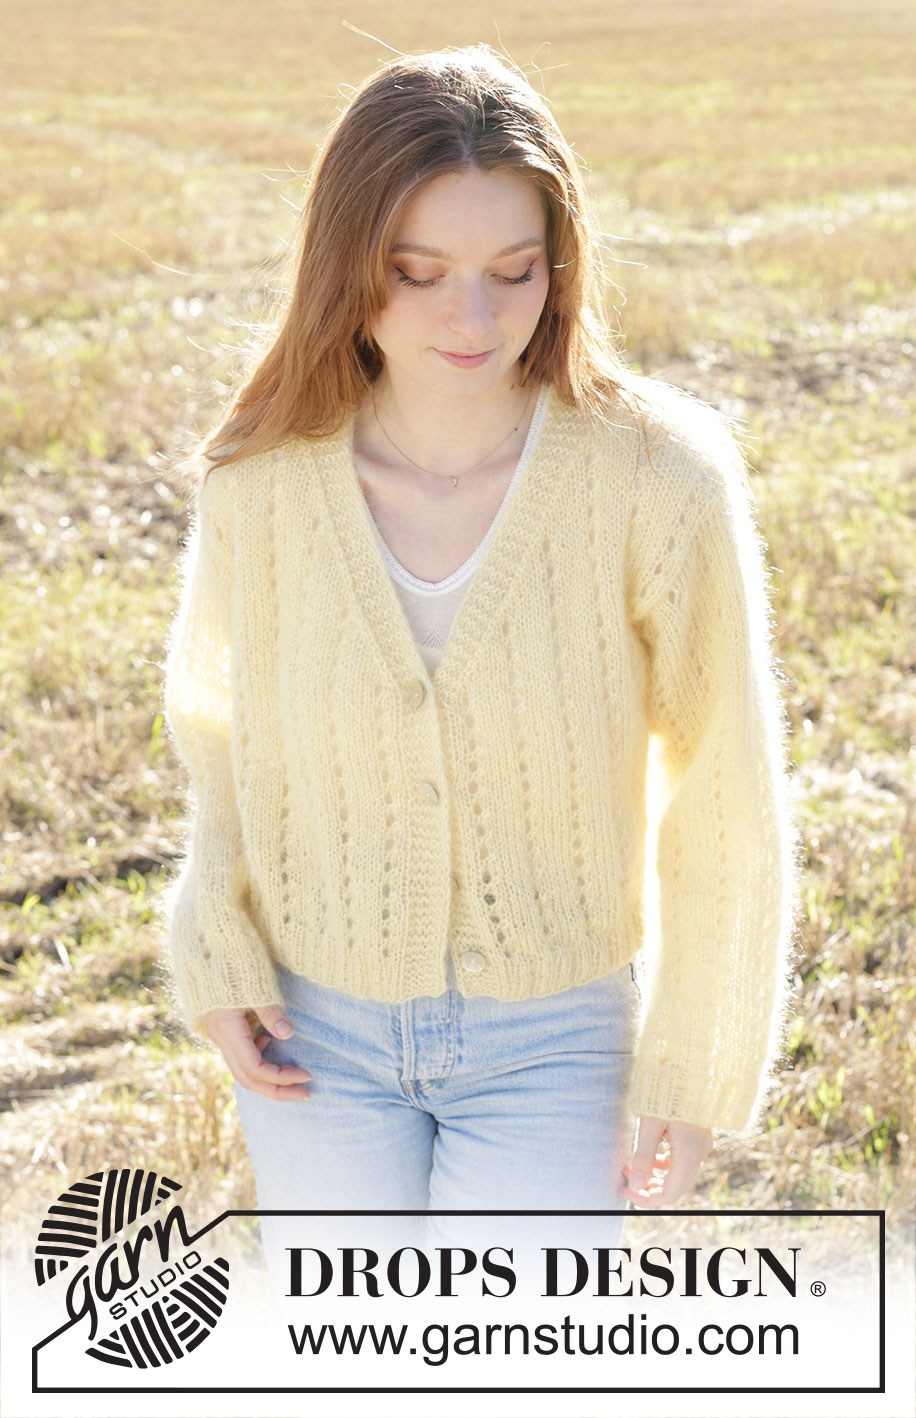
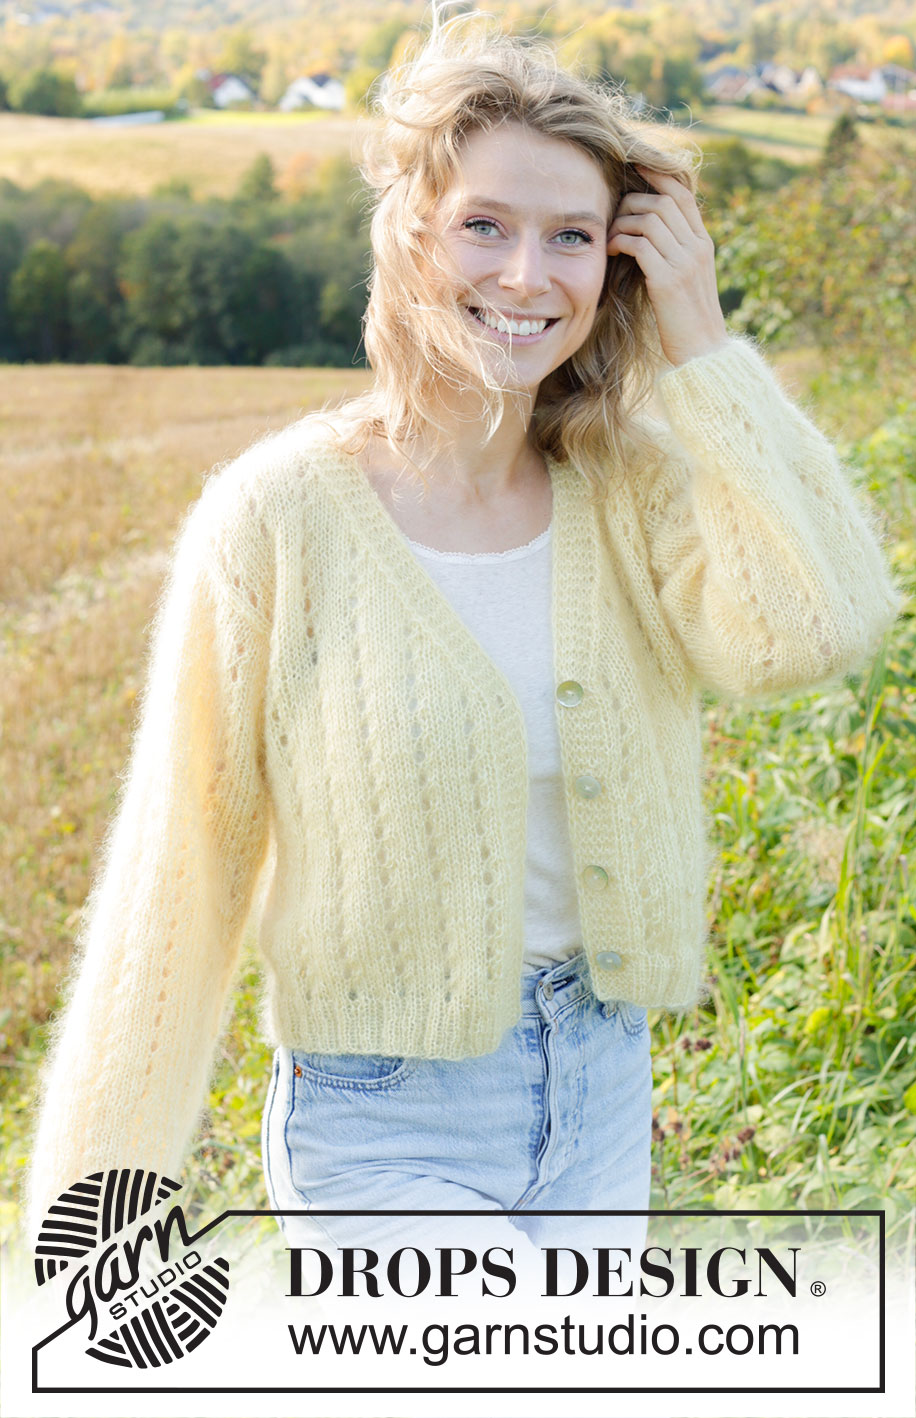
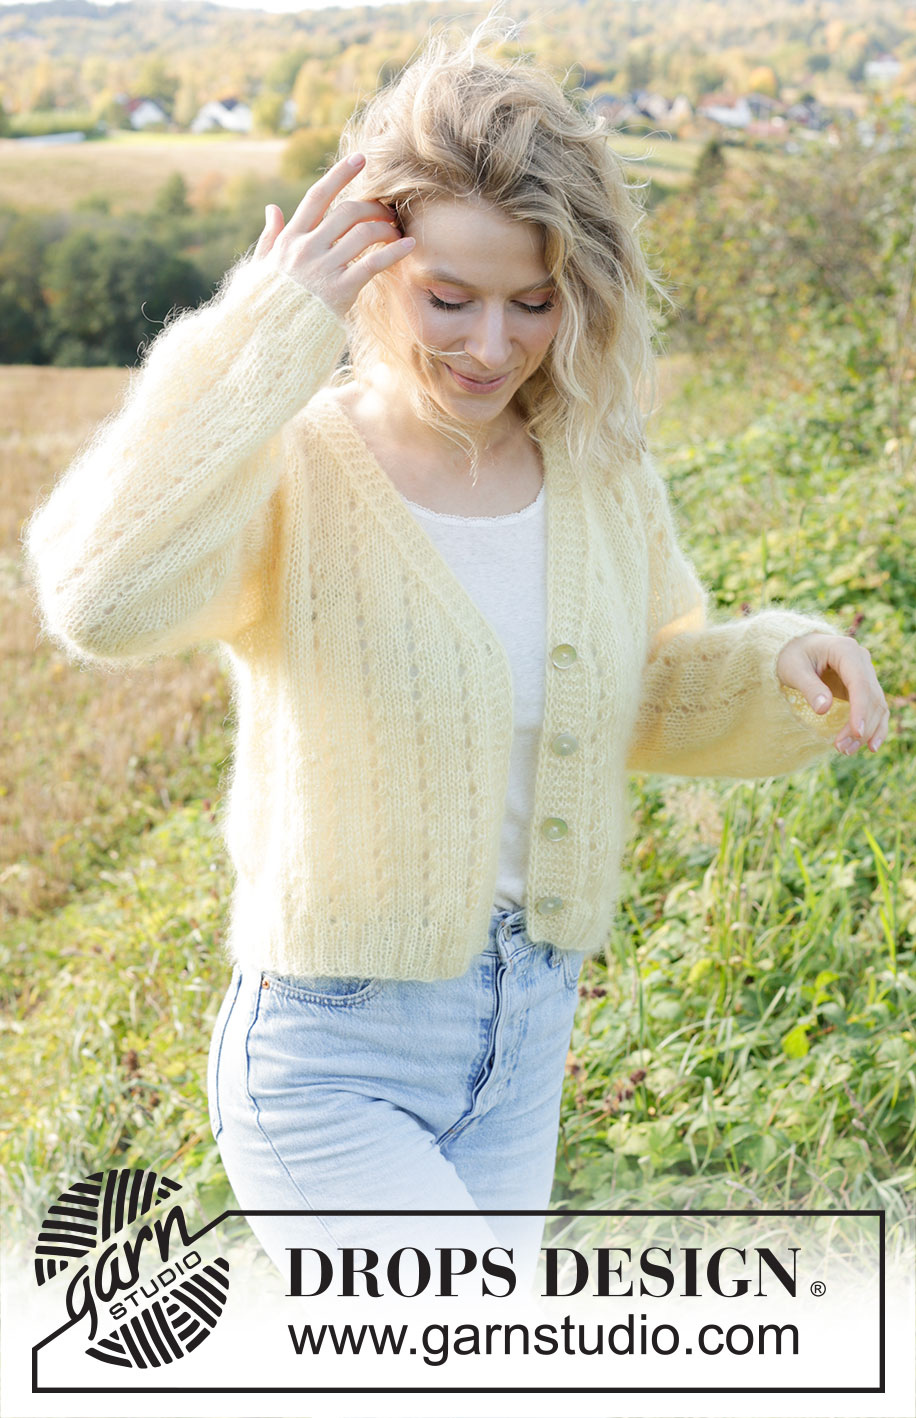
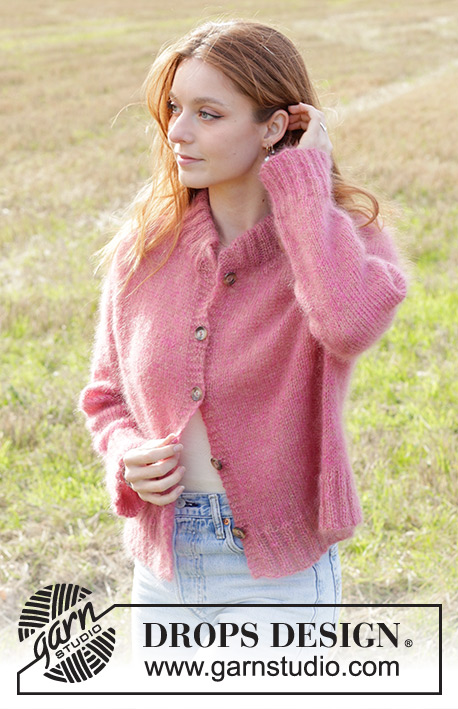
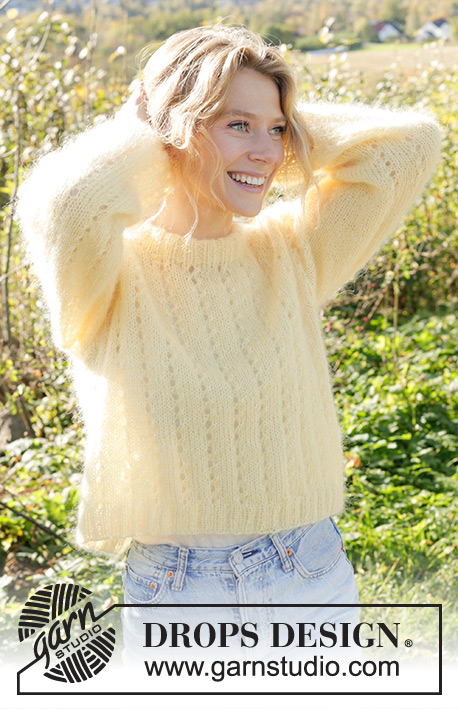
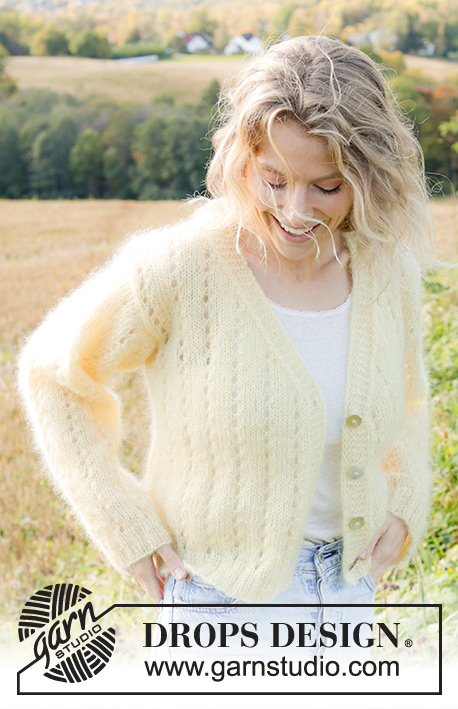
Knitted jacket in 3 strands DROPS Kid-Silk. The piece is worked bottom up with lace pattern, V-neck and I-cord. Sizes XS - XXL.
DROPS 249-6 |
|||||||||||||
|
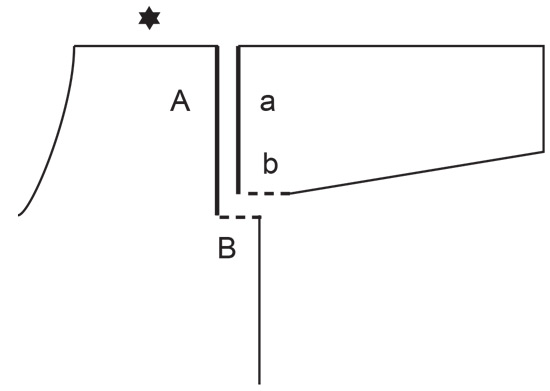
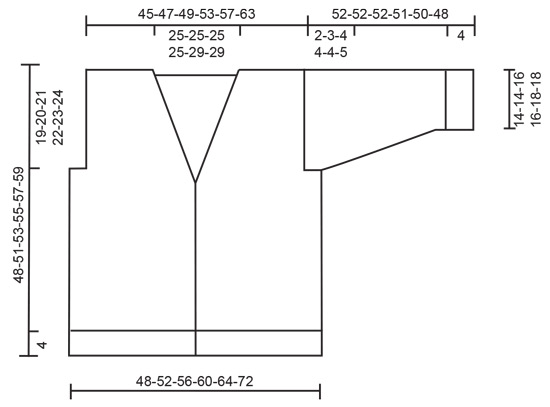
------------------------------------------------------- EXPLANATIONS FOR THE PATTERN: ------------------------------------------------------- GARTER STITCH (worked back and forth): Knit all rows. 1 ridge in height = knit 2 rows. BANDS WITH I-CORD: START OF ROW: Work the band as follows: Slip 1 stitch purl-wise, with yarn in front, knit 1, work 5 garter stitches. END OF ROW: Work the band as follows: Work until there are 7 stitches left on the row, work 5 garter stitches, slip 1 stitch purl-wise with yarn in front, knit 1. Work like this from both the right and wrong side. PATTERN: See diagram A.1. The diagram shows all rows in the pattern from the right side. BUTTONHOLES: Work the buttonholes on the right band. 1 BUTTONHOLE = knit together the 5th and 6th stitch from the edge and make 1 yarn over. On the next row knit the yarn over to leave a hole. Work the buttonholes when the piece measures XS: 4, 12, 19 and 26 cm S: 4, 12, 20 and 28 cm M: 4, 11, 17, 23 and 29 cm L: 4, 11, 17, 24 and 30 cm XL: 4, 11, 18, 25 and 31 cm XXL: 4, 11, 18, 25 and 32 cm V-NECK: All decreases are worked from the right side! Decrease for the V-neck inside the 7 band stitches on both front pieces. RIGHT FRONT PIECE: Work band as before, slip 1 stitch, knit 1, pass slipped stitch over. LEFT FRONT PIECE: Work until there are 9 stitches left, knit 2 together, work band as before. INCREASE TIP (for sleeves): Increase 1 stitch on each side of the marker-thread: Work until there is 1 stitch left before the marker-thread, make 1 yarn over, knit 2 (marker-thread sits between these 2 stitches), make 1 yarn over. On the next round work the yarn overs twisted to avoid holes. Then work the new stitches in stocking stitch. ------------------------------------------------------- START THE PIECE HERE: ------------------------------------------------------- JACKET – SHORT OVERVIEW OF THE PIECE: The pattern uses both long and short needles; start with the length which fits the number of stitches and change when necessary. The piece is worked back and forth, bottom up as far as the armholes, with band stitches on each side. The piece is divided and the front and back pieces are finished separately, back and forth. The sleeves are worked in the round as far as the armholes, then finished back and forth. The sections are sewn together. The bands are sewn to the neckline to finish. BODY: Cast on 204-220-236-252-268-300 stitches with circular needle size 3.5 mm and 3 strands DROPS Kid-Silk. Start from the right side and work the bands and rib as follows: 7 stitches BAND WITH I-CORD – read description above, * knit 2, purl 2 *, work from *-* until there are 9 stitches left, knit 2 and 7 stitches BAND WITH I-CORD. Work this rib back and forth for 4 cm, with the last row from the right side. Change to circular needle size 5 mm. Work as follows from the wrong side: 7 band stitches as before, purl and decrease 45-49-53-57-61-69 stitches evenly over the next 190-206-222-238-254-286 stitches, 7 band stitches as before = 159-171-183-195-207-231 stitches. Work as follows from the right side: The band as before – work the first BUTTONHOLE – read description above, work PATTERN A.1 over the first 30-35-36-36-42-47 stitches, knit 3-0-0-3-0-0, insert 1 marker-thread here, knit 6-8-12-12-12-14 (side), insert 1 marker-thread here, knit 4-0-1-4-1-0, work A.1 over the next 60-71-72-72-84-95 stitches, knit 3-0-0-3-0-0, insert 1 marker-thread here, knit 6-8-12-12-12-14 (side), insert 1 marker-thread here, knit 4-0-1-4-1-0, work A.1 over the next 29-35-35-35-41-47 stitches, work the band as before. Continue the bands and pattern, repeating A.1 in height with a lace pattern every 4th row (every 2nd row from the right side). REMEMBER THE KNITTING TENSION! Work until the piece measures 27-29-30-31-32-33 cm. Now start to decrease for the V-NECK – read description above. Continue the bands and A.1, and decrease for the V-neck on each side every 4th row 2 times, then every 2nd row 16-16-16-16-19-19 times, (a total of 18-18-18-18-21-21 stitches decreased on each side). NOTE! When decreasing for the V-neck, work any stitches which do not fit into the lace pattern in stocking stitch. 3-3-3-3-4-4 repeats of A.1 are decreased on each front piece. AT THE SAME TIME when the piece measures 29-31-32-33-34-35 cm, cast off for the armholes as follows: DIVIDE FOR ARMHOLES: On the next row from the right side divide for the armholes as follows: Work as before as far as the first marker-thread (right front piece), cast off 6-8-12-12-12-14 stitches for the armhole, work the next 67-71-73-79-85-95 stitches as before, 3rd marker-thread here (back piece), cast off 6-8-12-12-12-14 stitches for the armhole, work the remaining stitches as before (left front piece). The front and back pieces are finished separately. LEFT FRONT PIECE: The first row is from the wrong side. Work A.1 and the band as before, at the same time as you finish decreasing for the V-neck - making sure the pattern continues neatly. When the V-neck decreases are finished, there are 22-24-25-28-28-33 stitches on the front piece, with 2-3-3-3-3-4 repeats of the lace pattern on the shoulder. Continue working until the piece measures 48-51-53-55-57-59 cm. At the beginning of the next row from the armhole, cast off the first 15-17-18-21-21-26 stitches, leaving just the band. Work the band as before for a further 15-15-15-15-17-17 cm. Cast off. RIGHT FRONT PIECE: Work in the same way as the left front piece. BACK PIECE: = 67-71-73-79-85-95 stitches The first row is from the wrong side. Work A.1 back and forth as before – making sure the pattern continues neatly. When the piece measures 45-48-50-52-54-56 cm, cast off the middle 33-33-33-33-39-39 stitches for the neckline and finish each shoulder separately. On the next row from the neck cast off 2 stitches = 15-17-18-21-21-26 shoulder stitches. Work until the piece measures 48-51-53-55-57-59 cm. Cast off. Work the other shoulder in the same way. SLEEVES: Cast on 56-56-64-64-72-72 stitches with double pointed needles size 3.5 mm and 3 strands DROPS Kid-Silk. Work rib in the round (knit 2, purl 2) for 4 cm. Change to double pointed needles size 5 mm. Knit 1 round and decrease 14-14-16-16-18-18 stitches evenly spaced = 42-42-48-48-54-54 stitches. Insert 1 marker-thread at the beginning of the round. Work A.1 over all stitches. When the sleeve measures 11-6-9-7-7-7 cm, increase 1 stitch on each side of the marker-thread – read INCREASE TIP. Increase like this every 5-5-5-4½-5-4 cm a total of 8-9-8-9-8-9 times = 58-60-64-66-70-72 stitches. The new stitches are worked in stocking stitch, while the repeats of A.1 are continued (always 7-7-8-8-9-9 repeats of A.1). Continue working until the sleeve measures 50-49-48-47-46-43 cm, with the last round either row 1 or 3 in the diagram. Now divide at the marker-thread and continue back and forth until the sleeve measures 52-52-52-51-50-48 cm. Cast off. ASSEMBLY: Sew the shoulder seams. Sew the sleeve cap to the armhole, inside 1 stitch. Sew the split at the top of the sleeve to the bottom of the armhole – see sketch. Sew the buttons onto the left band. Sew the bands together mid-back and sew the bands to the neckline. |
|||||||||||||
Diagram explanations |
|||||||||||||
|
|||||||||||||
 |
|||||||||||||
 |
|||||||||||||
 |
|||||||||||||
Have you finished this pattern?Tag your pictures with #dropspattern #sunshinetrailcardigan or submit them to the #dropsfan gallery. Do you need help with this pattern?You'll find 28 tutorial videos, a Comments/Questions area and more by visiting the pattern on garnstudio.com. © 1982-2026 DROPS Design A/S. We reserve all rights. This document, including all its sub-sections, has copyrights. Read more about what you can do with our patterns at the bottom of each pattern on our site. |
|||||||||||||


With over 40 years in knitting and crochet design, DROPS Design offers one of the most extensive collections of free patterns on the internet - translated to 17 languages. As of today we count 324 catalogues and 12290 patterns translated into English (UK/cm). 12290
We work hard to bring you the best knitting and crochet have to offer, inspiration and advice as well as great quality yarns at incredible prices! Would you like to use our patterns for other than personal use? You can read what you are allowed to do in the Copyright text at the bottom of all our patterns. Happy crafting!
Post a comment to pattern DROPS 249-6
We would love to hear what you have to say about this pattern!
If you want to leave a question, please make sure you select the correct category in the form below, to speed up the answering process. Required fields are marked *.