
Popular categories
Looking for a yarn?


Comments / Questions (13)
![]() PEMANA wrote:
PEMANA wrote:
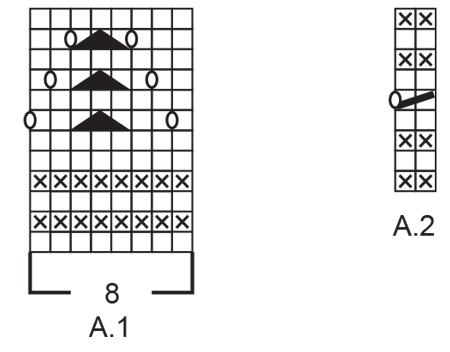
El gráfico A1 hay que empezarlo por abajo no? Para que el dibujo quede como en la foto .
08.10.2022 - 13:03DROPS Design answered:
Hola PEMANA, los diagramas se leen siempre de abajo arriba y de derecha a izquierda (en las filas por el lado derecho) o de izquierda a derecha (en las filas por el lado revés).
09.10.2022 - 18:55
![]() Steph wrote:
Steph wrote:
Hi, I’m very confused about how to knit the back of the head. Do you have a picture of the back and how it’s constructed? An example of how to knit the stitches from the side threads into the midsection would be very helpful. Thank you!
27.09.2022 - 00:46DROPS Design answered:
Dear Steph, you will work the stitches on mid back in garter stitch, and at the same time you will work at the beginning of every row from the right side the first stitch on row + the next stitch on the side together and at the end of the same row you will work the last stitch on mid back with the next stitch on the side together. see DECREASE TIP-1:. Happy knitting!
27.09.2022 - 09:15
![]() Wilma Vinton wrote:
Wilma Vinton wrote:
I would like to make this pattern, but I don't quite understand what is meant by the section "Place the outer most 27... stitched on each side on separate threads/extra needles.... through to the end. Do you only knit the sides, when you are decreasing? Thanks Wilma
12.06.2022 - 09:07DROPS Design answered:
Dear Mrs Vinton, you will now work the back of the head, so you slip the first and last 27 stitches on a thread and work now the remaining 21 stitches on needle (middle of piece), and now work garter stitch and at the same time, work the last of these 21 stiches together with the next stitch slipped on a thread at the end of every row until all the 27 stitches on each side have been worked together with the edge stitches of the middle section (and then decrease at the middle of this section) Happy knitting!
13.06.2022 - 09:28
|
||||||||||||||||
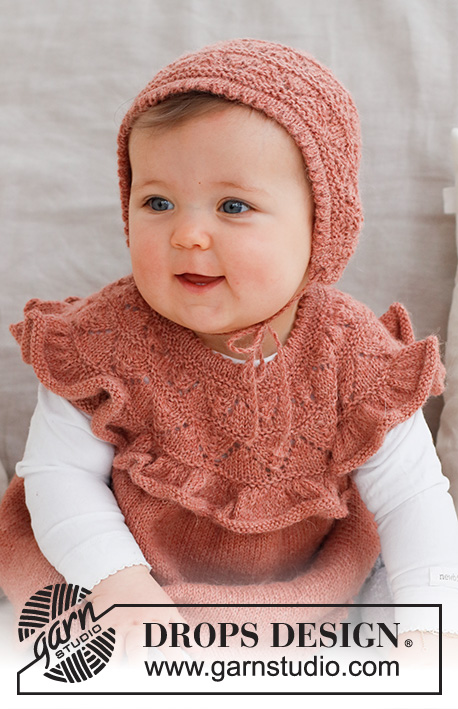
Sweet Primrose Bonnet#sweetprimrosebonnet |
||||||||||||||||
 |
 |
|||||||||||||||
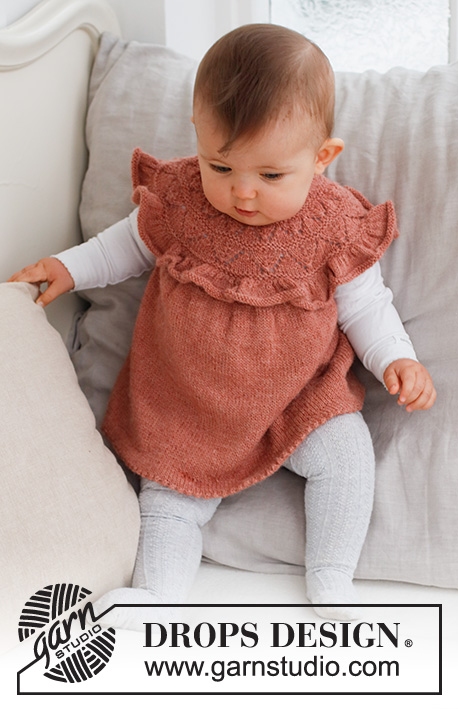
Knitted hat / bonnet for baby in DROPS Alpaca. The piece is worked with lace pattern. Sizes 0 – 2 years.
DROPS Baby 43-16 |
||||||||||||||||
|
------------------------------------------------------- EXPLANATIONS FOR THE PATTERN: ------------------------------------------------------- RIDGE/GARTER STITCH (worked back and forth): Knit all rows. 1 ridge = knit 2 rows. PATTERN: See diagrams A.1 and A.2. The diagrams show all rows in the pattern from the right side. DECREASE TIP-1: All decreases are worked from the right side! BEFORE THE MID-SECTION: Knit together the last stitch from the thread/extra needle and the first stitch from the mid-section. AFTER THE MID-SECTION: Knit twisted together the last stitch from the mid-section and the first stitch from the thread/extra needle. DECREASE TIP-2: All decreases are worked from the right side! AT THE BEGINNING OF THE MID-SECTION: Work the outermost stitch of mid-section together with the next stitch from thread/extra needle as before, knit the next 2 stitches together. AT THE END OF THE MID-SECTION: Work until there are 3 stitches left on the mid-section, knit 2 twisted together, knit the last stitch together with the next stitch from thread/extra needle as before. ------------------------------------------------------- START THE PIECE HERE: ------------------------------------------------------- HAT – SHORT OVERVIEW OF THE PIECE: The piece is worked back and forth with circular needle from mid-front. Side stitches are placed on a thread and the mid-section is worked separately, then knitted together with the stitches on the threads. A lace edge is worked around the hat and a twisted cord threaded through the holes to finish. HAT: Cast on 75-83-91 (99) stitches with circular needle size 3 mm and DROPS Alpaca. Change to circular needle size 2.5 mm and work 4 rows of stocking stitch with 1 stitch in GARTER STITCH on each side – read description above. Work the next row from the right side as follows: 1 stitch in garter stitch, * knit 2 together, 1 yarn over *, work from *-* until there are 2 stitches left, knit 1 and 1 stitch in garter stitch (folding edge). Work 5 rows of stocking stitch with 1 stitch in garter stitch on each side. Change to circular needle size 3 mm. Work the next row from the right side as follows: 1 stitch in garter stitch, work A.1, 9-10-11 (12) times, work the first stitch in A.1 so the pattern is symmetrical and 1 stitch in garter stitch. Continue this pattern back and forth. REMEMBER THE KNITTING TENSION! Work until the piece measures approx. 11-12-13 (14) cm from the folding edge – finish after row 4 or 12 in A.1. Place the outermost 27-30-33-36 stitches on each side on separate threads/extra needles. There are 21-23-25-27 stitches on the needle (mid-section). Cut the strand. Start from the right side and work garter stitch back and forth over the mid-section – AT THE SAME TIME on each row from the right side work together the outermost stitch on each thread/extra needle with its nearest stitch from the mid-section – read DECREASE TIP-1. AT THE SAME TIME when the mid-section measures 4-4-5 (5) cm decrease 1 stitch on each side of the mid-section – read DECREASE TIP-2. Repeat this decrease when the mid-section measures 7-7-8 (9) cm and 10-10-11 (13) cm = 15-17-19 (21) stitches on the mid-section. Continue working until all the stitches from the threads/extra needles have been worked together with the mid-section. Keep the stitches on the needle. ASSEMBLY: Fold the edge of the hat to the wrong side and sew down, giving a double edge. To avoid the edge being tight and rolling outwards it is important that the seam is elastic. LACE EDGE: Start from the right side at the bottom, using circular needle size 2.5 mm and knit up 28-31-34 (35) stitches inside the 1 edge stitch from the folded edge and up to the mid-section, knit the 15-17-19 (21) stitches from the mid-section and knit up 28-31-34 (35) stitches inside the 1 edge stitch from the mid-section to the folded edge = 71-79-87 (91) stitches (the number of stitches should be divisible by 4 + 3). Start from the wrong side and work A.2 (on row 5 in A.2 work the symbols from the wrong side, i.e. knit 2 together, 1 yarn over). When A.2 is finished change to circular needle size 3 mm. Cast off. TWISTED CORD: Cut 2 strands DROPS Alpaca of 3 metres. Twist them together until they begin to resist, fold the cord double and it will continue to twist. Tie a knot in each end. Thread the cord through the row of holes along the edge. |
||||||||||||||||
Diagram explanations |
||||||||||||||||
|
||||||||||||||||
 |
||||||||||||||||
Have you finished this pattern?Tag your pictures with #dropspattern #sweetprimrosebonnet or submit them to the #dropsfan gallery. Do you need help with this pattern?You'll find 21 tutorial videos, a Comments/Questions area and more by visiting the pattern on garnstudio.com. © 1982-2026 DROPS Design A/S. We reserve all rights. This document, including all its sub-sections, has copyrights. Read more about what you can do with our patterns at the bottom of each pattern on our site. |
||||||||||||||||


With over 40 years in knitting and crochet design, DROPS Design offers one of the most extensive collections of free patterns on the internet - translated to 17 languages. As of today we count 324 catalogues and 12290 patterns translated into English (UK/cm). 12290
We work hard to bring you the best knitting and crochet have to offer, inspiration and advice as well as great quality yarns at incredible prices! Would you like to use our patterns for other than personal use? You can read what you are allowed to do in the Copyright text at the bottom of all our patterns. Happy crafting!
Post a comment to pattern DROPS Baby 43-16
We would love to hear what you have to say about this pattern!
If you want to leave a question, please make sure you select the correct category in the form below, to speed up the answering process. Required fields are marked *.