Comments / Questions (64)
![]() Nathalie Lefort wrote:
Nathalie Lefort wrote:
Comment faire les manches sur cette combinaison je vous remercie beaucoup
16.02.2025 - 05:30DROPS Design answered:
Bonjour Mme Lefort, cette combinaison se crochète de haut en bas en commençant par l'empiècement, on va augmenter pour le raglan et ainsi former et augmenter pour les devants, les manches et le dos, comme dans cette vidéo. Bon crochet!
17.02.2025 - 09:17
![]() Melanie wrote:
Melanie wrote:
Still not clear I’m afraid . What do I do with the side of the triple from yoke and is the starting chain 2 to be stitched later to the chain 2 from the yoke
16.01.2025 - 09:00DROPS Design answered:
Dear Melanie, when you start with the chainstitches, then you crochet your trebles (UK) to the top of the stitches from the yoke. At the end of the round you close the round with a slip stitch to the chainstitch at the beginning of the round. And yes, there will be a hole underarm, that should be closed with a couple of stitches (as the pattern says under "assembly "Sew the openings under the sleeves". Happy Crafting!
18.01.2025 - 01:28
![]() Melanie wrote:
Melanie wrote:
I don’t understand the sleeve starting . After finishing the yoke , there are , 4 chain under the arm , the side of a Triple and 32 stitches and then the side of a triple ! Where do I start ?
15.01.2025 - 17:34DROPS Design answered:
Dear Melanie, you should start working on the sleeves at the middle of the undersleeve. Happy Crafting!
16.01.2025 - 01:23
![]() Abby wrote:
Abby wrote:
Thenk you very much for the fast answer! One more question please: as I understand I don't work the 4 chain at the bottom of the sleeve, right? Only the (skipped) 28 sts and chain 2 x 2 =32 back and forth?
28.11.2024 - 21:24DROPS Design answered:
Dear Abby, for your size you would work: 1 dc in 2nd ch from hook, 1 dc in every tr from previous row and 1 dc in each of the 2 ch from beg of previous row. You can't work over more chain stitches because you have no more chain stitches for your size; the instructions refer to the larger sizes, which had more chain stitches at the beginning of the row. Happy crochetting!
07.12.2024 - 19:20
![]() Abby wrote:
Abby wrote:
Hi! I don't understand the sleeve part (smallest size): "work 1 dc in each of the next 0-0-0-1 (1-2) ch, 1 dc in every tr from previous row and 1 dc in each of the 2-2-2-3 (3-4) ch from beg of previous row" I understand that I need to work back and forth, What is :"The next 0 ch"? Thank you!
27.11.2024 - 21:05DROPS Design answered:
Dear Abby, in this size you just don't work these dc; so in this example, just work 1 dc one very tr from previous row and 1 dc in each of the 2 chains from beg of previous row. Happy crocheting!
28.11.2024 - 10:02
![]() Helena Skoglund wrote:
Helena Skoglund wrote:
Alltså jag virkar baby blues och förstår inte vad som menas med att man virkar 2 LM över de 2 LM från förra varvet i raglanlinjetna?!
08.03.2024 - 13:14DROPS Design answered:
Hei Helena. Du har 4 raglanlinjer og midt i disse raglanlinjene hekles det 2 luftmasker. I disse luftmaskene økes det til raglan (les i oppskriften når og hvordan det økes), men på hver rad med fastmasker fra vrangen hekles det 2 luftmasker (LM) over de 2 luftmaskene (LM) fra forrige rad i raglanlinjene. mvh DROPS Design
11.03.2024 - 13:48
![]() Marta wrote:
Marta wrote:
Come posso lavorare un modello fatto con uncinetto 4.5 con filato n.3? Che uncinetto devo usare? Quante maglie devo aggiungere?
07.02.2024 - 00:59DROPS Design answered:
Buonasera Marta, per un'assistenza così personalizzata può rivolgersi al suo rivenditore DROPS di fiducia. Buon lavoro!
10.02.2024 - 19:13
![]() Emma Kristine Eliasen wrote:
Emma Kristine Eliasen wrote:
Kære Drops. Jeg forstår ikke hvorfor der kun beregnes 12 ekstra stm i dette trin, istedet for 16: "Hækl 1 st i hver fm, men i hver fm med mærketråd i hækles der 2 st + 2 lm + 2 st = 56-60-64-64 (68-68) st på rækken.", da man laver buer x4? Er det en fejl i opskriften eller er der noget jeg misforstår? :)
21.01.2024 - 14:39
![]() Pernille Skovlys Larsen wrote:
Pernille Skovlys Larsen wrote:
Jeg ønsker at bruge DROPS Baby Merino i stedet for, det er dog i gruppe A og jeg kan simpelthen ikke regne ud om det kan lade sig gøre med en tråd eller om jeg skal bruge to tråde, fordi A+A burde give C og ikke B. Hvad ville i her anbefale?
18.01.2024 - 11:14DROPS Design answered:
Hei Pernille. I oppskriften er det brukt garn fra garngruppe B og om du ønsker å bruke 2 tråder fra garngruppe A vil dette bli for tykt og oppskriften/målene vil ikke stemme. Om du ønsker å bruke DROPS Baby Merino kan du ta en titt på DROPS Baby 29-5, den er heklet med 1 tråd, med lignende strukturmønster og du kan legge til striper. mvh DROPS Design
18.01.2024 - 11:58
![]() Corinne wrote:
Corinne wrote:
Bonjour. Vous écrivez: "Après la dernière augmentation pour le raglan, crocheter 1 rang de ms sur l'envers comme avant." ok, mais que dois je faire au dessus des deux ml du rang précédant? des ml ou des ms? si je dois faire des ml comme avant, je ne les compte donc pas lorsque je dois sauter des mailles, je me trompe? Cordialement.
27.11.2023 - 08:33DROPS Design answered:
Bonjour Corinne, vous crochetez sur l'envers exactement comme avant, autrement dit avec 2 mailles en l'air à chaque raglan., ces mailles en l'air ne comptent effectivement pas au rang suivant. Bon crochet!
27.11.2023 - 10:18
Baby Blues#babybluesoverall |
|
 |
 |
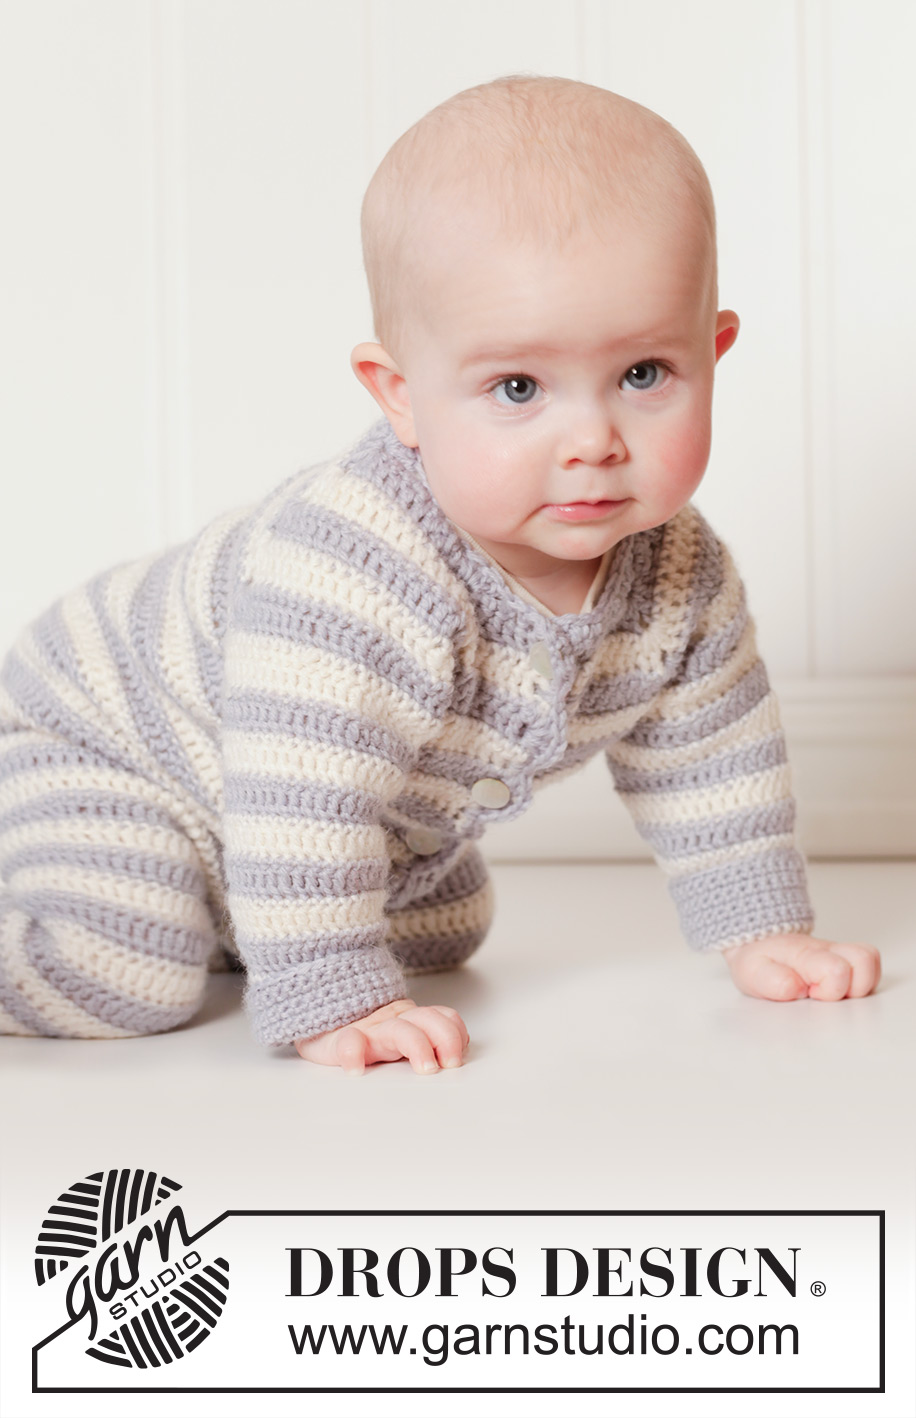
Crochet baby overall with raglan and stripes in DROPS Karisma. Size 0 - 4 years.
DROPS Baby 25-34 |
|
|
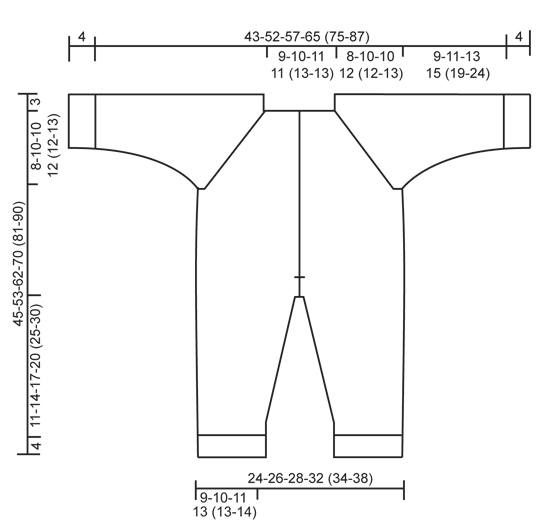
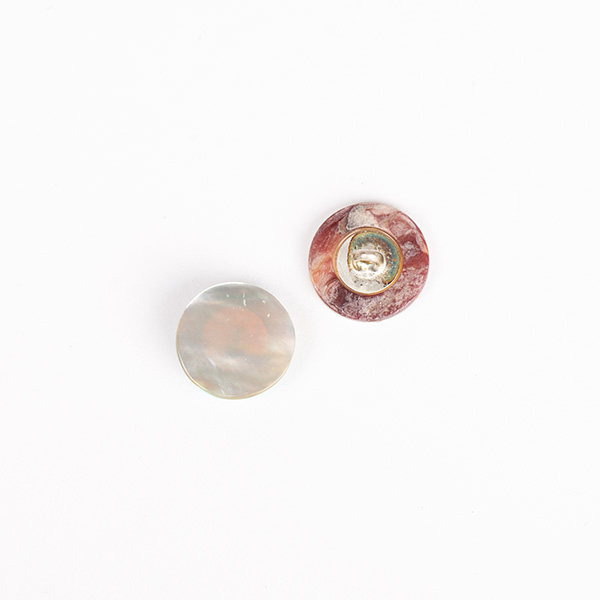
CROCHET INFO: Replace first dc at beg of every dc row with 1 ch, finish row with 1 dc in 3rd ch from beg of previous row. Replace first tr at beg of every tr row with 3 ch, finish row with 1 tr in ch from beg of previous row. TEXTURE ROWS: * 1 row dc (worked from WS), 1 row tr (worked from RS) *, repeat from *-* (1 row dc + 1 row tr = 1 texture row). STRIPES: Work entire suit in stripes as follows: * 1 row dc from WS with off white and then 1 row tr from RS with off white, 1 row dc from WS with light blue grey and then 1 row tr from RS with light blue grey *, repeat from *-*. INCREASE TIP: Inc 1 dc/tr by working 2 dc/tr in same st. DECREASE TIP: Work 1 dc/tr but wait with last pull through (= 2 sts on hook), then work next dc/tr but on last pull through, pull yarn through all sts on hook = 1 dc/tr dec. ---------------------------------------------------------- SUIT: The piece is worked top down. Worked back and forth from mid front. YOKE: Work 37-41-45-45 (49-49) LOOSE ch on hook size 4.5 mm with light blue grey. Work 1 dc in 2nd ch from hook, then work 1 dc in every ch the entire row = 36-40-44-44 (48-48) dc. Turn piece and work 1 row with dc back from WS while AT THE SAME TIME inc 8 dc evenly – READ INCREASE TIP = 44-48-52-52 (56-56) dc on row. Now insert 4 markers in piece for raglan as follows (beg mid front – NOTE: Do NOT work while inserting markers): Skip 6-7-8-8 (9-9) dc (= left front piece), insert 1 marker in next dc, skip 8 dc (= sleeve), insert 1 marker in next dc, skip 12-14-16-16 (18-18) dc (= back piece), insert 1 marker in next dc, skip 8 dc (= sleeve) and insert last marker in next dc (there are now 6-7-8-8 (9-9) dc on right front piece after last marker). READ ALL OF THE FOLLOWING SECTION BEFORE CONTINUING: Work next row as follows from RS: Work 1 tr in every dc but in every dc with marker work 2 tr + 2 ch + 2 tr = 56-60-64-64 (68-68) tr on row. Then work TEXTURE ROWS and STRIPES – see explanation above (work back and forth with 1 dc/tr in every st from previous row but on every row with dc from WS work 2 ch over the 2 ch from previous row in raglan lines). AT THE SAME TIME on 1st row from RS (i.e. row with tr) inc for raglan as follows: Work 2 tr + 2 ch + 2 tr in every ch-space in every raglan line (= 16 tr inc on row - NOTE: Work in both ch-spaces). Repeat inc on every row from RS 3-4-4-5 (5-6) more times (= 4-5-5-6 (6-7) times in total) = 120-140-144-160 (164-180) sts. REMEMBER THE CROCHET TENSION! After last inc for raglan work 1 row with dc from WS as before. Work next row as follows from RS: Work 1 tr in each of the first 16-19-20-22 (23-25) dc (= left front piece), skip the next 28-32-32-36 (36-40) dc (= sleeve), work 4-4-4-6 (6-8) ch, work 1 tr in each of the next 32-38-40-44 (46-50) dc (= back piece), skip the next 28-32-32-36 (36-40) dc (= sleeve), work 4-4-4-6 (6-8) ch and work 1 tr in each of the last 16-19-20-22 (23-25) dc (= right front piece). Then finish body and sleeves separately. BODY: NOW MEASURE PIECE FROM HERE! Work 1st row from WS – work 1 dc in every tr from previous row and 1 dc in each of the 4-4-4-6 (6-8) ch under each armhole = 72-84-88-100 (104-116) dc on row. Continue back and forth with texture rows and stripes as before – remember CROCHET INFO! AT THE SAME TIME on 1st row (= tr from RS), inc 4-0-2-2 (4-6) tr evenly = 76-84-90-102 (108-122) tr. When piece measures approx. 24-29-34-39 (44-48) cm from neck (i.e. approx. 27-32-37-42 (47-51) cm from shoulder) – adjust so that last row is 1 row with off white and tr from RS, finish opening for band mid front. Insert a marker in each side. Continue back and forth as before. When piece measures 27-32-38-43 (49-53) cm from neck (and 30-35-41-46 (52-56) cm from shoulder), divide for legs and finish each leg separately. LEG: Insert 1 marker – NOW MEASURE PIECE FROM HERE. Continue with texture rows and stripes back and forth over the first 38-42-45-51 (54-61) sts on row (i.e. over half of sts). When leg measures 2 cm from marker, dec 1 dc/tr in each side - READ DECREASE TIP. Repeat dec every 2-2-3-3½ (3½-3½) cm 4-4-4-4 (5-7) more times (= 5-5-5-5 (6-8) times in total) = 28-32-35-41 (42-45) sts. When leg measures 11-14-17-20 (25-30) cm from marker, switch to light blue grey and work dc back and forth for 4 cm. Fasten off. Leg measures approx. 15-18-21-24 (29-34) cm and entire suit measures approx. 45-53-62-70 (81-90) cm from shoulder. Work the other leg the same way. SLEEVE: = 28-32-32-36 (36-40) sts. Insert 1 marker here – NOW MEASURE PIECE FROM HERE. Work first row as follows from RS (continue stripes as before): Work 2-2-2-3 (3-4) ch, work 1 tr in every st and work 2-2-2-3 (3-4) ch. Turn piece, work 1 dc in 2nd ch from hook, work 1 dc in each of the next 0-0-0-1 (1-2) ch, 1 dc in every tr from previous row and 1 dc in each of the 2-2-2-3 (3-4) ch from beg of previous row = 32-36-36-42 (42-48) sts on row. Continue the texture rows and stripes back and forth as before. AT THE SAME TIME when sleeve measures 2 cm from marker, dec 1 st in each side - READ DECREASE TIP. Repeat dec every 2-2-2½-2 (2-2) cm 3-4-4-7 (7-9) more times (= 4-5-5-8 (8-10) times in total) = 24-26-26-26 (26-28) sts. When sleeve measures 9-11-13-15 (19-24) cm from marker, switch to light blue grey. Work dc back and forth for 4 cm, fasten off. Sleeve measures 13-15-17-19 (23-28) cm from marker. Work the other sleeve the same way. ASSEMBLY: Sew sleeve seams tog edge to edge in front loop of outermost sts. Sew the openings under the sleeves. Fold if desired the edge at the bottom of sleeves. Sew the opening mid front from markers where band ends and down to dividing for legs - sew in front loop of outermost st. LEFT BAND: Beg from WS at the bottom on left front piece with light blue grey and work 1 dc in tr at the edge on the off white stripe, * work 2 tr + 2 ch + 2 tr in next tr (i.e. in tr at the edge on light blue grey stripe), 1 dc in next tr (i.e. in tr at the edge on off white stripe) *, repeat from *-* up along left front piece to neck and finish with 1 sl st at the edge on corner by neck. Turn piece and work as follows back from RS: 3 ch (= 1 tr), then work 1 tr between every st and 1 tr in ch-space in every tr-group. Fasten off. Fasten band at the bottom by dividing for legs. RIGHT BAND AND NECK EDGE: Work as left band but beg from RS at the bottom on right front piece, work as left band up to neck but instead of finishing with 1 sl st in the corner by neck, continue edge around the neck as follows: Work 1 dc in every st along the neck until 3 sts remain before raglan line, skip these 3 sts and work 4 tr in st in raglan line, skip the next 3 sts and continue with 1 dc in every st until 3 sts remain before next raglan line, skip these 3 sts and work 4 tr in st in next raglan line. Continue like this around the neck and finish with 1 sl st at the edge on row. Turn piece and work 2nd row as on left band. Fasten off. MORE ASSEMBLY: Sew the buttons on to the left band. Beg with 1 button in the upper light blue grey stripe, then place 1 button in every other light blue grey stripe. Button through hole on the inside of "fan" on band. |
|
 |
|
Have you finished this pattern?Tag your pictures with #dropspattern #babybluesoverall or submit them to the #dropsfan gallery. Do you need help with this pattern?You'll find 10 tutorial videos, a Comments/Questions area and more by visiting the pattern on garnstudio.com. © 1982-2026 DROPS Design A/S. We reserve all rights. This document, including all its sub-sections, has copyrights. Read more about what you can do with our patterns at the bottom of each pattern on our site. |
|


Post a comment to pattern DROPS Baby 25-34
We would love to hear what you have to say about this pattern!
If you want to leave a question, please make sure you select the correct category in the form below, to speed up the answering process. Required fields are marked *.