
Popular categories
Looking for a yarn?


Comments / Questions (27)
![]() Laurence Epars wrote:
Laurence Epars wrote:
Bonjour, Anse à faire mais je ne comprends pas l'explication pouvez-vous m'éclaircir sur ce point ? Je comprends mieux les diagrammes si jamais. Merci pour ce joli modèle néanmoins explications pas facile à comprendre pour moi. Cordialement.
16.03.2026 - 09:34DROPS Design answered:
Bonjour Mme Epars, les anses se crochètent au 1er rang sur 15 mailles d'un côté du sac, en même temps, diminuer en sautant la dernière maille à la fin de chaque rang (tournez quand il reste 1 maille, sans la crocheter et crochetez le rang suivant de la même façon; 15 ms au 1er rang, 14 au 2ème rang, etc.. ); quand il reste 6 mailles, crochetez 1 mc dans la 1ère m du rang et continuez en rond, en mailles serrées, en même temps, crochetez M.2 (nopes) tous les 6 tours. À 20 cm arrêtez. Crochetez l'autre anse de la même façon de l'autre côté du sac et assemblez les 2 parties ensemble. Bon crochet!
16.03.2026 - 16:12
![]() Hanna wrote:
Hanna wrote:
Hej! Om man vill virka muscherna i endast en färg, hur många nystan behöver man? Tack.
09.07.2025 - 22:32DROPS Design answered:
Hei Hanna. Det har vi dessverre ikke oversikten over. mvh DROPS Design
11.07.2025 - 12:02
![]() Belouchat wrote:
Belouchat wrote:
Bonjour Merci pour votre réponse et finalement j’ai fini par comprendre les explications.
08.07.2025 - 16:26
![]() Belouchat wrote:
Belouchat wrote:
C’est un très joli sac , cependant la laine drop Paris n’est pas facile à crocheter surtout pour le point pop corn et j’ai eu un peu de mal avec la anse mais j’ai réussi et c’est super !!!!!
08.07.2025 - 16:24
![]() Belouchat wrote:
Belouchat wrote:
Je ne comprends pas comment crocheter l’anse ?
01.07.2025 - 20:32DROPS Design answered:
Dites-nous si la réponse ci-dessous a pu vous aider. Si ce n'est pas le cas, n'hésitez pas à préciser la partie que vous ne comprenez pas pour que l'on puisse vous aider. Merci pour votre compréhension.
02.07.2025 - 16:01
![]() Belouchat wrote:
Belouchat wrote:
Bonjour Je m’apprête à faire les anses et je ne comprends pas bien qd il nous reste 6 mailles , les 6 mailles en l’air ensuite??
01.07.2025 - 20:24DROPS Design answered:
Bonjour Mme Belouchat, lorsqu'il ne reste que 6 mailles serrées, vous crochetez désormais en rond, à la fin d'un rang sur l'endroit, crochetez 6 mailles en l'air (= vous avez maintenant 6 mailles serrées + 6 mailles en l'air), fermez en rond avec 1 maille coulée dans la 1ère des 6 mailles serrées, puis vous continuez en mailles serrées (= 1 maille serrée dans chaque maille serrée/maille en l'air) = 12 mailles serrées au total par tour. Et, tous les 6 tours, crochetez M.2. Bon crochet!
02.07.2025 - 16:00
![]() Christiane wrote:
Christiane wrote:
Bonsoir un grand merci pour vos explcations j,adore vos fils ainsi que vos modéles bonne soirée , cordialement
18.04.2024 - 18:16
![]() Christiane wrote:
Christiane wrote:
Donc rang 1 (2 ms en mauve clair et une noppe etc...) puis rang 2 ( 2 brides dans 1 ms et 1 ms sur la noppe est ce bien cela merci cordialement
18.04.2024 - 14:34DROPS Design answered:
Cf réponse ci-dessous :) (mais suivez bien les couleurs indiquées dans les explications écrites). Bon crochet!
18.04.2024 - 15:59
![]() Christiane wrote:
Christiane wrote:
Bonjour je ne comprend pas le rang n° 1 et 2 du diagramme M1 pour le sac bubble gum modele W-379 merci de me répondre , cordialement
18.04.2024 - 14:20DROPS Design answered:
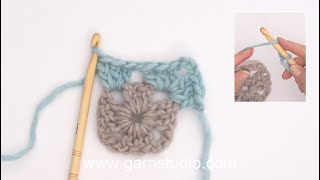
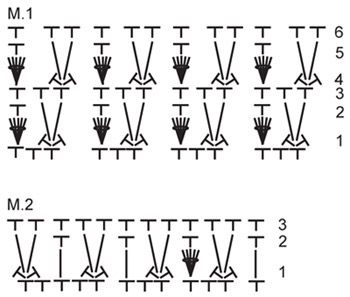
Bonjour Christiane, au 1er rang, crochetez *2 ms dans la même maille, sautez 1 m, 4 brides écoulées ensemble dans la maille suivante*, répétez de *-*. Au 2ème rang, crochetez: *2 brides entre les 2 mailles serrées, 1 maille serrée en haut des 4 brides écoulées ensemble* répétez de *-*. Au 3ème rang, crochetez 1 ms dans chaque maille. Répétez ces 3 rangs. Bon crochet!
18.04.2024 - 15:54
![]() Katleen Imbert wrote:
Katleen Imbert wrote:
Ok, super bedankt, kijk ernaar uit om dit projectje verder te haken;)
06.03.2024 - 12:57
|
||||||||||
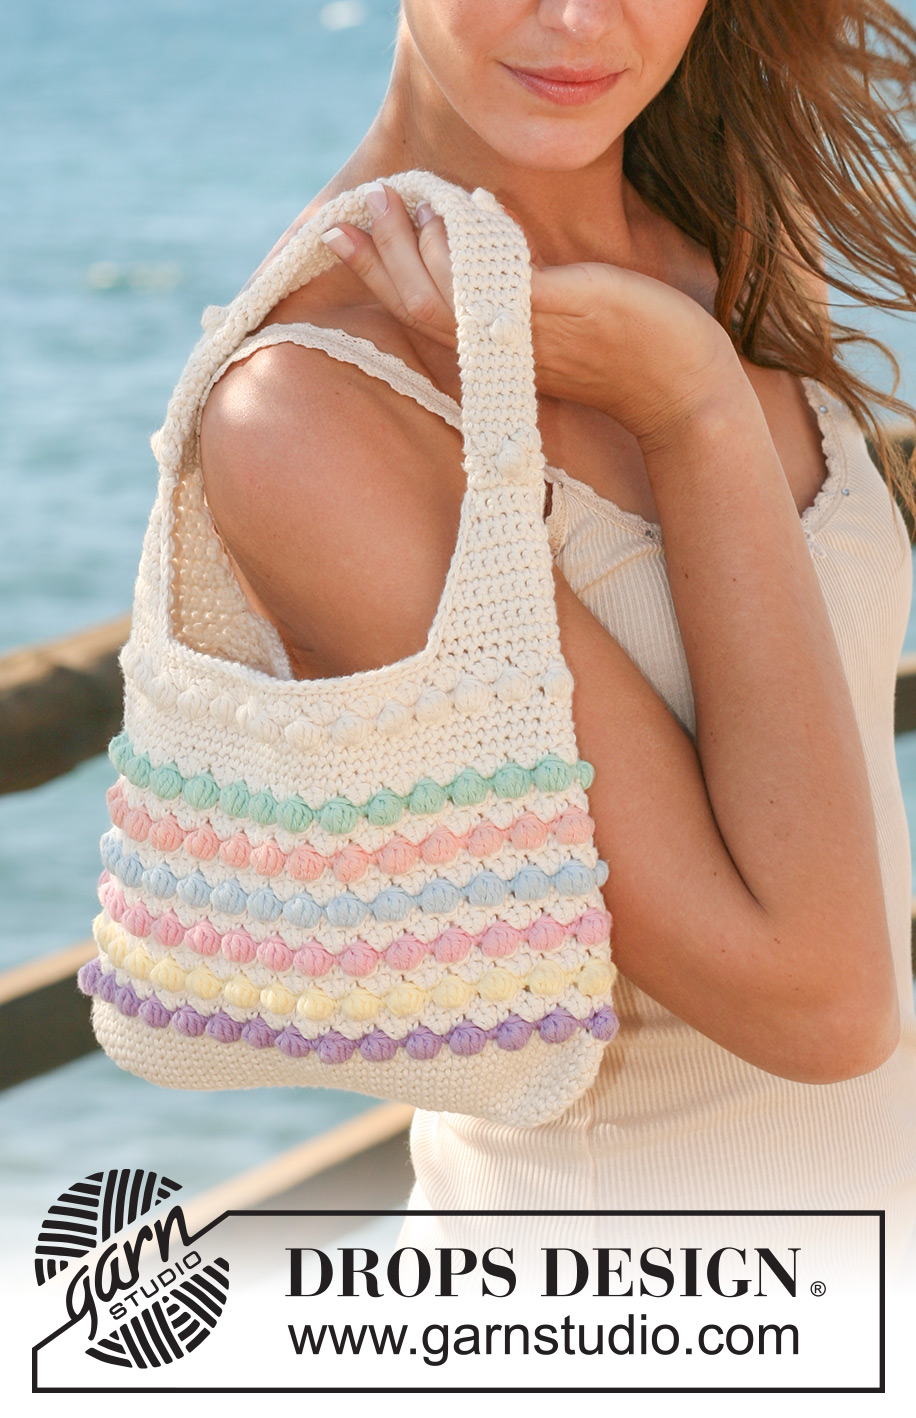
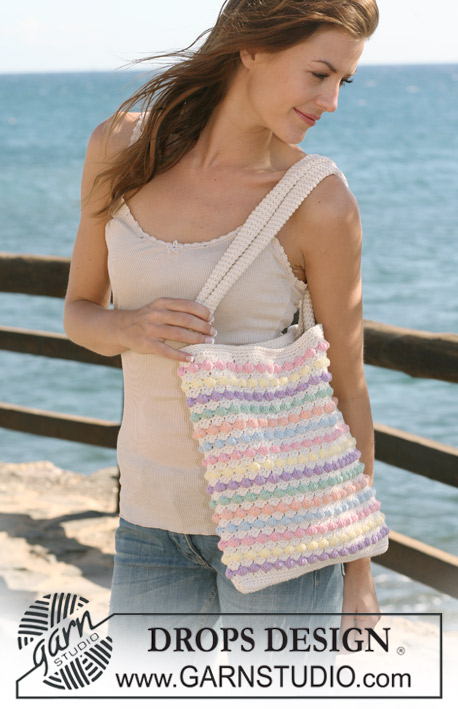
Bubble Gum#bubblegumbag |
||||||||||
 |
 |
|||||||||
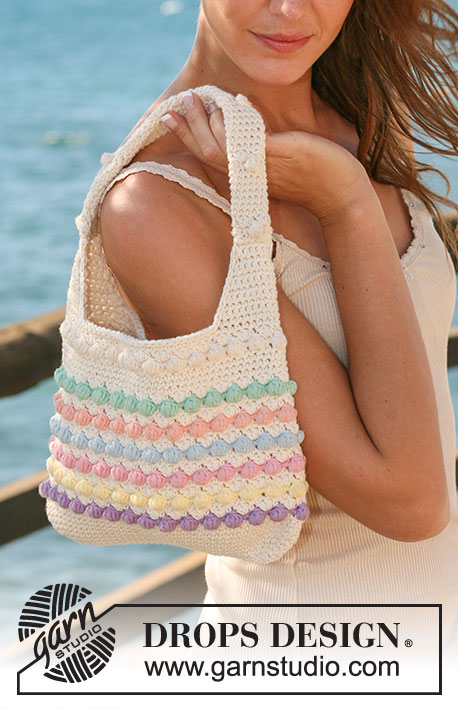
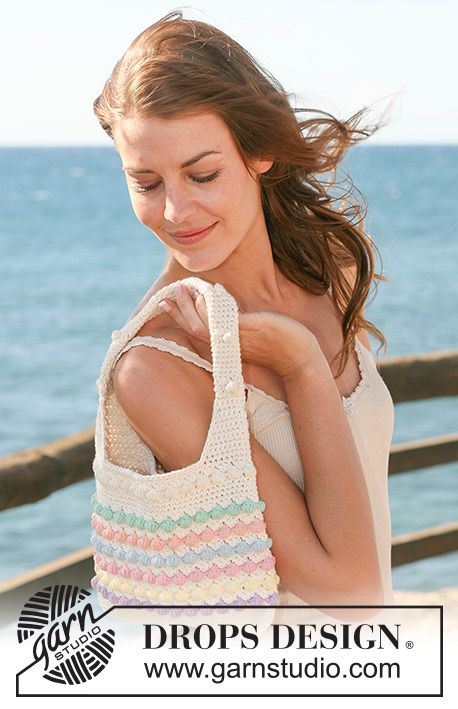
Crochet DROPS bag in ”Paris”.
DROPS 120-10 |
||||||||||
|
CROCHET TIP: Replace first tr on each round with 3 ch and replace first dc on round with 1 ch. These ch are extra sts and are not included in the number of sts. Finish each round with 1 sl st in 3rd ch/ch from beg of round. STRIPES: Round 2, 3, 5 and 6 in diagram M.1 are always off-white. Crochet row 1 and 4 in stripes as follows: Round 1: light purple Row 4: light yellow Row 1: light pink Row 4: light ice blue Row 1: peach Row 4: light mint PATTERN: See diagram M.1 and M.2. -------------------------------------------------------- -------------------------------------------------------- BAG: Crochet 33 ch on crochet hook size 3.5 mm with off-white. Round 1: Crochet in one side of ch-chain as follows: skip 1 ch, 2 dc in next ch, then 1 dc in each of the next 30 ch, in the last ch crochet 2 dc, insert a marker = the side, crochet 2 dc in the same ch, then crochet 1 dc in each of the next 30 ch on the other side of the ch-chain and finish with 2 dc in the first ch you crochet in at beg of round and 1 sl st in the first dc on round. Insert a marker = the side. There are now 68 dc on round. Round 2: See CROCHET TIP! Crochet 1 dc in each dc from previous round, but in dc each side of both markers crochet 2 dc, i.e. inc 4 dc per round. Repeat round 2 another 3 times = 84 dc on round. Now crochet 4 rounds with 1 dc in each dc but without inc. Now continue in STRIPES - see above - and M.1 (beg on row marked with 1 in diagram). After 3 vertical repeats of M.1 there is one stripe in each colour. Now continue in off-white. Crochet 3 rounds with 1 dc in each dc. Now crochet round 1, 2 and 3 in M.1, all in off-white. Crochet straps as follows: STRAP: Crochet dc back and forth on 15 sts with off-white at one side (first row = from RS). Continue with 1 dc in each dc but turn when 1 dc remain each side until there are 6 dc left. Turn piece (next row = from RS), work 1 dc in each dc, then work 6 ch and form a ring with 1 sl st in the first of the 6 dc. Continue in the round with 1 dc in each dc/ch = 12 dc, AT THE SAME TIME on every 6th round work M.2 (beg on row marked with 1 in diagram). The bobble should sit at the top of strap. When strap measures approx 20 cm (or desired length) cut the thread. Crochet in the same way on 15 sts on the other side of bag and sew straps tog at the top. BORDER: Beg in sl st on the 6 ch crochet on strap. Crochet 1 sl st in each st along the edge to the other strap and finish with 1 sl st between the 6 ch and 6 dc. Cut and fasten thread. Crochet in the same way along the edge on the other side of bag. Now sew the 6 ch on strap to the WS of bag. |
||||||||||
Diagram explanations |
||||||||||
|
||||||||||
 |
||||||||||
Have you finished this pattern?Tag your pictures with #dropspattern #bubblegumbag or submit them to the #dropsfan gallery. Do you need help with this pattern?You'll find 11 tutorial videos, a Comments/Questions area and more by visiting the pattern on garnstudio.com. © 1982-2026 DROPS Design A/S. We reserve all rights. This document, including all its sub-sections, has copyrights. Read more about what you can do with our patterns at the bottom of each pattern on our site. |
||||||||||


With over 40 years in knitting and crochet design, DROPS Design offers one of the most extensive collections of free patterns on the internet - translated to 17 languages. As of today we count 324 catalogues and 12291 patterns translated into English (UK/cm). 12291
We work hard to bring you the best knitting and crochet have to offer, inspiration and advice as well as great quality yarns at incredible prices! Would you like to use our patterns for other than personal use? You can read what you are allowed to do in the Copyright text at the bottom of all our patterns. Happy crafting!
Post a comment to pattern DROPS 120-10
We would love to hear what you have to say about this pattern!
If you want to leave a question, please make sure you select the correct category in the form below, to speed up the answering process. Required fields are marked *.